Love this? Save it for later!
Share the inspiration with your friends
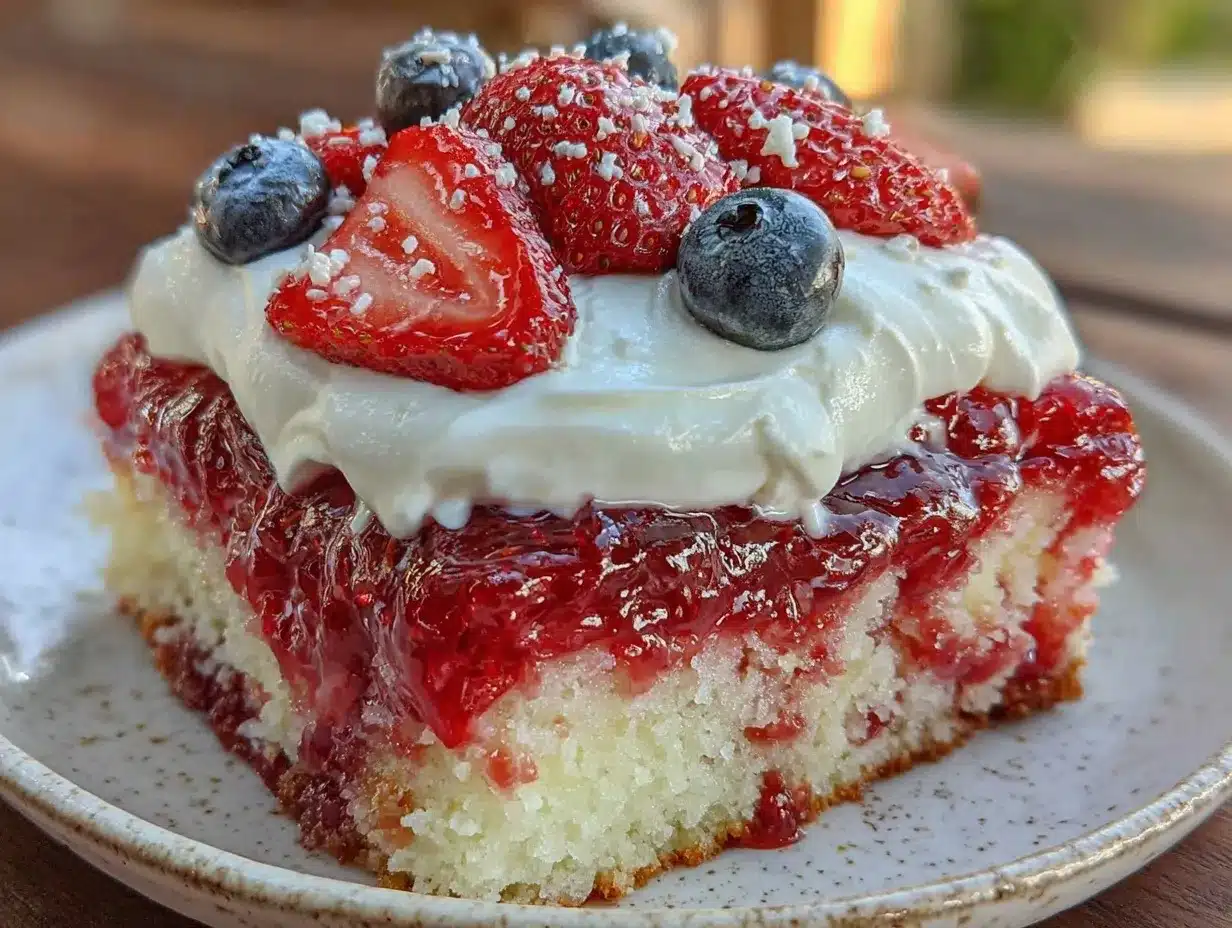
“You know that moment when you walk into a backyard barbecue, and the smell of grilled burgers mingles with the laughter of kids playing tag? Well, one July 4th, I found myself standing in my neighbor’s kitchen, watching her poke holes into a simple white cake with the tip of a wooden spoon. Honestly, I thought she was just making a mess until she started pouring bright red and blue gelatin over it. That was my first taste of this Festive Patriotic Jello Poke Cake with Red, White & Blue Layers, and let me tell you—it was like fireworks for my taste buds.
It wasn’t in some fancy bakery or a restaurant; it was right there, amidst paper plates and picnic blankets, with the sun setting behind the maple trees. I still remember the slight wobble of the gelatin as she sliced through the cake, the cool, creamy whipped topping contrasting with the vibrant, jiggly layers inside. It was simple, fun, and perfectly captured the spirit of celebration.
Maybe you’ve been there too—wanting a dessert that’s more than just tasty but also a statement piece for your holiday table. This recipe stuck with me because it’s easy to pull together, looks incredible, and brings that nostalgic “wow” factor without hours of fuss. So, let me walk you through how to make this crowd-pleaser your own—it’s honestly one of those recipes that keeps the party going long after the last bite.
Why You’ll Love This Recipe
After making this Festive Patriotic Jello Poke Cake with Red, White & Blue Layers several times, I can confidently say it’s a winner for any celebration. Here’s why:
- Quick & Easy: You can have this beauty ready in under an hour, perfect when time’s tight but you want something festive.
- Simple Ingredients: No need for exotic items—just pantry staples and a few jello packets you can find anywhere.
- Perfect for Holidays: Whether it’s Independence Day, Memorial Day, or a summer picnic, this cake brings the patriotic spirit effortlessly.
- Crowd-Pleaser: Kids love the colorful layers, and adults appreciate the nostalgic, creamy texture.
- Unbelievably Delicious: The moist cake soaked with jello, topped with fluffy whipped cream, is an unbeatable combo of flavor and texture.
This isn’t just another poke cake; what sets it apart is the layering technique that ensures every bite is a perfect balance of red, white, and blue. Plus, the whipped topping makes it feel light and fresh, not overly sweet or dense. Honestly, it’s the kind of dessert that makes you pause and smile with each forkful. Whether you’re aiming to impress your guests or just indulge your festive side, this recipe makes it happen without the stress.
What Ingredients You Will Need
This Festive Patriotic Jello Poke Cake relies on simple, wholesome ingredients that come together to give you bold color and flavor with minimal fuss. You probably have most of these in your kitchen already!
- For the Cake:
- 1 box white cake mix (or homemade white cake batter if you prefer)
- Ingredients required by the cake mix (usually eggs, oil, and water)
- For the Jello Layers:
- 1 small package (3 oz) strawberry or cherry flavored gelatin (red layer)
- 1 small package (3 oz) blueberry or berry blue flavored gelatin (blue layer)
- 2 cups boiling water (divided for each gelatin)
- 2 cups cold water (divided for each gelatin)
- For the Topping:
- 2 cups heavy whipping cream (cold, for best whipping results)
- 1/3 cup powdered sugar
- 1 teaspoon vanilla extract
Ingredient Tips: I like using Jell-O brand gelatin because it consistently gives that vibrant color and jiggly texture every time. For the cake, a trusted mix like Betty Crocker yields a moist crumb that soaks up the jello beautifully. If you want to keep it lighter, you can swap heavy cream for a stabilized whipped topping, but honestly, fresh whipped cream is worth the little extra effort.
For a seasonal twist, in place of the blue gelatin, you can use fresh blueberries mixed into a clear gelatin base, but note that the color won’t be as intense. Also, if you’re avoiding gelatin, there are plant-based alternatives you can try, but the texture will differ slightly.
Equipment Needed
- 9×13 inch baking pan (glass or metal works well for even baking)
- Mixing bowls (medium and large sizes for cake batter and whipping cream)
- Electric mixer or stand mixer (for whipping the cream to stiff peaks)
- Measuring cups and spoons (accuracy is key for cake mix and gelatin)
- Toothpick or wooden spoon handle (for poking the cake evenly)
- Spatula (for folding and spreading whipped cream)
If you don’t have an electric mixer, a sturdy whisk and some elbow grease will do—though it does take longer to get the cream fluffy. For the baking pan, glass pans are great because you can see the layers setting, which is a fun touch. I keep a small silicone spatula handy for scraping the bowl clean—trust me, it saves time and wasted whipped cream!
Preparation Method
- Prepare the Cake Batter: Preheat your oven to 350°F (175°C). Follow the instructions on your white cake mix box, combining the mix with eggs, oil, and water as directed. Pour the batter evenly into your greased 9×13 inch baking pan. Bake for about 30-35 minutes or until a toothpick inserted in the center comes out clean. Let the cake cool completely in the pan on a wire rack—this is crucial so your jello layers don’t melt.
- Poke the Cake: Once cooled, use a wooden spoon handle or a skewer to poke holes all over the cake, spacing them about an inch apart. This allows the jello to seep in and create those signature colorful layers. Don’t worry if your holes aren’t perfect—mine never are!
- Make the Red Jello Layer: Dissolve one package of red gelatin in 1 cup boiling water, stirring until fully dissolved. Add 1 cup cold water and mix. Pour half of this mixture evenly over the cake, making sure it seeps into the holes. Refrigerate the cake for about 30 minutes to let the jello set slightly.
- Make the Blue Jello Layer: Repeat the same process with the blue gelatin—dissolve in 1 cup boiling water, add 1 cup cold water. After the red layer is semi-set, carefully pour the blue gelatin over the cake to fill the remaining holes and create that beautiful layered effect. Return the cake to the fridge for another 30 minutes until fully set.
- Whip the Cream Topping: In a cold mixing bowl, beat the heavy cream, powdered sugar, and vanilla extract on high speed until stiff peaks form. This usually takes about 3-5 minutes, depending on your mixer. Spread the whipped cream evenly over the chilled cake, covering the jello layers completely.
- Chill and Serve: Refrigerate the finished cake for at least 1 hour before serving. This helps the whipped topping firm up and the jello layers to chill fully. When slicing, use a wet knife for cleaner cuts and to prevent sticking.
Pro Tip: If you find your gelatin layers aren’t setting well, double-check the refrigerator temperature and avoid rushing the process. Also, keeping the whipped cream bowl and beaters cold before whipping really makes a difference in achieving fluffy peaks.
Cooking Tips & Techniques
One thing I learned the hard way is that the cake must be completely cool before poking and pouring the jello—otherwise, the gelatin melts and turns the cake soggy. Patience here is key (I know, easier said than done when you’re eager to dig in!).
When poking the cake, consistent hole size and spacing make the jello layers more even and pretty. I usually count rows to keep myself honest. Also, pouring the gelatin slowly helps prevent it from pooling unevenly or spilling over the edges.
Whipping cream can be tricky if your equipment or ingredients aren’t cold enough. I sometimes pop my mixing bowl in the freezer for 10 minutes before starting. And don’t stop whipping too soon—stiff peaks are what keep the topping stable when sliced.
Pro tip: To save time, you can prepare the gelatin mixtures while the cake is baking. Just be mindful to pour them only when the cake has cooled fully. Multitasking like this helps the whole process feel less like a marathon.
Lastly, if you want to make this ahead, the cake stores beautifully in the fridge for up to 3 days. Just keep it covered to prevent the whipped cream from drying out.
Variations & Adaptations
This recipe is super flexible depending on your preferences or dietary needs.
- Dietary Adjustments: Use a gluten-free white cake mix to make it gluten-free. For a dairy-free version, substitute coconut whipped topping instead of heavy cream.
- Seasonal Twists: Swap the red and blue gelatin for seasonal fruit flavors—think raspberry and blueberry in summer, or cranberry and blackberry in winter.
- Flavor Boosts: Add a layer of cream cheese frosting beneath the whipped cream for tang and richness, or sprinkle fresh berries on top for extra texture and freshness.
- Cooking Method: Instead of the traditional poke method, try slicing the cake horizontally and layering with gelatin-soaked layers for a more structured look.
- Personal Variation: Once, I added a sprinkle of toasted coconut on top, which added a fun texture and a subtle tropical note that surprised everyone.
Serving & Storage Suggestions
This Festive Patriotic Jello Poke Cake is best served chilled, straight from the fridge. The cool whipped cream topping with the jiggly, colorful layers inside is such a delight on a warm summer day. Presentation-wise, a simple sprinkle of fresh berries or a few mint leaves adds a nice touch without stealing the spotlight.
Pair this cake with classic picnic beverages like lemonade, iced tea, or even a sparkling berry mocktail for a full patriotic spread. It also complements other summer favorites like crispy garlic chicken or a fresh garden salad.
For storage, cover the cake tightly with plastic wrap or a cake dome and keep refrigerated. It stays fresh for up to 3 days. If you want to keep it longer, you can freeze the cake without the whipped cream topping for up to 1 month. Thaw overnight in the fridge and add fresh whipped cream before serving.
When reheating, this cake really shines cold, so avoid warming. The flavors actually develop better after a day or two, so if you can wait, you’ll be rewarded with even more pronounced fruity notes and creaminess.
Nutritional Information & Benefits
This cake offers a fun way to enjoy a festive treat without going overboard. A typical serving (about 1/12th of the cake) contains roughly:
| Calories | 250-300 kcal |
|---|---|
| Fat | 12-15g (mostly from whipped cream) |
| Carbohydrates | 35-40g |
| Protein | 3-4g |
Using real fruit-flavored gelatin means you’re getting some antioxidants from the berries, plus the cake is lower in fat than many traditional frostings. If you choose a gluten-free cake mix, it’s a safe option for those with gluten sensitivities. Just be aware of the gelatin and dairy if you have allergies.
From my experience, this cake hits the sweet spot between indulgence and freshness, making it a feel-good choice for celebrations when you want to treat yourself but not feel weighed down.
Conclusion
This Festive Patriotic Jello Poke Cake with Red, White & Blue Layers is a joyous, simple dessert that’s perfect for marking any occasion where you want to bring a little extra color and fun to the table. Its ease and eye-catching layers make it a go-to when you need a last-minute showstopper that tastes as good as it looks. Honestly, I love how it sparks conversations and smiles every time I bring it along, whether for a casual get-together or a big holiday bash.
Feel free to make it your own with the variations and tips shared here. And hey, if you try the recipe, I’d love to hear about your twists and how it turned out! Drop a comment below or share your photos—let’s keep the festive spirit rolling together.
Remember, sometimes the best recipes are the ones that bring people together and create memories, one colorful slice at a time.
FAQs
Can I make this cake ahead of time?
Yes! You can bake the cake and prepare the jello layers a day ahead, then add the whipped cream topping just before serving for the freshest look and taste.
What if I don’t have a box white cake mix?
You can use a homemade white cake recipe or even a yellow cake mix if you prefer. Just keep in mind the color contrast with the jello layers may vary slightly.
Can I use different gelatin flavors?
Absolutely! Feel free to substitute with any red and blue flavored gelatin you like, or even mix in fresh fruit for added texture.
How do I prevent the whipped cream from deflating?
Make sure your cream and bowl are cold before whipping, and beat until stiff peaks form. Adding a stabilizer like gelatin or cream of tartar can help if you need it to hold longer.
Is there a non-gelatin alternative for this poke cake?
If you prefer a vegetarian or vegan option, agar-agar can be used, but it requires different preparation and may change the texture somewhat.
Pin This Recipe!
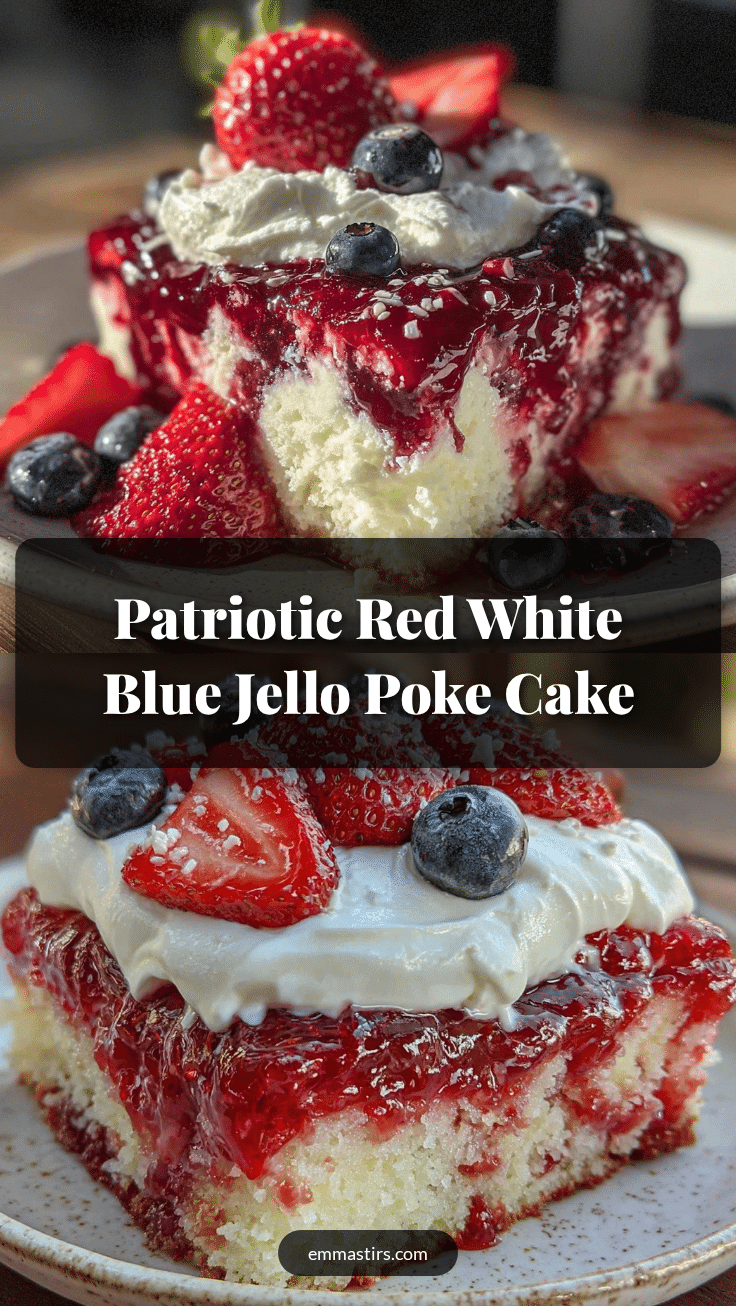
Festive Patriotic Jello Poke Cake Recipe with Easy Red White Blue Layers

A colorful and festive poke cake featuring red, white, and blue gelatin layers soaked into a moist white cake, topped with fluffy whipped cream. Perfect for patriotic celebrations and summer gatherings.
- Prep Time: 15 minutes
- Cook Time: 35 minutes
- Total Time: 1 hour 50 minutes
- Yield: 12 servings 1x
- Category: Dessert
- Cuisine: American
Ingredients
- 1 box white cake mix (or homemade white cake batter)
- Ingredients required by the cake mix (usually eggs, oil, and water)
- 1 small package (3 oz) strawberry or cherry flavored gelatin (red layer)
- 1 small package (3 oz) blueberry or berry blue flavored gelatin (blue layer)
- 2 cups boiling water (divided for each gelatin)
- 2 cups cold water (divided for each gelatin)
- 2 cups heavy whipping cream (cold)
- 1/3 cup powdered sugar
- 1 teaspoon vanilla extract
Instructions
- Preheat oven to 350°F (175°C). Prepare the white cake mix according to package instructions, combining with eggs, oil, and water as directed. Pour batter evenly into a greased 9×13 inch baking pan.
- Bake for 30-35 minutes or until a toothpick inserted in the center comes out clean. Let the cake cool completely in the pan on a wire rack.
- Use a wooden spoon handle or skewer to poke holes about an inch apart all over the cooled cake.
- Dissolve one package of red gelatin in 1 cup boiling water, stirring until fully dissolved. Add 1 cup cold water and mix. Pour half of this mixture evenly over the cake, allowing it to seep into the holes. Refrigerate for about 30 minutes to set slightly.
- Dissolve the blue gelatin in 1 cup boiling water, add 1 cup cold water, and mix. After the red layer is semi-set, pour the blue gelatin over the cake to fill remaining holes. Refrigerate for another 30 minutes until fully set.
- In a cold mixing bowl, beat heavy cream, powdered sugar, and vanilla extract on high speed until stiff peaks form (3-5 minutes). Spread whipped cream evenly over the chilled cake.
- Refrigerate the finished cake for at least 1 hour before serving. Use a wet knife for cleaner slices.
Notes
Ensure the cake is completely cooled before poking and pouring gelatin to prevent melting and sogginess. Keep mixing bowl and beaters cold for best whipped cream results. Use a wet knife for clean slicing. Cake stores well refrigerated for up to 3 days; can be frozen without whipped cream for up to 1 month.
Nutrition
- Serving Size: 1 slice (1/12th of c
- Calories: 275
- Sugar: 28
- Sodium: 250
- Fat: 13.5
- Saturated Fat: 8
- Carbohydrates: 37.5
- Fiber: 0.5
- Protein: 3.5
Keywords: jello poke cake, patriotic cake, red white blue dessert, 4th of July cake, easy poke cake, layered gelatin cake