Love this? Save it for later!
Share the inspiration with your friends
“You know that moment when you’re scrambling to pack your kid’s lunch, and suddenly you realize you’re out of snacks? That was me last Thursday morning — no time to run to the store, and my pantry looked like a ghost town. Honestly, I was about to throw in the towel, but then I remembered a little trick I stumbled upon last summer during a neighborhood picnic. A fellow parent, who swore she never baked, shared her quick, no-fuss recipe for peanut butter granola bars. It was scribbled hastily on a napkin, and I thought, ‘Why not give it a shot?’
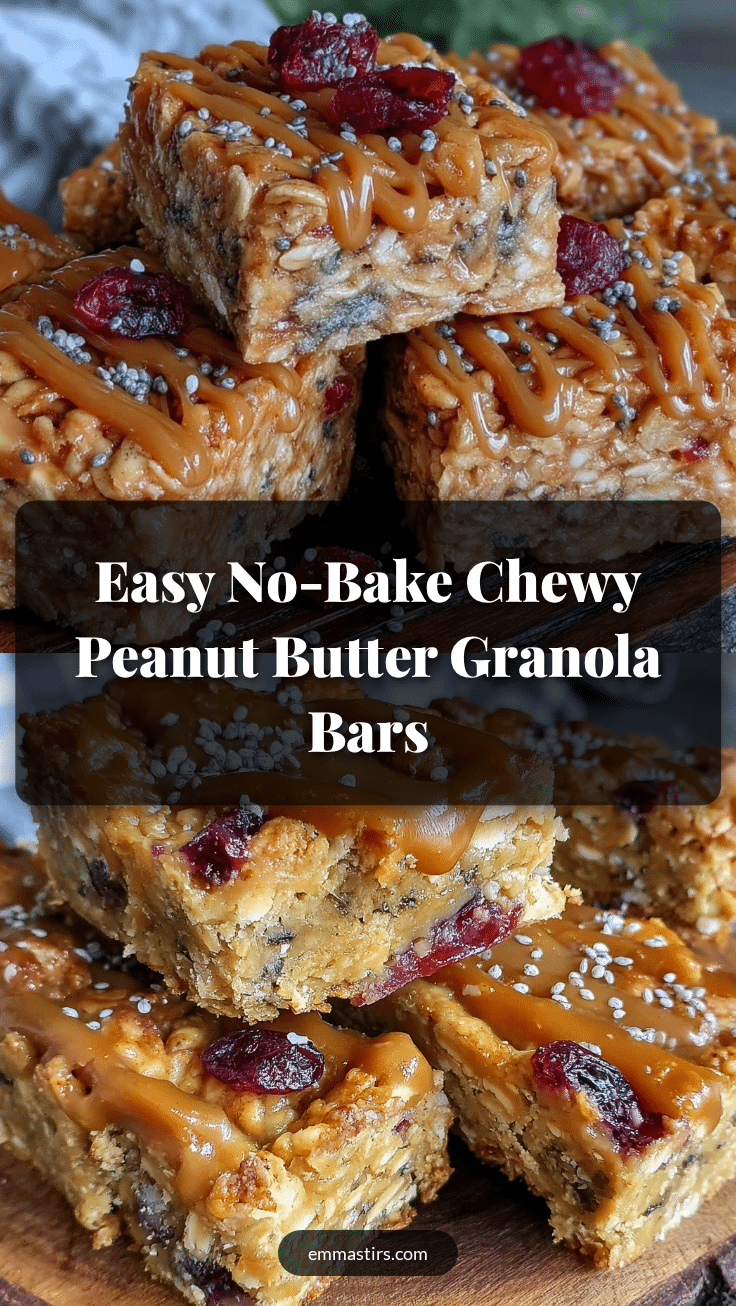
The result? These easy no-bake peanut butter granola bars became an instant hit in my household and have since been a staple in the kids’ lunchboxes. They’re chewy, nutty, and just sweet enough — the kind of treat that disappears from the lunchbox faster than I can say ‘snack time.’ Maybe you’ve been there too, needing something wholesome but fast, without the mess or baking drama. Let me tell you, these bars are exactly that kind of lifesaver.”
Why You’ll Love This Recipe
Over the months, I’ve tested countless snack recipes, and these no-bake peanut butter granola bars have stood the test of time — and picky eaters. Here’s why this recipe has earned a permanent spot in my lunchbox rotation:
- Quick & Easy: Ready in under 15 minutes, no oven required — perfect for busy mornings or last-minute snack prep.
- Simple Ingredients: Uses pantry staples like peanut butter, oats, and honey — no specialty stores needed.
- Perfect for Kids’ Lunchboxes: Portable, mess-free, and satisfying — they hold up well and make snack time fun.
- Crowd-Pleaser: Even adults sneak a bar or two. The balance of peanut butter and honey is just right.
- Unbelievably Delicious: The chewy texture combined with a slight crunch from oats makes every bite delightful.
What makes this recipe different from others? It’s all about the method — no baking means the peanut butter keeps its creamy richness, and the oats stay pleasantly chewy rather than dry. I also add a pinch of salt to bring out the flavors, a little secret I picked up from a nutritionist friend. Honestly, this recipe is my go-to when I want to whip up something wholesome that feels a bit like a treat but also fuels the kids for the afternoon.
What Ingredients You Will Need
This recipe uses simple, wholesome ingredients to deliver bold flavor and satisfying texture without the fuss. Most of these are pantry staples, so you probably have them on hand already.
- Rolled oats (2 cups / 180g) — Use old-fashioned oats for the best chewy texture.
- Natural peanut butter (1 cup / 250g) — Creamy or chunky works, but I prefer creamy for easy binding.
- Honey (1/2 cup / 120ml) — Adds natural sweetness and helps hold everything together.
- Vanilla extract (1 teaspoon) — For a subtle depth of flavor.
- Salt (1/4 teaspoon) — Enhances the peanut butter’s nuttiness.
- Mini chocolate chips (optional, 1/3 cup / 55g) — Adds a little fun and extra sweetness.
- Chopped nuts (optional, 1/4 cup / 30g) — Like almonds or walnuts for extra crunch.
Pro tip: I recommend using a trusted brand like Smucker’s natural peanut butter for the best creamy texture without added sugars. If you want to switch things up, almond or sunflower seed butter work too — great if you have allergies to consider. Also, if fresh honey isn’t available, maple syrup is a decent swap, though it changes the flavor slightly.
Equipment Needed
- Mixing bowl: A large bowl to combine ingredients comfortably.
- Spoon or spatula: For mixing sticky ingredients — a silicone spatula works wonders.
- Measuring cups and spoons: To get the ratios just right.
- 8×8-inch baking pan or similar: For pressing the granola mixture into bars.
- Parchment paper: Makes lifting the bars out easy — trust me, it’s a game-changer.
Don’t have an 8×8 pan? No worries — I’ve pressed bars into a loaf pan or even a shallow dish before, just adjust cutting size accordingly. Silicone pans are great for easy removal and cleanup. If you’re tight on budget, using a glass or metal pan you already have works just fine. I learned the hard way that parchment paper really saves you from a sticky mess!
Preparation Method
- Prepare your pan: Line an 8×8-inch (20x20cm) baking pan with parchment paper, leaving some overhang on the sides for easy lifting later.
- Mix the wet ingredients: In a large bowl, combine 1 cup (250g) of natural peanut butter, 1/2 cup (120ml) honey, 1 teaspoon vanilla extract, and 1/4 teaspoon salt. Stir until smooth and well blended. This should take about 2-3 minutes.
- Add the dry ingredients: Stir in 2 cups (180g) rolled oats. For extra texture, fold in 1/3 cup (55g) mini chocolate chips and/or 1/4 cup (30g) chopped nuts if using. Mix everything until all oats are evenly coated — about 2 minutes of stirring.
- Transfer and press: Pour the mixture into your prepared pan. Using a spatula or clean hands, press firmly and evenly into the pan. Don’t be shy with the pressure — compact bars hold together better. This step takes roughly 3-5 minutes.
- Chill and set: Place the pan in the refrigerator for at least 1 hour to let the bars firm up. If you’re in a hurry, 30 minutes in the freezer works too, but watch it doesn’t freeze solid.
- Cut and serve: Lift the set mixture out using the parchment paper overhang. Place on a cutting board and slice into 10-12 bars, depending on your preferred size.
Tip: If your bars crumble when cutting, chill them a bit longer. Also, pressing the mixture firmly is key — I learned this the hard way after my first batch was a bit crumbly. The bars should feel firm and slightly sticky but hold together well.
Cooking Tips & Techniques
Working with no-bake recipes is both fun and a little tricky. Here are some tricks I’ve picked up to get these peanut butter granola bars just right:
- Use room temperature peanut butter and honey: It mixes easier and results in a smoother texture.
- Don’t skip the salt: It might seem minor, but it really brings out the flavors.
- Press firmly: The denser the pack, the less crumbly the bars will be.
- Avoid overmixing: Once oats are added, stir just enough to coat — too much mixing makes bars tough.
- Chill for sufficient time: Setting is crucial; otherwise, bars fall apart when sliced.
One time, I forgot to press the mixture firmly and ended up with crumbly bars that barely survived transport. Since then, I make it a point to press down firmly and smooth out the top with a spatula dipped in water (prevents sticking). Also, timing is everything. I multitask by prepping the bars while making breakfast — saves time and keeps me sane on busy mornings.
Variations & Adaptations
These bars are a great base for customization, so feel free to make them your own:
- Gluten-Free Version: Use certified gluten-free rolled oats to keep them safe for sensitive eaters.
- Nut-Free Alternative: Swap peanut butter for sunflower seed butter or soy nut butter — great for school restrictions.
- Seasonal Twist: Add dried cranberries, chopped dried apricots, or pumpkin seeds depending on the season.
- Chocolate Lover’s Upgrade: Mix in cocoa powder or drizzle melted dark chocolate on top after setting.
- Personal Favorite: I once added shredded coconut and a splash of orange zest — it was surprisingly delicious and fresh!
You can also make smaller bites by shaping the mixture into balls instead of bars — perfect for little hands or party snacks.
Serving & Storage Suggestions
These peanut butter granola bars are best served chilled or at room temperature. They’re great as a grab-and-go snack or packed snugly in lunchboxes alongside a fruit and water bottle.
Pair them with a glass of milk or your child’s favorite juice for a balanced snack. For something different, these bars also go well with yogurt or a small side of fresh berries.
Store bars in an airtight container in the refrigerator for up to 1 week. If you want to keep them longer, freeze in a sealed bag for up to 3 months. When ready to eat, thaw at room temperature or microwave for 10-15 seconds for a soft, chewy bite.
Flavors actually meld and deepen after a day or two in the fridge, so making a batch ahead can be a smart move. Just don’t forget to pack extras — they tend to disappear fast!
Nutritional Information & Benefits
Each bar (assuming 12 bars per batch) offers approximately:
| Calories | 180-200 kcal |
|---|---|
| Protein | 5g |
| Fat | 9g (mostly healthy fats) |
| Carbohydrates | 22g |
| Fiber | 3g |
Thanks to natural peanut butter and oats, these bars provide sustained energy and protein — ideal for growing kids. The honey is a natural sweetener, avoiding refined sugars. If allergies are a concern, you can easily adapt the recipe with seed butters and gluten-free oats to fit dietary needs.
From a wellness perspective, these bars strike a nice balance between nourishing and tasty, making them a snack you can feel good about packing every school day.
Conclusion
So, there you have it — an easy no-bake peanut butter granola bars recipe that’s fast, kid-friendly, and downright delicious. Whether you’re rushing through a hectic morning or prepping snacks for the week ahead, these bars have your back. I love how flexible they are — you can tweak the mix-ins or swap ingredients to suit your family’s taste and dietary needs.
Honestly, this recipe is one I keep coming back to because it just works, no matter the day or mood. If you try them, I’d love to hear how your kids like them or what twists you put on the bars. Feel free to leave a comment or share your version — let’s keep the snack magic going!
Happy snacking — here’s to fewer lunchbox panics and more smiles around the table!
FAQs
Can I substitute peanut butter with another nut or seed butter?
Absolutely! Almond butter, cashew butter, or sunflower seed butter all work well. Just make sure to use a creamy version for easier mixing.
How long do these granola bars keep fresh?
Stored in an airtight container in the fridge, they stay fresh for about a week. You can also freeze them for up to 3 months.
Are these bars suitable for gluten-free diets?
Yes, if you use certified gluten-free rolled oats and ensure all other ingredients are gluten-free.
Can I add chocolate chips to the bars?
Yes, mini chocolate chips are a great addition. Add them last to the mixture so they don’t melt during preparation.
What’s the best way to prevent the bars from falling apart?
Press the mixture firmly into the pan and chill for at least an hour. Using enough sticky ingredients like peanut butter and honey helps them hold together well.
Pin This Recipe!
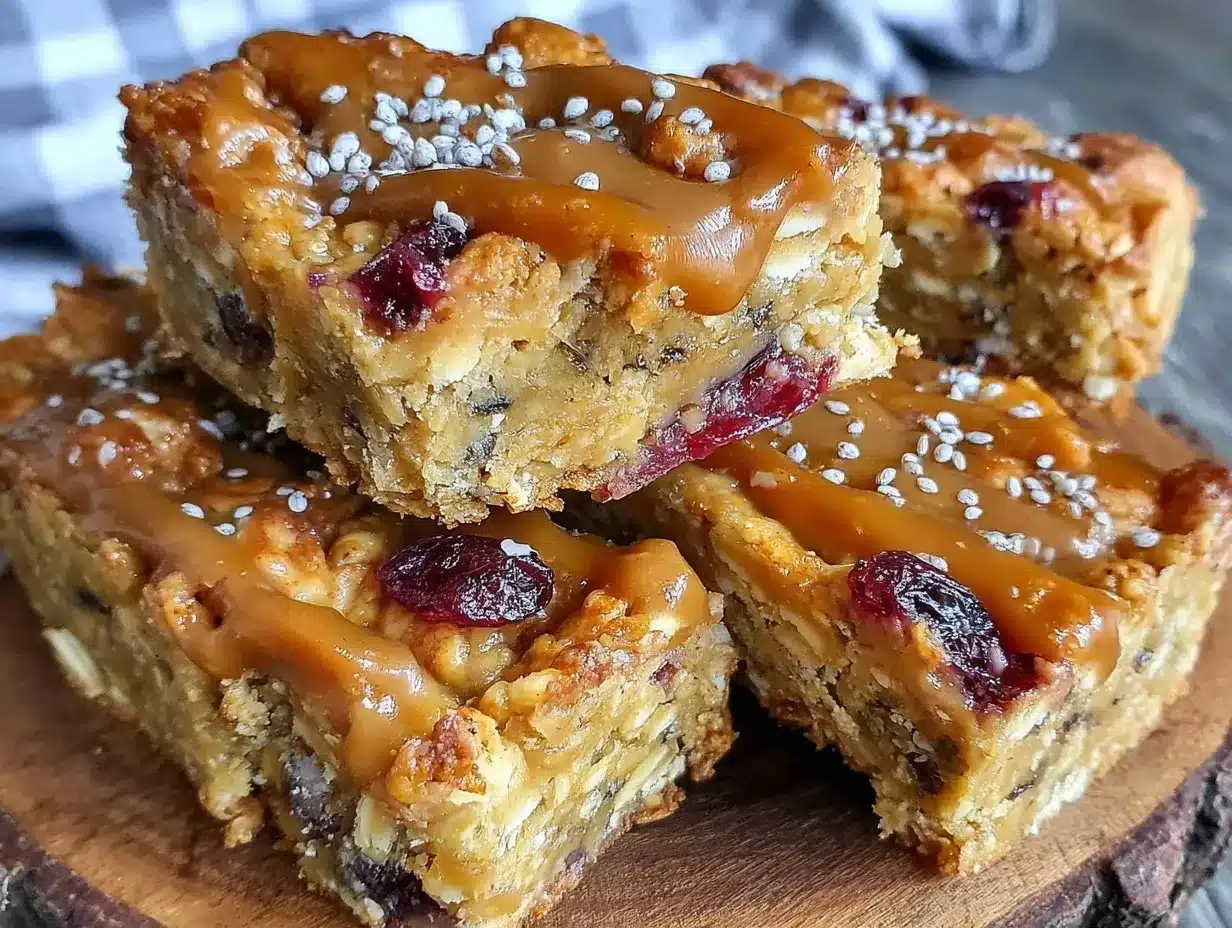
Easy No-Bake Peanut Butter Granola Bars Perfect for Kids Lunchboxes

These easy no-bake peanut butter granola bars are chewy, nutty, and just sweet enough, making them perfect for kids’ lunchboxes and quick snack prep without any baking.
- Prep Time: 10 minutes
- Cook Time: 0 minutes
- Total Time: 1 hour 10 minutes
- Yield: 10-12 bars 1x
- Category: Snack
- Cuisine: American
Ingredients
- 2 cups (180g) rolled oats (old-fashioned)
- 1 cup (250g) natural peanut butter (creamy preferred)
- 1/2 cup (120ml) honey
- 1 teaspoon vanilla extract
- 1/4 teaspoon salt
- 1/3 cup (55g) mini chocolate chips (optional)
- 1/4 cup (30g) chopped nuts like almonds or walnuts (optional)
Instructions
- Line an 8×8-inch (20x20cm) baking pan with parchment paper, leaving some overhang on the sides for easy lifting.
- In a large bowl, combine 1 cup (250g) natural peanut butter, 1/2 cup (120ml) honey, 1 teaspoon vanilla extract, and 1/4 teaspoon salt. Stir until smooth and well blended (2-3 minutes).
- Stir in 2 cups (180g) rolled oats. Fold in 1/3 cup (55g) mini chocolate chips and/or 1/4 cup (30g) chopped nuts if using. Mix until oats are evenly coated (about 2 minutes).
- Pour mixture into prepared pan. Press firmly and evenly into the pan using a spatula or clean hands (3-5 minutes).
- Place pan in refrigerator for at least 1 hour to let bars firm up. Alternatively, chill in freezer for 30 minutes but avoid freezing solid.
- Lift set mixture out using parchment paper overhang. Place on cutting board and slice into 10-12 bars depending on preferred size.
Notes
Use room temperature peanut butter and honey for easier mixing. Press mixture firmly to avoid crumbly bars. Chill sufficiently to set bars well. Parchment paper helps with easy removal. Optional add-ins like chocolate chips and nuts add texture and flavor.
Nutrition
- Serving Size: 1 bar (if 12 bars pe
- Calories: 190
- Fat: 9
- Carbohydrates: 22
- Fiber: 3
- Protein: 5
Keywords: no-bake, peanut butter, granola bars, kids lunchbox, easy snack, healthy snack, quick recipe