Love this? Save it for later!
Share the inspiration with your friends
“Can you believe I almost forgot the sliders?” That’s what I mumbled as I scrambled around my tiny kitchen last Fourth of July. The backyard was buzzing with kids running around, and the grown-ups were settling in with their drinks. Honestly, I was supposed to bring a simple dish to the barbecue, but the usual potato salad felt too ordinary. Then, I remembered a quick idea I’d scribbled down on a napkin during a neighborhood block party last summer.
The recipe came from Mrs. Ramirez, the cheerful woman who lives three houses down but never talks much beyond a quick wave. Turns out, she’s a wizard in the kitchen, especially when it comes to feeding her grandkids. She shared her secret for these bite-sized sliders that get gobbled up before the fireworks even start. They’re not just mini burgers—they’re little flavor bombs with a kid-friendly twist.
Making these Perfect Mini July 4th Sliders Kids Will Love totally saved the day, and let me tell you, they were a hit with the noisy crowd of kids and adults alike. Maybe you’ve been there—trying to find something fun, easy, and tasty to satisfy picky eaters during a holiday cookout. This recipe is exactly that kind of magic. Plus, I made a mess of the kitchen while flipping buns and dropping cheese slices (you know how it goes), but the smiles on those little faces made it all worth it.
So, if you’re looking for a slider recipe that’s simple, quick, and guaranteed to impress your young crowd this Independence Day (or any summer party), stick with me. This one’s a keeper.
Why You’ll Love This Recipe
After testing this slider recipe through several family gatherings and summer parties, I can confidently say it’s a winner for a bunch of reasons. I’m not just pulling this out of thin air—these sliders have been kid-approved, mom-tested, and even earned compliments from the neighbors (which, honestly, felt like a trophy).
- Quick & Easy: You can have these sliders ready in under 30 minutes, perfect for those last-minute Fourth of July plans or busy weeknights when you need a fast meal.
- Simple Ingredients: No need to hunt for fancy stuff. Most are pantry staples or easy to find at your local grocery store, which means less hassle and more fun.
- Perfect for Parties: These mini sliders are ideal for casual get-togethers, backyard barbecues, or any celebration where kids and adults mingle. They’re easy to grab and go, which is always a bonus.
- Crowd-Pleaser: The juicy beef patties with just the right seasoning, melty cheese, and soft buns make this a guaranteed hit. Plus, the sliders are sized just right for little hands.
- Unbelievably Delicious: The balance of flavors and textures—from the savory beef to the crisp pickles—makes these sliders more than just a quick snack. They have that classic American summer vibe, but with a special homemade touch.
This recipe isn’t just another burger slapped between buns. The secret lies in the seasoning mix I tweaked after a few batches and the way the cheese melts just perfectly over the patty (hint: a quick broil at the end does wonders). I also swap in buttery slider buns that toast up golden and soft. Honestly, it’s the kind of recipe that makes you want to close your eyes after the first bite and savor that simple satisfaction.
So whether you’re feeding a crowd or just want to treat your kids to a fun meal, these sliders bring a little joy, nostalgia, and ease to your table.
What Ingredients You Will Need
This recipe uses straightforward, kid-friendly ingredients that work together to deliver a juicy, flavorful slider without any fuss. Most items are pantry staples, and if you need to tweak for allergies or preferences, I’ve included some easy swaps.
- For the Sliders:
- 1 lb (450 g) ground beef (80/20 blend recommended for juiciness)
- 1/2 cup (50 g) finely chopped onion (adds moisture and mild sweetness)
- 1 tsp garlic powder (for subtle savory depth)
- 1 tsp salt
- 1/2 tsp black pepper
- 1/2 tsp smoked paprika (optional, adds a mild smoky flavor)
- For Assembly:
- 12 mini slider buns or dinner rolls (I like King’s Hawaiian for their soft, slightly sweet texture)
- 6 slices cheddar cheese, halved (or American cheese for classic melt)
- Pickle slices (dill or bread-and-butter, depending on your kid’s preference)
- Ketchup and mustard (for serving, optional but classic)
- Butter (for toasting buns, about 2 tbsp)
Substitution Tips: Use ground turkey or chicken if beef isn’t your thing, but be aware the sliders will be a bit leaner and may need a splash of olive oil for moisture. Gluten-free slider buns work well too, just choose soft varieties your kids will enjoy. If you’re dairy-free, swap cheese for a plant-based alternative or skip it altogether.
When picking your ground beef, I recommend trusted brands like ButcherBox or your local butcher for freshness and quality. And if you want to add a little extra zing, a tiny dash of Worcestershire sauce in the meat mix works wonders.
Equipment Needed
- Large mixing bowl – for combining the beef and seasoning. I use a glass bowl because it’s easy to clean and doesn’t hold odors.
- Non-stick skillet or griddle – perfect for cooking the sliders evenly. A cast-iron skillet works great too if you want those nice crusty edges.
- Spatula – for flipping the mini patties gently without breaking them.
- Baking sheet – to toast buns and melt cheese under the broiler quickly. If you don’t have a broiler, you can cover the pan with a lid to help melt the cheese.
- Measuring spoons – for seasoning accuracy. I keep a set of stainless steel ones handy.
If you don’t have a griddle, a large frying pan works just fine, and you can toast buns in a separate pan or the oven. For slider buns, if you can’t find mini ones, regular-sized buns sliced smaller will do the trick. I’ve also used a sandwich press once when I was in a pinch—it’s not traditional but surprisingly efficient.
Preparation Method

- Mix the Meat: In your large bowl, add 1 lb (450 g) ground beef, 1/2 cup (50 g) finely chopped onion, 1 tsp garlic powder, 1 tsp salt, 1/2 tsp black pepper, and 1/2 tsp smoked paprika. Using your hands or a spoon, mix gently until just combined (about 1-2 minutes). Overworking the meat can make sliders dense, so be gentle.
- Form Mini Patties: Divide the mixture into 12 equal portions. Roll each into a ball, then flatten gently into 2.5-inch (6 cm) patties about 1/2 inch (1.3 cm) thick. Make a small indentation in the center of each patty with your thumb to help them cook evenly and avoid puffing up.
- Heat the Skillet: Place your skillet or griddle over medium-high heat and let it warm for about 2 minutes. Add a small drizzle of oil if your pan isn’t non-stick.
- Cook the Patties: Place the patties in the skillet, leaving a little space between each. Cook for 3-4 minutes on the first side without moving them. Flip carefully and cook for another 3 minutes. The patties should reach an internal temperature of 160°F (71°C) for safety. If you have a meat thermometer, this is the perfect time to use it.
- Add Cheese: Once flipped, place half a slice of cheese on each patty. Cover the pan with a lid or transfer patties to a baking sheet and broil for 1-2 minutes until cheese melts.
- Toast the Buns: While cheese melts, spread butter on the inside of your slider buns. Toast in a separate pan over medium heat or under the broiler until golden brown and warm (about 1-2 minutes). Watch closely to avoid burning!
- Assemble the Sliders: Place each patty on a toasted bun bottom. Add a pickle slice, then a little ketchup or mustard if you like. Top with the bun crown.
- Serve Immediately: These sliders taste best fresh and warm. Serve on a platter and watch the kids (and adults) disappear them fast!
Tip: If your kitchen gets busy, prep the patties ahead of time and refrigerate them for up to 2 hours before cooking. Just bring them back to room temp before hitting the skillet.
Cooking Tips & Techniques
Getting these sliders just right involves a few little tricks I’ve learned from trial and error. For one, the thumb indentation in each patty is a must—it keeps the sliders from puffing up like little meatballs and ensures they cook evenly. I once skipped this step, and the buns barely fit!
Also, don’t overmix your meat. It’s tempting to knead it like dough, but that makes the texture tough. Gentle hands win here.
Using a cast-iron skillet can add a lovely crust to the patties that kids and adults both appreciate. If you don’t have one, a non-stick pan works fine but avoid overcrowding so each patty gets good heat.
When melting cheese, covering the pan is a neat hack if you don’t want to use the broiler. It traps heat and helps cheese melt without drying out the meat.
Timing is key if you’re making a double batch—cook in batches but keep finished sliders warm on a baking sheet in a low oven (around 200°F / 95°C) covered loosely with foil.
Finally, don’t skip toasting the buns! That buttery crispness on the inside prevents sogginess and adds a nice contrast to the juicy patties. I learned this the hard way after a soggy slider incident during a picnic.
Variations & Adaptations
If you want to switch things up, here are some ideas I’ve tried and loved:
- Vegetarian Version: Use black bean patties or a store-bought plant-based burger. Add a touch of smoked paprika and garlic powder to keep that classic slider flavor. Toast buns as usual and add cheese or a dairy-free slice.
- Seasonal Twist: Top sliders with a spoonful of fresh tomato salsa or a slice of ripe avocado in summer. In fall, swap pickles for caramelized onions for a sweeter note.
- Spicy Kick: Mix a little cayenne pepper or chipotle powder into the beef for a mild heat kids can handle. Pair with pepper jack cheese instead of cheddar.
- Gluten-Free: Use gluten-free slider buns or lettuce wraps for a low-carb option. I’ve done this for my cousin, and everyone loved the fresh crunch.
Personally, I once made these sliders with turkey and swapped cheddar for mozzarella—turns out kids love that gooey stretch! Feel free to customize based on what’s in your fridge or your family’s favorite flavors.
Serving & Storage Suggestions
Serve these sliders warm, right off the pan or oven, for the best experience. They’re perfect on a big platter with some colorful sides like corn on the cob, watermelon slices, or a crisp garden salad.
For drinks, lemonade or iced tea pairs beautifully, but honestly, kids love these with just a simple juice box too.
If you have leftovers, wrap sliders individually in foil and store in the refrigerator for up to 2 days. To reheat, unwrap and warm in a 350°F (175°C) oven for about 10 minutes, or microwave covered with a damp paper towel for 30-45 seconds to keep moisture.
Be aware that sliders are best fresh, but flavors meld nicely if you prep patties ahead of time. The buns might get a little softer when stored, so toast them again before serving leftovers.
Nutritional Information & Benefits
Each mini slider provides roughly 150-180 calories, depending on your choice of meat and toppings. Ground beef offers a good dose of protein and iron, important for growing kids. The onions add a little fiber and natural sweetness, while the buns provide energy-boosting carbs.
This recipe is flexible for many dietary needs. You can easily swap ingredients to make it gluten-free, lower fat, or dairy-free. Just keep an eye on added sugars if you use sweetened buns like Hawaiian rolls.
From my experience, feeding kids a familiar favorite like sliders with a homemade twist encourages them to enjoy a balanced meal without much fuss—something every parent can appreciate.
Conclusion
These Perfect Mini July 4th Sliders Kids Will Love have become my go-to for summer gatherings, especially when I want something that’s fast, fun, and guaranteed to please. It’s a recipe that’s easy to personalize but always delivers classic, satisfying flavors.
Whether you stick to the traditional beef version or try one of the variations, these sliders bring smiles and full bellies—two things I think we all want at any party. Honestly, I keep making them year after year because of how simple they are and how much joy they bring to the table.
If you give this recipe a try, I’d love to hear how you make it your own—drop a comment or share your adaptations. Let’s keep the slider love going strong!
FAQs
Can I make the mini sliders ahead of time?
Yes! You can prepare the patties up to 2 hours before cooking and keep them refrigerated. Bring them to room temperature before cooking for even results.
What’s the best way to keep sliders juicy?
Using ground beef with about 20% fat content helps. Avoid overmixing and cook patties just until done—overcooking dries them out.
Can I freeze leftover sliders?
Absolutely. Wrap them tightly in foil or plastic wrap and freeze for up to 2 months. Reheat in the oven for best texture.
What if my kids don’t like pickles?
No problem! You can skip pickles or swap them for thin slices of tomato, cucumber, or even a little lettuce for crunch.
Are these sliders suitable for very young children?
Yes, just cut sliders into smaller pieces and avoid spicy seasonings. Always supervise little ones to prevent choking hazards.
For those who love easy handheld meals, these sliders remind me a bit of the crispy garlic chicken I made last summer—both are guaranteed crowd-pleasers for family events. And if you want another quick crowd favorite, the cheesy baked mac and cheese pairs beautifully alongside these sliders for a full, comforting feast.
Pin This Recipe!
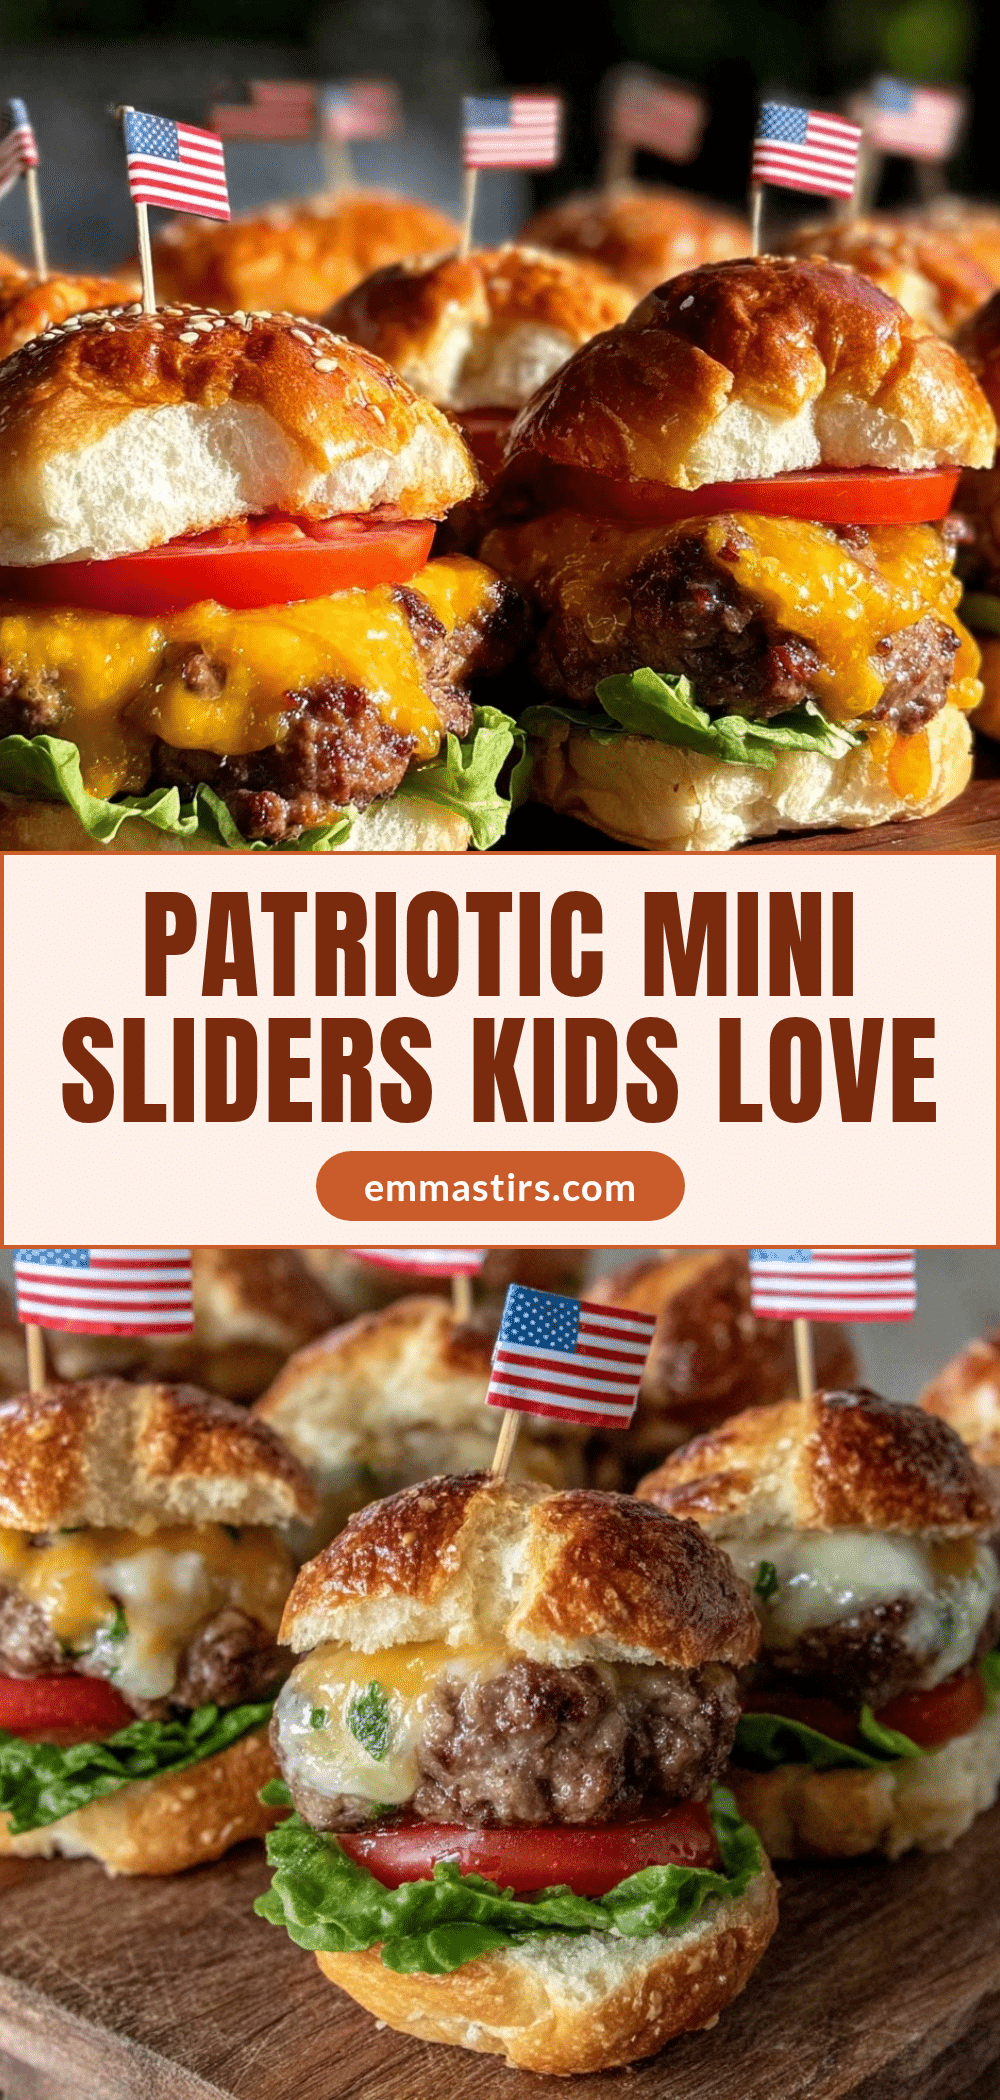
Perfect Mini July 4th Sliders Recipe Kids Will Love Easy Step-by-Step

These mini sliders are quick, easy, and kid-approved, perfect for Fourth of July cookouts or any summer party. Juicy beef patties with melty cheese and soft buns make a guaranteed crowd-pleaser.
- Prep Time: 10 minutes
- Cook Time: 15 minutes
- Total Time: 25 minutes
- Yield: 12 sliders 1x
- Category: Main Course
- Cuisine: American
Ingredients
- 1 lb ground beef (80/20 blend recommended for juiciness)
- 1/2 cup finely chopped onion
- 1 tsp garlic powder
- 1 tsp salt
- 1/2 tsp black pepper
- 1/2 tsp smoked paprika (optional)
- 12 mini slider buns or dinner rolls
- 6 slices cheddar cheese, halved (or American cheese)
- Pickle slices (dill or bread-and-butter)
- Ketchup (optional)
- Mustard (optional)
- 2 tbsp butter (for toasting buns)
Instructions
- In a large bowl, combine ground beef, chopped onion, garlic powder, salt, black pepper, and smoked paprika. Mix gently until just combined.
- Divide the mixture into 12 equal portions. Roll each into a ball and flatten into 2.5-inch patties about 1/2 inch thick. Make a small indentation in the center of each patty with your thumb.
- Heat a skillet or griddle over medium-high heat for about 2 minutes. Add a small drizzle of oil if needed.
- Place patties in the skillet, leaving space between each. Cook for 3-4 minutes on the first side without moving them.
- Flip patties and cook for another 3 minutes until internal temperature reaches 160°F (71°C).
- Place half a slice of cheese on each patty. Cover the pan with a lid or transfer patties to a baking sheet and broil for 1-2 minutes until cheese melts.
- Spread butter on the inside of slider buns. Toast buns in a separate pan over medium heat or under the broiler until golden brown and warm, about 1-2 minutes.
- Assemble sliders by placing each patty on a toasted bun bottom, adding a pickle slice, ketchup or mustard if desired, and topping with the bun crown.
- Serve immediately while warm.
Notes
Make a thumb indentation in each patty to prevent puffing up. Do not overmix the meat to keep sliders tender. Use a cast-iron skillet for a nice crust. Cover pan when melting cheese if not using broiler. Toast buns to prevent sogginess. Patties can be prepped up to 2 hours ahead and refrigerated.
Nutrition
- Serving Size: 1 mini slider
- Calories: 150180
- Sugar: 2
- Sodium: 350
- Fat: 9
- Saturated Fat: 4
- Carbohydrates: 12
- Fiber: 1
- Protein: 10
Keywords: mini sliders, kids recipe, Fourth of July, easy sliders, beef sliders, party food, summer recipe