Love this? Save it for later!
Share the inspiration with your friends
This was supposed to be a straightforward classic cheesecake, baked in my usual overenthusiastic style. I grabbed the wrong cream cheese—halfway through unwrapping I realized it was whipped, not the dense block I’d planned for—and the oven was already running too hot because I got distracted scrolling through my phone. Honestly, I was halfway panicked, thinking the whole thing might turn into a sad, mushy mess. What came out was nothing like the plan—and better.
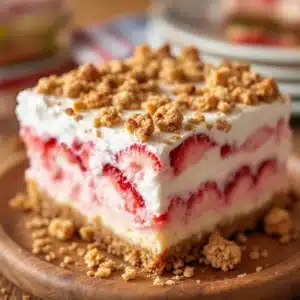
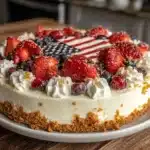
The texture was light, almost fluffy, which honestly felt like a gift on a hot summer day when you don’t want anything heavy. Then came the berry topping, slapped on in a bit of a hurry (I forgot to set aside the blueberries first), but arranged with a kind of happy messiness that actually looked like a flag—red, white, and blue in perfect summer harmony. I mean, I’d never intended to make a no-bake dessert that looked so festive, but hey, sometimes the kitchen chaos leads to the best memories.
Maybe you’ve been there too—caught mid-cooking, juggling a million things, and suddenly you realize the recipe’s gone sideways. But you keep going, because what else can you do? The result? A dessert that’s cool, refreshing, and has become my go-to summer recipe. This easy no-bake flag cheesecake with fresh berry topping isn’t just a pretty face; it’s a reminder that sometimes, the best dishes come from a little kitchen mess and a lot of improvisation.
Why You’ll Love This Recipe
After testing this easy no-bake flag cheesecake with fresh berry topping more times than I care to admit, I can say it’s a real crowd-pleaser. Whether you’re a seasoned baker or someone who breaks out in a sweat at the thought of complicated desserts, this recipe has your back.
- Quick & Easy: Comes together in under 30 minutes, which is perfect for when summer plans sneak up on you or you need a last-minute dessert.
- Simple Ingredients: No exotic or hard-to-find items here—just pantry staples and fresh berries you can grab from any farmer’s market or grocery store.
- Perfect for Summer Celebrations: Whether it’s a backyard BBQ, a Fourth of July picnic, or a casual get-together, this cheesecake brings a festive touch without fuss.
- Crowd-Pleaser: Kids love the colorful berry topping, and adults appreciate the light, creamy texture that’s not overly sweet.
- Unbelievably Delicious: That creamy no-bake filling paired with fresh berries strikes the perfect balance of tart and sweet, light but satisfying.
This cheesecake isn’t your average no-bake dessert. The secret is in the whipped cream and cream cheese combo that creates a silky smooth base without the heaviness typical of baked cheesecakes. Plus, the fresh berry topping arranged like a flag adds a fun, patriotic vibe that’s as pleasing to the eyes as it is to the taste buds. Honestly, it’s the kind of dessert that makes you close your eyes after the first bite and smile.
What Ingredients You Will Need
This easy no-bake flag cheesecake uses simple, wholesome ingredients to deliver bold flavor and satisfying texture without the fuss. Most of these are pantry staples, and the fresh berries really make the dish pop.
- For the crust:
- 1 ½ cups (150g) graham cracker crumbs (I like using Honey Maid for a nice balance of sweetness)
- 6 tbsp (85g) unsalted butter, melted (adds richness and helps the crust set)
- 2 tbsp granulated sugar (optional, depending on how sweet you like your crust)
- For the cheesecake filling:
- 16 oz (450g) cream cheese, softened (Philadelphia brand is my go-to for smooth texture)
- 1 cup (240ml) heavy whipping cream, cold
- ¾ cup (90g) powdered sugar, sifted (for smooth sweetness)
- 1 tsp pure vanilla extract (adds depth of flavor)
- ½ tsp lemon zest (optional, brightens the flavor)
- For the fresh berry topping:
- 1 cup fresh strawberries, sliced (red stripes on the flag)
- 1 cup fresh raspberries (more red stripes)
- 1 cup fresh blueberries (the blue corner)
If you want a gluten-free option, simply swap the graham crackers for almond flour or gluten-free crumbs. And if you need a dairy-free version, coconut cream and a dairy-free cream cheese substitute work surprisingly well here. In summer, you might swap in fresh blackberries or even cherries for a twist. The ingredient list is forgiving but thoughtfully chosen to keep the texture just right.
Equipment Needed
- 9-inch (23 cm) springform pan — makes removing the cheesecake effortless
- Mixing bowls — preferably one large for the filling and one for the crust
- Electric mixer or stand mixer — whipping the cream by hand is possible but takes a workout
- Rubber spatula — for folding ingredients gently without deflating the filling
- Measuring cups and spoons — precision helps when it comes to cream cheese and sugar
- Food processor or rolling pin — to crush graham crackers if you don’t buy pre-crumbled ones
If you don’t have a springform pan, a regular pie dish works, but be extra gentle when serving. I once tried this in a glass bowl (because I forgot my pan), and while it looked rustic, it was harder to slice neatly. For budget-friendly options, a simple hand mixer and a sturdy bowl can do the trick just fine.
Preparation Method
- Prepare the crust: In a medium bowl, combine the graham cracker crumbs, melted butter, and sugar. Mix until the crumbs are evenly coated and resemble wet sand. Press this mixture firmly into the bottom of your 9-inch springform pan. Use the bottom of a glass to pack it down evenly. Chill in the refrigerator while you prepare the filling (about 10 minutes). This chilling helps the crust set so it holds together when serving.
- Make the cheesecake filling: In a large bowl, beat the softened cream cheese with an electric mixer until smooth and creamy, about 2-3 minutes. Add the powdered sugar, vanilla extract, and lemon zest, and beat again until fully combined.
- Whip the heavy cream: In a separate chilled bowl, whip the cold heavy cream until stiff peaks form. (Tip: Chill your beaters for an even better whip.) This usually takes about 3-5 minutes. Be careful not to overwhip or you’ll get butter!
- Combine the filling and whipped cream: Using a rubber spatula, gently fold the whipped cream into the cream cheese mixture. Take your time and fold carefully to keep the filling light and airy. The texture should be fluffy but stable.
- Assemble the cheesecake: Pour the filling over the chilled crust and spread evenly with a spatula. Smooth the top as best you can.
- Chill the cheesecake: Cover the pan with plastic wrap and refrigerate for at least 4 hours, preferably overnight. This step is crucial for the cheesecake to set properly and develop that creamy texture.
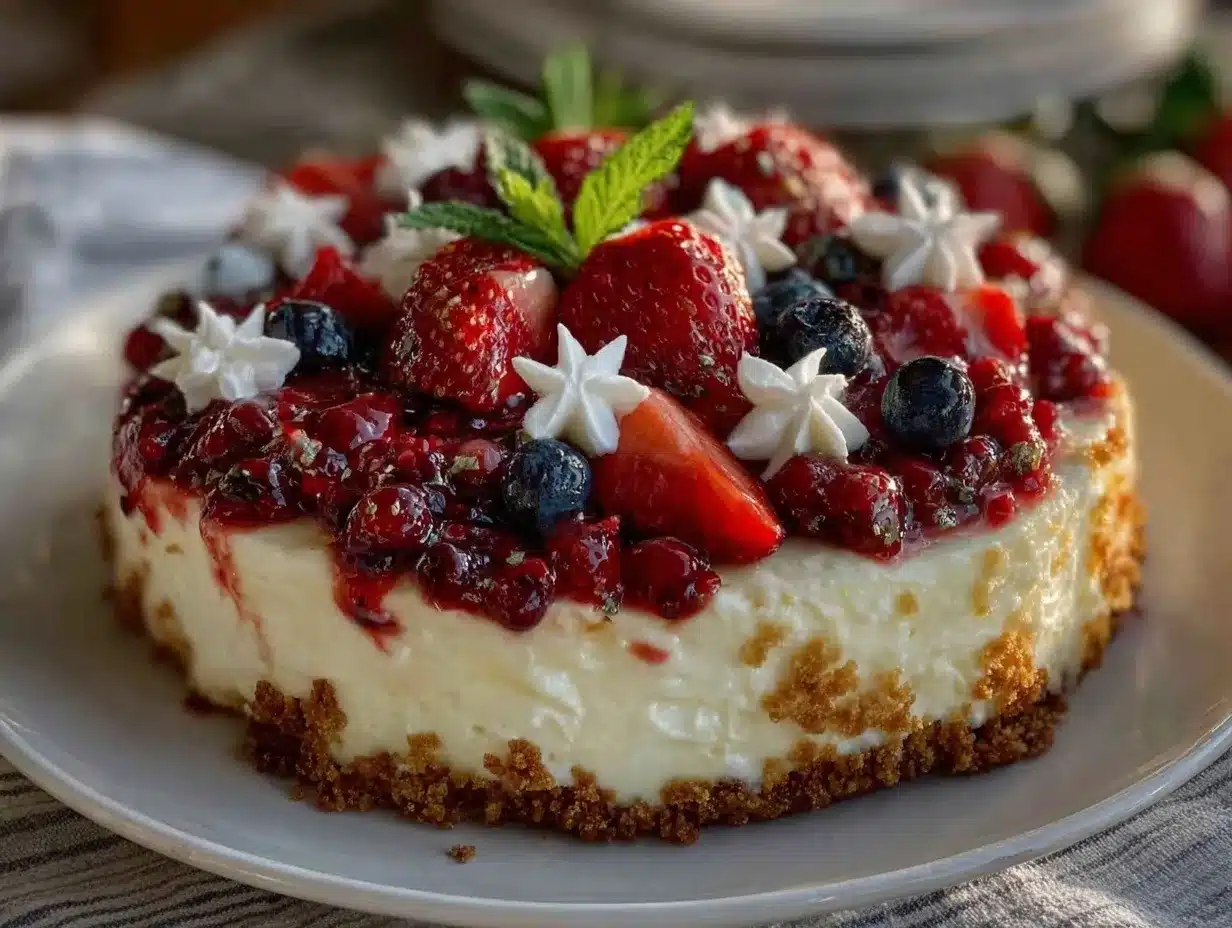
- Add the fresh berry topping: Just before serving, arrange the strawberries and raspberries in horizontal stripes across two-thirds of the top of the cheesecake. Fill the remaining third with blueberries to mimic a flag pattern. Don’t worry about perfection—this is a casual, festive look.
- Serve and enjoy: Run a warm knife around the edges before releasing the springform to get clean slices. Serve chilled for the best experience.
Pro tip: If your cream cheese isn’t fully softened, you’ll get lumps. I learned that the hard way when I tried rushing it in the microwave and ended up with a curdled mess. Let it sit at room temp for at least 30 minutes next time. Also, when chilling, don’t skip the overnight rest if you can swing it—this cheesecake tastes best when fully set.
Cooking Tips & Techniques
Whipping cream properly is key here—you want stiff peaks but no graininess. If you see the cream starting to separate, stop immediately. Another tip: when folding the whipped cream into the cream cheese mix, use a gentle hand and a large spatula. I’ve made the mistake of stirring too vigorously and lost that fluffy texture I was after.
Regarding the crust, pressing it firmly and chilling it well helps avoid crumbly slices. If you find your crust too soft, pop the cheesecake back in the fridge for a bit before serving. Also, the lemon zest in the filling adds a subtle brightness that really lifts the whole cheesecake—don’t skip it.
Timing-wise, I like to whip the cream and mix the filling simultaneously to speed things up. But if multitasking isn’t your thing, no worries—just keep everything chilled and fresh. Lastly, fresh berries should be washed and completely dried before topping, so they don’t make the cheesecake soggy.
Variations & Adaptations
- Dietary Twist: Use gluten-free graham crackers or crushed nuts like pecans for a gluten-free crust. Swap cream cheese for a dairy-free alternative and heavy cream with coconut cream to make it vegan.
- Seasonal Flavors: In fall, try topping with sliced pears and pomegranate seeds instead of berries. During winter, a warm berry compote spooned over the cheesecake adds cozy vibes.
- Flavor Boost: Add a tablespoon of bourbon or almond extract to the filling for a grown-up twist. Or sprinkle crushed pistachios on top for a crunchy contrast.
- Alternative Cooking Methods: This recipe is no-bake, but if you want a baked version, check out my classic baked cheesecake recipe for a richer option.
Once, I tried swapping the berries for tropical fruits—mango and kiwi—which was unexpected but delightful. It reminded me that this cheesecake is forgiving and flexible, so feel free to make it your own.
Serving & Storage Suggestions
This cheesecake is best served chilled, straight from the fridge. The fresh berry topping adds a juicy, vibrant contrast to the creamy filling. For a festive touch, serve it on a simple white platter to let those reds and blues pop.
It pairs beautifully with a cup of iced tea or a light sparkling wine for summer entertaining. If you’re planning a picnic, transport it in the springform pan with a secure lid and a cooler pack to keep it fresh.
Store leftovers in the refrigerator, covered tightly with plastic wrap or a cake dome, for up to 3 days. You can freeze the cheesecake without the berries for up to 1 month—just thaw overnight in the fridge before topping and serving. The flavors mellow and deepen after a day or two, so sometimes waiting a bit makes it taste even better.
Nutritional Information & Benefits
Per slice (based on 12 servings), this cheesecake offers approximately 280 calories, 18g fat, 25g carbohydrates, and 4g protein. The fresh berries provide a boost of antioxidants, fiber, and vitamin C, making this dessert a little more than just indulgence.
Using real cream cheese and heavy cream means this recipe is rich in calcium and fat-soluble vitamins, though definitely best enjoyed in moderation. For those watching carbs, swapping sugar for a natural sweetener can lighten the carb load.
From a wellness perspective, this dessert strikes a balance between treat and nourishment—offering fresh fruit alongside creamy satisfaction without complicated ingredients or artificial additives.
Conclusion
This easy no-bake flag cheesecake with fresh berry topping is one of those recipes that’s stayed in my rotation because it’s simple, forgiving, and just plain fun to make. It brings together fresh, basic ingredients into a dessert that looks festive and tastes like summer joy on a plate.
Feel free to tweak the berries or crust to suit your tastes or dietary needs—this recipe thrives on personalization. Honestly, it’s become my go-to for casual celebrations and anytime I want a dessert that impresses without the stress.
Give it a try, share your berry arrangements, and let me know how your cheesecake turns out. I’d love to hear your stories and variations—after all, every great recipe has a little bit of kitchen chaos behind it.
Happy no-baking!
Frequently Asked Questions
Can I make this cheesecake ahead of time?
Absolutely! Prepare the crust and filling the day before, chill overnight, and add the fresh berry topping just before serving for the best texture.
What if I don’t have a springform pan?
You can use a pie dish or any round dish, but slicing might be trickier. Just be gentle when serving to keep slices intact.
Can I use frozen berries for the topping?
Fresh is best for texture and appearance, but if you use frozen, thaw and drain them well to avoid sogginess.
How do I soften cream cheese quickly?
Leave it on the counter for 30-60 minutes or microwave in short 10-second bursts, checking frequently to avoid melting.
Is this recipe suitable for kids?
Yes! The berry topping is colorful and fun, and the cheesecake is mild and creamy—perfect for little taste buds.
Pin This Recipe!
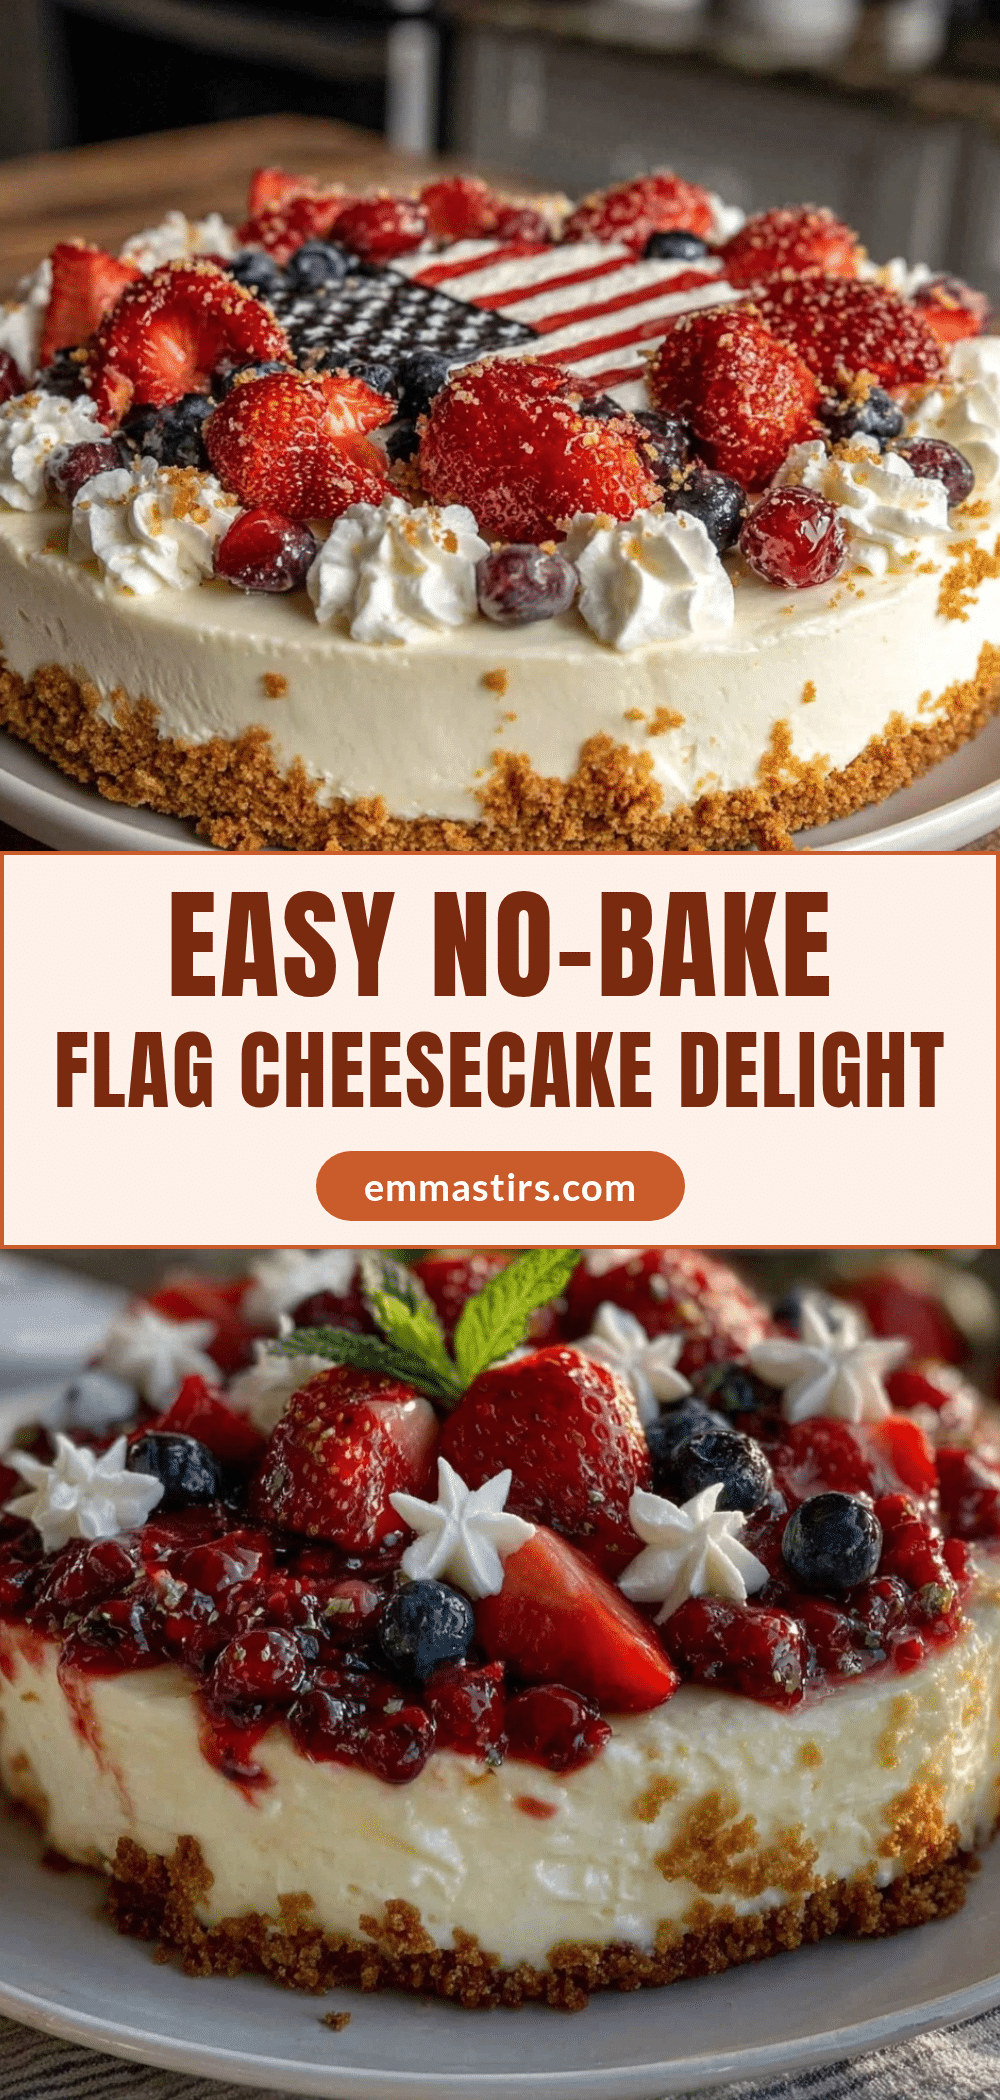
Easy No-Bake Flag Cheesecake Recipe with Fresh Berry Topping Perfect for Summer
A light and fluffy no-bake cheesecake topped with fresh berries arranged like a flag, perfect for summer celebrations and easy to prepare in under 30 minutes.
- Prep Time: 15 minutes
- Cook Time: 0 minutes
- Total Time: 4 hours 15 minutes
- Yield: 12 servings 1x
- Category: Dessert
- Cuisine: American
Ingredients
- 1 ½ cups (150g) graham cracker crumbs
- 6 tbsp (85g) unsalted butter, melted
- 2 tbsp granulated sugar (optional)
- 16 oz (450g) cream cheese, softened
- 1 cup (240ml) heavy whipping cream, cold
- ¾ cup (90g) powdered sugar, sifted
- 1 tsp pure vanilla extract
- ½ tsp lemon zest (optional)
- 1 cup fresh strawberries, sliced
- 1 cup fresh raspberries
- 1 cup fresh blueberries
Instructions
- Prepare the crust: In a medium bowl, combine the graham cracker crumbs, melted butter, and sugar. Mix until the crumbs are evenly coated and resemble wet sand. Press this mixture firmly into the bottom of your 9-inch springform pan. Use the bottom of a glass to pack it down evenly. Chill in the refrigerator for about 10 minutes.
- Make the cheesecake filling: In a large bowl, beat the softened cream cheese with an electric mixer until smooth and creamy, about 2-3 minutes. Add the powdered sugar, vanilla extract, and lemon zest, and beat again until fully combined.
- Whip the heavy cream: In a separate chilled bowl, whip the cold heavy cream until stiff peaks form, about 3-5 minutes. Be careful not to overwhip.
- Combine the filling and whipped cream: Using a rubber spatula, gently fold the whipped cream into the cream cheese mixture until fluffy but stable.
- Assemble the cheesecake: Pour the filling over the chilled crust and spread evenly with a spatula. Smooth the top.
- Chill the cheesecake: Cover the pan with plastic wrap and refrigerate for at least 4 hours, preferably overnight.
- Add the fresh berry topping: Just before serving, arrange the strawberries and raspberries in horizontal stripes across two-thirds of the top of the cheesecake. Fill the remaining third with blueberries to mimic a flag pattern.
- Serve and enjoy: Run a warm knife around the edges before releasing the springform to get clean slices. Serve chilled.
Notes
Let cream cheese soften at room temperature for at least 30 minutes to avoid lumps. Chill crust well before adding filling to help it set. Whip cream to stiff peaks but avoid overwhipping to prevent butter formation. Fold whipped cream gently into cream cheese mixture to maintain fluffy texture. Fresh berries should be washed and dried completely before topping to avoid sogginess. For gluten-free option, substitute graham crackers with almond flour or gluten-free crumbs. For dairy-free, use coconut cream and dairy-free cream cheese substitutes. Chill cheesecake overnight for best texture and flavor.
Nutrition
- Serving Size: 1 slice (1/12th of c
- Calories: 280
- Fat: 18
- Carbohydrates: 25
- Protein: 4
Keywords: no-bake cheesecake, flag cheesecake, summer dessert, fresh berry topping, easy cheesecake, patriotic dessert, quick dessert