Love this? Save it for later!
Share the inspiration with your friends
Introduction
“Hand me that bowl,” my neighbor said, barely looking up from her kitchen counter as she tossed garlic cloves and fresh dill into a jar of cucumbers. I wasn’t expecting much—I’d stopped by to borrow some sugar, honestly—but the tangy, garlicky aroma hit me before I even stepped inside. She shrugged off my wide-eyed stare as if whipping up these crispy garlic dill refrigerator pickles ready in 24 hours was just another Tuesday thing. There was nothing fancy about the setup: a cracked ceramic bowl, a slightly stained cutting board, and a jar that looked like it belonged in a summer picnic rather than a gourmet food blog.
Maybe you’ve been there—the kind of moment where something ordinary suddenly smells extraordinary. That’s exactly what happened, and I couldn’t help but ask for the recipe. The magic? It’s the perfect balance of sharp garlic, fresh dill, and that unmistakable crunch you expect from a pickle, all without the wait of traditional canning. Honestly, this recipe has stuck with me because it’s so effortlessly brilliant. You can have fresh, crispy pickles in just one day, and no one would guess you didn’t spend hours fussing over them.
Let me tell you, you don’t need to be a pickle pro to pull this off—just a jar, some good cucumbers, and a little patience. Whether you’re a dill lover or just want a quick tangy snack, these refrigerator pickles are going to become your new go-to. And if you’re anything like me, once you’ve had these, you’ll be sneaking back to the fridge for another bite before dinner’s even on the table.
Why You’ll Love This Recipe
After testing countless pickle recipes in my kitchen (and yes, eating way too many), this crispy garlic dill refrigerator pickles recipe stands out for several reasons. It’s been family-approved, neighbor-tested, and honestly, it’s the kind of pickle that makes you close your eyes and savor that perfect crunch and tang.
- Quick & Easy: Ready in just 24 hours, making it perfect for last-minute cravings or when you want fresh pickles without the wait.
- Simple Ingredients: No need for fancy spices or hard-to-find items; standard pantry staples and fresh cucumbers are all you need.
- Perfect for Summer Snacks or Sandwiches: Adds the ideal zing to burgers, deli sandwiches, or just straight from the jar.
- Crowd-Pleaser: Even pickle skeptics have given this recipe a thumbs-up thanks to its balanced garlic and dill flavor.
- Unbelievably Delicious: The crisp texture with that bright, garlicky punch is next-level comfort food—without the canned taste.
This isn’t just another pickle recipe — it’s the one where the garlic is punchy but not overpowering, the dill is fresh and fragrant, and the cucumbers stay crunchy instead of soggy. It’s all about that quick soak in the brine, which gives you the best of both worlds: a deep flavor and a satisfying bite. Honestly, it’s the kind of recipe that turns pickle-making from a chore into a fun little kitchen experiment that yields big rewards. Perfect for impressing guests casually or just treating yourself after a long day.
What Ingredients You Will Need
This recipe uses simple, wholesome ingredients to deliver bold flavor and satisfying texture without the fuss. Most are pantry staples, and if you’re lucky, you might have everything on hand already. The fresh dill and garlic really bring it home, creating that classic dill pickle flavor we all crave.
- Fresh Cucumbers: 4-5 medium Kirby cucumbers or pickling cucumbers, washed and sliced into spears or rounds (Kirby cucumbers hold their crunch best)
- Garlic Cloves: 4-5 large cloves, peeled and smashed (adds the essential garlicky punch)
- Fresh Dill: 4-5 sprigs, or about 2 tablespoons of chopped dill (use fresh for best aroma and flavor)
- White Vinegar: 1 cup (240 ml) – standard white vinegar keeps the flavor sharp and clean
- Water: 1 cup (240 ml) – use filtered if possible for clearest taste
- Salt: 1 tablespoon of kosher salt or pickling salt (do not use table salt, it can make the pickles cloudy and taste off)
- Sugar: 1 teaspoon (balances the acidity without making it sweet)
- Black Peppercorns: 1 teaspoon (whole, adds subtle warmth)
- Red Pepper Flakes: Optional, 1/4 teaspoon for a mild kick
If you want to swap things up, you can use apple cider vinegar instead of white vinegar for a slightly fruitier tang. For a dairy-free or vegan-friendly twist, this recipe is naturally suitable as is! Look for organic cucumbers at your local farmer’s market if you want the freshest crunch. And if you’re in a pinch, you can substitute dried dill, but fresh really makes the flavor pop.
Equipment Needed
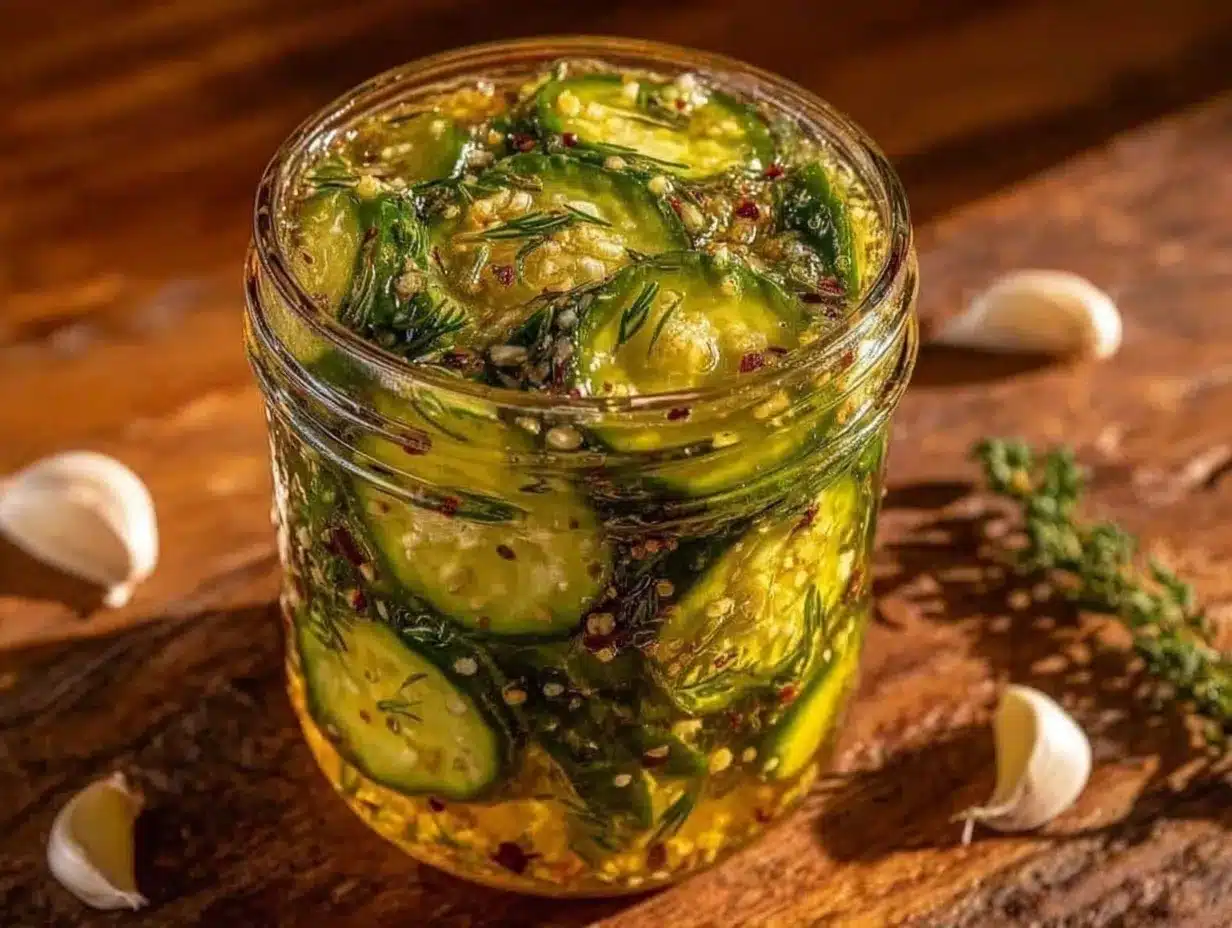
- Glass Jar with Lid: A quart-sized (1-liter) jar works best for easy storage and brining. Mason jars are perfect and reusable.
- Mixing Bowl: For combining the brine ingredients and tossing cucumbers.
- Measuring Cups and Spoons: To keep ingredients precise, especially salt and vinegar amounts.
- Knife and Cutting Board: Sharp knife for slicing cucumbers evenly.
- Optional Tongs or Fork: To pack the cucumbers into the jar without bruising them.
Honestly, you don’t need fancy tools here. I’ve tried this recipe with simple kitchenware from my starter set, and it worked just as well as the high-end stuff. If you don’t have a jar with a lid, a tightly covered bowl or storage container can substitute, but the jar keeps the flavors sealed and the pickles crisp. For regular pickle lovers, investing in a set of mason jars is worth it—they’re versatile and easy to clean.
Preparation Method
- Prepare the Cucumbers (10 minutes): Wash and dry the cucumbers thoroughly. Slice them into spears about 3-4 inches long or rounds about 1/4 inch thick, depending on your preference. Even slicing helps ensure consistent pickling.
- Make the Brine (5 minutes): In a mixing bowl, combine 1 cup (240 ml) white vinegar, 1 cup (240 ml) water, 1 tablespoon kosher salt, and 1 teaspoon sugar. Stir until the salt and sugar dissolve completely. This balance keeps the pickles tangy but not overpowering.
- Pack the Jar (5 minutes): Place smashed garlic cloves, fresh dill sprigs, black peppercorns, and optional red pepper flakes in the bottom of your clean glass jar. Pack the cucumber slices tightly on top, leaving about 1/2 inch (1.3 cm) space below the rim.
- Pour the Brine (2 minutes): Pour the brine mixture over the cucumbers, making sure they’re fully submerged. Use a clean utensil to press down the cucumbers gently. Seal the jar tightly.
- Refrigerate and Wait (24 hours): Place the jar in the refrigerator. The pickles need at least 24 hours to develop that crispy garlic dill flavor. You can taste them after 12 hours if you’re curious, but the best crunch and bite come at the full day mark.
- Enjoy and Store (ongoing): These pickles keep well in the fridge for up to 2 weeks. Always use clean utensils to avoid contamination.
Quick tip: If you find your pickles a little less crisp than you’d like, try adding a small piece of horseradish leaf or a grape leaf to the jar next time — it’s an old-school trick to keep that crunch alive. Also, be patient; rushing the refrigeration time means missing out on the full flavor punch.
Cooking Tips & Techniques
Let me share some lessons I learned the hard way while perfecting these crispy garlic dill refrigerator pickles. First, the salt really matters. Using table salt can make your brine cloudy and the flavor flat, so stick to kosher or pickling salt. Also, don’t skip smashing the garlic cloves—this releases the oils and aroma that make the pickles sing.
Timing is key: less than 24 hours and the cucumbers might taste bland; more than 48 hours, and you could lose some crunch. I usually set a reminder to check mine right at the 24-hour mark. Another trick is packing the cucumbers tightly but not squashing them—you want a snug fit but still room for the brine to circulate.
When slicing cucumbers, try to keep pieces uniform for even pickling. I once tried half thick, half thin slices, and the thicker ones stayed too firm while the thinner ones got mushy. Finally, always store your pickles in the fridge; these aren’t shelf-stable like canned pickles, so keep them chilled to maintain freshness.
Variations & Adaptations
- Spicy Kick: Add sliced jalapeños or increase red pepper flakes to give your pickles a fiery touch.
- Low-Sodium Version: Reduce salt by half and add a splash of lemon juice to keep brightness without overdoing the sodium.
- Herb Twist: Swap fresh dill for fresh tarragon or basil for a unique flavor profile that still complements the garlic.
- Different Vinegars: Use apple cider vinegar or white wine vinegar for a fruitier or milder tang.
- Quick Pickle Chips: Slice cucumbers very thin and place in the brine for 12 hours for delicate, chip-like pickles.
Personally, I once tried mixing fresh dill with a bit of fresh mint for a summer picnic. It was unexpected but surprisingly refreshing. If you want to make this recipe gluten-free or vegan, it fits perfectly as is. And if you prefer a more traditional canned pickle, this brine works well — just extend the pickling time and follow safe canning procedures.
Serving & Storage Suggestions
These crispy garlic dill refrigerator pickles are best served cold straight from the fridge. They pair wonderfully with deli sandwiches, grilled burgers, or charcuterie boards. I love adding a few slices to tuna salad or mixing chopped pickles into potato salad for an extra zing.
Store the pickles in their brine in the refrigerator for up to 2 weeks. Over time, the flavors meld and intensify, but the cucumbers may become softer after about a week, so enjoy early for maximum crunch. When reheating isn’t needed—these are meant to be eaten chilled. Just grab a clean fork or tongs and enjoy!
If you want to keep the pickles longer, consider freezing the brine separately (not recommended for the cucumbers themselves, as freezing ruins their texture). When you want fresh pickles, thaw the brine and pour it over new cucumbers for a quick batch.
Nutritional Information & Benefits
These crispy garlic dill refrigerator pickles are low in calories (about 10-15 calories per serving), fat-free, and provide a good source of vitamin K thanks to the fresh dill. The vinegar in the brine may aid digestion, and garlic is well-known for its antimicrobial and immune-boosting properties.
Keep in mind the sodium content is moderate because of the salt, so if you’re watching your sodium intake, you can adjust the salt level in the recipe. These pickles are naturally gluten-free, vegan, and keto-friendly, making them a versatile snack or condiment for most diets.
From a wellness perspective, I love that this recipe encourages eating more fresh herbs and raw veggies, giving you a flavorful snack that’s also refreshing and hydrating.
Conclusion
If you’re looking for a quick, delicious way to enjoy homemade pickles without the fuss of traditional canning, this crispy garlic dill refrigerator pickles recipe is your new best friend. It’s simple, fast, and honestly, addictively crunchy. Customize it to your liking—more garlic, extra spice, or even different herbs—and make it your own.
I keep a jar of these in my fridge most weeks; they’re the perfect snack, side, or sandwich topper that never disappoints. I hope you’ll love how easy it is to make fresh pickles at home. When you do, please drop a comment or share how you’ve tweaked the recipe. I’d love to hear your pickle stories!
Now, go grab some cucumbers and get pickling—your fridge will thank you.
FAQs
How long do refrigerator pickles last?
They typically last up to 2 weeks in the fridge if kept submerged in the brine and stored in a sealed jar.
Can I use regular cucumbers instead of pickling cucumbers?
You can, but pickling cucumbers like Kirby cucumbers stay crispier and have thinner skins, which makes for better pickles.
Do I need to sterilize the jars for refrigerator pickles?
While sterilization isn’t required like with canning, it’s a good idea to wash jars thoroughly with hot soapy water to reduce bacteria.
Can I make these pickles without garlic?
Yes! Garlic adds flavor, but if you’re not a fan, you can omit it or substitute with shallots or onion slices.
Why are my pickles not crunchy?
Possible reasons include using the wrong cucumbers, too much water diluting the brine, or pickling for too long. Using fresh Kirby cucumbers and following the recipe closely helps keep them crisp.
Pin This Recipe!
Crispy Garlic Dill Refrigerator Pickles
Quick and easy refrigerator pickles with a perfect balance of sharp garlic, fresh dill, and a satisfying crunch, ready in just 24 hours without traditional canning.
- Prep Time: 15 minutes
- Cook Time: 0 minutes
- Total Time: 24 hours 15 minutes
- Yield: 4 servings 1x
- Category: Condiment
- Cuisine: American
Ingredients
- 4–5 medium Kirby cucumbers or pickling cucumbers, washed and sliced into spears or rounds
- 4–5 large garlic cloves, peeled and smashed
- 4–5 sprigs fresh dill, or about 2 tablespoons chopped dill
- 1 cup (240 ml) white vinegar
- 1 cup (240 ml) water
- 1 tablespoon kosher salt or pickling salt
- 1 teaspoon sugar
- 1 teaspoon whole black peppercorns
- 1/4 teaspoon red pepper flakes (optional)
Instructions
- Wash and dry the cucumbers thoroughly. Slice into spears about 3-4 inches long or rounds about 1/4 inch thick.
- In a mixing bowl, combine 1 cup white vinegar, 1 cup water, 1 tablespoon kosher salt, and 1 teaspoon sugar. Stir until salt and sugar dissolve.
- Place smashed garlic cloves, fresh dill sprigs, black peppercorns, and optional red pepper flakes in the bottom of a clean quart-sized glass jar.
- Pack the cucumber slices tightly on top, leaving about 1/2 inch space below the rim.
- Pour the brine mixture over the cucumbers, ensuring they are fully submerged. Press down gently and seal the jar tightly.
- Refrigerate for at least 24 hours to develop flavor and crunch. Taste after 12 hours if desired.
- Store pickles in the refrigerator for up to 2 weeks. Use clean utensils to serve.
Notes
Use kosher or pickling salt to avoid cloudy brine and off flavors. Smash garlic cloves to release oils and aroma. For extra crispness, add a horseradish or grape leaf to the jar. Keep pickles refrigerated and consume within 2 weeks. Uniform slicing ensures even pickling. Adjust salt and spices to taste. Optionally substitute apple cider vinegar for a fruitier tang.
Nutrition
- Serving Size: About 1/2 cup pickle
- Calories: 15
- Sugar: 1
- Sodium: 800
- Carbohydrates: 3
- Fiber: 1
Keywords: refrigerator pickles, garlic dill pickles, quick pickles, easy pickles, homemade pickles, crisp pickles, dill pickles


