Love this? Save it for later!
Share the inspiration with your friends
Someone asked me last week why I always have a jar of homemade syrup in my fridge. I fumbled through an answer about saving money and controlling ingredients, but the real reason is simpler. I got tired of paying eight dollars for a tiny bottle of flavored syrup that tasted more like chemicals than actual food. That frustration led me down a rabbit hole of boiling sugar and steeping spices, and honestly, it was one of the best kitchen messes I’ve ever made.
This salted caramel apple cider coffee syrup started as a happy accident. I had a half-gallon of fresh apple cider sitting in my fridge that was about to turn, and a bag of sugar that was calling my name. I figured I’d try to make a simple syrup, but I kept adding things. A pinch of salt here, a splash of vanilla there. By the time I was done, my kitchen smelled like a fall festival had exploded inside it. I poured the syrup into a mason jar, let it cool, and the next morning I added a splash to my coffee. Let me tell you, that first sip was a revelation.
You know that feeling when you take a drink of something and it’s exactly what you needed but didn’t know you were looking for? That’s this syrup. It’s rich without being heavy, sweet with a touch of salt, and the apple cider adds this bright, fruity note that cuts through the coffee’s bitterness. I’ve been making it every fall since, and I keep finding new ways to use it. Drizzled over pancakes, stirred into oatmeal, even splashed into a cocktail. I mean, it’s versatile in a way that feels almost unfair.
Why You’ll Love This Recipe
This isn’t just another flavored syrup recipe. This is the one that makes you wonder why you ever bought the store-bought stuff. Here’s why it’s going to become your new fall obsession:
- Quick & Easy : Comes together in under 30 minutes, most of which is hands-off simmering time. Perfect for a lazy Sunday afternoon or a weekday evening when you need a little seasonal cheer.
- Simple Ingredients : No fancy grocery trips needed. You likely have sugar, salt, and vanilla in your pantry right now. The apple cider is the only special item, and it’s everywhere this time of year.
- Perfect for Fall Mornings : Great for cozy breakfasts, weekend brunches, or those chilly mornings when you need an extra reason to get out of bed.
- Crowd-Pleaser : I brought a jar to my neighbor’s housewarming party, and three people asked for the recipe before I left. It’s that kind of syrup.
- Unbelievably Delicious : The combination of salted caramel and apple cider is next-level comfort in a mug. It tastes like autumn distilled into liquid form.
What makes this recipe different from the rest is the technique. Most caramel syrops rely on heavy cream or butter, which can separate or spoil quickly. This version uses a simple sugar base infused with real apple cider and a touch of vanilla. The result is a syrup that stays smooth, stores beautifully, and lets the apple flavor shine without being overpowered by dairy. It’s my best version after several rounds of trial and error—trust me, I’ve made some syrups that ended up as sticky science experiments.
This recipe isn’t just good—it is the kind that makes you close your eyes after the first sip. It’s comfort in a cup, reimagined as something you can make yourself. Perfect for impressing guests without stress, or turning a simple cup of coffee into something memorable. Honestly, it makes you feel like you’ve got your life together, even if you’re still in your pajamas at noon.
What Ingredients You Will Need
This recipe uses simple, wholesome ingredients to deliver bold flavor and satisfying texture without the fuss. Most of these are pantry staples, which makes this syrup an easy win any day of the week.
- 1 cup apple cider (fresh or store-bought, just make sure it’s not spiced if you want to control the flavor yourself)
- 1 cup granulated sugar (regular white sugar works best; don’t use brown sugar here as it can overpower the apple)
- 1/2 cup light brown sugar, packed (adds depth and that classic caramel note)
- 1/2 teaspoon sea salt (I prefer fine sea salt for even distribution, but flaky salt works if you crush it first)
- 1 teaspoon vanilla extract (pure vanilla, not imitation, if you can swing it—the flavor is noticeably better)
- 1 cinnamon stick (optional but highly recommended for that cozy spice layer)
- 1/4 teaspoon apple pie spice or pumpkin pie spice (optional, but I love the extra warmth it brings)
For the salted caramel element, the combination of white and brown sugar is key. The white sugar provides the structure for the caramel, while the brown sugar adds that molasses-like richness that makes it taste complex. I’ve tried using all brown sugar, and it was too heavy. All white sugar, and it was flat. The blend is where the magic happens.
When it comes to apple cider, I recommend a brand like Martinelli’s or a fresh-pressed option from a local orchard if you have one. The fresher the cider, the brighter the apple flavor will be in the final syrup. If you’re using store-bought, shake the bottle well before measuring because the solids can settle at the bottom.
For the salt, don’t skip it. The salt is what makes this “salted caramel” and it balances the sweetness beautifully. If you’re watching your sodium, you can reduce it to 1/4 teaspoon, but I wouldn’t go lower than that. The salt is doing important work here.
Substitution guidance: If you’re out of apple cider, you can use apple juice, but the flavor will be milder and less complex. For a dairy-free version, this recipe is naturally dairy-free since it uses no butter or cream. For a lower-sugar option, you can try using a sugar substitute like monk fruit sweetener, but I haven’t tested that myself, so results may vary.
Equipment Needed
You don’t need a fancy kitchen to make this syrup. Here’s what you’ll need:
- Medium saucepan (heavy-bottomed is best to prevent scorching; I use a 2-quart size)
- Wooden spoon or silicone spatula (metal can react with the caramel and cause crystallization)
- Fine-mesh strainer (for straining out the cinnamon stick and any solids)
- Glass jar or bottle for storage (a 16-ounce mason jar works perfectly)
- Measuring cups and spoons
- Small whisk (optional, but helpful for incorporating the salt)
If you don’t have a fine-mesh strainer, you can use cheesecloth or even a clean coffee filter. I’ve also used a slotted spoon to fish out the cinnamon stick, but the strainer gives a smoother result. For the jar, make sure it’s clean and dry before you pour in the syrup. I once used a slightly damp jar and ended up with crystals forming at the bottom—lesson learned.
Budget-friendly tip: You don’t need a fancy saucepan. My go-to is a stainless steel one I bought at a thrift store for five dollars. As long as it’s heavy enough to distribute heat evenly, you’re good.
Preparation Method
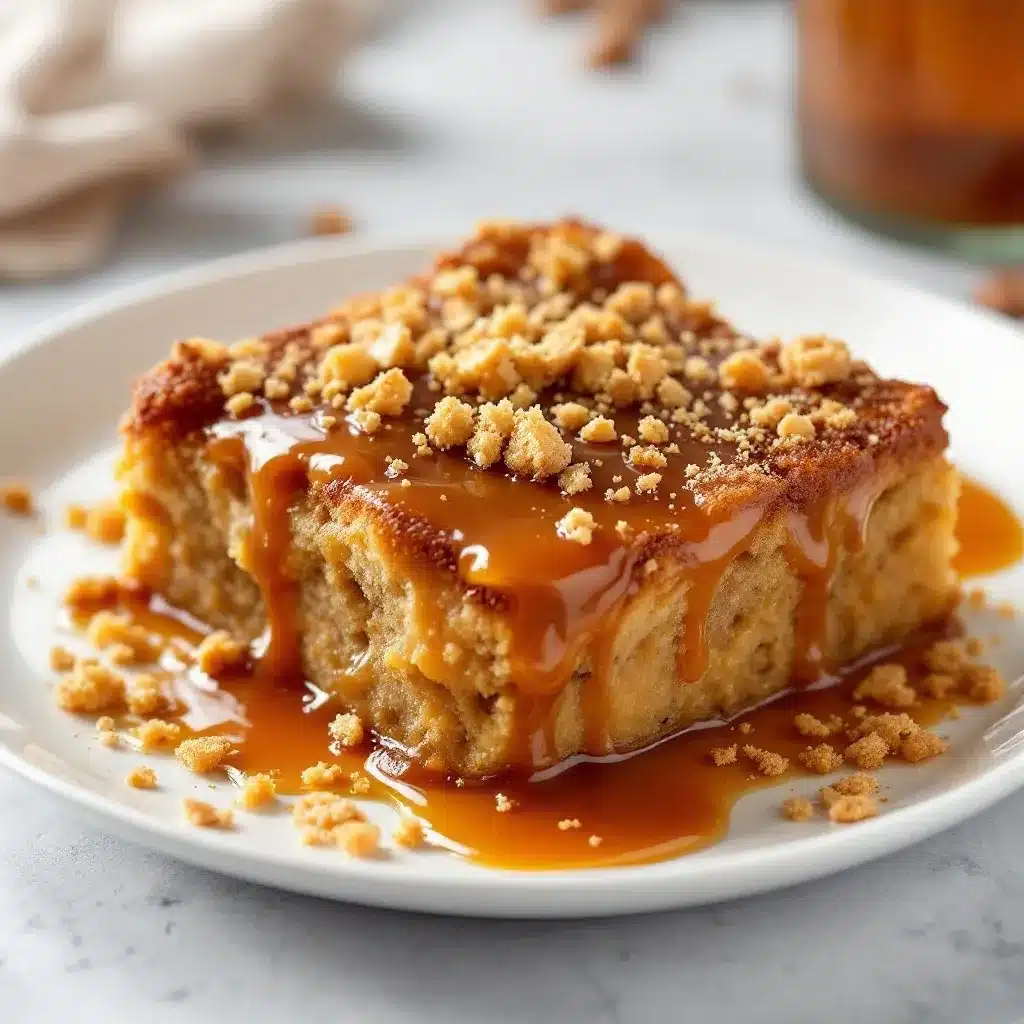
Making this syrup is straightforward, but there are a few moments where you’ll want to pay attention. Let’s break it down step by step.
- Combine the sugars and apple cider. In your medium saucepan, add the granulated sugar, brown sugar, and apple cider. Stir them together with your wooden spoon until the sugars are mostly dissolved. Don’t worry if there are a few lumps—they’ll melt as the mixture heats up. Place the saucepan over medium heat.
- Bring to a gentle boil. Let the mixture come to a boil, stirring occasionally. You’ll see the liquid go from cloudy to clear as the sugar dissolves. This takes about 4-5 minutes. Don’t walk away at this point—sugar can go from fine to burnt faster than you think. I learned this the hard way when I tried to fold laundry while making syrup. Spoiler: the laundry won, the syrup lost.
- Reduce to a simmer and add the spices. Once the mixture is boiling, reduce the heat to low so it’s at a gentle simmer. Drop in the cinnamon stick and the apple pie spice if you’re using it. Let it simmer for 10-12 minutes, stirring every couple of minutes. The mixture will thicken slightly and the apple flavor will concentrate. Your kitchen should start smelling incredible around the 8-minute mark.
- Remove from heat and add the salt and vanilla. After the simmering time, take the saucepan off the heat. Remove the cinnamon stick with tongs or a fork (it’s hot, so don’t use your fingers). Stir in the sea salt and vanilla extract. The salt will dissolve quickly, and the vanilla will release its aroma immediately. Give it a good stir and taste it. It should be sweet, salty, and deeply apple-y. If it’s not salty enough, add another pinch. If it’s too sweet, don’t worry—the coffee will balance it.
- Strain and cool. Pour the syrup through your fine-mesh strainer into a heat-safe glass jar or bottle. This step catches any stray bits of spice or undissolved sugar. Let the syrup cool completely at room temperature. Don’t put it in the fridge while it’s still hot—it can cause the jar to crack. I usually let it sit on the counter for about an hour until it’s barely warm to the touch.
- Store and enjoy. Once cooled, screw on the lid and store the syrup in the refrigerator. It will thicken slightly as it chills, but it will still pour easily. Give it a good shake before each use because the salt can settle at the bottom over time.
Time estimate: Total active time is about 5 minutes, with 15 minutes of simmering and 1 hour of cooling. It’s a low-effort, high-reward project.
Sensory cues: When the syrup is simmering, you should see small bubbles rising to the surface, not a rolling boil. The color will deepen from a pale golden to a rich amber. The smell will be like apple pie meets caramel candy—it’s intoxicating. When you taste it, the salt should hit your tongue first, followed by the sweetness and a bright apple finish.
Troubleshooting: If your syrup crystallizes after cooling, you might have cooked it too long or stirred it too vigorously. To fix it, gently reheat the syrup with a splash of water and stir until the crystals dissolve. If it’s too thin, simmer it a few minutes longer next time. If it’s too thick, add a tablespoon of water and stir.
Cooking Tips & Techniques
I’ve made this syrup at least a dozen times, and I’ve collected a few tricks along the way. Here’s what I’ve learned:
Don’t rush the simmer. The 10-12 minute simmer is where the magic happens. This is when the apple cider reduces and concentrates, giving the syrup its depth. If you cut the time short, the syrup will taste thin and watery. If you go too long, it can become overly thick and candy-like. Set a timer and trust the process.
Watch for crystallization. Sugar syrups can be temperamental. If you see crystals forming on the sides of the pan, use a wet pastry brush to brush them down into the liquid. This prevents the crystals from spreading and ruining your syrup. I forgot to do this once and ended up with a jar of grainy syrup that looked like sand. Not my finest moment.
Use a heavy-bottomed pan. This is non-negotiable for caramel-based recipes. A thin pan can cause hot spots that burn the sugar before the rest of the mixture is even warm. A heavy-bottomed pan distributes heat evenly and gives you more control.
Taste as you go. This is the most important tip. Everyone’s apple cider is different—some are sweeter, some are more tart. Your salt might be saltier than mine. Your vanilla might be stronger. Taste the syrup before you bottle it and adjust accordingly. Cooking is about your senses, not just following a recipe.
Multitasking strategy: While the syrup is simmering, clean up your workspace and prepare your storage jar. This way, when the syrup is done, you can strain it directly into the jar without scrambling. I’ve learned that having everything ready makes the process feel effortless.
Variations & Adaptations
This syrup is a canvas, and you can paint it however you like. Here are some variations I’ve tried and loved:
- Spiced Chai Version: Add 2 cardamom pods, a star anise, and a slice of fresh ginger to the simmering syrup along with the cinnamon stick. Strain it all out at the end. The result is a chai-spiced apple cider syrup that’s incredible in black tea or lattes.
- Bourbon Maple Twist: Replace 1/4 cup of the apple cider with bourbon and add 2 tablespoons of maple syrup. This version is less sweet and has a warm, boozy undertone. Perfect for adult coffee drinks or drizzled over vanilla ice cream.
- Dairy-Free Caramel Sauce: If you want a thicker, sauce-like consistency, add 1/4 cup of coconut cream during the last 5 minutes of simmering. Stir well and let it thicken. This turns your syrup into a pourable caramel sauce that’s vegan and incredibly rich.
- Low-Sugar Adaptation: Use 1/2 cup of granulated sugar and 1/2 cup of a monk fruit sweetener blend. The texture will be slightly thinner, but the flavor will still be delicious. I’ve made this for a friend who’s watching her sugar intake, and she said it was “dangerously good.”
- Extra Spicy Version: Add a pinch of cayenne pepper or a small dried chili pepper to the simmering syrup. The heat pairs beautifully with the sweet apple and salty caramel. I made this for a Halloween party and it was a hit with the brave souls who tried it.
My personal favorite variation is the bourbon maple twist. I made it last Thanksgiving for a brunch gathering, and my cousin asked me to bottle it for her. It’s now a staple in my fall rotation. If you try any variation, let me know how it goes!
Serving & Storage Suggestions
This syrup is best served chilled or at room temperature, stirred into hot coffee, iced lattes, or even tea. I love it in a simple black coffee—just a tablespoon or two transforms a plain cup into something special. For a treat, try it in a latte with oat milk. The creaminess of the oat milk balances the sweetness perfectly.
Storage: Keep the syrup in an airtight glass jar in the refrigerator. It will last for up to 3 weeks, though mine never makes it that long. The flavors actually deepen after a day or two, so don’t be surprised if it tastes even better on day three.
Reheating: If the syrup becomes too thick after refrigeration, let it sit at room temperature for 10 minutes or microwave it in 10-second bursts until it pours easily. Don’t overheat it, or the sugar can crystallize.
Freezing: You can freeze this syrup in ice cube trays for individual portions. Pop out a cube and drop it into your coffee for instant flavor. This is my secret weapon for busy mornings when I don’t want to dirty a measuring spoon.
Serving suggestions: Drizzle it over pancakes, waffles, or French toast. Use it as a topping for vanilla ice cream or yogurt. Stir it into oatmeal or overnight oats. Splash it into a cocktail—it’s amazing in a whiskey sour or an old fashioned. The possibilities are endless, and I encourage you to experiment.
Nutritional Information & Benefits
While this syrup is a treat, it does have some redeeming qualities. Here’s the estimated nutritional breakdown per tablespoon (approximately 15ml):
- Calories: 45
- Total Fat: 0g
- Sodium: 75mg (from the salt)
- Total Carbohydrates: 11g
- Sugars: 11g
- Protein: 0g
Health benefits: Apple cider is rich in antioxidants called polyphenols, which may help reduce inflammation and support heart health. The cinnamon in this recipe has anti-inflammatory properties and can help regulate blood sugar levels. Of course, these benefits are modest given the small serving size, but every little bit helps.
Dietary considerations: This syrup is naturally gluten-free, dairy-free, and vegan. It contains no nuts or soy, making it suitable for most dietary restrictions. The main allergen concern is the sugar content, so those with diabetes or blood sugar concerns should use it sparingly.
Personal perspective: I believe in enjoying treats in moderation. This syrup makes me happy, and a little bit goes a long way. If I’m going to have sugar, I’d rather it be in something I made myself with real ingredients than in a processed product with a long ingredient list. That’s my philosophy, and this syrup fits it perfectly.
Conclusion
This salted caramel apple cider coffee syrup is one of those recipes that feels like a secret weapon. It’s simple enough to make on a whim, but impressive enough to gift to friends and family. The combination of sweet caramel, tart apple, and flaky salt is a flavor trio that never gets old.
I encourage you to make this your own. Adjust the salt level, add your favorite spices, or experiment with different liquors. Cooking is about playing and discovering what you love. This syrup is a great place to start that journey.
For me, this recipe is a reminder that the best things in life don’t have to be complicated. A few simple ingredients, a little patience, and a whole lot of love can create something truly special. I hope you make this syrup and find your own joy in it.
If you try this recipe, I’d love to hear about it! Leave a comment below, share your variations, or tag me in your photos. Let’s spread the homemade syrup love, one jar at a time.
Frequently Asked Questions
Can I use apple juice instead of apple cider?
Yes, but the flavor will be milder and less complex. Apple cider has a richer, more concentrated apple taste because it’s less filtered. If you use apple juice, consider adding an extra cinnamon stick to boost the flavor.
How long does this syrup last in the fridge?
Up to 3 weeks when stored in an airtight container. Make sure your jar is clean and dry before pouring in the syrup to prevent mold or crystallization.
Can I double this recipe?
Absolutely! Just double all the ingredients and use a larger saucepan. The simmering time may need to increase by 2-3 minutes to allow for the extra liquid to reduce.
Why did my syrup crystallize?
Crystallization happens when sugar molecules clump together. This can occur if you stir the syrup too vigorously, if there are sugar crystals on the sides of the pan, or if the syrup was cooked too long. To prevent it, use a wet pastry brush to brush down the sides of the pan and avoid stirring once the syrup is boiling.
Can I use this syrup in cold drinks?
Yes! It dissolves beautifully in cold liquids, especially if you give it a good stir. For iced coffee, I recommend adding the syrup to the hot coffee first so it dissolves, then pouring it over ice. This prevents the syrup from sinking to the bottom.
Pin This Recipe!
Homemade Salted Caramel Apple Cider Coffee Syrup

This easy homemade syrup combines salted caramel and apple cider for a rich, sweet, and salty flavor that transforms coffee, pancakes, oatmeal, and more. Made with simple ingredients, it’s a versatile fall favorite.
- Prep Time: 5 minutes
- Cook Time: 15 minutes
- Total Time: 20 minutes (plus 1 hour cooling)
- Yield: About 1.5 cups (24 tablespoons) 1x
- Category: Condiment
- Cuisine: American
Ingredients
- 1 cup apple cider (fresh or store-bought, not spiced)
- 1 cup granulated sugar
- 1/2 cup light brown sugar, packed
- 1/2 teaspoon sea salt (fine sea salt preferred)
- 1 teaspoon vanilla extract (pure vanilla recommended)
- 1 cinnamon stick (optional)
- 1/4 teaspoon apple pie spice or pumpkin pie spice (optional)
Instructions
- Combine the sugars and apple cider. In a medium saucepan, add the granulated sugar, brown sugar, and apple cider. Stir with a wooden spoon until the sugars are mostly dissolved. Place over medium heat.
- Bring to a gentle boil. Let the mixture come to a boil, stirring occasionally, until the liquid goes from cloudy to clear (about 4-5 minutes).
- Reduce to a simmer and add the spices. Once boiling, reduce heat to low for a gentle simmer. Add the cinnamon stick and apple pie spice (if using). Simmer for 10-12 minutes, stirring every couple of minutes, until the mixture thickens slightly and the apple flavor concentrates.
- Remove from heat and add the salt and vanilla. Take the saucepan off the heat. Remove the cinnamon stick. Stir in the sea salt and vanilla extract. Taste and adjust salt if needed.
- Strain and cool. Pour the syrup through a fine-mesh strainer into a heat-safe glass jar or bottle. Let cool completely at room temperature (about 1 hour).
- Store and enjoy. Once cooled, screw on the lid and store in the refrigerator. Shake well before each use.
Notes
Don’t rush the simmer; it concentrates the apple flavor. Watch for crystallization by brushing down the sides of the pan with a wet pastry brush. Taste as you go to adjust salt and sweetness. The syrup thickens slightly when chilled; let it sit at room temperature or microwave briefly if too thick.
Nutrition
- Serving Size: 1 tablespoon (15 ml)
- Calories: 45
- Sugar: 11
- Sodium: 75
- Carbohydrates: 11
Keywords: salted caramel, apple cider, coffee syrup, homemade syrup, fall recipe, easy syrup


