Love this? Save it for later!
Share the inspiration with your friends
I used to think themed food boards were for people with way more patience than me. Honestly, the idea of arranging things into a specific shape—especially for a holiday like Halloween—felt like a project I’d start, get frustrated with, and then just eat all the ingredients straight from the bag. That was my stance for years. Then my best friend, Jen, texted me a photo of a mummy board she made for her kids’ class party last October. She’d wrapped string cheese in crescent roll dough to look like bandages, and the little olive eyes were staring up at me from my phone screen. I laughed out loud, not because it was silly, but because she’d made it look so easy. She swore it took her less than twenty minutes. I, of course, called her a liar. But the next weekend, I found myself buying a block of cheddar and a tube of Pillsbury, purely out of spite. I had to prove her wrong.
The power went out in my kitchen halfway through baking the dough. Just a flicker, then darkness. I stood there, holding a greasy baking sheet, and I actually laughed. Of course it did. I finished the mummy board by the light of my phone flashlight, and you know what? It was the most fun I have ever had prepping a snack. It wasn’t fussy or stressful. It was just… silly. The way the dough puffed up around the cheese, the way the pepperoni looked like little red patches on a monster’s skin—it was perfect. I have made this board for every Halloween gathering since, and I keep making it because it’s the one recipe that makes people smile before they even take a bite. Maybe you’ve been there, rolling your eyes at a complicated holiday craft snack. Trust me, this one is different.
Why You’ll Love This Easy Spooky Mummy Charcuterie Board
This isn’t just another Halloween snack. This is the board that saves you from the chaos of a busy holiday week while still making you look like a kitchen hero. Let me break down exactly why this recipe works:
- Quick & Easy: You can assemble this entire board in about 20 minutes of active time. The oven does most of the work for you while you arrange the rest of the ingredients.
- Simple Ingredients: No weird gelatin molds or specialty candy. You probably have most of these items in your fridge right now, or you can grab them in one quick trip to the grocery store.
- Perfect for Halloween Parties: Whether it’s a classroom celebration, a spooky movie night, or a grown-up costume party, this board fits right in without looking childish or boring.
- Crowd-Pleaser: Kids go nuts for the mummy shapes, and adults appreciate that it’s not just a pile of candy corn. It’s a balanced snack board with something for everyone.
- Unbelievably Delicious: The warm, flaky crescent dough wrapped around creamy cheese is honestly addictive. It tastes like a soft pretzel crossed with a cheese stick, and that combination is hard to beat.
What makes this board different from every other charcuterie board you’ve seen? It’s the texture. The contrast between the warm, buttery mummy wraps and the cold, crisp veggies or juicy grapes is next-level. I tested this with three different types of dough before landing on crescent rolls—they puff up just right and don’t get too dense. This isn’t just another version of a Halloween snack board. It’s the best version, and I say that with zero hesitation.
This recipe taps into something deeper, too. It’s the kind of food that makes you close your eyes after the first bite because it tastes like comfort. It’s Halloween fun without the sugar crash. It’s perfect for impressing guests without the stress, and honestly, it’s the only board I’ve ever made that gets photographed before it gets eaten.
What Ingredients You Will Need
This recipe uses simple, mostly pantry-stable ingredients to deliver a spooky snack board that feels festive without being fussy. Most of these items are easy to find, and I’ve included notes on swaps where they work well.
For the Mummy Wraps
- 1 can (8 ounces) refrigerated crescent roll dough (I recommend Pillsbury for consistent puffing, but any brand works fine)
- 6 to 8 string cheese sticks (mozzarella works best for its mild flavor and good melting quality; look for sticks that are firm and not pre-shredded)
- 12 to 16 candy eyeballs (you can find these in the baking aisle at most grocery stores; Wilton brand is my go-to for bright white eyes)
- 1 large egg, beaten (for an egg wash that gives the dough a golden, shiny finish)
For the Board Fillers
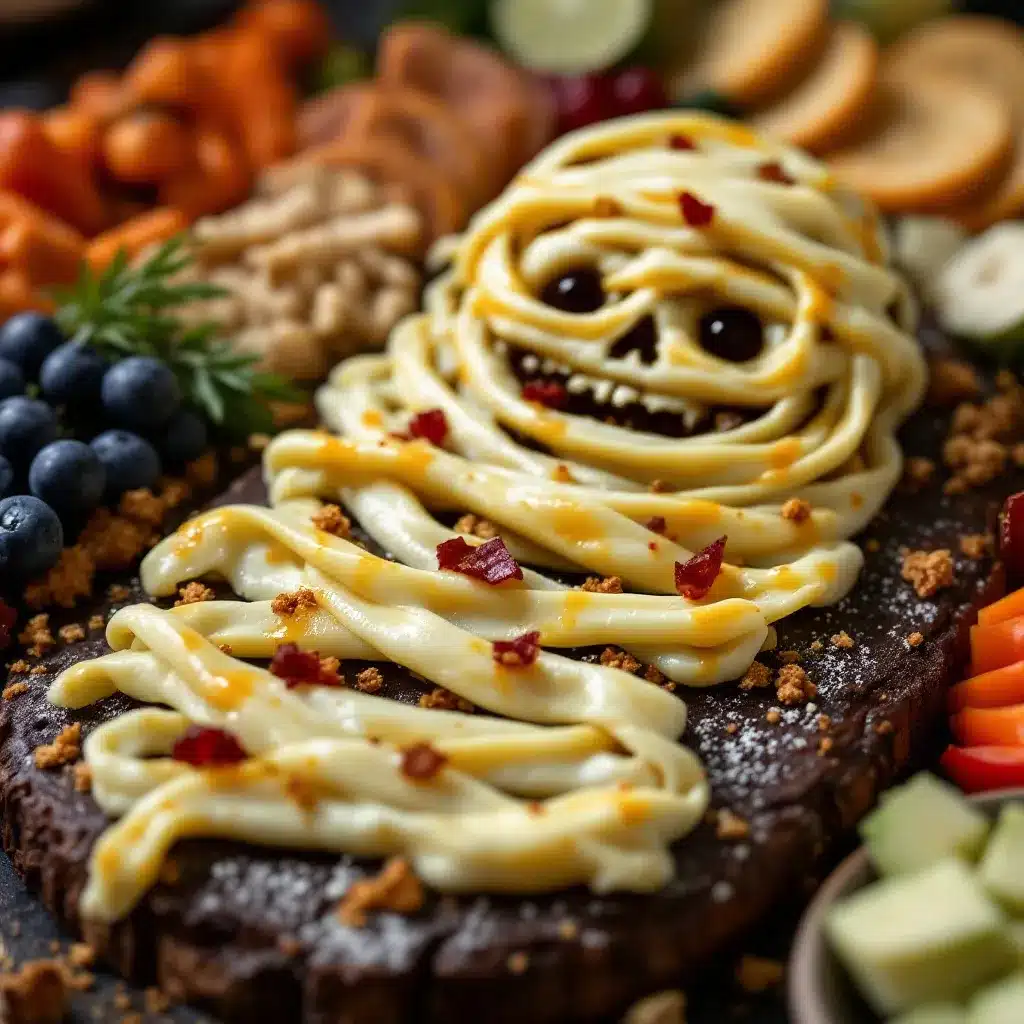
- 8 ounces pepperoni slices (regular or turkey pepperoni both work; I prefer the slightly thicker slices from the deli counter for better texture)
- 4 ounces cheddar cheese, cubed (sharp cheddar adds a nice tang against the mild mummy wraps)
- 1 cup red seedless grapes (they look like little bloody eyeballs, which is perfect for the theme)
- 1 cup pretzel sticks (these add crunch and look like little bones scattered around the board)
- 1/2 cup black olives (pitted, drained; these add a salty bite and fit the color scheme)
- 1 cup baby carrots or cucumber slices (for a fresh, crunchy element that balances the richness)
- Optional: 1/4 cup hummus or ranch dressing (for dipping; I like homemade ranch, but store-bought works in a pinch)
Ingredient selection tip: When choosing string cheese, look for brands that are individually wrapped and feel firm to the touch. Softer cheese sticks can turn into a melty mess inside the dough. For the crescent rolls, make sure your can is not expired—old dough doesn’t puff as well. If you want a gluten-free option, use gluten-free pizza dough rolled thin and cut into strips, though the texture will be slightly different.
Equipment Needed
- Large baking sheet (a rimmed sheet works best to catch any cheese drips; I use a standard 13×18 inch half-sheet pan)
- Parchment paper (non-stick foil also works, but parchment gives the best release)
- Small bowl for egg wash (any small dish works; I use a ramekin)
- Pastry brush (a silicone brush is easier to clean than natural bristles, but a folded paper towel works in a pinch)
- Large wooden or slate board for serving (at least 12×16 inches; a clean cutting board works perfectly if you don’t have a dedicated charcuterie board)
- Sharp knife or pizza cutter (for cutting the dough into strips)
- Small bowls for dips and olives (ramekins or tiny prep bowls work great)
Budget-friendly tip: You don’t need a fancy charcuterie board. I’ve used a plain white cutting board for years, and it photographs beautifully. If you’re serving a crowd, a disposable aluminum baking sheet lined with parchment works just fine for a party setting.
Preparation Method
This method breaks down into simple steps. Take your time with the dough wrapping—it’s the most important part for getting that mummy look.
- Preheat your oven to 375°F (190°C). Line your baking sheet with parchment paper. This is non-negotiable—the cheese will stick to bare metal, and you’ll cry trying to scrape it off. Trust me on this one.
- Prepare the crescent dough. Unroll the can of crescent roll dough onto a clean cutting board. Press the perforated seams together gently with your fingers to create one solid sheet of dough. Don’t overwork it—just press until the seams disappear.
- Cut the dough into strips. Using a sharp knife or pizza cutter, slice the dough into thin strips about 1/2 inch wide and 3 to 4 inches long. You should get roughly 24 to 30 strips from one can. They don’t have to be perfect—uneven strips actually look more like real bandages.
- Wrap the cheese sticks. Take one string cheese stick and begin wrapping a dough strip around it, starting at one end and working your way to the other. Leave a small gap about 1/2 inch wide near the top for the eyes. Overlap the dough slightly as you go, like you’re wrapping a real bandage. Press the ends of the dough gently against the cheese to seal. Repeat with remaining cheese sticks and dough strips.
- Apply the egg wash. Place the wrapped cheese sticks on the prepared baking sheet, leaving about 1 inch of space between each one. Brush the tops and sides with the beaten egg wash using your pastry brush. This gives the dough that beautiful golden color as it bakes.
- Bake the mummies. Place the baking sheet in the preheated oven and bake for 10 to 12 minutes, or until the dough is puffed up and golden brown. The cheese inside will be melted and gooey, so let them cool on the baking sheet for 2 minutes before moving them. Sensory cue: You’ll know they’re done when the kitchen smells like buttery pastry and the dough looks like little golden cocoons.
- Attach the eyes. While the mummies are still warm (but not hot enough to burn your fingers), press two candy eyeballs into the small gap you left at the top of each mummy. The warmth of the cheese will help them stick. If the gap has closed up during baking, use a small knife to gently pry it open before inserting the eyes.
- Assemble the board. Place your large serving board on the counter. Arrange the mummy wraps in the center, spacing them out so they look like little creatures scattered across the board. Fill the empty spaces with pepperoni slices, cheddar cubes, grapes, pretzel sticks, black olives, and baby carrots. Place your small bowls of hummus or ranch dressing in the corners. Pro tip: Group similar colors together for a more intentional look—put all the red grapes near the pepperoni, and keep the green veggies separate for contrast.
- Serve immediately. This board is best enjoyed within an hour of assembly. The mummy wraps are most delicious when the dough is still slightly warm and the cheese is gooey. If you’re making this ahead, bake the mummies and assemble the board separately, then combine just before serving.
Cooking Tips & Techniques
I’ve made this board more times than I care to count, and I’ve definitely made my share of mistakes. Here’s what I’ve learned so you don’t have to repeat my failures.
Don’t overbake the mummies. The first time I made these, I left them in the oven for 15 minutes because I wanted them “extra golden.” The dough was dry and the cheese had leaked out onto the pan. Stick to 10 to 12 minutes, and check them at the 10-minute mark. They should be light golden brown, not dark brown.
Keep the dough cold. If your kitchen is warm, the crescent dough can get sticky and hard to work with. Pop the unopened can in the fridge for 10 minutes before you start. This makes the dough easier to cut and wrap without tearing.
Use a light hand with the egg wash. You don’t need to soak the dough. A thin, even layer is all you need for that golden finish. Too much egg wash can make the dough soggy in spots.
Multitask wisely. While the mummies are baking, prep your board fillers. Wash the grapes, cube the cheese, and arrange everything on the board. This way, when the mummies come out of the oven, you just add them and serve. It saves you from standing around waiting.
My biggest failure: I once forgot to press the dough seams together before cutting strips. The strips fell apart in my hands, and I ended up with a pile of dough scraps and a very sad-looking string cheese. Now I always double-check that the seams are sealed before I start cutting.
Variations & Adaptations
This recipe is incredibly flexible. Here are some ways to make it your own.
Dietary Variations
- Gluten-free version: Use gluten-free pizza dough or gluten-free crescent roll dough (check the freezer section at your grocery store). The texture will be slightly denser, but the mummy look still works beautifully.
- Dairy-free version: Swap the string cheese for dairy-free cheese sticks or even firm tofu cut into stick shapes. Use a plant-based egg wash (a splash of plant milk works fine).
- Low-carb version: Skip the dough entirely and use thin slices of deli meat (like turkey or ham) to wrap the cheese sticks. They won’t puff up like dough, but they still look like bandages.
Flavor Twists
- Spicy mummies: Add a thin slice of jalapeño under the dough before wrapping, or sprinkle red pepper flakes over the egg wash before baking.
- Everything bagel mummies: Sprinkle everything bagel seasoning over the egg wash before baking. The sesame seeds and garlic add incredible flavor.
- Sweet mummies: Use cream cheese sticks instead of mozzarella, and drizzle the baked mummies with a little honey or maple syrup. This makes a great dessert board.
Different Cooking Methods
- Air fryer method: Cook the wrapped mummies at 350°F (175°C) for 6 to 8 minutes. Check at the 6-minute mark—air fryers run hot and can burn the dough quickly.
- Grill method: Place the wrapped mummies on a piece of foil and grill over medium heat for 8 to 10 minutes, turning once halfway through. This adds a subtle smoky flavor that’s surprisingly good.
Serving & Storage Suggestions
This board is best served at room temperature or slightly warm. If you’ve baked the mummies ahead of time, pop them in a 300°F (150°C) oven for 3 to 4 minutes to re-crisp the dough before adding them to the board. I like to arrange the mummies in the center with the eyes facing outward, so they’re looking at your guests as they reach for snacks.
Complementary dishes: This board pairs beautifully with a simple pumpkin soup or a bowl of chili. For drinks, apple cider or a crisp white wine like Sauvignon Blanc cuts through the richness of the cheese and pepperoni. If you’re serving kids, warm apple juice is a cozy match.
Storage instructions: Store leftover mummy wraps in an airtight container in the refrigerator for up to 3 days. The dough will soften as it sits, so they won’t be as crispy as fresh. For the board fillers, store each component separately—grapes and veggies in produce bags, cheese and pepperoni in separate containers. The assembled board does not store well, so only assemble what you plan to eat.
Reheating method: To bring leftover mummies back to life, place them on a baking sheet in a 350°F (175°C) oven for 5 minutes. The microwave will make them soggy, so avoid it if you can. The flavor actually improves slightly after a day in the fridge—the cheese and dough meld together in a way that feels almost like a stuffed breadstick.
Nutritional Information & Benefits
Here’s an approximate nutritional breakdown for one serving (based on 8 servings per board, with one mummy wrap and a handful of fillers):
| Nutrient | Amount Per Serving |
|---|---|
| Calories | 320 |
| Total Fat | 18g |
| Saturated Fat | 8g |
| Cholesterol | 45mg |
| Sodium | 680mg |
| Total Carbohydrates | 24g |
| Dietary Fiber | 2g |
| Sugars | 6g |
| Protein | 14g |
Health benefits: This board offers a good balance of protein from the cheese and pepperoni, healthy fats from the olives, and fiber from the fresh vegetables. The grapes provide antioxidants like resveratrol, while the carrots offer a solid dose of vitamin A for eye health. If you’re watching your sodium, opt for low-sodium cheese and turkey pepperoni to cut the salt content by nearly half.
Dietary considerations: This recipe contains gluten (from the crescent dough), dairy (from the cheese), and eggs (from the egg wash). For allergen-friendly versions, check the variations section above. I personally love that this board lets me enjoy a fun Halloween snack without feeling like I’ve overindulged in pure sugar.
Conclusion
This Easy Spooky Mummy Charcuterie Board is proof that Halloween snacks don’t have to be complicated to be memorable. It’s simple enough for a Tuesday night movie marathon, but impressive enough to steal the show at any party. The mummy wraps are fun to make (especially if you get your kids or friends involved in wrapping the dough), and the board comes together in under 30 minutes from start to finish.
I love this recipe because it captures the spirit of Halloween without the stress. It’s playful without being childish, and it’s filling without being heavy. Every time I set this board on the table, I watch people’s faces light up. That’s the magic of it—it makes people smile before they even taste it.
So go ahead and make this your own. Swap in your favorite cheeses, add spooky-shaped crackers, or throw in some candy corn if that’s your thing. The beauty of a charcuterie board is that there are no rules. I’d love to hear how yours turns out. Drop a comment below and tell me what fillers you used, or tag me in your photos if you share them online. Happy Halloween, and happy snacking!
Frequently Asked Questions
Can I make the mummy wraps ahead of time?
Yes! You can bake the mummy wraps up to 2 days in advance. Store them in an airtight container in the refrigerator, then reheat them in a 350°F oven for 5 minutes before assembling the board. I don’t recommend freezing them—the texture changes too much.
What can I use instead of crescent roll dough?
Puff pastry works well, though it puffs up more and creates a flakier texture. Refrigerated pizza dough is another option—it’s sturdier and gives a breadstick-like result. For a low-carb option, use thin slices of deli meat like turkey or ham to wrap the cheese.
How do I keep the candy eyeballs from falling off?
Press the eyes into the cheese while it’s still warm from the oven. The residual heat softens the cheese just enough to hold the eyes in place. If they still fall off, dab a tiny bit of cream cheese or peanut butter on the back of the eye as “glue.”
Can I make this board vegetarian?
Absolutely! Skip the pepperoni and add more veggies like cherry tomatoes, bell pepper strips, and snap peas. You can also add marinated artichoke hearts or roasted red peppers for extra flavor. The mummy wraps themselves are vegetarian since they’re just cheese and dough.
How many people does this board serve?
This board serves about 6 to 8 people as a snack or appetizer. If you’re serving it as a main course for a light meal, it will feed 4 people. Double the recipe for larger parties—the mummy wraps disappear fast!
Pin This Recipe!
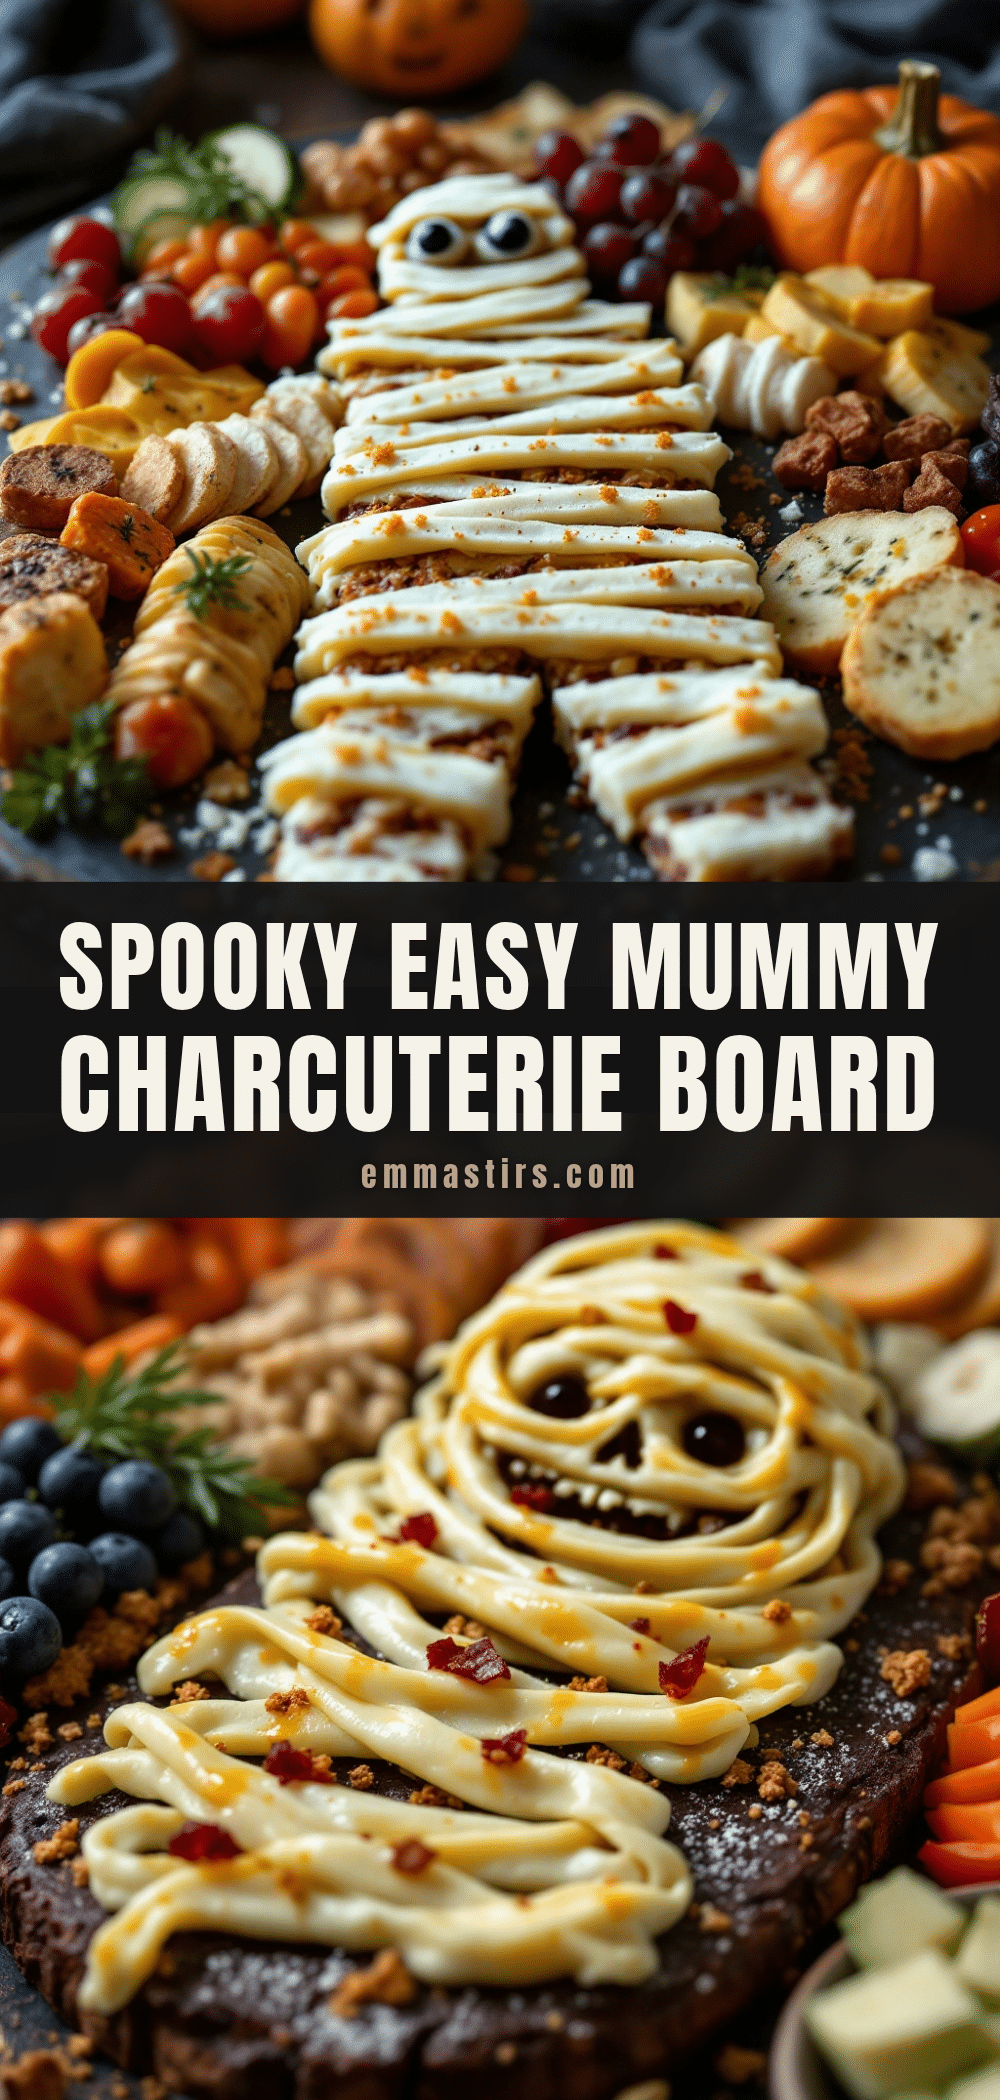
Easy Spooky Mummy Charcuterie Board
A fun and easy Halloween snack board featuring mummy-shaped cheese sticks wrapped in crescent dough, surrounded by pepperoni, cheese cubes, grapes, pretzels, and veggies. Ready in under 30 minutes, it’s perfect for parties and guaranteed to make everyone smile.
- Prep Time: 20 minutes
- Cook Time: 12 minutes
- Total Time: 32 minutes
- Yield: 8 servings 1x
- Category: Appetizer
- Cuisine: American
Ingredients
- 1 can (8 ounces) refrigerated crescent roll dough
- 6 to 8 string cheese sticks (mozzarella)
- 12 to 16 candy eyeballs
- 1 large egg, beaten
- 8 ounces pepperoni slices
- 4 ounces cheddar cheese, cubed
- 1 cup red seedless grapes
- 1 cup pretzel sticks
- 1/2 cup black olives, pitted and drained
- 1 cup baby carrots or cucumber slices
- Optional: 1/4 cup hummus or ranch dressing
Instructions
- Preheat your oven to 375°F (190°C). Line your baking sheet with parchment paper.
- Unroll the crescent roll dough onto a clean cutting board. Press the perforated seams together gently to create one solid sheet.
- Using a sharp knife or pizza cutter, slice the dough into thin strips about 1/2 inch wide and 3 to 4 inches long (about 24 to 30 strips).
- Take one string cheese stick and wrap a dough strip around it, starting at one end and working to the other. Leave a small gap near the top for the eyes. Overlap the dough slightly. Press ends to seal. Repeat with remaining cheese sticks.
- Place wrapped cheese sticks on the prepared baking sheet, leaving about 1 inch of space between each. Brush tops and sides with beaten egg.
- Bake for 10 to 12 minutes, until dough is puffed and golden brown. Let cool on baking sheet for 2 minutes.
- While still warm, press two candy eyeballs into the gap at the top of each mummy.
- On a large serving board, arrange mummy wraps in the center. Fill empty spaces with pepperoni, cheddar cubes, grapes, pretzel sticks, black olives, and baby carrots. Place small bowls of hummus or ranch in corners.
- Serve immediately. Best enjoyed within an hour of assembly.
Notes
Don’t overbake the mummies—check at 10 minutes. Keep dough cold if kitchen is warm. Use a light hand with egg wash. While mummies bake, prep board fillers. For gluten-free, use gluten-free pizza dough. For dairy-free, use dairy-free cheese sticks and plant-based milk for egg wash. Store leftover mummy wraps in airtight container in fridge for up to 3 days; reheat in 350°F oven for 5 minutes.
Nutrition
- Serving Size: 1 serving (1 mummy w
- Calories: 320
- Sugar: 6
- Sodium: 680
- Fat: 18
- Saturated Fat: 8
- Carbohydrates: 24
- Fiber: 2
- Protein: 14
Keywords: Halloween, charcuterie board, mummy, snack board, party food, easy appetizer, spooky, crescent rolls, string cheese


