Love this? Save it for later!
Share the inspiration with your friends
I figured making royal icing sugar cookies that actually looked like a black cat would require a steady hand and probably some expensive piping tips I did not own. It took about twenty minutes of my first batch looking like sad, misshapen blobs for that assumption to fall apart completely. And honestly? That failure is the best thing that could have happened to these cookies.
Because when I stopped trying to be precise and started letting the cookies be a little imperfect, they suddenly looked like cats. Real cats. The kind that squint at you from across the room and knock things off counters. These Black Cat Halloween Sugar Cookies are not about perfection — they are about personality. That slightly lopsided ear? That is the charm. The royal icing tail that dripped just a bit too far? That is the cat stretching mid-nap.
I tested this recipe four times before I landed on the right sugar cookie base — one sturdy enough to hold royal icing without spreading into a shapeless pancake, but tender enough that you actually want to eat it. The royal icing recipe I am sharing sets firm but still has a soft bite, which means you can stack these cookies for Halloween parties without them sticking together. And the best part? You do not need a projector, a steady hand, or a pastry degree. Just a piping bag, some black gel food coloring, and a willingness to embrace the wobble.
These cookies became my go-to Halloween treat because they are genuinely fun to decorate. There is something about making a cat face out of icing that makes even adults giggle. And when you get that one cookie that looks like it is judging you? That is the one you keep for yourself.
Why You Will Love These Black Cat Halloween Cookies
- No Special Equipment Needed : You do not need a fancy cookie cutter set or decorating projector. A simple cat-shaped cutter (or even a round cutter with some hand-cutting) works perfectly. I have made these with just a 3-inch round cutter and a paring knife, and they turned out adorable.
- Foolproof Royal Icing : This is the royal icing recipe that actually works for beginners. It dries hard enough to stack but stays soft enough to bite through without cracking your teeth. No more rock-hard cookies.
- Make-Ahead Friendly : The cookie dough freezes beautifully for up to 3 months, and the baked cookies store well for up to 2 weeks in an airtight container. You can prep everything ahead of Halloween week.
- Customizable Personalities : Every cat can have a different expression. Grumpy cat, surprised cat, sleepy cat, judgmental cat. The variety is part of the fun, and kids absolutely love designing their own.
- Crowd-Pleasing Flavor : The sugar cookie base is buttery, slightly crisp at the edges, and soft in the center. It is the kind of cookie that disappears from platters before the Halloween decorations come down.
What makes these cookies different from the standard sugar cookie cutout is the texture. I use a combination of butter and cream cheese in the dough, which gives the cookies a slight tang and a tenderness that holds up to royal icing without getting soggy. The cream cheese also helps the cookies keep their shape during baking — no more cats that look like they melted in the sun.
These cookies are not just good — they are the kind that make you close your eyes after the first bite. The royal icing cracks slightly as you bite through it, and then you hit that soft, buttery cookie underneath. It is comfort food dressed up in a Halloween costume, and somehow that makes it taste even better.
What Ingredients You Will Need
This recipe uses simple baking staples, but a few specific choices make the difference between a good sugar cookie and a great one. I have tested this dough with all-purpose flour, bread flour, and even a gluten-free blend, and the all-purpose version consistently gives the best balance of tenderness and structure.
For the Sugar Cookies
- 2 ¾ cups (345g) all-purpose flour — Spoon and level your flour. Scooping directly from the bag packs in too much flour and makes cookies dense. I use King Arthur Flour for consistent results.
- 1 teaspoon baking powder — Ensure it is fresh. Old baking powder will give flat cookies.
- ½ teaspoon salt — Fine sea salt works best. It balances the sweetness without leaving salty pockets.
- 1 cup (226g) unsalted butter — Softened to room temperature. Do not melt it. Melted butter spreads too much during baking and your cats will look like puddles.
- 4 ounces (113g) cream cheese — Full-fat cream cheese, softened. This is the secret ingredient that gives the cookies their tender texture and prevents spreading. Low-fat cream cheese has too much water content.
- 1 cup (200g) granulated sugar — Regular white sugar. Do not substitute with brown sugar, which changes the spread and color.
- 1 large egg — Room temperature. Cold egg will seize the butter mixture.
- 1 teaspoon vanilla extract — Pure vanilla extract, not imitation. The flavor difference is noticeable in a simple sugar cookie.
- ½ teaspoon almond extract — Optional but highly recommended. It adds a subtle, almost floral note that makes these cookies taste bakery-quality.
For the Royal Icing
- 4 cups (480g) powdered sugar — Sifted. Lumps in the powdered sugar create lumps in the icing. I sift directly into the mixing bowl.
- 3 tablespoons meringue powder — I recommend Wilton brand for consistency. Meringue powder stabilizes the icing and gives it that smooth, hard finish.
- 5-6 tablespoons warm water — Start with 5 tablespoons and add the sixth only if needed. The consistency should be thick enough to hold a ribbon when you lift the whisk.
- 1 teaspoon vanilla extract — Or clear vanilla if you want a pure white base for other colors.
- Black gel food coloring — Do not use liquid food coloring. It thins the icing too much and requires a ridiculous amount to achieve true black. I use Americolor Super Black gel.
- Optional: White and pink gel food coloring — For eyes, noses, and other details.
For Decoration
- Black sanding sugar or black sprinkles — Optional, for adding texture to the icing before it sets.
- Edible glitter in black or silver — For a spooky shimmer effect.
- Candy eyes — Small white candy melts or white royal icing dots for eyes.
Equipment Needed
You do not need a professional bakery setup for these cookies, but a few key tools make the process smoother. I have made these with minimal equipment and they still turned out cute, so do not let a lack of fancy tools stop you.
- Cat-shaped cookie cutter — A 3 to 4-inch cutter works best. I found mine on Amazon for under $10. If you do not have a cat cutter, use a 3-inch round cutter and cut triangles for ears by hand.
- Rolling pin with thickness guides — Consistent thickness is crucial for even baking. I use a wooden rolling pin with removable ¼-inch rings. If you do not have guides, use two stacked popsicle sticks on either side of the dough.
- Parchment paper or silicone baking mats — Parchment paper prevents sticking and makes cleanup easy. Silicone mats are reusable but can cause slightly more spread.
- Stand mixer or hand mixer — A stand mixer with the paddle attachment is ideal for creaming butter and cream cheese. A hand mixer works fine but takes a bit longer.
- Piping bags — Disposable piping bags are easiest for royal icing. You will need at least 3 bags for black, white, and pink icing.
- Piping tips — A #2 or #3 round tip for outlining and flooding. A #1 tip for fine details like whiskers and eyes.
- Toothpicks — Essential for popping air bubbles in flooded icing and for dragging icing into corners.
- Cooling racks — Cookies must cool completely before icing. Wire racks allow air circulation.
- Small offset spatula — Helpful for transferring fragile cookies and for smoothing icing edges.
If you are new to royal icing, I recommend starting with a basic piping tip set. The Ateco 8-piece set is affordable and includes all the tips you need for these cookies. And honestly, you can use a zip-top bag with the corner snipped off if you are in a pinch — just be aware the icing flow will be less controlled.
Preparation Method
Step 1: Make the Cookie Dough (15 minutes + 2 hours chilling)
In a medium bowl, whisk together the flour, baking powder, and salt. Set aside. In the bowl of a stand mixer fitted with the paddle attachment, beat the softened butter and cream cheese together on medium speed until smooth and combined — about 2 minutes. Scrape down the sides of the bowl. Add the granulated sugar and beat on medium-high speed until light and fluffy, about 3 minutes. The mixture should look pale and slightly increased in volume. Add the egg, vanilla extract, and almond extract, and beat on low until just combined. Scrape the bowl again. With the mixer on low, gradually add the flour mixture, mixing until just incorporated. Do not overmix — the dough should come together in a soft, cohesive mass. Divide the dough in half, flatten each half into a disc about 1 inch thick, wrap tightly in plastic wrap, and refrigerate for at least 2 hours. Chilling is non-negotiable. The dough needs to be firm enough to roll without sticking, and the chilling time allows the gluten to relax, preventing tough cookies.
Step 2: Roll and Cut the Cookies (20 minutes + 30 minutes chilling)
Preheat your oven to 350°F (175°C) and line two baking sheets with parchment paper. Remove one disc of dough from the refrigerator. On a lightly floured surface, roll the dough to ¼-inch thickness. I use a rolling pin with guide rings for consistency. If the dough starts to stick, dust the surface and rolling pin with a little more flour. Use your cat-shaped cookie cutter to cut out as many cookies as possible, pressing straight down without twisting. Twisting seals the edges and prevents the cookies from rising evenly. Transfer the cut cookies to the prepared baking sheets, spacing them about 2 inches apart. Gather the scraps, gently press them together, re-roll, and cut more cookies. Repeat with the second disc of dough. Once all cookies are on the baking sheets, place the sheets in the refrigerator for 15-30 minutes. This final chill is crucial — it solidifies the butter and prevents the cookies from spreading during baking.
Step 3: Bake the Cookies (10-12 minutes)
Bake the chilled cookies in the preheated oven for 10-12 minutes, rotating the baking sheets halfway through. The cookies are done when the edges are just barely golden and the centers look set but not browned. They should be pale — you want them light in color so the black icing pops. Allow the cookies to cool on the baking sheets for 5 minutes, then transfer them to wire cooling racks to cool completely. Do not attempt to ice warm cookies. The royal icing will melt and slide right off. I learned this the hard way and ended up with a sticky, multicolored mess.
Step 4: Prepare the Royal Icing (10 minutes)
In the bowl of a stand mixer fitted with the whisk attachment, combine the sifted powdered sugar and meringue powder. Add 5 tablespoons of warm water and the vanilla extract. Mix on low speed until the sugar is incorporated, then increase to medium-high speed and beat for 5-7 minutes. The icing should be thick, glossy, and hold stiff peaks. To test, lift the whisk — the icing should form a ribbon that slowly settles back into the bowl. If it is too thick, add water ½ teaspoon at a time. If it is too thin, add more powdered sugar 1 tablespoon at a time. Divide the icing into three bowls. Color the largest portion black using the black gel food coloring. Color a small portion white and an even smaller portion pink. Transfer each color into separate piping bags fitted with #2 round tips. For the black icing, you will need to add a significant amount of gel coloring. Start with 10 drops, mix, and add more until you reach the desired darkness. The color will deepen slightly as it sits.
Step 5: Decorate the Cookies (Varies by skill, 30-60 minutes)
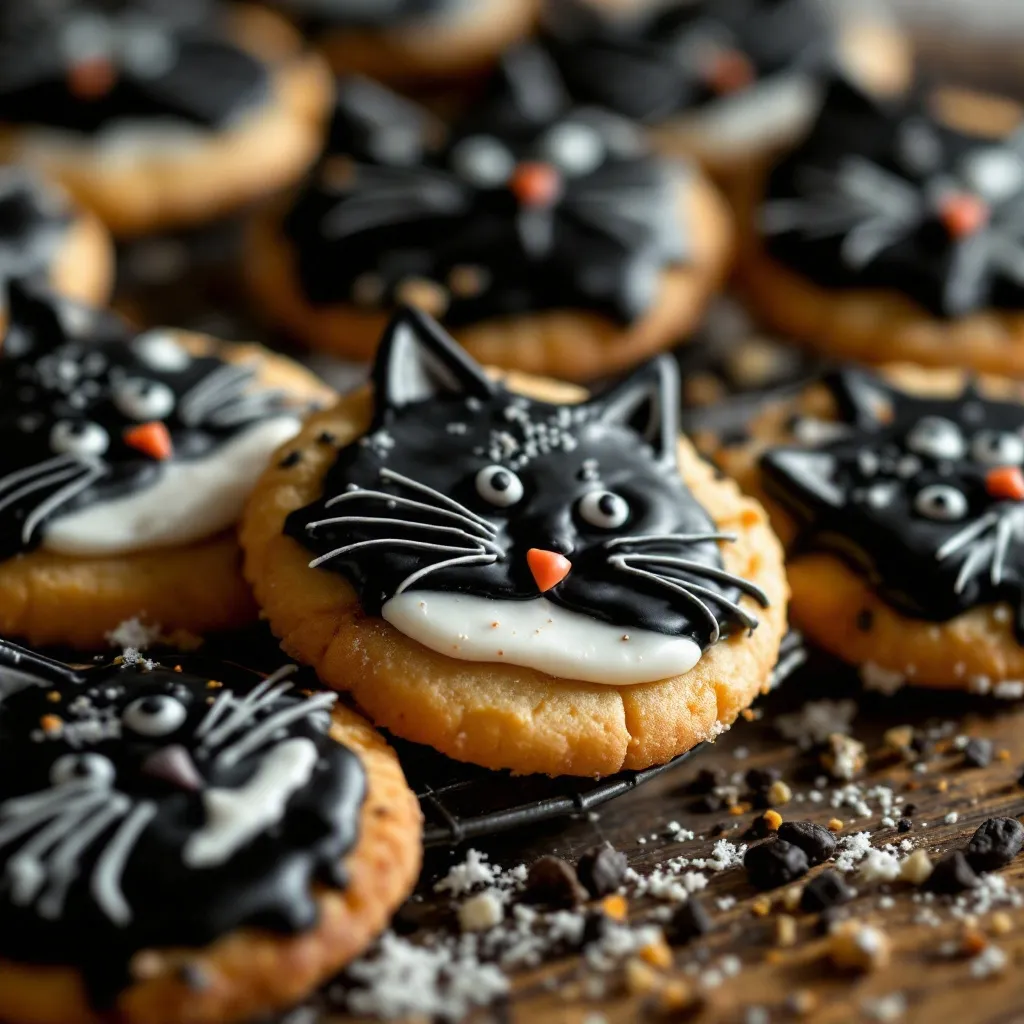
Start with the black icing. Pipe an outline around the edge of each cat cookie. This creates a barrier that will hold the flooding icing inside. Let the outlines dry for about 10 minutes. Then, thin the remaining black icing with water, adding ½ teaspoon at a time until it reaches a 10-second consistency — when you lift a spoon, the icing should flow back into the bowl and smooth out in about 10 seconds. Flood the inside of each outlined cookie with this thinner icing. Use a toothpick to spread the icing into corners and pop any air bubbles. Let the flooded cookies dry completely — this takes 4-6 hours at room temperature. I usually flood in the morning and decorate in the evening. Once the black base is dry, use the white icing to pipe eyes. Two small dots for simple eyes, or slightly larger ovals for a cuter look. Use the pink icing to pipe a tiny triangle for the nose. For whiskers, use the white icing with a #1 tip and pipe three thin lines on each side of the nose. Let the details dry for another hour before handling or stacking.
Cooking Tips and Techniques
The first time I made these cookies, I skipped the final chill before baking. Big mistake. My cats came out looking like stretched-out blobs with no definable features. That extra 15 minutes in the fridge is the difference between a cat and a abstract art piece.
Another lesson I learned the hard way: royal icing takes longer to dry than you think. I once got impatient and tried to stack cookies after only two hours. The icing smeared, the eyes slid off, and I had a batch of cookies that looked like they had been through a haunted house. Plan ahead. Flood your cookies in the morning, and decorate them in the evening or the next day.
For the black icing, do not be shy with the gel coloring. True black requires a lot of color. I use about 1 teaspoon of Americolor Super Black for a full batch of icing. And be aware that black gel food coloring can have a slightly bitter taste. Using a high-quality brand like Americolor or Wilton minimizes this. If you are concerned about the taste, you can use a combination of black cocoa powder and black gel coloring, but black cocoa powder will change the texture of the icing slightly.
If you are new to piping, practice on a piece of parchment paper first. Draw some cat faces and practice your outlines and flooding. It takes the pressure off when you are working on the actual cookies. And remember — imperfect cats are charming cats. A slightly crooked eye or a lopsided nose just gives the cat personality. I have had people specifically request the “derpy cat” cookies from my batches.
For consistent cookie thickness, I cannot recommend rolling pin guide rings enough. They are cheap and eliminate the guesswork. If you do not have them, you can use two wooden dowels or even two thick books placed on either side of the dough as guides.
Variations and Adaptations
Gluten-Free Version: Substitute the all-purpose flour with a 1:1 gluten-free baking flour blend that contains xanthan gum. I have used Bob’s Red Mill 1:1 Baking Flour with good results. The cookies will be slightly more tender and delicate, so handle them gently when transferring to the baking sheet.
Vegan Version: Replace the butter with vegan butter sticks (not spreadable margarine) and the cream cheese with vegan cream cheese. Use a flax egg (1 tablespoon ground flaxseed mixed with 3 tablespoons water, let sit for 5 minutes) instead of the egg. For the royal icing, use aquafaba (the liquid from a can of chickpeas) instead of meringue powder. Beat 3 tablespoons of aquafaba with the powdered sugar until stiff peaks form. The vegan version is slightly less stable but still works beautifully.
Different Cat Expressions: This is where the fun really starts. Instead of simple dot eyes, try piping crescent shapes for closed, happy eyes. Pipe a tiny open mouth for a meowing cat. Add a pink tongue by piping a small oval and filling it in. You can even pipe little fangs for a vampire cat. Each cookie can have its own mood, and I love making a whole batch of cats with different personalities.
Spider Web Background: For a spookier look, pipe a spider web behind the cat. Flood a small area with white icing, then use a toothpick to drag lines from the center outward. It adds a Halloween vibe without requiring additional cookie cutters.
Pumpkin Patch Cats: Place the cat cookies on a platter with small pumpkin-shaped sugar cookies. The orange and black color scheme is classic Halloween, and the combination is always a hit at parties. If you are looking for other Halloween treat ideas, my cozy one-bowl banana bread makes a great non-cookie option for fall gatherings.
Serving and Storage Suggestions
These cookies are best served at room temperature. Arrange them on a black or orange platter for maximum Halloween impact. I like to display them on a tiered stand with other Halloween treats — it creates a stunning centerpiece for a Halloween party.
For storage, place the decorated cookies in a single layer in an airtight container. If you need to stack them, place a sheet of parchment paper or wax paper between each layer. The royal icing is hard enough to prevent sticking, but stacking too many layers can cause pressure cracks. I recommend no more than three layers deep.
These cookies store well at room temperature for up to 2 weeks. The flavor actually improves after a day or two as the cookies soften slightly from the moisture in the icing. Do not refrigerate them — the refrigerator dries out the cookies and can cause the royal icing to crack.
For freezing, place the undecorated baked cookies in a freezer-safe container with parchment paper between layers. They freeze well for up to 3 months. Thaw at room temperature before decorating. I often bake and freeze the cookies weeks before Halloween, then decorate them a day or two before the party. It spreads out the workload and makes the process much less stressful.
These cookies also make excellent gifts. Package them in clear cellophane bags tied with orange or black ribbon. Attach a little tag that says “Black Cat Kisses” or “Spooky Sweets.” They are always well-received, and people are impressed by the detailed decorating.
If you are hosting a Halloween brunch or party, these cookies pair beautifully with a warm drink. I love serving them alongside a crockpot French toast casserole for a cozy Halloween morning spread.
Nutritional Information and Benefits
Each black cat sugar cookie (based on a 3-inch cookie with royal icing) contains approximately 180-220 calories, 9g fat, 28g carbohydrates, and 2g protein. The exact values depend on the thickness of your icing and the size of your cookies.
While these are definitely a treat, the cream cheese in the dough adds a small amount of calcium and protein. The royal icing contains egg whites (from the meringue powder), which provide a tiny protein boost, but honestly, these are celebration cookies. They are meant to be enjoyed in moderation as part of a Halloween celebration.
For those watching their sugar intake, you can reduce the sugar in the cookie dough by ¼ cup without significantly affecting the texture. However, do not reduce the sugar in the royal icing — it is essential for the structure and drying process.
These cookies are nut-free if you omit the almond extract, making them safe for school Halloween parties. They do contain dairy, eggs, and gluten, so they are not suitable for those with allergies to those ingredients without modifications.
I personally love that these cookies use real ingredients — butter, cream cheese, eggs — rather than artificial mixes or preservatives. Yes, they are indulgent, but at least you know exactly what is in them. And the joy they bring? That is priceless.
Conclusion
These Black Cat Halloween Sugar Cookies have become a tradition in my kitchen, and I hope they become one in yours too. They are forgiving enough for beginners but detailed enough to challenge experienced decorators. The combination of that tender, buttery cookie with the crisp royal icing is genuinely delicious — not just something you eat because it looks cute.
The best part about these cookies is that they capture the spirit of Halloween without being scary. They are perfect for kids, for classroom parties, for office gatherings, or for a quiet night of decorating while watching Hocus Pocus for the hundredth time. Every cat you make will have its own personality, and that is the whole point. Embrace the imperfections. Enjoy the process. And definitely eat the ones that look a little weird — they taste just as good.
I would love to see your black cat creations! Tag me in your photos, leave a comment below with your decorating tips, or share how you customized your cats. Did you make a grumpy cat? A sleepy cat? A cat with a witch hat? I want to hear about it. And if you run into any issues, drop a question in the comments and I will help you troubleshoot. Happy Halloween, and happy baking!
Frequently Asked Questions
Can I use a different cookie cutter shape for these cookies?
Absolutely! While the cat shape is the star of this recipe, you can use any Halloween-themed cutter — pumpkins, ghosts, bats, or even simple round circles. The royal icing technique works the same regardless of the shape. Just adjust your decorating design to fit the cookie.
Why did my royal icing turn out too runny?
Runny royal icing usually means you added too much water. The fix is simple: add more sifted powdered sugar, 1 tablespoon at a time, and mix until the icing thickens to a glue-like consistency. For the flooding consistency, it should flow slowly off a spoon and smooth out in about 10 seconds.
How far in advance can I make these cookies?
You can make the dough up to 3 days ahead and keep it refrigerated. Bake the cookies up to 2 weeks ahead and store them undecorated in an airtight container. Decorate them 1-2 days before serving for the best appearance. The royal icing needs at least 6-8 hours to dry completely before stacking or packaging.
My cookies spread during baking. What went wrong?
Spreading usually happens for one of three reasons: the dough was not chilled long enough before baking, the butter was too soft, or the baking sheet was too warm. Make sure to chill the cut cookies on the baking sheet for at least 15 minutes before baking. If your baking sheets are warm from a previous batch, let them cool completely before placing new cookies on them.
Can I freeze the decorated cookies?
I do not recommend freezing decorated cookies because the royal icing can crack and the condensation from thawing can ruin the design. However, you can freeze the undecorated baked cookies for up to 3 months. Thaw them at room temperature, then decorate as usual. For a complete make-ahead Halloween menu, pair these with a creamy cheeseburger soup for a cozy pre-trick-or-treat dinner.
Pin This Recipe!
Easy Black Cat Halloween Cookies with Royal Icing

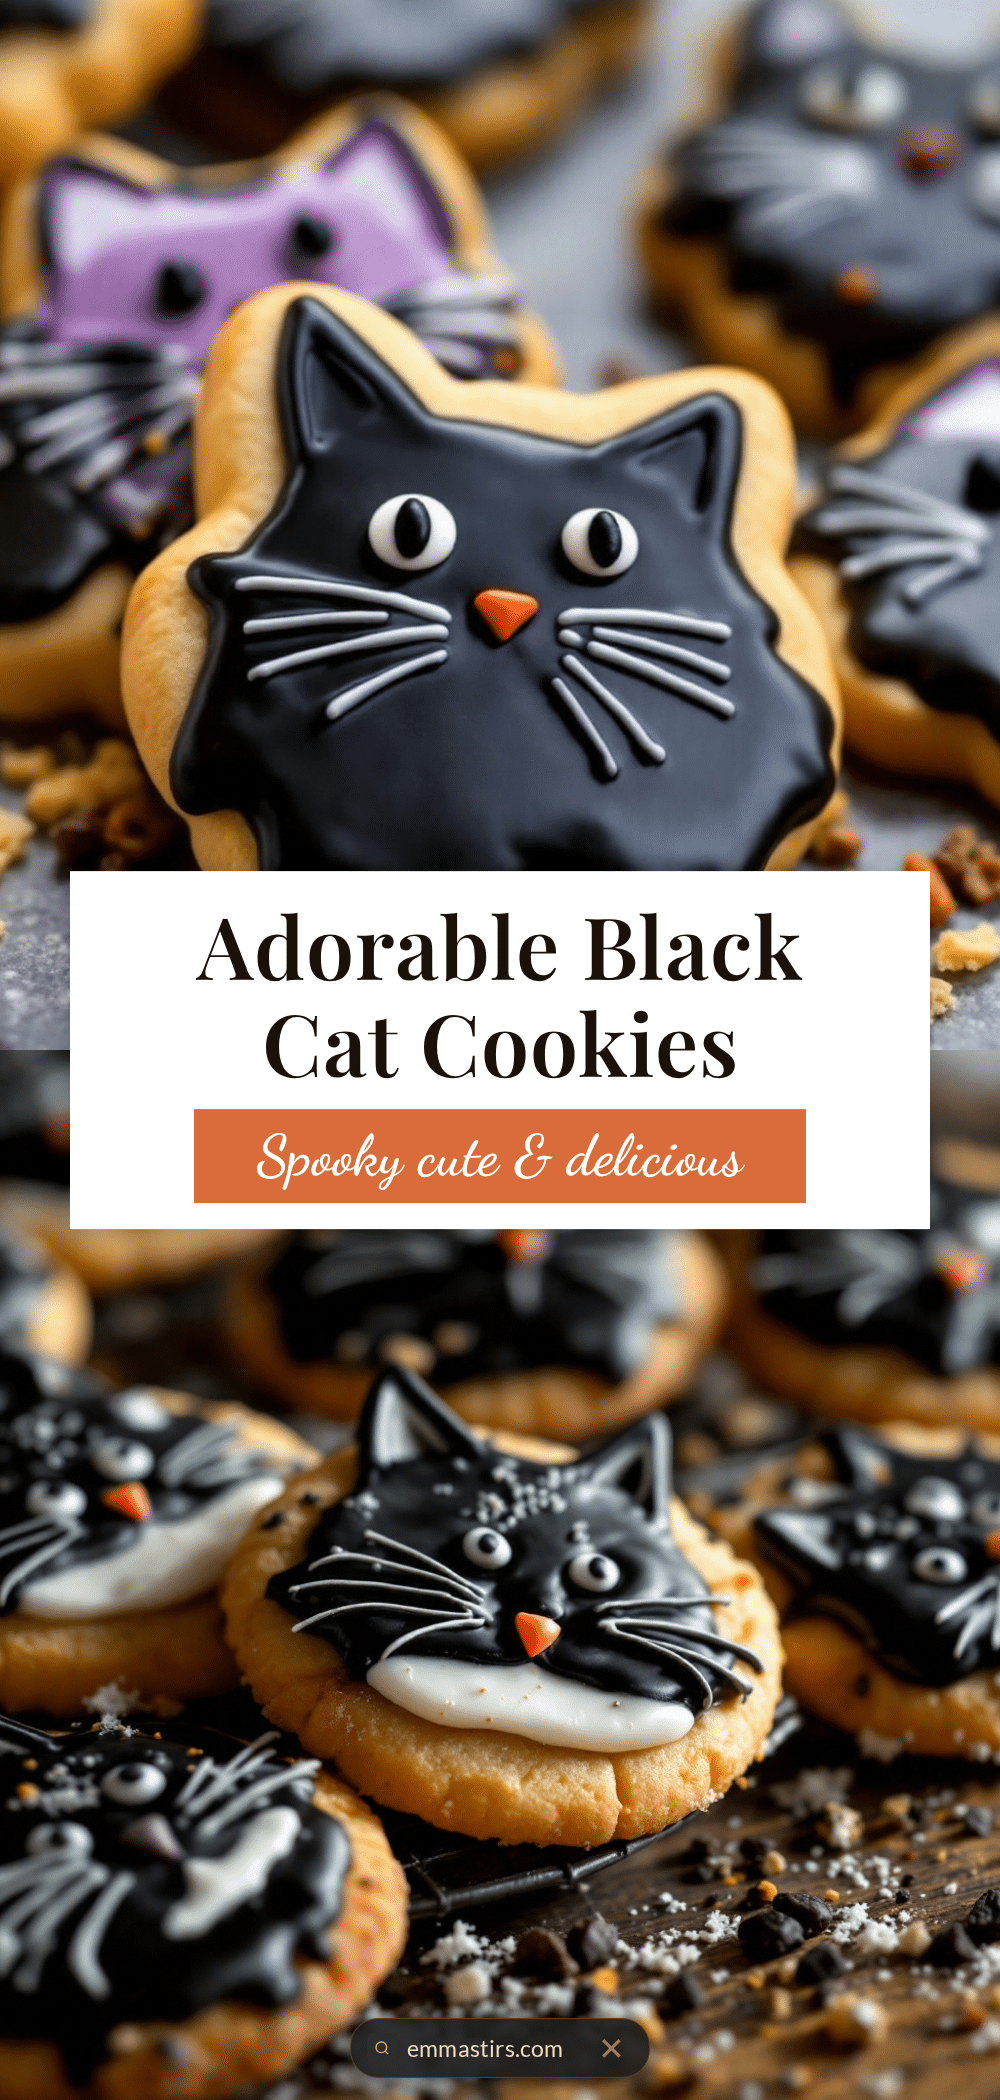
These Black Cat Halloween Sugar Cookies are not about perfection — they are about personality. A tender, buttery sugar cookie base with cream cheese is paired with a foolproof royal icing that sets firm but still has a soft bite, making them perfect for Halloween parties.
- Prep Time: 15 minutes
- Cook Time: 12 minutes
- Total Time: 2 hours 45 minutes (includes chilling and decorating time)
- Yield: 24 servings 1x
- Category: Dessert
- Cuisine: American
Ingredients
- 2 ¾ cups (345g) all-purpose flour
- 1 teaspoon baking powder
- ½ teaspoon fine sea salt
- 1 cup (226g) unsalted butter, softened
- 4 ounces (113g) full-fat cream cheese, softened
- 1 cup (200g) granulated sugar
- 1 large egg, room temperature
- 1 teaspoon pure vanilla extract
- ½ teaspoon almond extract (optional)
- 4 cups (480g) powdered sugar, sifted
- 3 tablespoons meringue powder (Wilton brand recommended)
- 5–6 tablespoons warm water
- 1 teaspoon vanilla extract (or clear vanilla)
- Black gel food coloring (Americolor Super Black recommended)
- White and pink gel food coloring (optional, for details)
- Black sanding sugar or black sprinkles (optional)
- Edible glitter in black or silver (optional)
- Candy eyes (optional)
Instructions
- Make the Cookie Dough: In a medium bowl, whisk together flour, baking powder, and salt. Set aside. In a stand mixer with paddle attachment, beat softened butter and cream cheese on medium speed until smooth (about 2 minutes). Add granulated sugar and beat on medium-high until light and fluffy (about 3 minutes). Add egg, vanilla, and almond extract; beat on low until combined. Gradually add flour mixture on low until just incorporated. Divide dough in half, flatten into discs, wrap in plastic, an…
- Roll and Cut the Cookies: Preheat oven to 350°F (175°C). Line baking sheets with parchment. On a lightly floured surface, roll dough to ¼-inch thickness. Cut with a cat-shaped cookie cutter (or 3-inch round cutter with hand-cut ears). Transfer to baking sheets, spacing 2 inches apart. Refrigerate cut cookies for 15-30 minutes.
- Bake the Cookies: Bake chilled cookies for 10-12 minutes, rotating sheets halfway through. Edges should be just barely golden; centers set but not browned. Cool on baking sheets for 5 minutes, then transfer to wire racks to cool completely.
- Prepare the Royal Icing: In a stand mixer with whisk attachment, combine sifted powdered sugar and meringue powder. Add 5 tablespoons warm water and vanilla. Mix on low, then beat on medium-high for 5-7 minutes until thick, glossy, and holds stiff peaks. Adjust consistency with water or powdered sugar as needed. Divide icing into three bowls; color largest portion black, a small portion white, and an even smaller portion pink. Transfer to piping bags with #2 round tips.
- Decorate the Cookies: Pipe black outline around each cookie. Let dry 10 minutes. Thin remaining black icing to 10-second consistency; flood inside outlines. Use toothpick to spread and pop bubbles. Let dry 4-6 hours. Once dry, pipe white eyes and pink nose. For whiskers, use white icing with #1 tip. Let details dry 1 hour before handling.
Notes
Chilling the dough and cut cookies is non-negotiable to prevent spreading. Royal icing takes 4-6 hours to dry completely; plan ahead. Use high-quality black gel food coloring to avoid bitter taste. Imperfect cats are charming—embrace the wobble. Cookies store well at room temperature for up to 2 weeks in an airtight container. Undecorated cookies can be frozen for up to 3 months.
Nutrition
- Serving Size: 1 cookie
- Calories: 200
- Sugar: 18
- Sodium: 95
- Fat: 9
- Saturated Fat: 5
- Carbohydrates: 28
- Protein: 2
Keywords: black cat cookies, Halloween sugar cookies, royal icing cookies, cat-shaped cookies, Halloween baking, easy sugar cookies, cream cheese sugar cookies


