Love this? Save it for later!
Share the inspiration with your friends
I was standing in the grocery store aisle, staring at a bag of pretzel sticks and feeling completely uninspired by the usual Halloween snack lineup. Candy corn, caramel apples, the same orange-frosted cookies. Honestly, I wanted something that actually tasted good—not just sweet sugar overload—and something that looked like it took way more effort than it actually did. The idea hit me somewhere between the cream cheese section and the almond flour. What if I made a savory appetizer that looked like a mummy? And what if the bones were edible, crunchy, and ridiculously easy? That night, I went home and tested the first version of this spooky mummy cheese ball with pretzel bones. It sat on my counter looking ridiculous and delicious, wrapped in its little cheese bandages, and I knew I had found the thing. No fuss, no fondant, just a really good cheese ball dressed up for Halloween.
Why You Will Love This Recipe
This is the appetizer that steals the show without stealing your time. I have brought this spooky mummy cheese ball to three different Halloween parties now, and every single time, people hover around it asking for the recipe before they even grab a cracker. Here is why it works so well:
- No Baking Required: You do not turn on the oven. At all. Just mix, chill, wrap, and serve. Perfect for busy Halloween prep or last-minute party planning.
- Simple Ingredients: Cream cheese, cheddar, a few seasonings, and pretzel sticks. You probably have most of this in your kitchen right now.
- Perfect for Halloween Parties: It looks like a creepy mummy wrapped in bandages, but it tastes like a creamy, savory cheese ball. The contrast is what makes it fun.
- Crowd-Pleaser: Kids love the mummy look. Adults love the cheesy, garlicky flavor. Everyone fights over the pretzel bones.
- Make-Ahead Friendly: You can assemble this spooky mummy cheese ball a day or two in advance and just add the pretzel bones right before serving. Less stress, more party.
What makes this recipe different from other Halloween appetizers is the texture. The cheese ball stays soft and spreadable, while the pretzel bones add that satisfying crunch. It is not just a gimmick—it is genuinely good food dressed up in a costume. I have tested this with different cheese blends, and the combination of sharp cheddar and cream cheese gives you that rich, tangy base that works perfectly with the salty pretzels. This is the kind of appetizer that makes people close their eyes after the first bite, even while they are laughing at how silly it looks.
What Ingredients You Will Need
This recipe uses simple, everyday ingredients to create something that looks complicated but is actually incredibly straightforward. The ingredients work together to give you a creamy, flavorful cheese ball that holds its shape and tastes amazing.
- Cream Cheese (16 oz, softened): Use full-fat cream cheese for the best texture and flavor. Low-fat works, but the cheese ball will be slightly less creamy. Let it sit at room temperature for about 30 minutes before mixing so it blends smoothly.
- Sharp Cheddar Cheese (1 ½ cups, shredded): I recommend shredding your own from a block. Pre-shredded cheese has anti-caking agents that can make the cheese ball grainy. Sharp cheddar gives you that bold, tangy flavor that stands up to the other ingredients.
- Green Onions (3 tablespoons, finely chopped): These add a mild onion flavor and little flecks of green that look nice inside the cheese ball. You can substitute with chives if you prefer a milder taste.
- Garlic Powder (½ teaspoon): Do not use fresh garlic here—it can be too sharp and might overpower the cheese. Garlic powder gives you that savory depth without the bite.
- Onion Powder (½ teaspoon): Works with the garlic powder to build that classic savory cheese ball flavor. Simple but effective.
- Worcestershire Sauce (1 teaspoon): Adds umami and a little tang. This is the secret ingredient that makes people ask what is in it. Do not skip it.
- Salt (¼ teaspoon): Go easy here since the cheese and pretzels are already salty. You can always add more to taste.
- Black Pepper (⅛ teaspoon): Just a pinch for background warmth.
- Pretzel Sticks (about 20-25): These become the bones sticking out of the mummy. Use thick pretzel sticks, not the thin twists. They need to be sturdy enough to poke into the cheese ball without breaking.
- Sliced Almonds (2, for eyes): Two whole sliced almonds work perfectly for the mummy eyes. You can also use candy eyes if you prefer, but almonds keep it savory.
For the cream cheese, I personally use Philadelphia because it is consistent and blends beautifully. When it comes to the cheddar, look for a block of aged sharp cheddar—it makes a noticeable difference in flavor. If you want a milder cheese ball, you can use Monterey Jack or colby, but I find sharp cheddar gives the best contrast with the salty pretzels.
Equipment Needed
You do not need any fancy equipment for this spooky mummy cheese ball, which is part of why I love it. Here is what you will need:
- Mixing Bowl: A medium-sized bowl works fine. Nothing special needed.
- Hand Mixer or Stand Mixer: You can mix by hand with a sturdy spatula, but a hand mixer makes it much easier to get the cream cheese smooth and lump-free. I have done it both ways, and the mixer saves about five minutes of arm work.
- Plastic Wrap: Essential for shaping the cheese ball and keeping it tidy in the fridge. Stretch-tight wrap works best.
- Spatula: A rubber spatula helps scrape every bit of cheese mixture out of the bowl. Waste not, want not.
- Cutting Board: For arranging the pretzel bones and assembling the mummy face.
- Serving Platter: A flat platter or wooden board works best for displaying the mummy. Make sure it is big enough to fit the cheese ball plus crackers around it.
If you do not have a hand mixer, you can absolutely do this by hand. Just make sure your cream cheese is very soft, and use a fork to mash and stir until smooth. It takes a little longer, but the result is the same. For the plastic wrap, I like using the pre-cut sheets because they are easier to handle, but a standard roll works just fine.
Preparation Method
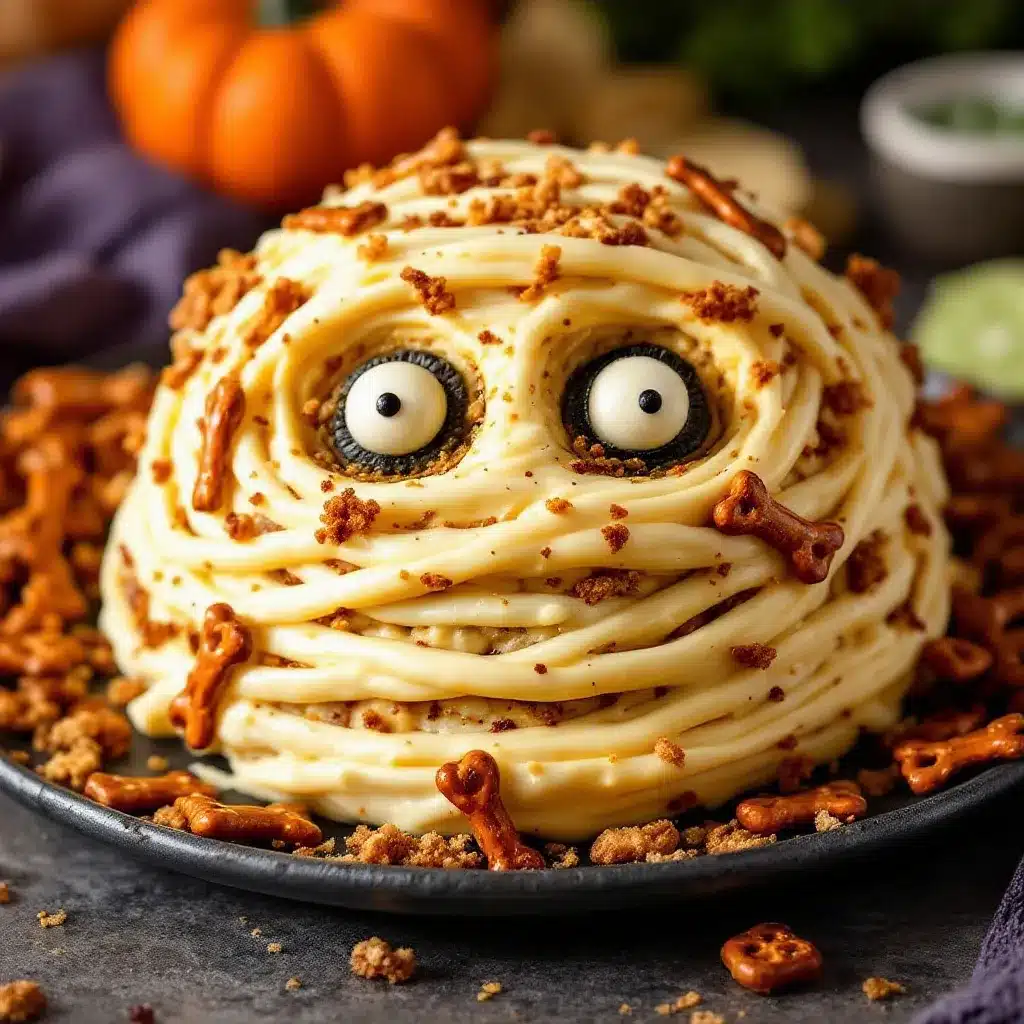
Follow these steps carefully, and you will have a spooky mummy cheese ball that looks like it came from a professional kitchen. I have included timing estimates and sensory cues so you know exactly what to look for at each stage.
Step 1: Soften the Cream Cheese
Take your cream cheese out of the fridge about 30 minutes before you start. It should be soft to the touch but not melted. If you are in a hurry, you can microwave it for 10-15 seconds on low power, but be careful—cream cheese gets runny fast if you overheat it.
Step 2: Mix the Cheese Base
In your mixing bowl, combine the softened cream cheese, shredded sharp cheddar, chopped green onions, garlic powder, onion powder, Worcestershire sauce, salt, and black pepper. Beat with a hand mixer on medium speed for about 2 minutes, until everything is fully combined and the mixture is smooth. Scrape down the sides of the bowl halfway through. The mixture should look creamy and uniform, with small flecks of green onion throughout. Taste it at this point—if you want more garlic or salt, add a pinch more.
Step 3: Shape the Cheese Ball
Lay out a large piece of plastic wrap on your counter. Scoop the cheese mixture onto the center of the plastic wrap. Use the wrap to gather the cheese into a ball shape, twisting the top to tighten it. Then, shape it into an oval or slightly elongated ball—this will be the mummy body. Do not make it perfectly round; a slightly lumpy shape looks more like a wrapped mummy. Refrigerate the wrapped cheese ball for at least 2 hours, or up to overnight. It needs to be firm enough to hold its shape when you add the pretzel bones.
Step 4: Prepare the Pretzel Bones
About 15 minutes before you are ready to serve, take the cheese ball out of the fridge and unwrap it. Arrange the pretzel sticks so they look like bones sticking out of the mummy. I like to place 4-5 pretzels on each side, angled slightly outward, and 2-3 at the top near the head area. Press them gently into the cheese ball so they stay in place. The pretzels should be about halfway inserted—enough to hold firm but still visible.
Step 5: Wrap the Mummy
This is the fun part. Tear off strips of plastic wrap about 1 inch wide and 6 inches long. You will use these to create the mummy bandages. Starting at the bottom, wrap a strip around the cheese ball, leaving gaps between each strip so some of the cheese shows through. Overlap the strips slightly as you work your way up. Leave a small section at the top uncovered for the eyes. The wrapping should look uneven and slightly messy—that is the mummy aesthetic. If you want a more authentic look, you can use a few shorter strips to create wrapped layers.
Step 6: Add the Eyes
Place two sliced almonds in the uncovered section at the top, positioning them like eyes. Press them gently into the cheese so they stay. If you are using candy eyes, just place them on top. The almonds give it a more natural, creepy look, but candy eyes are fun too.
Step 7: Serve
Transfer the mummy cheese ball to a serving platter. Arrange crackers, pretzel sticks, or vegetable sticks around it for dipping. The cheese ball should be served at room temperature for the best flavor and spreadability, so let it sit out for about 15 minutes after unwrapping before serving.
Cooking Tips & Techniques
I have made this spooky mummy cheese ball about six times now, and I have learned a few things the hard way. Here are my best tips to save you from the same mistakes.
Do not skip the chilling time. I know it is tempting to rush, but if the cheese ball is not firm enough, the pretzel bones will slide right out. Give it at least two hours in the fridge, and overnight is even better. The texture firms up beautifully, and the flavors meld together more.
Break a few pretzels on purpose. Not all pretzel sticks are perfectly straight. If you have some broken pieces, use them as shorter bones near the top or bottom. It actually looks more realistic when the bones are slightly uneven. I broke a batch once and almost threw them away, but they ended up looking better than the perfect ones.
Use the plastic wrap as a shaping tool. When you are forming the cheese ball, the plastic wrap is your best friend. Use it to press and mold the cheese into shape without getting your hands sticky. Twist the top tightly and let the fridge do the rest of the work.
Warm up your serving platter. If you are serving this outdoors or in a cold room, the cheese ball can get too firm to spread easily. Let it sit at room temperature for 15-20 minutes before serving. I usually set it out while I am arranging the crackers and pretzels around it.
Make extra pretzel bones. People will eat the pretzels off the cheese ball as soon as they see it. Have a small bowl of extra pretzel sticks nearby so guests can grab more. Trust me on this one.
Do not overmix. Once the cheese mixture is smooth and combined, stop mixing. Overmixing can make the cheese ball too soft and difficult to shape. A few small lumps are fine—they will not be noticeable once the cheese ball is chilled.
Variations & Adaptations
This recipe is easy to adapt for different tastes and dietary needs. Here are a few variations I have tried and loved.
Spicy Mummy Cheese Ball: Add ½ teaspoon of cayenne pepper or 1 tablespoon of finely chopped pickled jalapeños to the cheese mixture. The heat pairs surprisingly well with the cool cream cheese and salty pretzels. I made this version for a Halloween party where everyone wanted something with a kick, and it disappeared faster than the original.
Herb and Roasted Garlic Version: Replace the garlic powder with 1 tablespoon of roasted garlic paste (you can buy it or roast your own). Add 1 tablespoon of fresh chopped parsley and 1 teaspoon of fresh thyme. This version tastes more sophisticated and works well for adult gatherings where you want something a little elevated.
Gluten-Free Option: Use gluten-free pretzel sticks for the bones. Most brands work well, though they can be a bit more fragile. You can also use carrot sticks or celery sticks as the bones for a completely gluten-free, low-carb option. They will not look exactly like bones, but they still work for the mummy aesthetic.
Dairy-Free Version: Substitute the cream cheese with a high-quality dairy-free cream cheese (I like Kite Hill or Violife). Use a dairy-free cheddar-style shred. The texture will be slightly different, but the flavor still holds up. Just make sure to chill it well, as dairy-free cream cheese can be softer.
Sweet Mummy Cheese Ball: For a dessert version, swap the cheddar and seasonings for ¼ cup of powdered sugar, ½ teaspoon of vanilla extract, and ¼ cup of mini chocolate chips. Use candy eyes instead of almonds, and use pretzel sticks or cookie sticks for the bones. This version is a hit with kids and works great for Halloween dessert tables.
Serving & Storage Suggestions
This spooky mummy cheese ball is best served at room temperature, so plan accordingly. Take it out of the fridge about 20 minutes before you are ready to serve. Arrange it on a large wooden board or a white platter so the mummy really stands out. Surround it with an assortment of crackers—I like buttery Ritz-style crackers, sturdy wheat crackers, and thin pretzel crisps. You can also add vegetable sticks like celery, carrot sticks, and bell pepper strips for a lighter option.
For a complete Halloween spread, serve this alongside other party favorites. It pairs beautifully with a flavorful grazing board recipe with whipped feta honey and seasonal fruit for a savory-sweet balance. If you are looking for something lighter to balance the richness, a fresh watermelon cucumber feta salad adds a refreshing contrast. For a heartier option, the creamy one-pan tuscan chicken makes a great main dish to serve alongside this appetizer.
Storage Instructions: If you have leftovers (unlikely, but possible), remove the pretzel bones and store the cheese ball in an airtight container in the refrigerator for up to 5 days. The pretzels will get soft if left in the cheese ball, so store them separately. To reuse, let the cheese ball come to room temperature and add fresh pretzel bones before serving again.
Freezer Instructions: You can freeze the cheese ball for up to 1 month. Wrap it tightly in plastic wrap and then in aluminum foil. Thaw in the refrigerator overnight before serving. Add the pretzel bones after thawing. The texture will be slightly softer after freezing, but the flavor remains excellent.
Flavor Development: The flavors actually improve after a day in the fridge. The garlic and onion powders meld with the cheese, and the Worcestershire sauce becomes more pronounced. If you are making this for a party, I recommend preparing it a day ahead for the best flavor.
Nutritional Information & Benefits
This spooky mummy cheese ball is indulgent, but it does offer some nutritional benefits worth noting. Here is an approximate breakdown per serving (based on 12 servings):
- Calories: 210
- Protein: 7g
- Fat: 18g
- Carbohydrates: 5g
- Fiber: 0g
- Sugar: 2g
- Sodium: 320mg
The cream cheese provides a good amount of calcium and vitamin A, while the sharp cheddar adds protein and more calcium. The green onions contribute a small amount of vitamin K and antioxidants. This is not a health food, but it is a satisfying, protein-rich appetizer that will keep you full longer than a handful of candy corn.
For those watching their carbohydrate intake, this recipe is naturally low-carb and keto-friendly if served with vegetable sticks instead of crackers. The pretzel bones add about 3g of carbs each, so you can easily adjust by using fewer pretzels or substituting with cheese crisps.
If you are looking for a higher-protein option, consider serving this alongside a healthy egg white breakfast burrito for a balanced meal. The combination of creamy cheese and protein-packed eggs makes for a satisfying Halloween brunch or party spread.
Conclusion
This spooky mummy cheese ball with pretzel bones is the Halloween appetizer you did not know you needed. It is fun without being fussy, delicious without being complicated, and it genuinely makes people smile when they see it sitting on the table. I have made this for kids parties, adult gatherings, and even a Halloween movie night where it was the only thing on the snack table that did not involve sugar. Every time, it gets the same reaction: laughter, then a double-take, then someone reaching for a cracker.
I love this recipe because it proves that Halloween food does not have to be scary to make—or scary to eat. You can have something that looks like it crawled out of a tomb but tastes like a really good cheese ball. That is the kind of magic I can get behind.
I would love to hear how your mummy turns out. Did you use candy eyes or almonds? Did anyone actually eat the pretzel bones before you could take a picture? Drop a comment below and let me know. And if you tweak the recipe—add some spice, swap the cheese, make it sweet—share that too. The best recipes are the ones we make our own.
Now go make something spooky and delicious. Your Halloween party will thank you.
Frequently Asked Questions
Can I make this spooky mummy cheese ball ahead of time?
Yes, absolutely. You can prepare the cheese ball up to 2 days in advance and keep it wrapped in the refrigerator. Just add the pretzel bones and plastic wrap bandages right before serving so the pretzels stay crunchy.
What if my cheese ball is too soft to shape?
If the mixture feels too soft, pop it in the fridge for 20-30 minutes before shaping. You can also add a little more shredded cheddar to help firm it up. The key is to start with well-softened cream cheese but not overheated cream cheese.
Can I use a different type of cheese?
Absolutely. Sharp cheddar is my favorite for flavor, but you can use Monterey Jack, gouda, or even pepper jack for a spicy kick. Just make sure to shred it finely so it blends evenly with the cream cheese.
How do I keep the pretzel bones from falling out?
Make sure the cheese ball is thoroughly chilled before inserting the pretzels. Insert them about halfway into the cheese ball, and angle them slightly downward so gravity helps keep them in place. If they still seem loose, you can use a dab of cream cheese on the end of the pretzel to help it stick.
Can I make this dairy-free?
Yes, use dairy-free cream cheese and dairy-free cheddar shreds. The texture will be slightly softer, so chill it well before adding the pretzels. I recommend Kite Hill or Violife brands for the best results.
Pin This Recipe!
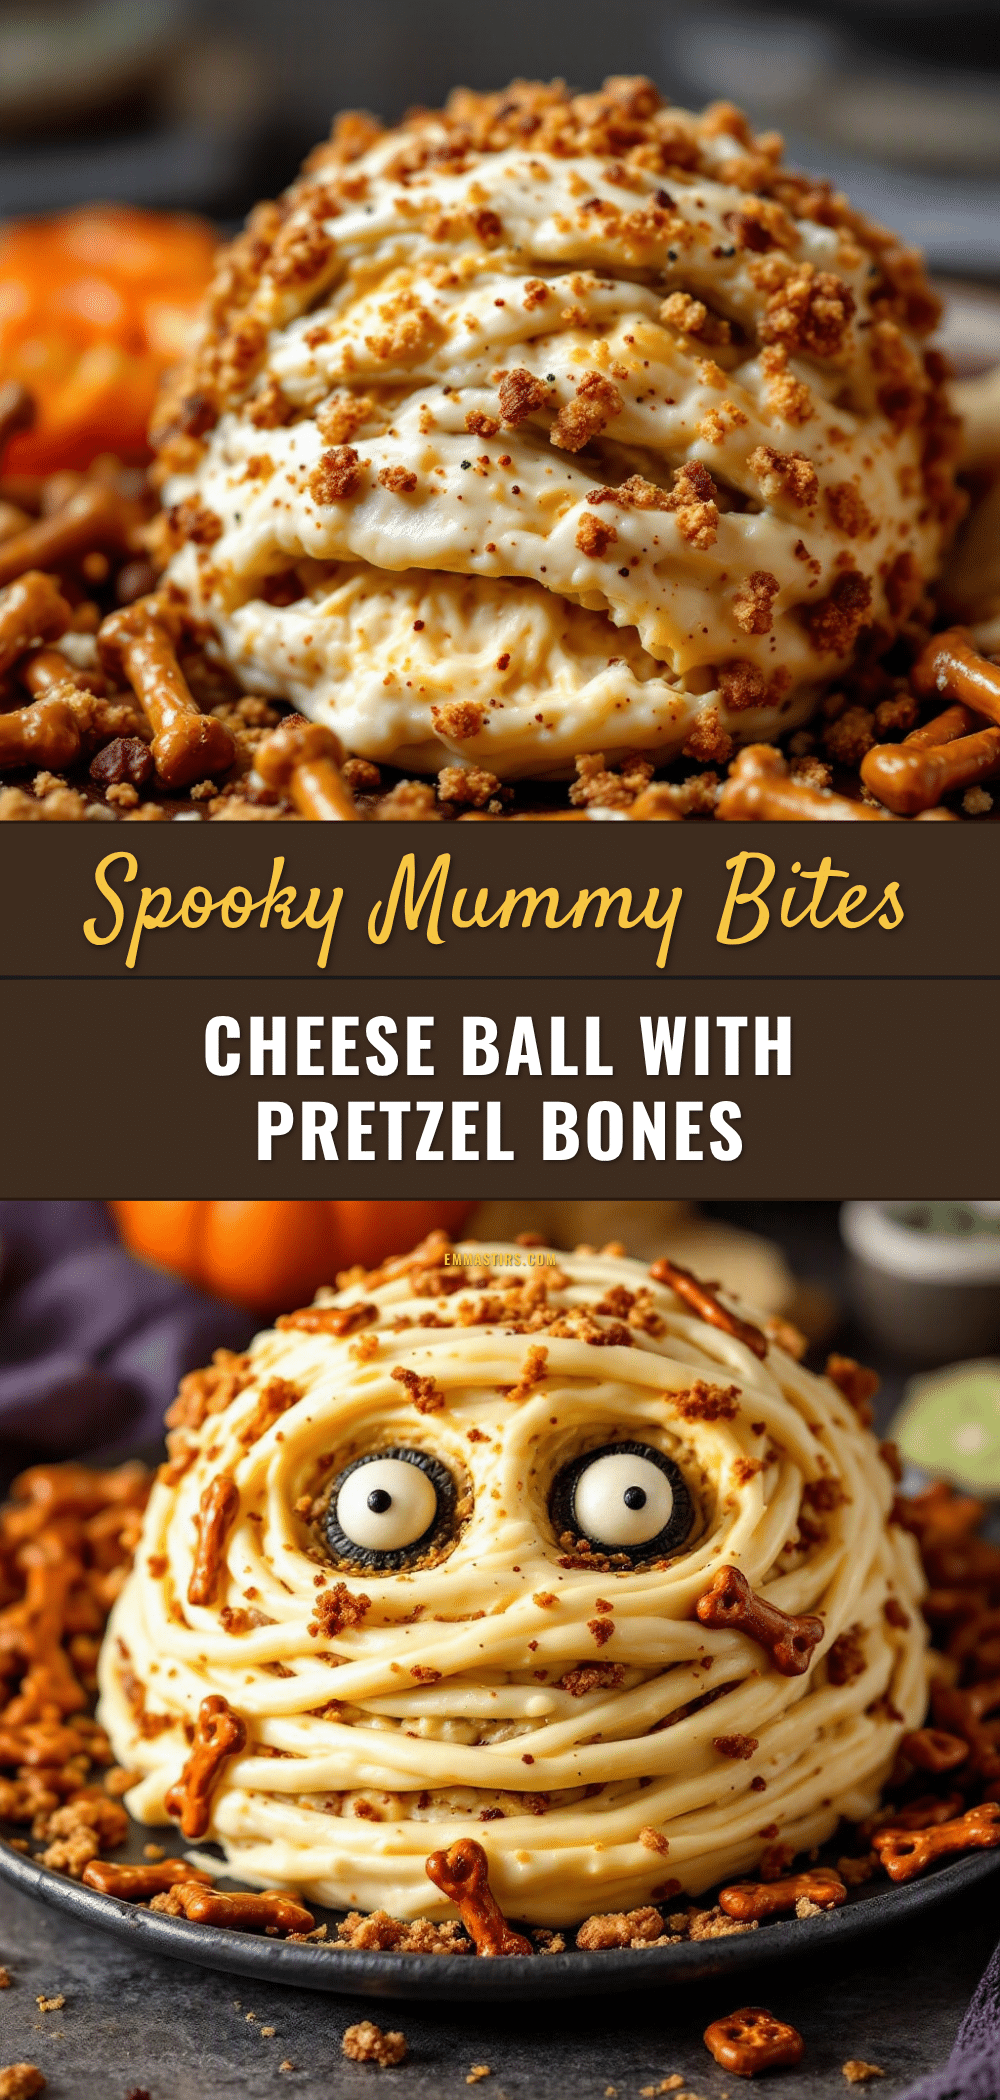
Spooky Mummy Cheese Ball Recipe with Easy Pretzel Bones
A savory Halloween appetizer that looks like a creepy mummy wrapped in bandages but tastes like a creamy, garlicky cheese ball. No baking required, simple ingredients, and perfect for parties.
- Prep Time: 15 minutes
- Cook Time: 0 minutes
- Total Time: 2 hours 15 minutes (includes chilling)
- Yield: 12 servings 1x
- Category: Appetizer
- Cuisine: American
Ingredients
- 16 oz cream cheese, softened
- 1 ½ cups sharp cheddar cheese, shredded
- 3 tablespoons green onions, finely chopped
- ½ teaspoon garlic powder
- ½ teaspoon onion powder
- 1 teaspoon Worcestershire sauce
- ¼ teaspoon salt
- ⅛ teaspoon black pepper
- 20–25 pretzel sticks
- 2 sliced almonds (for eyes)
Instructions
- Soften the cream cheese: Take cream cheese out of fridge 30 minutes before starting, or microwave for 10-15 seconds on low power.
- Mix the cheese base: In a mixing bowl, combine softened cream cheese, shredded cheddar, green onions, garlic powder, onion powder, Worcestershire sauce, salt, and black pepper. Beat with a hand mixer on medium speed for about 2 minutes until smooth and creamy.
- Shape the cheese ball: Lay a large piece of plastic wrap on the counter. Scoop the cheese mixture onto the center, gather into a ball shape using the wrap, then shape into an oval or slightly elongated ball. Refrigerate for at least 2 hours or overnight.
- Prepare the pretzel bones: About 15 minutes before serving, remove cheese ball from fridge and unwrap. Insert pretzel sticks into the cheese ball to look like bones—4-5 on each side, 2-3 at the top. Press gently halfway in.
- Wrap the mummy: Tear plastic wrap into 1-inch wide, 6-inch long strips. Starting at the bottom, wrap strips around the cheese ball, leaving gaps and overlapping slightly. Leave a small section at the top uncovered for eyes.
- Add the eyes: Place two sliced almonds in the uncovered section at the top, pressing gently to secure.
- Serve: Transfer to a serving platter, arrange crackers or vegetables around it, and let sit at room temperature for 15 minutes before serving.
Notes
Chill the cheese ball thoroughly before adding pretzel bones to prevent them from falling out. Break a few pretzels on purpose for a more realistic look. Make extra pretzel bones as guests will eat them. The flavors improve after a day in the fridge.
Nutrition
- Serving Size: 1 serving (based on
- Calories: 210
- Sugar: 2
- Sodium: 320
- Fat: 18
- Saturated Fat: 10
- Carbohydrates: 5
- Protein: 7
Keywords: Halloween appetizer, mummy cheese ball, pretzel bones, no-bake, savory, party food, spooky, cream cheese, cheddar


