Love this? Save it for later!
Share the inspiration with your friends
I want pumpkin banana bread right now. Not the kind that’s dry and crumbly and makes you reach for a glass of milk just to get through a slice. No, I want the kind that’s so moist it almost feels like you’re eating a thick slice of autumn in cake form. The kind where the pumpkin keeps everything tender and the banana adds that natural sweetness that means you can get away with using less sugar. I have ripe bananas on the counter—three of them, spotty and practically begging to be used—and a can of pumpkin puree that’s been sitting in my pantry since last October. I have everything. Everything except a complicated recipe that requires multiple bowls and a stand mixer and a whole lot of cleanup. That’s the thing about this one-bowl pumpkin banana bread. It’s not fussy. It’s not demanding. It’s the kind of recipe you make when you want something warm and comforting but don’t want to spend an hour washing dishes afterward.
Honestly, I stumbled into this combination by accident. I had leftover pumpkin from making something else (I think it was a batch of those cozy one-bowl banana bread I keep coming back to), and I thought, what if I just dumped it in? The first loaf was a happy accident—a little too wet, a little too dense. But after a few tweaks, I landed on something that works perfectly every single time. The pumpkin keeps the bread incredibly moist without making it soggy, and the banana adds enough sweetness that you can cut the sugar by a third without anyone noticing. It’s the kind of bread that makes your kitchen smell like fall even in the middle of July. And honestly? That’s a superpower worth having.
This recipe is for the days when you want homemade baked goods but don’t want to deal with the mess. One bowl, a whisk, a spatula, and you’re done. No creaming butter and sugar together. No sifting dry ingredients into a separate bowl. Just dump, stir, pour, and bake. It’s the kind of recipe that proves you don’t need fancy equipment or complicated techniques to make something genuinely delicious.
Why You’ll Love This Recipe
Let me tell you why this pumpkin banana bread has become my go-to fall bake (and honestly, my year-round bake too).
- One Bowl, No Fuss: You mix everything in a single bowl. No stand mixer needed, no food processor required. Just a whisk and your own two hands. Cleanup takes about two minutes, and that’s if you’re being slow about it.
- Uses Pantry Staples: Chances are you already have most of these ingredients sitting in your kitchen right now. Canned pumpkin, bananas, flour, sugar, eggs, oil. This isn’t one of those recipes that sends you running to the store for weird ingredients you’ll never use again.
- Perfect for Fall Mornings: Slice this bread, toast it lightly, and slather it with butter. It’s the kind of breakfast that makes you want to sit by a window with a cup of coffee and watch the leaves change colors.
- Incredibly Moist Texture: The combination of pumpkin and banana creates a texture that’s almost pudding-like in its tenderness. This bread stays moist for days—if it lasts that long, which it probably won’t.
- Naturally Sweetened: Between the ripe bananas and the pumpkin’s natural sweetness, you can cut the added sugar significantly. I use about half the sugar most recipes call for, and nobody has ever complained.
What makes this recipe different from the dozens of other pumpkin banana bread recipes out there? It’s the ratio. I spent weeks testing different proportions of pumpkin to banana, trying to find the sweet spot where neither flavor overpowers the other. The result is a bread that tastes like both pumpkin AND banana, not just one or the other. Plus, the one-bowl method means you’re less likely to overmix the batter, which keeps the bread tender instead of tough. I’ve made this for brunches, holiday breakfasts, and random Tuesday afternoons when I needed something warm and comforting. It never disappoints.
What Ingredients You Will Need
This recipe uses simple ingredients that work together to create something greater than the sum of their parts. Here’s what you’ll need and why each one matters.
For the Bread
- 1 ½ cups all-purpose flour (I use King Arthur for consistent results, but any brand works fine. For a whole wheat version, swap half the flour for whole wheat pastry flour.)
- 1 teaspoon baking soda (This helps the bread rise. Make sure it’s fresh—test it by dropping a bit into vinegar; if it fizzes, it’s good.)
- 1 teaspoon baking powder (Adds extra lift for a lighter texture.)
- ½ teaspoon salt (Don’t skip this. Salt balances the sweetness and enhances all the other flavors.)
- 1 ½ teaspoons pumpkin pie spice (Store-bought is fine, but you can make your own with 1 teaspoon cinnamon, ½ teaspoon ginger, ¼ teaspoon nutmeg, and ¼ teaspoon cloves.)
- 1 teaspoon ground cinnamon (Because you can never have too much cinnamon in pumpkin bread.)
- 1 cup pumpkin puree (Not pumpkin pie filling—make sure you grab the plain puree. Libby’s is my go-to brand.)
- 2 medium ripe bananas, mashed (About 1 cup. The riper the better—those spotty brown bananas are perfect here.)
- ½ cup vegetable oil (Or melted coconut oil, or melted butter. Each gives a slightly different texture. Oil makes it the most moist.)
- ⅔ cup granulated sugar (You can use brown sugar for a deeper flavor, or coconut sugar for a less processed option.)
- 2 large eggs, room temperature (Cold eggs can make the batter seize up. Let them sit on the counter for 20 minutes first.)
- 1 teaspoon vanilla extract (Pure vanilla is best, but imitation works in a pinch.)
Optional Add-Ins
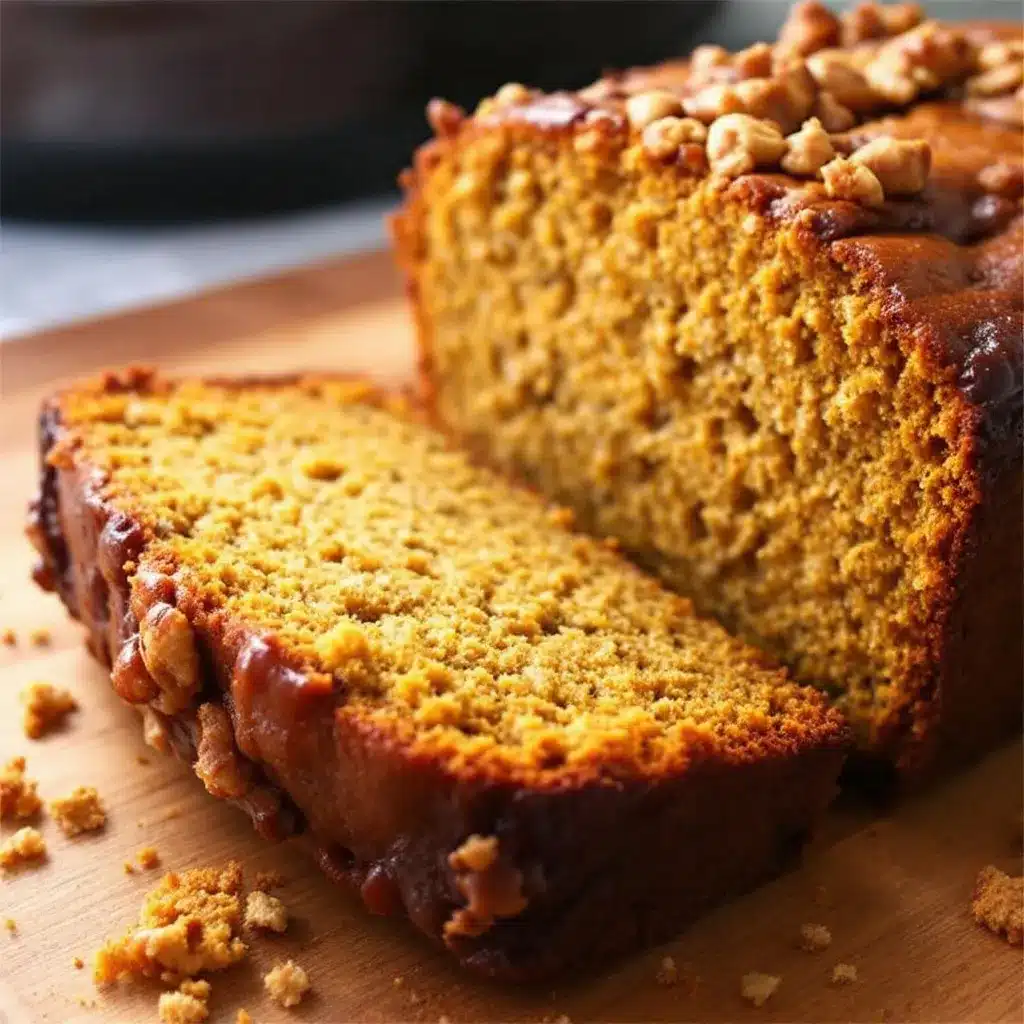
- ½ cup chopped walnuts or pecans (Toast them first for extra flavor.)
- ½ cup chocolate chips (Dark chocolate chips are my favorite—they add a nice bitterness that contrasts with the sweet bread.)
- ¼ cup dried cranberries or raisins (Adds little bursts of sweetness.)
The beauty of this recipe is that it’s flexible. If you don’t have pumpkin pie spice, just use cinnamon and a pinch of nutmeg. If you’re out of vegetable oil, melted butter works beautifully. The only thing I wouldn’t recommend swapping is the bananas—they add moisture and sweetness that’s hard to replicate with anything else.
Equipment Needed
You don’t need much to make this bread, which is exactly the point. Here’s what you’ll need:
- One large mixing bowl (I use a 4-quart bowl, but anything big enough to hold all the ingredients without sloshing will work.)
- A whisk (For mixing the wet and dry ingredients together. A fork works in a pinch, but a whisk is better.)
- A rubber spatula (For scraping down the sides of the bowl and folding in any add-ins.)
- A 9×5-inch loaf pan (Glass, metal, or ceramic all work. I prefer metal because it conducts heat evenly and gives a nice golden crust.)
- Parchment paper (Optional but highly recommended. It makes lifting the bread out of the pan so much easier.)
- Cooling rack (Allows air to circulate around the bread so it cools evenly and doesn’t get soggy on the bottom.)
If you don’t have a loaf pan, you can bake this in an 8×8-inch square pan for about 30-35 minutes, or even in a muffin tin for pumpkin banana muffins (bake for 18-22 minutes). I’ve also made this in a cast-iron skillet for a rustic look—just reduce the baking time by about 10 minutes and keep an eye on it.
Preparation Method
This is the part where the magic happens. Follow these steps, and you’ll have a loaf of pumpkin banana bread that’s tender, flavorful, and absolutely worth every bite.
- Preheat your oven to 350°F (175°C). Position the rack in the center of the oven. While the oven heats, grease your loaf pan with butter or cooking spray, or line it with parchment paper, leaving some overhang on the sides for easy removal.
- In your large mixing bowl, whisk together the dry ingredients: flour, baking soda, baking powder, salt, pumpkin pie spice, and cinnamon. Whisk them well to combine—about 15 seconds of vigorous whisking. This aerates the flour and distributes the leavening agents evenly.
- Add the wet ingredients directly to the same bowl: pumpkin puree, mashed bananas, vegetable oil, sugar, eggs, and vanilla extract. Don’t worry about making a well in the center or any of that fussy stuff. Just dump everything in.
- Mix until just combined. Use your whisk or spatula to stir everything together. Start slowly to avoid flinging flour everywhere, then increase speed as the ingredients come together. Stop mixing as soon as you no longer see streaks of flour. A few small lumps are totally fine—overmixing will make the bread tough.
- Fold in any add-ins. If you’re using walnuts, chocolate chips, or dried fruit, gently fold them in with your spatula. Don’t overmix—just a few folds until they’re evenly distributed.
- Pour the batter into your prepared loaf pan. Use your spatula to scrape every last bit of batter out of the bowl. Smooth the top gently—it doesn’t need to be perfect.
- Bake for 50-60 minutes. Start checking at 50 minutes by inserting a toothpick or skewer into the center of the bread. If it comes out clean or with just a few moist crumbs attached, it’s done. If it’s still wet, give it another 5 minutes and check again.
- Cool in the pan for 10 minutes. This allows the bread to set up enough that it won’t fall apart when you remove it. After 10 minutes, lift the bread out using the parchment paper overhang and transfer it to a cooling rack.
- Let it cool completely before slicing. I know, I know—it’s hard to wait. But if you slice it while it’s still warm, it will crumble and fall apart. Give it at least an hour on the cooling rack. If you can’t wait that long, at least let it cool for 30 minutes before cutting into it.
Sensory cues to watch for: The batter should be thick but pourable—like a thick milkshake. When you pour it into the pan, it should spread slowly and hold its shape. The bread is done when the top is golden brown and cracked, and the edges have pulled away slightly from the sides of the pan. Your kitchen will smell like fall—cinnamon, pumpkin, and banana all mingling together.
Cooking Tips & Techniques
After making this bread more times than I can count, I’ve learned a few things that make the difference between good pumpkin banana bread and great pumpkin banana bread.
Don’t overmix the batter. This is the number one mistake people make with quick breads. Mix until the flour just disappears into the wet ingredients. Overmixing develops gluten, which makes the bread tough and dense. You want tender, not tough. A few lumps are your friends.
Use room temperature ingredients. Cold eggs and cold bananas can cause the batter to seize up, making it harder to mix evenly. Let your eggs sit on the counter for 20 minutes before you start. If you forgot to take them out, place them in a bowl of warm water for 5 minutes—that’ll bring them to room temperature quickly.
Check for doneness with a thermometer. This is my secret weapon for perfect quick breads every time. The internal temperature of a fully baked loaf should be around 200-205°F (93-96°C). If you have an instant-read thermometer, use it. It’s more reliable than the toothpick test, especially with moist breads like this one.
Let it cool completely. I know I said this already, but it bears repeating. Cutting into warm bread is tempting, but it will crumble and fall apart. The bread continues to set as it cools, and the texture improves significantly. If you absolutely must have warm bread, toast individual slices after the loaf has cooled completely.
Toast it for maximum enjoyment. This bread is delicious at room temperature, but it’s transcendent when toasted. Slice it, pop it in the toaster or under the broiler for a few minutes, and spread butter on top while it’s still warm. The butter melts into the bread, and the edges get slightly crispy. It’s the best way to eat this bread, hands down.
Variations & Adaptations
One of the best things about this recipe is how adaptable it is. Here are some variations I’ve tried and loved.
Gluten-Free Version: Substitute the all-purpose flour with a 1:1 gluten-free baking flour blend. I’ve had good results with Bob’s Red Mill and King Arthur brands. Add an extra tablespoon of flour to account for the fact that gluten-free flours tend to absorb less moisture. The texture will be slightly denser, but still delicious.
Vegan Version: Replace the eggs with flax eggs (1 tablespoon ground flaxseed mixed with 3 tablespoons water per egg, let sit for 5 minutes). Use melted coconut oil instead of butter, and make sure your sugar is vegan-friendly. The bread will be a bit more delicate, so handle it gently when removing it from the pan.
Chocolate Chip Pumpkin Banana Bread: Fold in ¾ cup of dark chocolate chips along with the walnuts. The chocolate adds a richness that complements the pumpkin and banana beautifully. My kids practically fight over the slices with the most chocolate chips.
Pumpkin Banana Muffins: Divide the batter among a 12-cup muffin tin lined with paper liners. Bake at 350°F for 18-22 minutes, or until a toothpick comes out clean. These are perfect for grab-and-go breakfasts or lunchbox treats.
Streusel Topping: Mix together ¼ cup brown sugar, ¼ cup flour, 2 tablespoons cold butter (cut into small pieces), and ½ teaspoon cinnamon. Sprinkle this over the batter before baking. It creates a crispy, sweet crust that’s absolutely addictive.
I’ve also made this with a cream cheese swirl (drop spoonfuls of softened cream cheese mixed with a little sugar on top of the batter and swirl with a knife) and with a maple glaze (mix 1 cup powdered sugar with 2 tablespoons maple syrup and a splash of milk). Both are excellent, but the plain version is so good that I usually skip the extras.
Serving & Storage Suggestions
This bread is versatile enough to serve at breakfast, brunch, dessert, or as an afternoon snack. Here’s how to get the most out of it.
Serving: Serve slices at room temperature or lightly toasted. For breakfast, pair it with a cup of coffee or a tall glass of cold milk. For dessert, top a slice with a scoop of vanilla ice cream and a drizzle of caramel sauce. For a brunch spread, arrange slices on a platter alongside fresh fruit and a fresh savory cottage cheese bowl for a balanced meal that satisfies both sweet and savory cravings.
Storage: Store the bread in an airtight container at room temperature for up to 4 days. If your kitchen is particularly warm or humid, you can store it in the refrigerator, but note that refrigeration tends to dry out baked goods. To prevent this, wrap the bread tightly in plastic wrap before placing it in the container.
Freezing: This bread freezes beautifully. Wrap the cooled loaf tightly in plastic wrap, then in aluminum foil, and freeze for up to 3 months. To thaw, leave it on the counter overnight, or unwrap individual slices and microwave for 20-30 seconds. I often make two loaves at once—one to eat now and one to stash in the freezer for later.
Reheating: For best results, toast slices in a toaster or under the broiler for 1-2 minutes per side. You can also microwave individual slices for 15-20 seconds, but they won’t have the same crispy edges that toasting provides.
Flavor development: Here’s a secret—this bread actually tastes better on day two. The flavors have time to meld together, and the texture becomes even more moist. If you can resist the urge to eat it all on day one, you’ll be rewarded with an even better experience on day two.
Nutritional Information & Benefits
While this bread is definitely a treat, it does offer some nutritional benefits thanks to the pumpkin and bananas.
Estimated nutrition per slice (based on 10 slices):
- Calories: 245
- Total Fat: 11g
- Saturated Fat: 2g
- Cholesterol: 37mg
- Sodium: 280mg
- Total Carbohydrates: 34g
- Dietary Fiber: 2g
- Sugars: 16g
- Protein: 4g
Health Benefits: Pumpkin is packed with vitamin A (in the form of beta-carotene), which supports eye health and immune function. Bananas provide potassium, which helps regulate blood pressure, and vitamin B6, which supports brain health. The walnuts (if you add them) offer omega-3 fatty acids and antioxidants. This bread also provides a small amount of fiber, which aids digestion and helps you feel full longer.
Dietary Considerations: This recipe can be made gluten-free, dairy-free, and vegan with simple substitutions (see Variations section). It contains eggs and wheat (if using regular flour), so it’s not suitable for those with celiac disease or egg allergies without modifications. The sugar content is moderate compared to many quick bread recipes, thanks to the natural sweetness from the bananas.
I don’t pretend that this is health food—it’s a treat, and treats are meant to be enjoyed. But knowing that it has some nutritional value makes me feel a little better about having a second slice with my afternoon coffee.
Conclusion
This one-bowl pumpkin banana bread is the kind of recipe that becomes a staple in your kitchen. It’s forgiving, flexible, and consistently delicious. You don’t need to be an experienced baker to make it, and you don’t need to spend a lot of time or money on ingredients. It’s the recipe you turn to when you want something homemade but don’t have the energy for a complicated project.
What I love most about this bread is how it makes me feel when I make it. The smell of pumpkin and cinnamon filling the kitchen, the warmth of the first slice fresh from the oven, the way it brings people together around the table. That’s what baking is really about, isn’t it? Not perfection, but connection.
I’d love to hear how this recipe turns out for you. Did you add chocolate chips or walnuts? Did you make it as muffins or a loaf? Did you sneak a slice while it was still warm (no judgment here)? Drop a comment below and let me know. And if you’re looking for more easy, one-bowl recipes, check out my savory brown butter salted chocolate chip cookies for another simple, satisfying bake.
Happy baking, friends. Your kitchen is about to smell amazing.
Frequently Asked Questions
Can I use fresh pumpkin instead of canned?
Yes, you can use fresh pumpkin puree. Just make sure to drain it well after pureeing—fresh pumpkin tends to be more watery than canned. Spread the puree on a paper towel-lined plate for a few minutes to absorb excess moisture before using it in the recipe.
Why did my bread sink in the middle?
A sunken middle usually means the bread was underbaked or the oven temperature was too low. Make sure your oven is properly preheated to 350°F and check for doneness with a toothpick or thermometer. If the outside is browning too quickly but the inside is still raw, tent the loaf with aluminum foil for the last 15 minutes of baking.
Can I reduce the sugar even more?
You can reduce the sugar to ½ cup without significantly affecting the texture. If you go lower than that, the bread may be less tender and less sweet. I’ve found that ⅔ cup is the sweet spot—enough sweetness to satisfy but not so much that it’s cloying.
How do I know when my bananas are ripe enough?
Look for bananas with brown spots on the peel. The peel should be mostly yellow with brown speckles or even fully brown. The bananas should be soft to the touch and smell sweet. If your bananas aren’t ripe enough, you can speed up the process by placing them in a paper bag with an apple overnight.
Can I make this recipe into a layer cake?
This batter is designed for a loaf pan and may not hold up well as a layer cake. For a cake version, I’d recommend doubling the recipe and baking it in two 8-inch round pans for about 25-30 minutes. The texture will be more like a dense coffee cake than a light, fluffy layer cake. For a true layer cake, you’re better off using a dedicated pumpkin cake recipe.
Pin This Recipe!
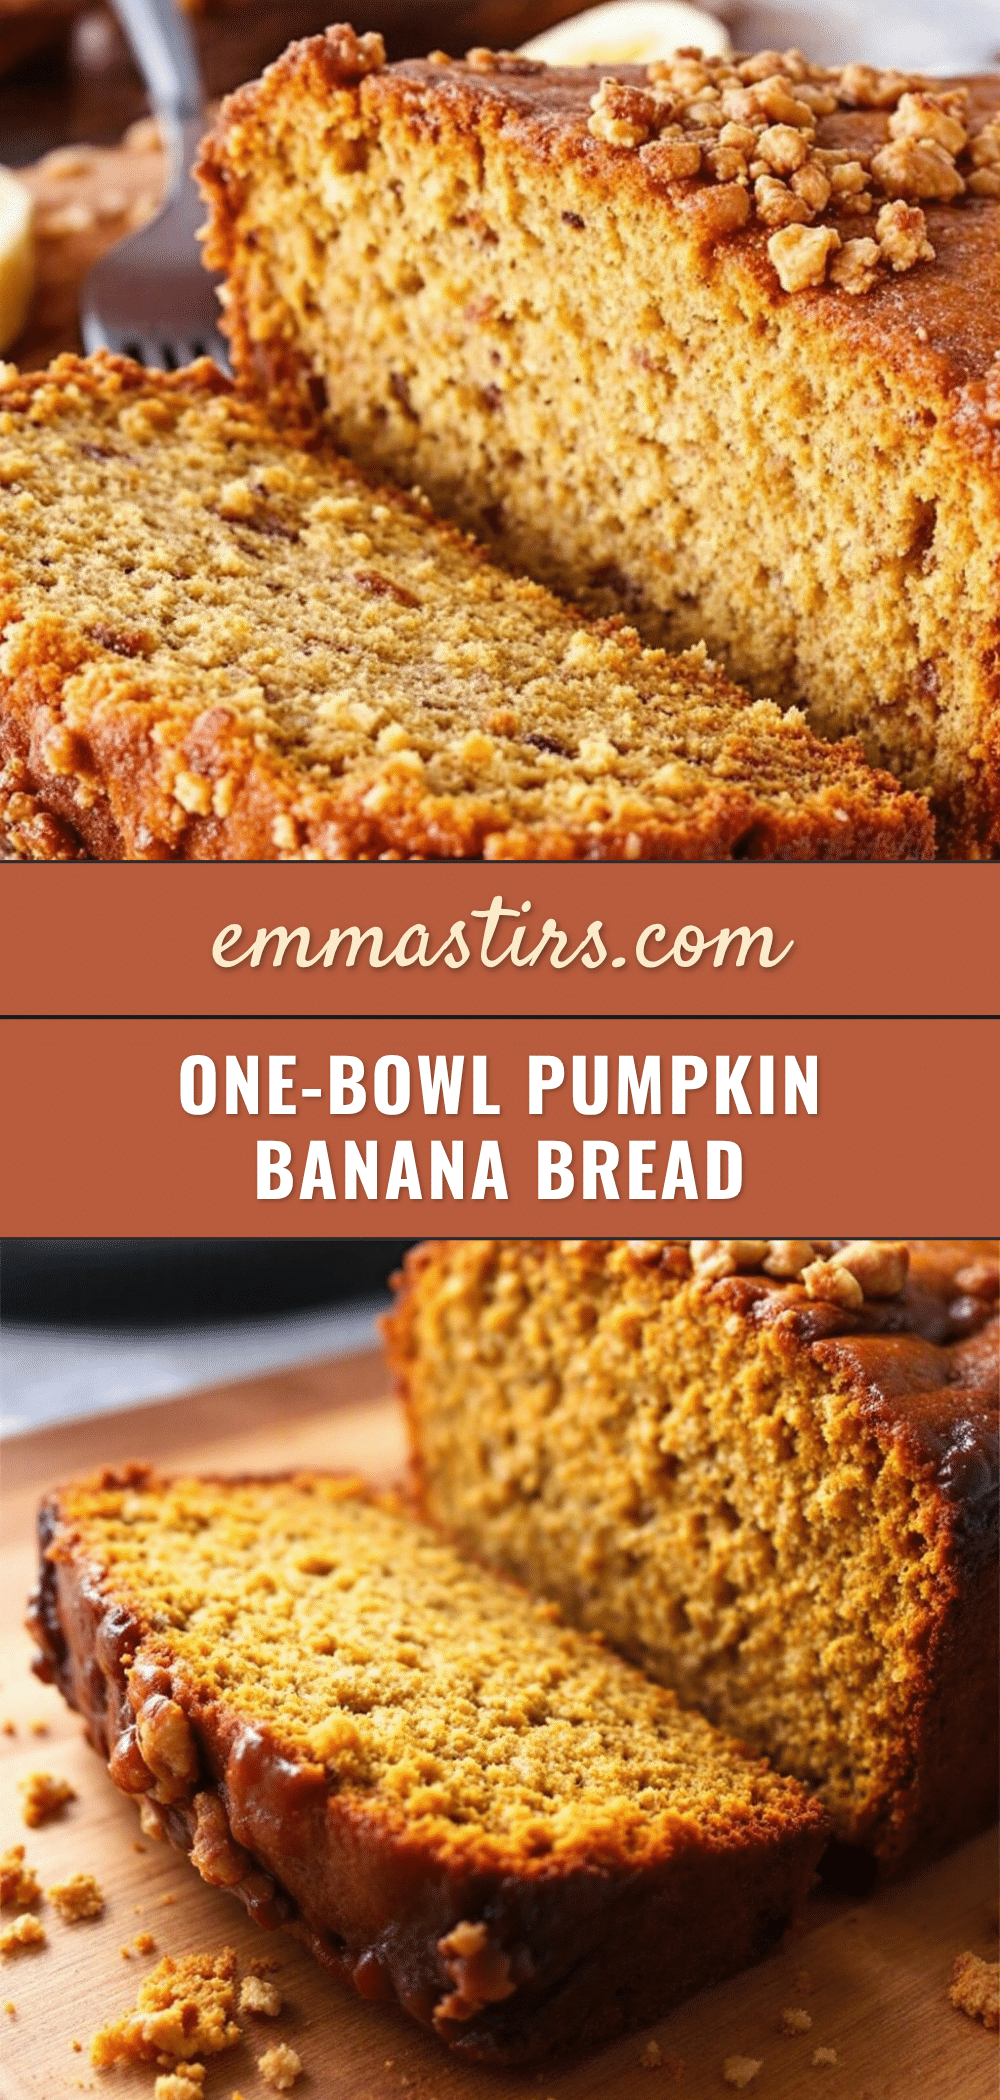
Easy One-Bowl Pumpkin Banana Bread Recipe
This incredibly moist and tender pumpkin banana bread is made in one bowl with simple pantry staples. The combination of pumpkin and banana creates a naturally sweet, perfectly spiced loaf that’s perfect for fall mornings or any time you crave a comforting homemade treat.
- Prep Time: 15 minutes
- Cook Time: 50-60 minutes
- Total Time: 1 hour 15 minutes
- Yield: 10 servings 1x
- Category: Bread
- Cuisine: American
Ingredients
- 1 ½ cups all-purpose flour
- 1 teaspoon baking soda
- 1 teaspoon baking powder
- ½ teaspoon salt
- 1 ½ teaspoons pumpkin pie spice
- 1 teaspoon ground cinnamon
- 1 cup pumpkin puree (not pumpkin pie filling)
- 2 medium ripe bananas, mashed (about 1 cup)
- ½ cup vegetable oil (or melted coconut oil or melted butter)
- ⅔ cup granulated sugar (or brown sugar or coconut sugar)
- 2 large eggs, room temperature
- 1 teaspoon vanilla extract
- ½ cup chopped walnuts or pecans (optional)
- ½ cup chocolate chips (optional)
- ¼ cup dried cranberries or raisins (optional)
Instructions
- Preheat your oven to 350°F (175°C). Position the rack in the center of the oven. Grease your 9×5-inch loaf pan with butter or cooking spray, or line it with parchment paper, leaving some overhang on the sides for easy removal.
- In your large mixing bowl, whisk together the dry ingredients: flour, baking soda, baking powder, salt, pumpkin pie spice, and cinnamon. Whisk well to combine—about 15 seconds of vigorous whisking.
- Add the wet ingredients directly to the same bowl: pumpkin puree, mashed bananas, vegetable oil, sugar, eggs, and vanilla extract. Dump everything in.
- Mix until just combined. Use your whisk or spatula to stir everything together. Start slowly to avoid flinging flour everywhere, then increase speed as the ingredients come together. Stop mixing as soon as you no longer see streaks of flour. A few small lumps are fine.
- Fold in any add-ins (walnuts, chocolate chips, dried fruit) gently with your spatula. Do not overmix.
- Pour the batter into your prepared loaf pan. Use your spatula to scrape every last bit of batter out of the bowl. Smooth the top gently.
- Bake for 50-60 minutes. Start checking at 50 minutes by inserting a toothpick or skewer into the center of the bread. If it comes out clean or with just a few moist crumbs attached, it’s done. If it’s still wet, give it another 5 minutes and check again.
- Cool in the pan for 10 minutes. This allows the bread to set up enough that it won’t fall apart when you remove it. After 10 minutes, lift the bread out using the parchment paper overhang and transfer it to a cooling rack.
- Let it cool completely before slicing. Give it at least an hour on the cooling rack. If you can’t wait that long, at least let it cool for 30 minutes before cutting.
Notes
Don’t overmix the batter—mix until flour just disappears. Use room temperature ingredients for best results. Check for doneness with a thermometer (internal temperature should be 200-205°F). Let the bread cool completely before slicing to prevent crumbling. The bread tastes even better on day two. For gluten-free, use a 1:1 gluten-free baking flour blend. For vegan, replace eggs with flax eggs and use coconut oil.
Nutrition
- Serving Size: 1 slice
- Calories: 245
- Sugar: 16
- Sodium: 280
- Fat: 11
- Saturated Fat: 2
- Carbohydrates: 34
- Fiber: 2
- Protein: 4
Keywords: pumpkin banana bread, one-bowl banana bread, moist pumpkin bread, easy pumpkin bread, fall baking, quick bread, pumpkin banana loaf


