Love this? Save it for later!
Share the inspiration with your friends
I want to make Halloween treats that actually look festive but don’t require me to turn on the oven or wrestle with melted candy that sets before I can shape it. That’s the whole thought process right there, standing in the grocery aisle staring at a bag of marshmallows and orange gel food coloring. The kids want something fun for their school party, and I want something that doesn’t make me want to pull my hair out. These Easy Halloween Rice Krispie Treat Pumpkins are exactly that—the perfect no-bake solution that delivers on cuteness without the stress.
Honestly, I’ve tried so many Halloween recipes over the years. There was the year I attempted a full-on fondant-covered cake that looked more like a sad potato than a pumpkin. And the time I tried to make homemade candy corn from scratch (never again). But these little pumpkins? They’re the ones that stuck. They’re forgiving, they’re fun, and they let the kids get their hands messy right alongside me. That’s the real win, you know? Not just a pretty treat, but a memory made in the kitchen together.
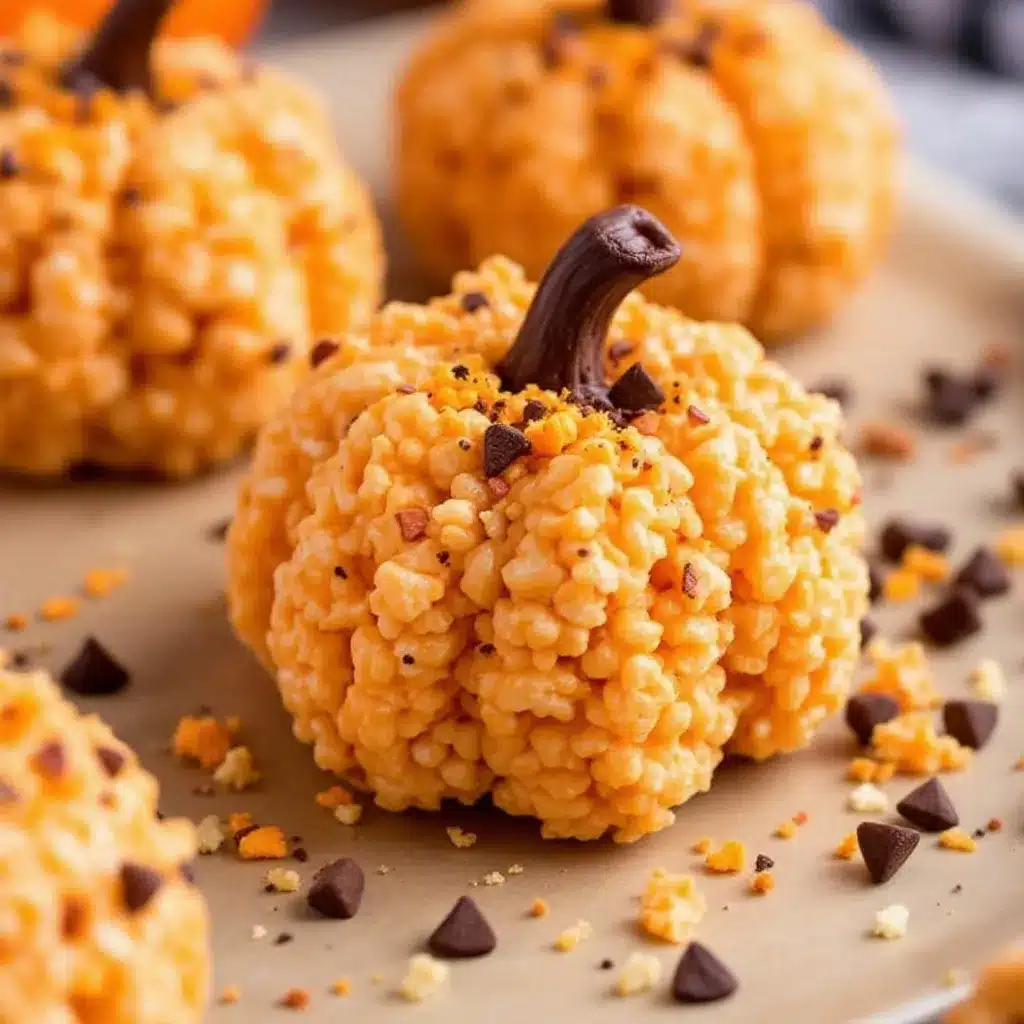
So here’s the thing—these aren’t just any Rice Krispie treats. They’re shaped into adorable little pumpkins, coated in a thin layer of orange magic, and finished with a tiny pretzel stem. They look like you spent hours. You didn’t. And that’s our little secret.
Why You’ll Love This Recipe
Let me tell you why these little pumpkins have become my go-to for every Halloween gathering. I’ve tested this recipe through three different batches, two different marshmallow brands, and one very memorable incident with too much food coloring (my hands were orange for three days). Here’s what I’ve learned:
- No-Bake & Quick : These come together in under 20 minutes, and the hardest part is waiting for them to set. Perfect for last-minute Halloween party prep or when the kids announce they need treats for tomorrow’s class party.
- Simple Pantry Ingredients : You probably already have everything in your kitchen right now. Rice Krispies, marshmallows, butter, and orange food coloring. That’s it. No fancy grocery store trips required.
- Kid-Friendly Activity : My three-year-old helped roll these into balls (and ate about half the marshmallow mixture before we got to the shaping part). It’s a great way to get little hands involved without worrying about hot ovens or sharp knives.
- Perfect for Halloween Parties : Whether it’s a school celebration, a neighborhood potluck, or just a fun family movie night, these pumpkins are always the first thing to disappear from the dessert table.
- Endlessly Customizable : Once you’ve got the basic shape down, you can dress these up any way you want. Different colored sprinkles, chocolate drizzle, or even turning them into little Jack-o’-lantern faces.
What makes these different from every other Halloween treat out there? It’s the texture, honestly. You get that classic Rice Krispie crunch, but the orange coating adds a subtle sweetness and a slightly different mouthfeel that makes them feel more like a real pumpkin-shaped confection. Plus, the pretzel stem gives that salty-sweet balance that keeps you reaching for just one more.
What Ingredients You Will Need
This recipe uses simple, straightforward ingredients that come together to create something truly special. No weird specialty items here—just good old-fashioned pantry staples dressed up for Halloween.
For the Rice Krispie Base
- 6 cups Rice Krispies cereal (or any crispy rice cereal—I’ve used store brands and they work fine, but Kellogg’s gives the best consistent crunch)
- 1 (10 oz) bag mini marshmallows (about 4 cups—the mini ones melt faster and more evenly than the big ones)
- 3 tablespoons unsalted butter (salted works too, just skip the extra salt I sometimes add)
- 1 teaspoon vanilla extract (optional, but I think it rounds out the sweetness nicely)
- Orange gel food coloring (the gel kind is key—liquid food coloring will make the mixture too wet and won’t give you that vibrant pumpkin orange)
For the Orange Coating
- 1 (10 oz) bag white candy melts or white chocolate chips (I prefer Ghirardelli white melting wafers—they melt like a dream)
- 1 tablespoon coconut oil or vegetable shortening (helps thin the coating for easier dipping)
- Orange gel food coloring (same kind you used for the base)
For Decoration
- Mini pretzel twists (for the stems—about 24 of them)
- Green candy melts or green frosting (optional, for little leaves)
Ingredient Selection Tips
Fresh marshmallows make a huge difference here. If your marshmallows are old and stale, they won’t melt properly and your treats will be dry and crumbly. I learned this the hard way when I used a bag that had been sitting in my pantry for months—the treats never set right and fell apart when I tried to shape them. If you’re using white chocolate chips instead of candy melts, make sure they’re good quality. Cheap white chocolate can seize up when melted, and nobody wants lumpy pumpkins.
Substitution Guidance
If you need these to be gluten-free, most Rice Krispies are made with malt flavoring which contains gluten. Look for the gluten-free version or use a generic crispy rice cereal that’s certified gluten-free. For a dairy-free version, use vegan butter and dairy-free white chocolate. I’ve made these with coconut oil instead of butter in the base and they turned out great—just a slight coconut flavor that actually pairs nicely with the sweetness.
Equipment Needed
- Large pot or Dutch oven (for melting the marshmallow mixture—nonstick is ideal but not required)
- Wooden spoon or silicone spatula (the silicone is better because it won’t scratch your pot and the marshmallow doesn’t stick as much)
- 9×13 inch baking dish (for pressing the Rice Krispie mixture to cool slightly before shaping)
- Parchment paper or wax paper (essential for lining your baking sheet—trust me on this)
- Baking sheet (for holding the shaped pumpkins while they set)
- Microwave-safe bowl (for melting the candy coating)
- Fork or dipping tool (for dipping the pumpkins in the coating)
- Small piping bag or zip-top bag (for adding any decorative details)
If you don’t have a 9×13 dish, a 9×9 square pan works fine—the mixture will just be a little thicker. And if you don’t have a microwave for melting the candy coating, a double boiler works beautifully. I actually prefer the double boiler method because it gives me more control, but I know most people want the speed of the microwave.
Preparation Method
Step 1: Prepare Your Workspace
Before you start anything, line your baking sheet with parchment paper. Grease your hands lightly with butter or cooking spray—you’ll thank me later when you’re shaping the balls. Get all your ingredients measured and ready because once that marshmallow mixture is hot, you need to move fast.
Step 2: Make the Rice Krispie Base
In a large pot over medium-low heat, melt the butter completely. Add the mini marshmallows and stir constantly until they’re about 75% melted. Remove from heat (the residual heat will finish melting them) and stir in the vanilla extract. Now add your orange gel food coloring—start with about 10 drops and stir. You want a vibrant orange, but remember the coating will add more color later. Add the Rice Krispies cereal and stir until everything is evenly coated. Work quickly here, but don’t rush so much that you crush all the cereal.
Step 3: Cool and Shape
Pour the mixture into your prepared 9×13 dish and let it cool for about 5 minutes. It needs to be cool enough to handle but still warm enough to shape. Scoop out about 2 tablespoons of the mixture and roll it into a ball between your lightly greased palms. You should get about 20-24 balls depending on size. Place each ball on your parchment-lined baking sheet. Don’t worry if they’re not perfectly round—pumpkins aren’t perfect spheres anyway.
Step 4: Chill the Balls
Pop the baking sheet into the refrigerator for at least 30 minutes. This step is crucial—if the balls aren’t cold when you dip them, they’ll fall apart in the warm candy coating. I learned this the hard way when I tried to rush the process and ended up with orange marshmallow soup instead of pumpkins.
Step 5: Prepare the Orange Coating
While the balls are chilling, melt your white candy melts according to package directions. I usually microwave them in 30-second bursts, stirring between each, until smooth. Stir in the coconut oil or shortening until fully combined. Add orange gel food coloring until you get your desired shade. You want it a little darker than you think because it’ll lighten slightly as it sets.
Step 6: Dip the Pumpkins
Remove the chilled balls from the refrigerator. Using a fork or dipping tool, gently lower each ball into the orange coating. Turn it to coat completely, then lift it out and let the excess drip off. Place it back on the parchment paper. While the coating is still wet, gently press a mini pretzel twist into the top for the stem. Work quickly here—the coating sets fast.
Step 7: Add Details (Optional)
If you want to add little green leaves, melt a small amount of green candy melts and pipe a tiny leaf shape next to the pretzel stem. Or skip it—the pretzel alone looks adorable. Let the pumpkins set completely at room temperature or pop them back in the fridge for 10 minutes to speed things up.
Cooking Tips & Techniques
Here’s the thing about Rice Krispie treats—they’re simple, but they have their quirks. I’ve made probably fifty batches of these over the years, and I’ve made every mistake in the book so you don’t have to.
Don’t Overheat the Marshmallows. This is the number one mistake I see people make. If you overheat the marshmallows, they’ll become tough and rubbery. You want them just melted—still slightly lumpy when you take them off the heat. The residual heat will finish the job. I once walked away from the pot for “just a second” and came back to a marshmallow disaster that could have been used as construction adhesive.
Work Quickly but Gently. When you’re mixing the cereal into the marshmallow, you want to fold it in gently. If you stir too aggressively, you’ll crush the cereal and end up with dense, hard treats instead of light, crispy ones. Think of it like folding in whipped cream—gentle, sweeping motions.
The Temperature Trick. If your Rice Krispie mixture is too sticky to shape, let it cool a few more minutes. If it’s too firm and crumbly, you either overcooked the marshmallows or didn’t use enough. For a rescue fix, melt a tablespoon of butter and stir it in—it’ll help bind everything back together.
Timing is Everything. I like to make the Rice Krispie base the night before and chill the balls overnight. Then the next day, I do the dipping and decorating. This breaks the process into manageable chunks and makes it way less stressful, especially if you’re making these with kids or for a big event.
Consistency Check. Your coating should be thin enough to drip off easily but thick enough to coat completely. If it’s too thick, add more coconut oil. If it’s too thin, let it sit for a minute to thicken slightly. You’re looking for the consistency of warm honey.
Variations & Adaptations
Once you’ve mastered the basic pumpkin, the possibilities are endless. Here are some of my favorite variations:
Chocolate Pumpkins
Swap the white candy melts for orange-tinted milk chocolate or dark chocolate. The combination of chocolate and marshmallow is classic for a reason. I made a batch of these for a Halloween party and they disappeared faster than the traditional ones.
Jack-o’-Lantern Faces
Before the coating sets completely, use a toothpick or small piping tip to create little Jack-o’-lantern faces. You can also pipe on faces using black frosting or melted dark chocolate. My kids love this version—they each get to design their own pumpkin face.
Gluten-Free Version
Use certified gluten-free crispy rice cereal and ensure your marshmallows are gluten-free (most are, but check the label). Everything else in the recipe is naturally gluten-free. These are always a hit at parties where multiple dietary restrictions need to be accommodated.
Spiced Pumpkin Version
Add 1 teaspoon of pumpkin pie spice to the marshmallow mixture before adding the cereal. The warm spices complement the sweetness beautifully and make these feel even more festive. I tried this on a whim one year and now it’s my secret weapon for fall gatherings.
Mini Pumpkin Bites
Instead of 2-tablespoon balls, make teaspoon-sized mini pumpkins. They’re perfect for snack bags or as cupcake toppers. Just reduce the dipping time since they’re smaller—they’ll set faster too.
Serving & Storage Suggestions
These little pumpkins are best served at room temperature. The coating stays firm but not hard, and the Rice Krispie center stays perfectly chewy. If you serve them straight from the fridge, the coating might be a bit too firm and the marshmallow center will be less tender.
For a Halloween party spread, arrange them on a platter with some cozy campfire banana s’mores boats for a fun dessert table that covers all the bases. They also pair beautifully with a warm mug of apple cider or hot chocolate.
Storage Instructions: Store these in an airtight container at room temperature for up to 5 days. Layer them between sheets of parchment paper so the coating doesn’t stick together. Do not refrigerate them long-term—the refrigerator will make the Rice Krispie center hard and stale.
Freezer Instructions: You can freeze the undipped Rice Krispie balls for up to 3 months. Just wrap them tightly in plastic wrap and place them in a freezer bag. When you’re ready to use them, thaw them in the refrigerator overnight, then dip and decorate as directed. The dipped and decorated pumpkins don’t freeze as well—the coating can develop condensation and lose its shine.
Make-Ahead Tips: These are perfect for making ahead. I often make the Rice Krispie balls a week in advance and freeze them. Then the day before my event, I thaw, dip, and decorate. The coating stays beautiful for 2-3 days after dipping, so you can even dip them a day ahead.
Nutritional Information & Benefits
Let’s be real—these are a treat, not a health food. But here’s what you’re looking at per pumpkin (based on 24 servings):
- Calories: Approximately 180-200 per pumpkin
- Fat: 8-10g (mostly from the butter and candy coating)
- Carbohydrates: 28-32g
- Sugar: 18-22g
- Protein: 1-2g
- Sodium: 120-150mg
While these aren’t exactly a health food, they do have a couple of redeeming qualities. Rice Krispies are fortified with iron and B vitamins, so you’re getting a tiny nutritional boost. And if you use dark chocolate for the coating instead of white chocolate, you’ll get some antioxidants. But honestly? These are about joy, not nutrition. They’re about making memories with your kids and sharing something special with the people you love.
Dietary Considerations: These contain gluten (unless you use certified gluten-free cereal), dairy (unless you use dairy-free substitutes), and are not suitable for vegans (unless you use vegan marshmallows and dairy-free chocolate). They are nut-free, which makes them a good option for school parties where nut allergies are a concern.
Conclusion
These Easy Halloween Rice Krispie Treat Pumpkins are everything I want in a holiday recipe—simple, adorable, and absolutely delicious. They’re the kind of treat that makes people light up when they see them, and even better when they take that first bite and get that perfect combination of crunchy, chewy, and sweet.
I love that this recipe is forgiving enough for beginners but impressive enough to serve at any Halloween gathering. Whether you’re making them for a school party, a neighborhood get-together, or just a fun afternoon with your kids, these pumpkins deliver every single time. And honestly? There’s something deeply satisfying about creating something so festive with your own two hands.
So go ahead—grab your ingredients, get the kids involved, and make some memories. And when you do, I’d love to hear about it. Drop a comment below and tell me how your pumpkins turned out, or share your own creative twist on the recipe. Did you add sprinkles? Make them into ghosts instead? I want to know! And if you’re looking for more easy no-bake treats, check out these easy no-bake peanut butter chocolate protein energy balls for a healthier twist on the same concept.
Happy Halloween, friends. May your kitchen be messy, your pumpkins be perfect, and your candy bowl always be full.
Frequently Asked Questions
Can I use regular food coloring instead of gel?
You can, but I don’t recommend it. Liquid food coloring will make the marshmallow mixture too wet and can affect the texture of both the Rice Krispie base and the coating. Gel food coloring gives you vibrant color without adding extra liquid. If you only have liquid, use it sparingly and expect a slightly different texture.
Why did my Rice Krispie mixture turn out hard?
This usually happens when the marshmallows are overheated. When marshmallows get too hot, the sugar crystallizes and the mixture becomes tough and hard. Next time, melt the marshmallows on low heat and remove them from the heat when they’re about 75% melted. The residual heat will finish the job.
Can I make these without the candy coating?
Absolutely! The Rice Krispie balls themselves are delicious on their own. You can skip the coating and just press a pretzel stem into the top of each ball. They won’t look as polished, but they’ll taste just as good. Or dust them with powdered sugar for a snowy pumpkin effect.
How far in advance can I make these?
You can make the Rice Krispie balls up to a week ahead and freeze them. The fully decorated pumpkins are best within 2-3 days of dipping. The coating can start to soften or develop a slightly sticky texture after that, especially in humid weather.
Can I use a different cereal?
Yes! Cocoa Krispies make chocolate pumpkins, Fruity Pebbles give a fun fruity flavor and color, and even puffed rice cereal works in a pinch. Just keep in mind that different cereals have different textures and absorption rates, so you might need to adjust the marshmallow-to-cereal ratio slightly.
And if you’re in the mood for more easy, crowd-pleasing treats, don’t miss these savory brown butter salted chocolate chip cookies—they’re the perfect companion to your pumpkin-themed dessert table.
Pin This Recipe!
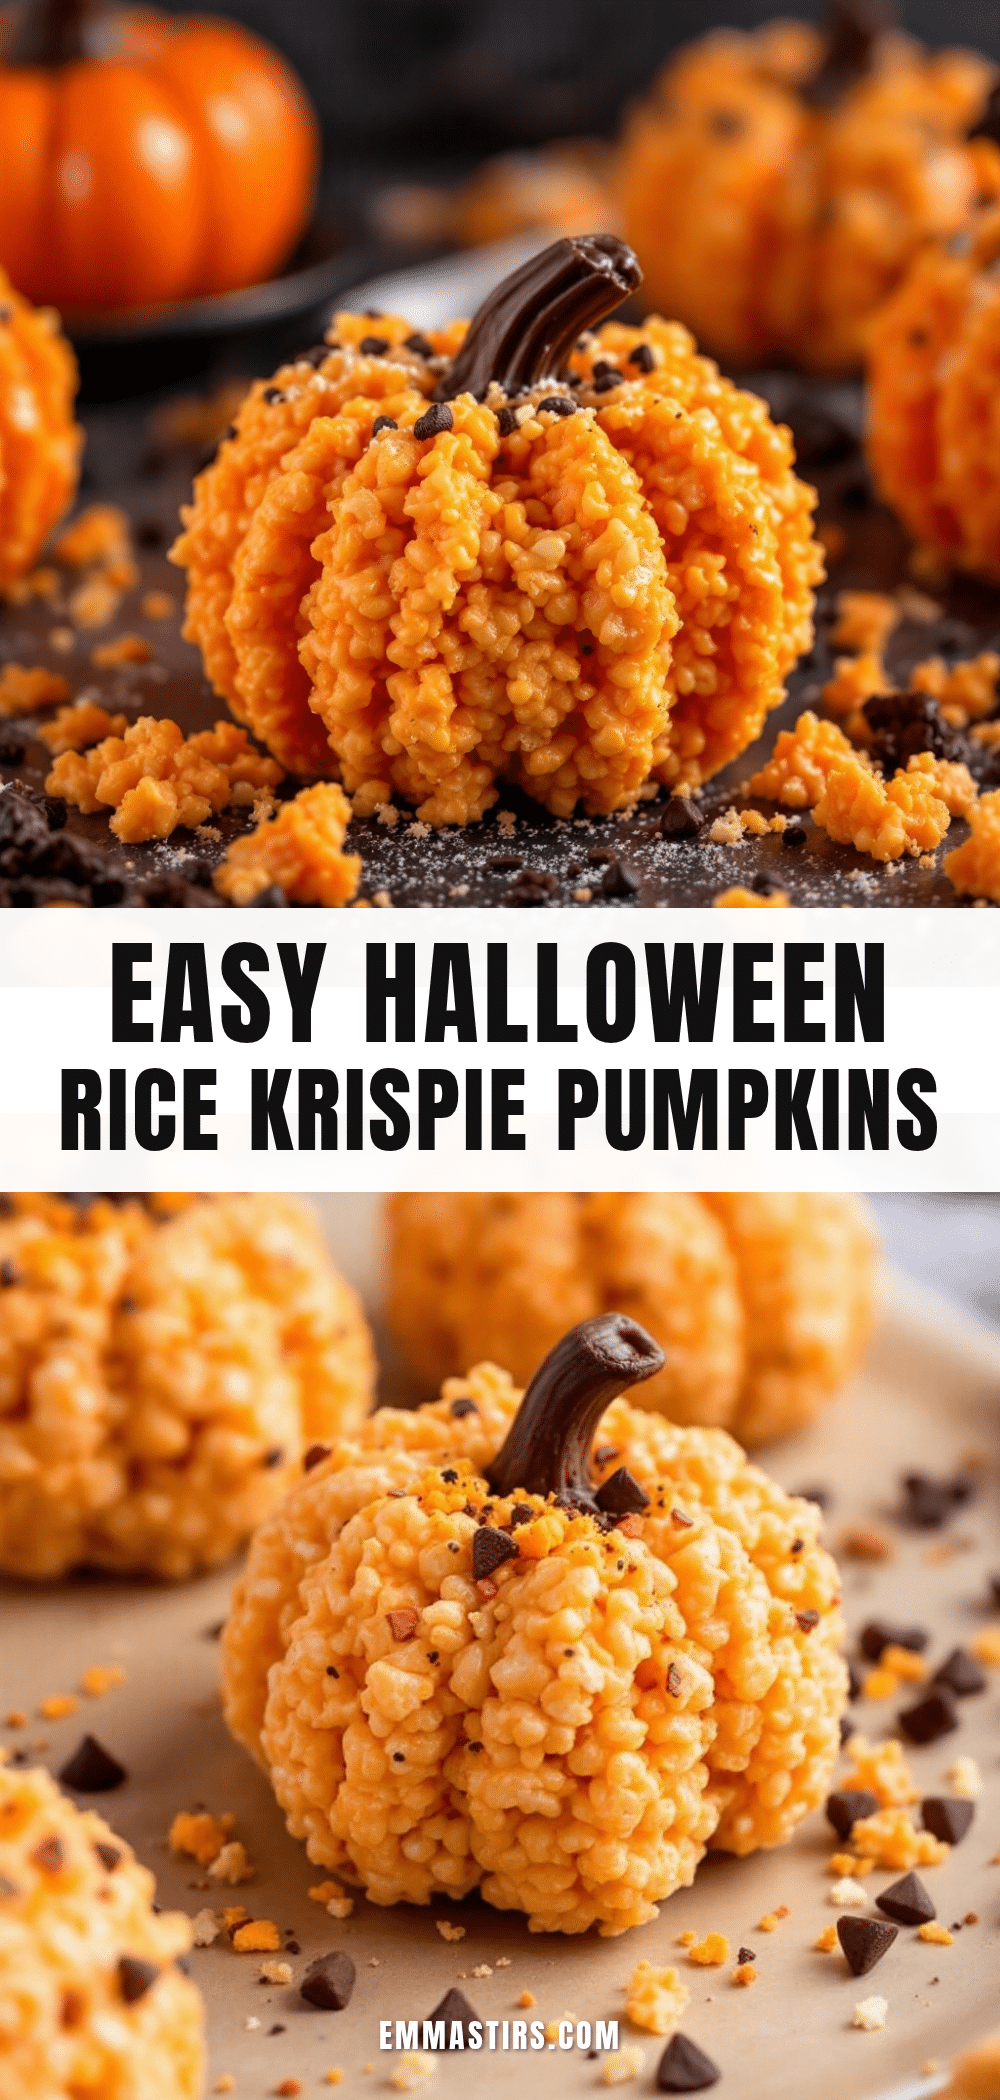
Easy Halloween Rice Krispie Treat Pumpkins: Best No-Bake Recipe
These no-bake Rice Krispie Treat Pumpkins are shaped into adorable little pumpkins, coated in a thin layer of orange candy coating, and finished with a tiny pretzel stem. They’re quick, kid-friendly, and perfect for Halloween parties.
- Prep Time: 15 minutes
- Cook Time: 5 minutes
- Total Time: 20 minutes (plus 30 minutes chilling)
- Yield: 20-24 servings 1x
- Category: Dessert
- Cuisine: American
Ingredients
- 6 cups Rice Krispies cereal
- 1 (10 oz) bag mini marshmallows (about 4 cups)
- 3 tablespoons unsalted butter
- 1 teaspoon vanilla extract (optional)
- Orange gel food coloring
- 1 (10 oz) bag white candy melts or white chocolate chips
- 1 tablespoon coconut oil or vegetable shortening
- Mini pretzel twists (about 24)
- Green candy melts or green frosting (optional, for leaves)
Instructions
- Line a baking sheet with parchment paper. Grease your hands lightly with butter or cooking spray.
- In a large pot over medium-low heat, melt the butter completely. Add the mini marshmallows and stir constantly until about 75% melted. Remove from heat and stir in vanilla extract. Add orange gel food coloring (start with about 10 drops) and stir until vibrant orange. Add Rice Krispies cereal and stir until evenly coated.
- Pour the mixture into a 9×13 inch dish and let cool for about 5 minutes. Scoop about 2 tablespoons of the mixture and roll into a ball between greased palms. Repeat to make 20-24 balls. Place on the prepared baking sheet.
- Refrigerate the balls for at least 30 minutes until firm.
- While the balls chill, melt the white candy melts in a microwave-safe bowl in 30-second bursts, stirring between each, until smooth. Stir in coconut oil or shortening and orange gel food coloring until desired shade is reached.
- Remove the chilled balls from the refrigerator. Using a fork or dipping tool, dip each ball into the orange coating, turning to coat completely. Let excess drip off, then place back on the parchment paper. While the coating is still wet, press a mini pretzel twist into the top for the stem.
- If desired, melt green candy melts and pipe a small leaf shape next to the pretzel stem. Let the pumpkins set completely at room temperature or refrigerate for 10 minutes to speed up setting.
Notes
Don’t overheat the marshmallows or they’ll become tough. Work quickly but gently when mixing. For best results, chill the Rice Krispie balls overnight before dipping. The coating should be the consistency of warm honey. Store in an airtight container at room temperature for up to 5 days.
Nutrition
- Serving Size: 1 pumpkin
- Calories: 180200
- Sugar: 1822
- Sodium: 120150
- Fat: 810
- Saturated Fat: 57
- Carbohydrates: 2832
- Protein: 12
Keywords: Halloween, Rice Krispie treats, no-bake, pumpkin, kid-friendly, party treat


