Love this? Save it for later!
Share the inspiration with your friends
I was staring at a bag of candy corn in the grocery aisle last September, thinking about how much I love the flavor but how I rarely eat it straight from the bag anymore. It’s too sweet on its own, you know? But the idea of that creamy vanilla-butterscotch taste in a soft cookie bar? That felt different. I wanted something that actually tasted like fall but didn’t require rolling out dough or chilling anything for hours. For a while, I just accepted that most holiday treats meant a lot of fussing in the kitchen. Then this recipe happened, and honestly, it solved a problem I didn’t even know I had. These bars give you that nostalgic candy corn flavor in a form you can actually enjoy—soft, buttery, and perfectly balanced with a little salt. No complicated steps, no fancy equipment. Just a simple bar that tastes like the best part of autumn.
Why You’ll Love This Recipe
These candy corn sugar cookie bars are the kind of treat that makes people stop mid-conversation and ask for the recipe. I’ve tested this one at three different fall gatherings and watched them disappear every single time. Here’s what makes them stand out:
- Quick & Easy: From start to finish, you’re looking at about 30 minutes of hands-on time. No chilling, no rolling, no fuss.
- Simple Ingredients: You probably have most of this in your pantry right now. Butter, sugar, flour, eggs—the basics.
- Perfect for Fall Gatherings: These bars are ideal for Halloween parties, Thanksgiving dessert tables, or cozy movie nights when you want something festive without the stress.
- Crowd-Pleaser: Kids love the candy corn topping, and adults appreciate that it’s not cloyingly sweet. The buttery cookie base balances everything out.
- Unbelievably Delicious: The texture is soft and tender with slightly crisp edges. The candy corn gets a little chewy as it bakes, which creates this amazing contrast with the cookie bar.
What makes these different from every other sugar cookie bar recipe out there is the technique. I blend the butter and sugars until they’re light and fluffy—not just combined—which gives the bars that bakery-style texture. And I add a tiny pinch of salt on top before baking. It sounds simple, but it makes the candy corn flavor pop in a way that feels intentional, not accidental.
This is the kind of recipe that makes you look forward to fall baking season. It’s comfort in bar form, and it comes together without any drama. Perfect for when you want to impress people but also want to keep your sanity.
What Ingredients You Will Need
This recipe uses simple, pantry-friendly ingredients to create something that tastes way more complicated than it actually is. Every ingredient has a job, and together they make magic.
- Unsalted butter, softened (1 cup / 2 sticks) — Use good quality butter here. It’s the backbone of the flavor. I prefer Kerrygold for its richness, but any unsalted butter works.
- Granulated sugar (1 cup / 200g) — Adds sweetness and helps create those slightly crisp edges.
- Light brown sugar, packed (1/2 cup / 100g) — This is my secret ingredient. The molasses in brown sugar adds depth and keeps the bars soft and chewy.
- Large eggs (2, room temperature) — Room temperature eggs incorporate more easily into the butter mixture, creating a smoother batter.
- Vanilla extract (2 teaspoons) — Pure vanilla makes a difference here. Skip the imitation stuff for this one.
- All-purpose flour (2 1/2 cups / 312g) — Spoon and level your flour. Scooping directly from the bag packs in too much flour and makes the bars dry.
- Baking soda (1 teaspoon) — Helps the bars rise just enough to stay tender.
- Salt (1/2 teaspoon, plus extra for sprinkling) — Salt balances the sweetness and enhances the candy corn flavor.
- Candy corn (1 1/2 cups / about 225g) — The star of the show. Use fresh candy corn for best results. Stale candy corn gets hard and doesn’t soften properly during baking.
- Optional: Powdered sugar (for dusting) — Adds a pretty finish, but totally optional.
Ingredient Tips: If you’re in a pinch, salted butter works—just reduce the added salt to 1/4 teaspoon. For a gluten-free version, swap the all-purpose flour with a good 1:1 gluten-free baking flour blend. I’ve tested this with Bob’s Red Mill 1:1 and it worked beautifully. Just don’t overmix the batter if you go that route.
Fresh candy corn is key here. If your candy corn feels hard and crunchy before baking, it won’t soften enough in the oven. Look for bags that feel slightly pliable when you squeeze them through the packaging. That’s how you know they’re fresh.
Equipment Needed
You don’t need a lot of fancy tools for this recipe, which is exactly how I like it. Here’s what you’ll need:
- 9×13-inch baking pan — Metal pans work best for even browning. Glass pans work too, but you might need to add a few minutes to the baking time.
- Electric hand mixer or stand mixer — You can cream the butter and sugar by hand, but a mixer makes it much easier and gives you a lighter texture.
- Parchment paper — Line your pan with parchment paper, leaving some overhang on the sides. This makes lifting the bars out so much easier.
- Mixing bowls — One large, one medium.
- Rubber spatula — For folding in the candy corn without crushing it.
- Measuring cups and spoons — I recommend using a kitchen scale for the flour if you have one. It’s more accurate.
- Cooling rack — Helps the bars cool evenly so the edges don’t get soggy.
Budget-Friendly Tip: If you don’t have parchment paper, you can grease the pan thoroughly with butter or non-stick spray. Just run a knife around the edges before lifting the bars out. It’s not as neat, but it works.
Preparation Method
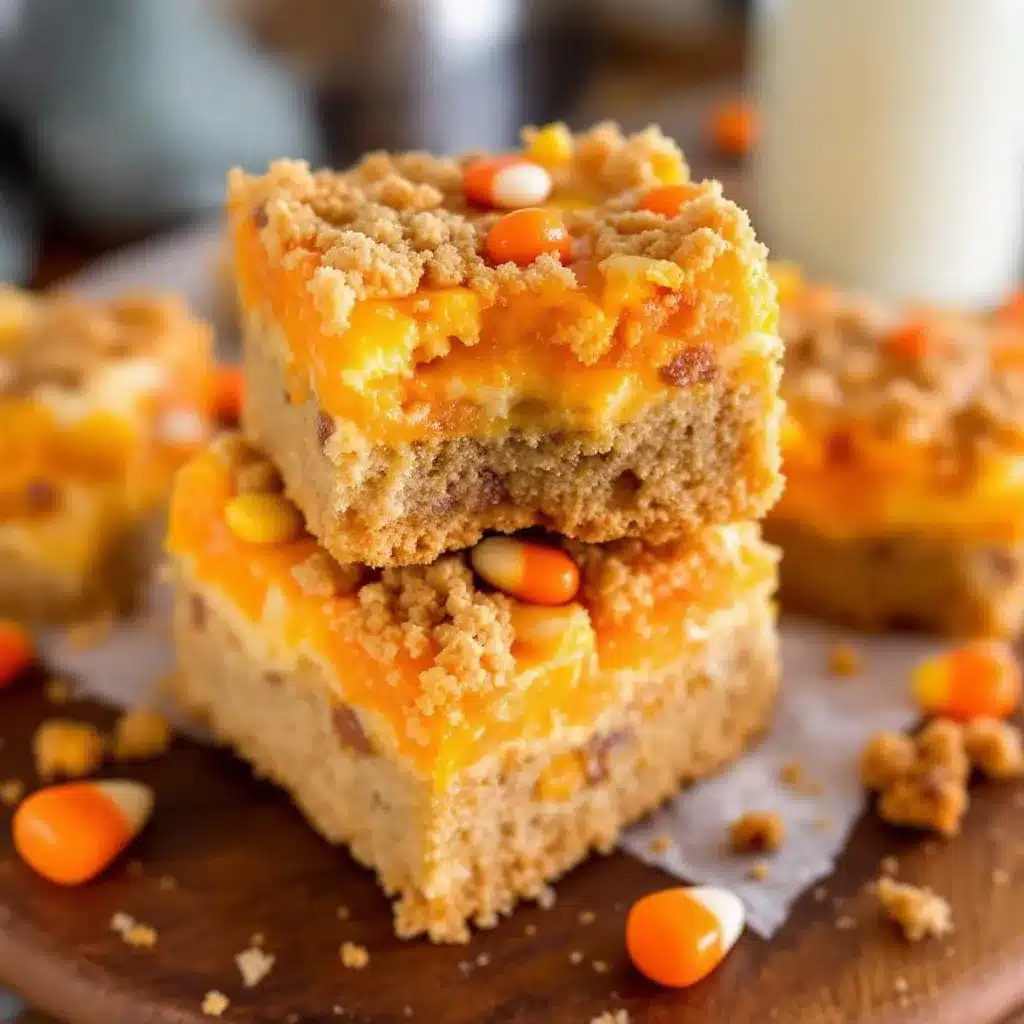
Let me walk you through this step by step. I’ve made these bars at least a dozen times, so I’ve learned a few things along the way.
- Preheat and Prep: Preheat your oven to 350°F (175°C). Line your 9×13-inch baking pan with parchment paper, leaving about 2 inches of overhang on the long sides. This creates little handles for lifting the bars out later.
- Cream the Butter and Sugars: In a large mixing bowl, beat the softened butter, granulated sugar, and brown sugar together on medium speed until light and fluffy—about 3 to 4 minutes. Don’t rush this step. You want the mixture to look pale and airy. Scrape down the sides of the bowl halfway through.
- Add the Eggs and Vanilla: Add the eggs one at a time, beating well after each addition. Then add the vanilla extract and beat until combined. The mixture should look smooth and glossy at this point. If it looks separated, your butter might have been too soft. Don’t panic—just keep mixing and it will come together.
- Combine the Dry Ingredients: In a separate medium bowl, whisk together the flour, baking soda, and salt. Whisking aerates the flour and distributes the leavening agents evenly. You don’t want a pocket of baking soda in one bite of your bar.
- Mix the Dry into the Wet: Gradually add the dry ingredients to the wet mixture, mixing on low speed just until combined. Overmixing at this stage develops gluten and makes the bars tough. Stop as soon as you don’t see any more streaks of flour. The dough will be thick and slightly sticky—that’s exactly what you want.
- Fold in the Candy Corn: Using a rubber spatula, gently fold in 1 cup of the candy corn. Reserve the remaining 1/2 cup for the top. Be gentle here. You want the candy corn distributed throughout the dough, not crushed into little pieces.
- Press into the Pan: Transfer the dough to your prepared pan. Using slightly damp fingers (this prevents sticking), press the dough evenly into the pan. Take your time with this step to make sure the layer is uniform. An uneven layer means some bars will be thicker than others, and they won’t bake evenly.
- Top with Remaining Candy Corn: Sprinkle the reserved 1/2 cup of candy corn over the top, pressing them in gently so they stick. Don’t bury them completely—you want them visible for that festive look.
- Bake: Bake for 20 to 25 minutes, or until the edges are golden brown and the center looks set and slightly puffed. A toothpick inserted into the center should come out clean or with a few moist crumbs. If the toothpick has wet batter on it, give it another 2 to 3 minutes. Every oven runs a little differently, so start checking at 20 minutes.
- Cool Completely: Place the pan on a cooling rack and let the bars cool completely in the pan—about 1 to 2 hours. This is crucial. If you try to cut them while they’re warm, they’ll crumble and fall apart. Trust me, I learned this the hard way the first time I made these.
- Slice and Serve: Once completely cool, use the parchment paper handles to lift the entire block of bars out of the pan. Place it on a cutting board and slice into squares. I usually cut 24 bars (6 rows by 4 rows), but you can make them bigger or smaller depending on your crowd.
Sensory Cue: When the bars are done, your kitchen will smell like butter and vanilla with a hint of that candy corn sweetness. The edges should be visibly golden, and the center should feel firm but spring back slightly when you touch it.
Cooking Tips & Techniques
I’ve made these bars enough times to know where things can go wrong. Here’s what I’ve learned so you don’t have to make the same mistakes.
Room Temperature Ingredients Matter: Cold eggs can seize the butter mixture and make your batter lumpy. Leave your eggs on the counter for 30 minutes before starting. Same goes for the butter—it should be soft enough that your finger leaves an indent when you press it, but not so soft that it’s greasy or melted.
Don’t Overbake: This is the number one mistake people make with cookie bars. They look underdone in the center when you pull them out, but they continue to cook from the residual heat of the pan. Overbaked bars turn out dry and crumbly. Pull them out when the center is just set and the edges are golden. You want that soft, tender texture.
Use Fresh Candy Corn: I cannot stress this enough. Candy corn that’s been sitting in your pantry since last Halloween will be rock hard and won’t soften during baking. Buy a fresh bag for this recipe. Your bars will thank you.
Press the Dough Evenly: I use damp fingers to press the dough into the pan. The moisture keeps the dough from sticking to your hands, and it’s way easier than using a spatula. Just wet your fingers, shake off the excess, and press away.
Let Them Cool: I know it’s tempting to cut into warm bars, but resist the urge. Warm bars are fragile and will fall apart. Patience pays off here. If you’re in a hurry, pop the pan in the fridge for 30 minutes after they’ve cooled to room temperature. That firms them up enough to slice cleanly.
My Biggest Mistake: The first time I made these, I used old candy corn and the bars turned out with these hard, crunchy bits that were almost inedible. I was so disappointed. Now I always buy a fresh bag specifically for this recipe, and the difference is night and day.
Variations & Adaptations
One of the best things about this recipe is how adaptable it is. Here are some variations I’ve tried and loved:
Chocolate Drizzle: Melt 1/2 cup of semi-sweet chocolate chips with 1 teaspoon of coconut oil and drizzle it over the cooled bars. The chocolate adds a richness that pairs beautifully with the candy corn. This is my husband’s favorite version.
Fall Spice Twist: Add 1 teaspoon of pumpkin pie spice to the flour mixture. It gives the bars a warm, cozy flavor that feels even more autumnal. I did this for a Friendsgiving gathering and people couldn’t stop talking about it.
Gluten-Free Version: Substitute the all-purpose flour with a 1:1 gluten-free baking flour blend. I’ve tested this with King Arthur Measure for Measure and Bob’s Red Mill 1:1, and both worked great. Just don’t overmix the batter, and let the bars cool completely before slicing.
Dairy-Free Option: Use vegan butter sticks (like Miyoko’s or Country Crock Plant Butter) in place of regular butter. The texture will be slightly different—a bit more tender—but still delicious. Make sure your candy corn is dairy-free too (most brands are, but check the label).
Different Candy Corn Varieties: Try using autumn mix candy corn (the ones with the brown tips) or even candy pumpkins for a fun twist. The brown-tipped ones add a subtle caramel flavor that’s really nice.
Personal Variation: My favorite version includes a sprinkle of flaky sea salt on top right after they come out of the oven. That salty-sweet combination is absolutely addictive. It’s a small change, but it makes these bars feel fancy enough for a holiday dessert table.
Serving & Storage Suggestions
These bars are incredibly versatile when it comes to serving. Here’s how I like to do it:
Serving Temperature: Serve these bars at room temperature for the best texture. The cookie base stays soft and tender, and the candy corn has that perfect chewy bite. If you’ve refrigerated them, let them sit out for about 20 minutes before serving.
Presentation Ideas: Arrange the bars on a white platter or cake stand for a beautiful fall display. Dust them with a light sprinkle of powdered sugar just before serving for an extra touch. For Halloween parties, I like to arrange them on a tray with mini pumpkins and fall leaves scattered around. It looks festive without being over the top.
Perfect Pairings: These bars are wonderful with a glass of cold milk, a hot cup of apple cider, or a pumpkin spice latte. For an adult option, they pair surprisingly well with a dark stout beer or a bourbon cocktail. The sweetness of the bars balances the bitterness of the drink beautifully.
Storage Instructions: Store leftover bars in an airtight container at room temperature for up to 5 days. Layer them between sheets of parchment paper to prevent sticking. Do not refrigerate them—the cold air will dry out the cookie base and make the candy corn hard.
Freezing Instructions: These bars freeze beautifully. Wrap individual bars in plastic wrap, then place them in a freezer-safe bag or container. They’ll keep for up to 3 months. To thaw, simply leave them at room temperature for about 30 minutes. I always keep a stash in the freezer for unexpected guests or late-night cravings.
Flavor Development: Honestly, these bars taste even better the day after you make them. The flavors meld together overnight, and the texture becomes even more tender. If you can resist eating them all on day one, you’re in for a treat on day two.
Nutritional Information & Benefits
Let’s be real—these are a treat, not a health food. But here’s the estimated nutritional breakdown for one bar (based on 24 servings):
- Calories: Approximately 210
- Fat: 9g
- Carbohydrates: 30g
- Protein: 2g
- Sugar: 20g
- Sodium: 120mg
Dietary Considerations: This recipe contains dairy, eggs, and gluten. For dairy-free and gluten-free options, see the variations section above. Candy corn is typically gluten-free, but always check the label if you have celiac disease or a severe gluten sensitivity.
Health Perspective: I believe in balance. These bars are meant to be enjoyed in moderation as part of a well-rounded diet. They’re perfect for special occasions when you want something indulgent and fun. Pair them with a protein-rich meal or a fresh savory cottage cheese bowl for a satisfying contrast. Life is too short not to enjoy a candy corn sugar cookie bar every once in a while.
Conclusion
These easy candy corn sugar cookie bars are everything I want in a fall treat—simple to make, incredibly delicious, and just the right amount of festive. They’ve become my go-to recipe for Halloween parties, Thanksgiving dessert tables, and those cozy autumn afternoons when I want to bake something without spending hours in the kitchen.
What I love most about this recipe is how forgiving it is. You don’t need to be a professional baker to nail these bars. The ingredients are basic, the steps are straightforward, and the results are consistently amazing. Plus, they’re endlessly customizable. Add chocolate, spice them up, or keep them classic—they work every time.
I’d love to hear how these turn out for you. Did you try a variation? Did your family love them? Drop a comment below and let me know. And if you’re looking for more easy dessert ideas, check out my cozy one-bowl banana bread recipe or these savory brown butter chocolate chip cookies for more baking inspiration.
Happy baking, friends. And remember—save yourself a bar before they disappear.
Frequently Asked Questions
Can I use salted butter instead of unsalted butter?
Yes, you can. Just reduce the added salt in the recipe to 1/4 teaspoon. The bars will still turn out great, but they’ll be slightly saltier. If you like that sweet-salty combination, go for it.
Why did my candy corn turn into hard chunks after baking?
This usually happens when your candy corn is old or stale. Fresh candy corn softens and becomes chewy during baking. If your candy corn was hard before baking, it will stay hard after. Always buy a fresh bag for best results.
Can I make these bars ahead of time for a party?
Absolutely. These bars actually taste better the next day. Bake them up to two days in advance, store them in an airtight container at room temperature, and they’ll be perfect for your gathering. You can also freeze them for up to three months.
How do I cut clean squares without the bars crumbling?
Let the bars cool completely before cutting—this is the most important step. Use a sharp chef’s knife and wipe it clean between cuts. For the cleanest slices, chill the bars in the fridge for 30 minutes before cutting, then let them come back to room temperature before serving.
Can I add other mix-ins like chocolate chips or nuts?
Definitely. Try adding 1/2 cup of mini chocolate chips or chopped pecans along with the candy corn. Just be careful not to overload the dough, or the bars might not hold together well. Stick to about 1 1/2 cups total of add-ins.
Pin This Recipe!
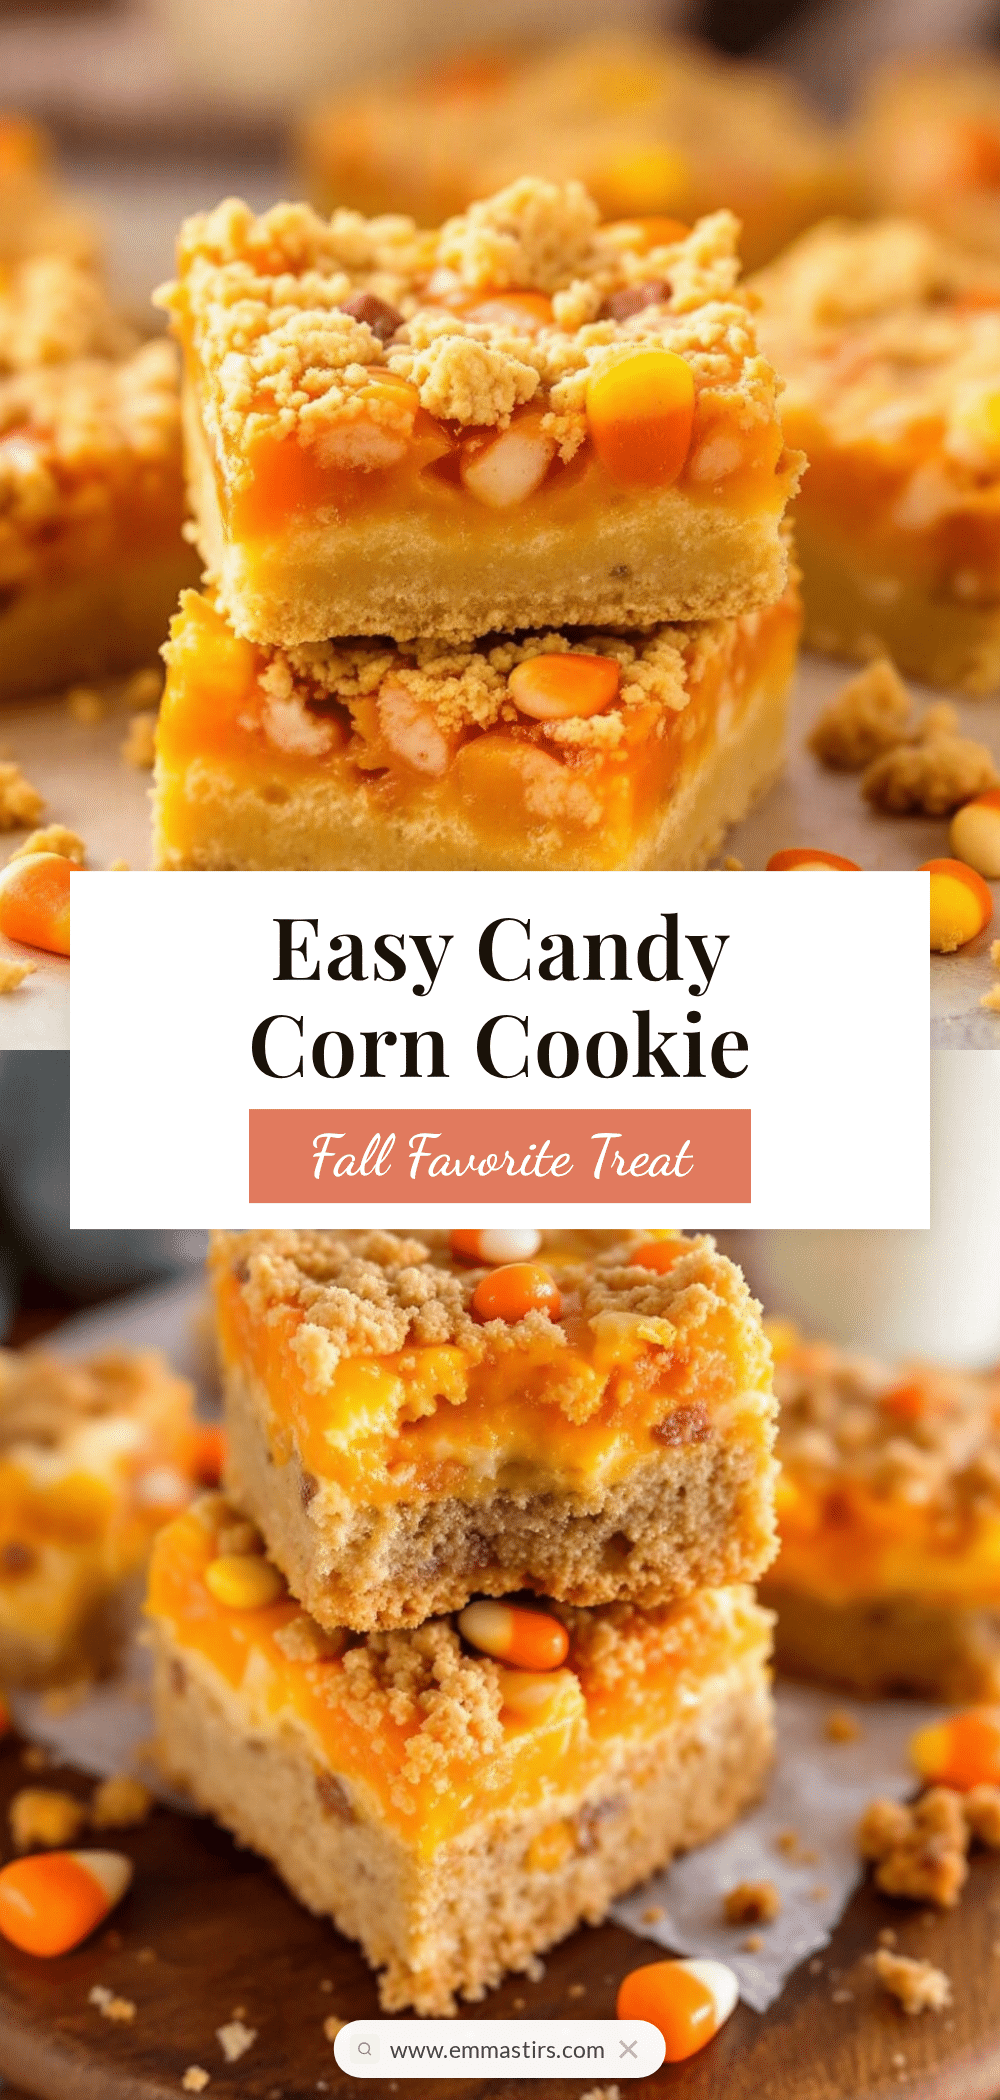
Best Easy Candy Corn Sugar Cookie Bars Recipe
These soft, buttery sugar cookie bars are loaded with candy corn for a nostalgic fall treat that comes together in about 30 minutes of hands-on time. No chilling, no rolling, and no fuss—just a simple bar that tastes like the best part of autumn.
- Prep Time: 15 minutes
- Cook Time: 25 minutes
- Total Time: 40 minutes
- Yield: 24 servings 1x
- Category: Dessert
- Cuisine: American
Ingredients
- 1 cup (2 sticks) unsalted butter, softened
- 1 cup (200g) granulated sugar
- 1/2 cup (100g) light brown sugar, packed
- 2 large eggs, room temperature
- 2 teaspoons vanilla extract
- 2 1/2 cups (312g) all-purpose flour
- 1 teaspoon baking soda
- 1/2 teaspoon salt, plus extra for sprinkling
- 1 1/2 cups (about 225g) candy corn, divided
- Optional: powdered sugar for dusting
Instructions
- Preheat your oven to 350°F (175°C). Line a 9×13-inch baking pan with parchment paper, leaving about 2 inches of overhang on the long sides.
- In a large mixing bowl, beat the softened butter, granulated sugar, and brown sugar together on medium speed until light and fluffy—about 3 to 4 minutes. Scrape down the sides of the bowl halfway through.
- Add the eggs one at a time, beating well after each addition. Then add the vanilla extract and beat until combined. The mixture should look smooth and glossy.
- In a separate medium bowl, whisk together the flour, baking soda, and salt.
- Gradually add the dry ingredients to the wet mixture, mixing on low speed just until combined. Do not overmix. The dough will be thick and slightly sticky.
- Using a rubber spatula, gently fold in 1 cup of the candy corn. Reserve the remaining 1/2 cup for the top.
- Transfer the dough to the prepared pan. Using slightly damp fingers, press the dough evenly into the pan.
- Sprinkle the reserved 1/2 cup of candy corn over the top, pressing them in gently so they stick.
- Bake for 20 to 25 minutes, or until the edges are golden brown and the center looks set and slightly puffed. A toothpick inserted into the center should come out clean or with a few moist crumbs.
- Place the pan on a cooling rack and let the bars cool completely in the pan—about 1 to 2 hours.
- Once completely cool, use the parchment paper handles to lift the entire block of bars out of the pan. Place on a cutting board and slice into squares (6 rows by 4 rows for 24 bars).
Notes
Use fresh candy corn for best results—stale candy corn will remain hard after baking. For clean slices, let bars cool completely before cutting. Bars taste even better the next day. Store in an airtight container at room temperature for up to 5 days. Freeze for up to 3 months.
Nutrition
- Serving Size: 1 bar
- Calories: 210
- Sugar: 20
- Sodium: 120
- Fat: 9
- Saturated Fat: 5
- Carbohydrates: 30
- Protein: 2
Keywords: candy corn, sugar cookie bars, fall dessert, Halloween treats, easy cookie bars, Thanksgiving dessert, cookie bars recipe


