Love this? Save it for later!
Share the inspiration with your friends
The stretch of melted mozzarella as you pull a forkful away from the pepper—that’s the whole point. Not the spooky face, not the Halloween theme, not even the savory filling inside. That single, glorious, cheese-pull moment is what I was chasing when I first made these Spooky Mummy Stuffed Bell Peppers. Everything else—the bandages, the olive eyes, the slightly ridiculous presentation—is just a really fun bonus.
I had a bag of bell peppers sitting on my counter last October, and I was staring at them, feeling that pre-Halloween pressure to make something festive. But I didn’t want another tray of cupcakes or a bowl of punch. I wanted dinner. Real, filling, comforting dinner that just happened to look like it was wrapped up for a costume party. So I grabbed a block of mozzarella, a paring knife, and decided to see if I could make a pepper look like a tiny, edible mummy.
The first attempt was a disaster. The cheese slid right off the pepper. The olive eyes kept sinking into the filling. Honestly, it looked less like a mummy and more like a sad, cheesy blob. But that second batch? The one where I let the cheese cool just enough to grip the pepper? That was the one. That stretchy, ridiculous, perfect bite made me realize that dinner and decoration don’t have to be separate things. Sometimes, you just need a little stringy cheese to bring them together.
Why You’ll Love This Recipe
I’ve tested this recipe about six times to get the cheese bandages just right. I wanted them to look spooky but also taste incredible. Here is why this version is the one you will come back to every Halloween.
- Fun for the Whole Family: Kids love helping wrap the “bandages” and placing the olive eyes. It turns dinner into a craft project.
- Simple Ingredients: You probably already have ground beef, rice, tomato sauce, and cheese in your kitchen. No weird Halloween candy needed.
- Customizable Filling: Swap the ground beef for ground turkey, add black beans, or make it vegetarian. The mummy look works with any filling you love.
- Perfect for a Halloween Party: These look impressive on a platter, but they are secretly easy to make. They are the showstopper that doesn’t stress you out.
- Actually Delicious: Beyond the cute factor, these are classic, cheesy, stuffed peppers. The flavor is comforting and familiar.
What makes these different from every other stuffed pepper recipe? It is the technique. I don’t just melt cheese on top. I wrap thin strips of mozzarella around the pepper to create the mummy look, and I broil them just long enough to get that perfect golden-brown stretch. It is a small detail, but it turns a simple dinner into a conversation piece.
This is the kind of meal that makes you smile before you even take a bite. It is Halloween fun without the sugar crash. Honestly, it is the dinner that makes your kids forget they were asking for candy.
What Ingredients You Will Need
This recipe uses simple, wholesome ingredients to create a filling dinner that looks like it walked out of a haunted house. Most of these are pantry staples, which makes last-minute Halloween planning a breeze.
For the Bell Peppers
- 4 large bell peppers: Pick ones that are tall and relatively straight. Yellow, orange, or red peppers work best because they contrast nicely with the white cheese bandages. Green peppers work too, but they are slightly more bitter.
For the Savory Filling
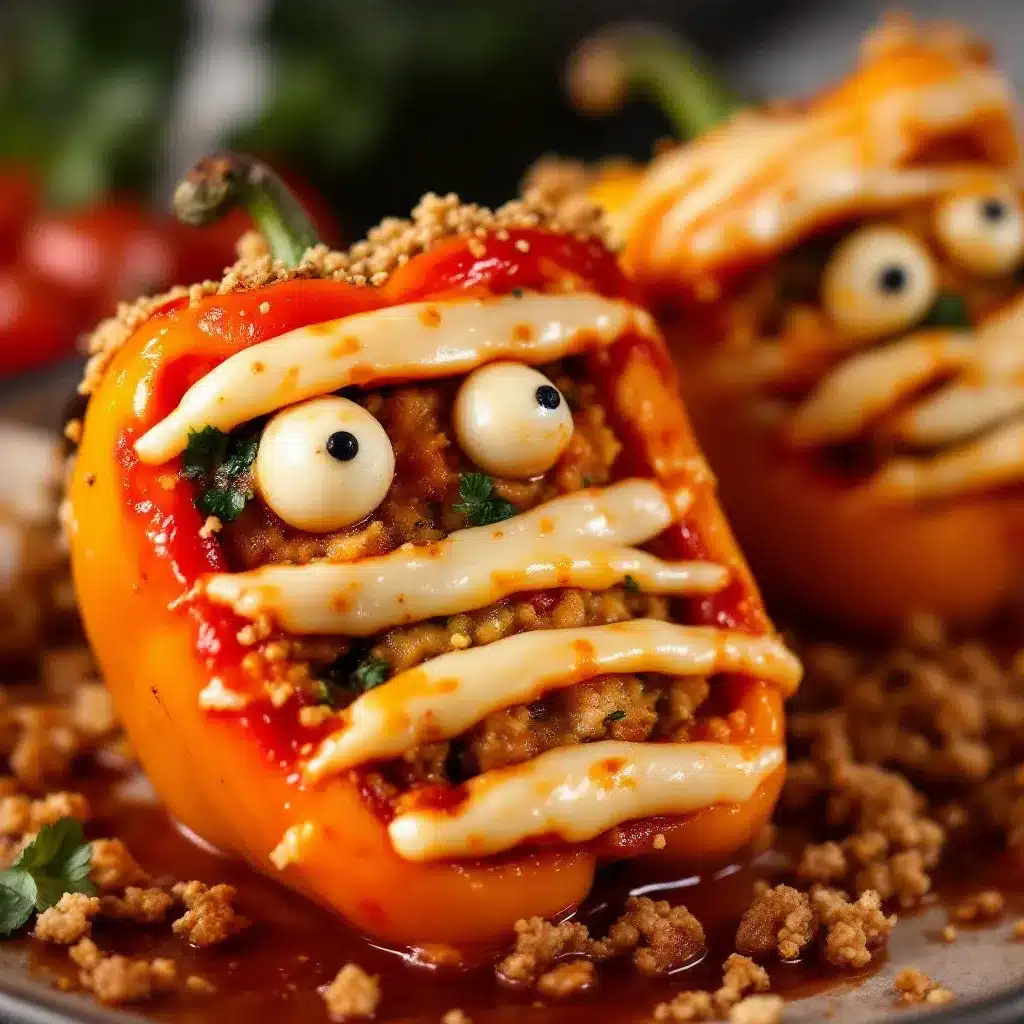
- 1 pound ground beef (85/20): The fat keeps the filling moist. You can use ground turkey or chicken, but add a tablespoon of olive oil to prevent dryness.
- 1 cup cooked white rice: Leftover rice is perfect here. Brown rice or quinoa also work great.
- 1 small yellow onion, diced: Adds sweetness and depth to the filling.
- 3 cloves garlic, minced: Because garlic makes everything better, especially on a chilly October night.
- 1 can (15 oz) tomato sauce: Use a good-quality brand like Muir Glen or Hunt’s. The sauce keeps the filling from being too dry.
- 1 teaspoon dried oregano: Adds that classic Italian-style flavor.
- 1 teaspoon smoked paprika: This gives the filling a subtle smoky depth that pairs beautifully with the cheese.
- ½ teaspoon salt: Adjust to your taste.
- ¼ teaspoon black pepper: Freshly ground is always better.
For the Mummy Wraps & Decorations
- 8 ounces low-moisture mozzarella cheese, block: Do not use pre-shredded cheese. It has anti-caking agents that prevent it from melting into that perfect, stretchy bandage. You need a block that you can slice into thin strips.
- 12-16 black olives, sliced: These become the mummy eyes. Use pitted olives so they are easy to slice.
- 2 tablespoons olive oil: For brushing the peppers before baking.
Ingredient Selection Tip: Look for bell peppers that can stand up straight on their own. If they wobble, slice a tiny bit off the bottom to create a flat surface—just don’t cut into the cavity. For the mozzarella, I recommend a block of Polly-O or Galbani. They melt evenly and don’t get rubbery.
Substitution Guidance: If you are gluten-free, use cooked quinoa instead of rice. For a dairy-free version, use a vegan mozzarella block that melts well. I have tried this with Follow Your Heart brand, and it worked surprisingly well for the bandages.
Equipment Needed
- Large skillet or frying pan: For browning the beef and sautéing the onions.
- Cutting board and sharp knife: A sharp knife makes slicing the mozzarella into thin strips much easier. Dull knives will just squish the cheese.
- Baking dish (9×13 inches): Big enough to hold all four peppers without them touching too much.
- Paring knife: For carving the mummy faces into the peppers. A small, sharp knife gives you more control.
- Small bowl: For mixing the filling ingredients.
- Aluminum foil: To cover the peppers during the first part of baking so they soften without burning.
- Broiler-safe baking dish: You will need to broil the cheese at the end, so make sure your dish can handle high heat. Glass dishes are usually not broiler-safe, so stick with ceramic or metal.
I have made these peppers using a cast-iron skillet for the filling and then transferring everything to a ceramic baking dish. The cast iron holds heat beautifully, but it is heavy. A non-stick skillet works just fine for the filling. Honestly, you don’t need any fancy equipment for this recipe. A sharp knife and a steady hand are the most important tools.
Preparation Method
Let us walk through this step by step. I have included all the little tricks I learned from my failed first batch so you can skip straight to the success.
- Preheat your oven to 375°F (190°C). Position the rack in the middle of the oven. You will also need the broiler later, so keep an eye on that setting.
- Prepare the bell peppers. Wash and dry the peppers. Using a sharp knife, cut the top off each pepper (about ½ inch from the stem). Set the tops aside—you can chop them up and add them to the filling if you want to reduce waste. Remove the seeds and white membranes from inside each pepper. If a pepper wobbles, slice a thin piece off the bottom to make it flat. Be careful not to cut into the cavity.
- Blanch the peppers (optional but recommended). Bring a large pot of water to a boil. Submerge the hollowed peppers for 3 minutes. This softens them slightly, so they cook faster and are less likely to crack. Drain them upside down on a paper towel. I skip this step when I am in a hurry, and the peppers still turn out great—they just need a few extra minutes in the oven.
- Make the filling. Heat a large skillet over medium-high heat. Add the ground beef and cook, breaking it apart with a spoon, until it is browned (about 6-8 minutes). Drain off any excess fat. Add the diced onion and cook for 3 minutes until it softens. Stir in the minced garlic and cook for 1 minute until fragrant. The smell at this point is incredible—earthy, savory, and warm.
- Season the filling. Reduce the heat to low. Stir in the cooked rice, tomato sauce, dried oregano, smoked paprika, salt, and black pepper. Mix everything together until it is well combined. Let it simmer for 2-3 minutes so the flavors meld. Taste it and adjust the salt if needed. Remove from heat.
- Stuff the peppers. Place the blanched peppers upright in your baking dish. Spoon the filling into each pepper, pressing down gently with the back of the spoon to pack it in. Fill them all the way to the top—the filling will settle slightly as it bakes. You might have a little leftover filling, which you can bake in a small ramekin alongside the peppers.
- Bake the peppers. Cover the baking dish tightly with aluminum foil. Bake for 25 minutes. This steams the peppers and heats the filling all the way through. The house will start smelling like a cozy Italian kitchen, which is the perfect pre-Halloween mood.
- Create the mummy wraps. While the peppers bake, prepare the cheese bandages. Slice the block of mozzarella into thin strips, about ¼-inch thick and 3-4 inches long. You want them thin enough to wrap easily but thick enough to hold their shape when melted. Aim for about 8-10 strips per pepper.
- Wrap the mummies. After 25 minutes, remove the peppers from the oven. Increase the oven temperature to broil (high heat). Carefully unwrap the foil. Let the peppers cool for 2-3 minutes—they will be very hot. Now, take your mozzarella strips and wrap them around each pepper, crossing them over the top like bandages. Leave a small gap near the top front for the eyes. The cheese will be raw at this point, but it will melt and fuse together under the broiler.
- Add the eyes. Place two olive slices in the gap you left on each pepper. Press them gently into the filling so they stay put. This is the moment when the peppers go from “dinner” to “adorable.”
- Broil the mummies. Place the baking dish under the broiler for 2-4 minutes. Watch it closely—cheese can go from perfectly golden to burnt in seconds. You want the mozzarella to be bubbly, lightly browned in spots, and fully melted. The bandages should look like they are clinging to the pepper.
- Rest and serve. Remove the dish from the oven and let the peppers rest for 5 minutes. This allows the cheese to set slightly so it doesn’t slide off when you serve them. The filling will also cool down to a safe eating temperature.
Sensory Cue: When you pull the peppers out from under the broiler, you should see the cheese bubbling and stretching. The edges of the mozzarella should be golden brown, and the olive eyes should look like they are peeking out from under the bandages. The smell will be rich, cheesy, and slightly smoky from the paprika.
Cooking Tips & Techniques
I learned a few hard lessons making these peppers. Let me save you the trouble.
Cheese bandages are tricky. The first time I made these, I used pre-shredded mozzarella. It melted into a blob and looked nothing like bandages. You really need a block of low-moisture mozzarella that you slice yourself. Also, do not wrap the peppers while they are piping hot from the oven. Let them cool for those 2-3 minutes. If the cheese hits a scorching hot pepper, it melts instantly and slides right off. You want it to melt slowly under the broiler, not immediately upon contact.
Keep the olive eyes in place. Olive slices are slippery little things. I lost three eyes into the bottom of my baking dish before I figured out that pressing them gently into the hot filling helps them stay put. The filling acts like glue once it cools slightly. You can also use a toothpick to secure them, but remember to remove the toothpicks before serving.
Blanch or don’t blanch. If you skip the blanching step, your peppers will be crunchier. Some people love that texture. I prefer them softer, so I always blanch. If you are short on time, just add 10 extra minutes to the covered baking time. The peppers will steam and soften in the foil-covered dish.
Multitasking is key. While the peppers are baking covered, slice your mozzarella and olives. This saves you from scrambling at the end. I also like to set up my “assembly station” near the oven so I can wrap the peppers quickly before they cool down too much.
Don’t over-broil. I once walked away for “just a second” and came back to blackened cheese. Broiling is fast and unforgiving. Stand by the oven, watch through the window, and pull them out the moment the cheese is bubbly and spotted with brown.
Variations & Adaptations
One of the best things about this recipe is how flexible it is. You can change almost everything and still end up with a cute, delicious dinner.
Vegetarian Mummies: Swap the ground beef for a can of black beans (drained and rinsed) and a cup of cooked quinoa. Add a little extra smoked paprika and some corn kernels for texture. The filling is hearty and satisfying, and the mummy look works just the same. I made this version for my vegetarian sister, and she said it was “the best thing I have ever put in a pepper.”
Spicy Mummies: Add ½ teaspoon of cayenne pepper or a diced jalapeño to the filling. You can also use pepper jack cheese for the bandages instead of mozzarella. The spicy kick contrasts beautifully with the sweet bell pepper. My husband loves this version, and he usually adds hot sauce on top.
Cheesy Mummies: Mix ½ cup of shredded cheddar or Monterey Jack into the filling before stuffing the peppers. This creates an extra layer of gooey cheese inside, so you get a surprise cheese pull when you cut into the pepper. It is decadent, but Halloween only comes once a year.
Mexican-Style Mummies: Use taco seasoning instead of oregano and paprika. Swap the tomato sauce for salsa. Top the finished peppers with a dollop of sour cream and some chopped cilantro. The flavors are bold and festive, and the presentation is still spooky.
Low-Carb Mummies: Skip the rice and double the amount of ground beef. Add finely chopped mushrooms or cauliflower rice to bulk up the filling without the carbs. This version is keto-friendly and still incredibly satisfying.
I have personally tried the vegetarian version with black beans and quinoa, and I honestly liked it just as much as the original. The beans add a creamy texture that pairs well with the bell pepper. If you are feeding a crowd with different dietary needs, you can easily make a mix of versions in the same baking dish—just use a marker on the foil to label which is which.
Serving & Storage Suggestions
These Spooky Mummy Stuffed Bell Peppers are best served warm, straight from the oven. The cheese bandages are at their stretchiest and most dramatic when they are hot. I like to serve them on a large platter with a side of extra marinara sauce for dipping. The red sauce adds a nice “bloody” touch that fits the Halloween theme perfectly.
What to serve with them: A simple side salad with a tangy vinaigrette balances the richness of the cheese and beef. You can also serve them with roasted vegetables or a crusty baguette. For a full Halloween spread, pair them with a batch of creamy cheeseburger soup for a cozy, comforting meal.
Storage: Leftover stuffed peppers keep well in the refrigerator for up to 4 days. Store them in an airtight container. The cheese bandages will soften and lose some of their stretchiness, but the flavor will still be great. In fact, the flavors meld together even more overnight, making the leftovers almost better than the fresh version.
Reheating: The best way to reheat these is in the oven at 350°F (175°C) for 10-15 minutes, covered with foil. This prevents the cheese from burning while the filling heats through. You can use the microwave in a pinch, but the cheese will be rubbery and the pepper will be soggy. If you have an air fryer, reheat them at 350°F for 5-7 minutes. The air fryer crisps up the cheese bandages beautifully.
Freezing: You can freeze the stuffed peppers before adding the cheese bandages. Assemble the peppers with the filling, wrap them tightly in plastic wrap and then foil, and freeze for up to 3 months. When you are ready to serve, thaw them in the refrigerator overnight, then bake them covered at 375°F for 30 minutes. Add the cheese bandages and olives, then broil as directed. The cheese does not freeze well once melted, so always add it fresh.
Nutritional Information & Benefits
These stuffed peppers are a surprisingly balanced meal. Each serving (one stuffed pepper) provides a good mix of protein, carbohydrates, and vegetables. Here are the estimated values for one pepper made with 85/20 ground beef and white rice:
| Nutrient | Amount per Serving |
|---|---|
| Calories | 420 |
| Protein | 32g |
| Carbohydrates | 28g |
| Fat | 18g |
| Fiber | 4g |
| Sugar | 8g |
| Sodium | 680mg |
Health Benefits: Bell peppers are an excellent source of vitamin C. One red bell pepper contains more vitamin C than an orange. They are also rich in vitamin A, which supports eye health. The ground beef provides high-quality protein and iron, while the mozzarella adds calcium for strong bones. This is a meal that satisfies your Halloween cravings without derailing your nutrition goals.
Dietary Considerations: This recipe is naturally gluten-free if you use rice or quinoa instead of breadcrumbs. It is also nut-free and egg-free. To make it dairy-free, use a vegan mozzarella block. The filling is already dairy-free, so you only need to swap the cheese bandages.
Allergen Note: This recipe contains dairy (mozzarella cheese). If you are serving guests with allergies, make sure to label the dish clearly.
Conclusion
These Spooky Mummy Stuffed Bell Peppers are more than just a Halloween gimmick. They are a genuinely delicious, comforting dinner that happens to look like it belongs in a haunted house. The combination of savory beef, tender rice, sweet bell pepper, and stretchy melted cheese is a classic for a reason. Adding the mummy face just makes it more fun to eat.
I love this recipe because it brings people together. I have made it for Halloween parties, family dinners, and even a spooky movie night. Every time, someone laughs when they see the peppers, and then they take a bite and ask for the recipe. That is the best compliment a cook can get.
I encourage you to make these your own. Swap the filling, change the cheese, or add extra spice. The mummy look is forgiving—even if your bandages are messy, they will still look adorable. If you make these, I would love to hear about it. Leave a comment below and tell me how your mummies turned out. Did your kids help wrap the bandages? Did you try a crazy variation? Share your stories, and let us make Halloween dinner something to remember.
Now go preheat that oven. Your mummies are waiting.
Frequently Asked Questions
Can I make these ahead of time for a Halloween party?
Absolutely. You can assemble the peppers completely (including the cheese bandages and olive eyes) up to 24 hours in advance. Store them covered in the refrigerator. When you are ready to serve, bake them covered at 375°F for 30 minutes, then uncover and broil for 2-4 minutes to re-crisp the cheese. This is a huge time-saver for party hosting.
Can I use ground turkey instead of beef?
Yes, ground turkey works great. Since turkey is leaner, I recommend adding a tablespoon of olive oil to the pan when browning it. You can also mix in a little grated Parmesan cheese to boost the umami flavor. The rest of the recipe stays the same.
Why did my cheese bandages slide off the pepper?
This usually happens if the pepper is too hot when you add the cheese. Let the baked peppers cool for 2-3 minutes before wrapping them. Also, make sure you are using a block of low-moisture mozzarella, not fresh mozzarella. Fresh mozzarella has too much water and will slide right off. If the cheese still slides, you can press it gently into the pepper to help it stick.
Can I use different colored bell peppers?
Yes, any color works. Red, orange, and yellow peppers are sweeter and milder. Green peppers are more vegetal and slightly bitter. For the best visual contrast with the white cheese bandages, I recommend red or orange peppers. They make the mummy look pop.
What if I don’t have a broiler?
You can still make these peppers without a broiler. After wrapping the peppers with cheese, return them to the oven at 400°F (200°C) and bake uncovered for 8-10 minutes. The cheese will melt and brown slightly, but it won’t have the same spotty char as a broiler. It will still taste delicious and look cute.
If you are looking for another fun, comforting dinner idea, try my cheesy ground beef stuffed bell peppers for a non-spooky version that is just as satisfying. And for a lighter option, this healthy grilled chicken Caesar salad pairs beautifully with the richness of the peppers.
Pin This Recipe!
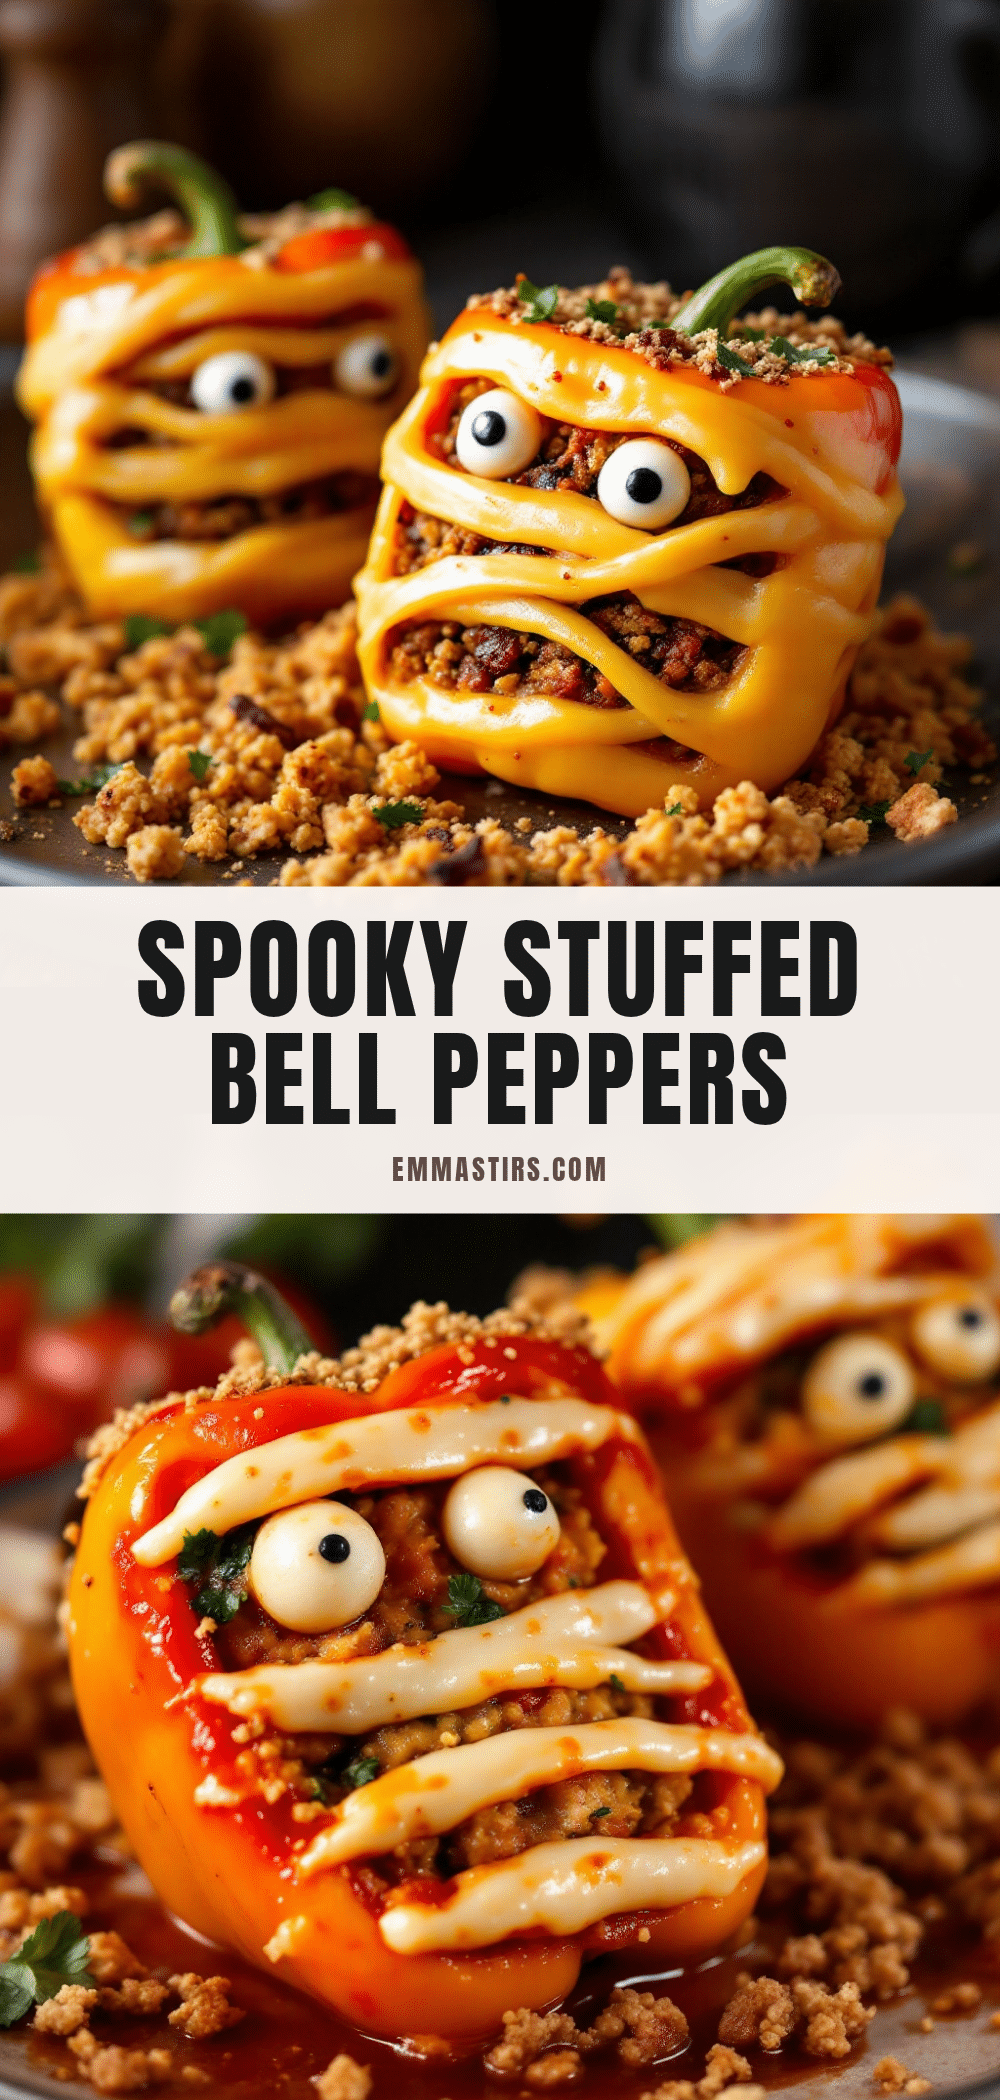
Spooky Mummy Stuffed Bell Peppers: Easy Halloween Recipe
These Spooky Mummy Stuffed Bell Peppers are a fun and delicious Halloween dinner. Bell peppers are stuffed with a savory beef and rice filling, then wrapped in mozzarella cheese bandages and baked until bubbly and golden.
- Prep Time: 20 minutes
- Cook Time: 35 minutes
- Total Time: 55 minutes
- Yield: 4 servings 1x
- Category: Main Course
- Cuisine: American
Ingredients
- 4 large bell peppers (red, orange, or yellow)
- 1 pound ground beef (85/20)
- 1 cup cooked white rice
- 1 small yellow onion, diced
- 3 cloves garlic, minced
- 1 can (15 oz) tomato sauce
- 1 teaspoon dried oregano
- 1 teaspoon smoked paprika
- ½ teaspoon salt
- ¼ teaspoon black pepper
- 8 ounces low-moisture mozzarella cheese, block
- 12–16 black olives, sliced
- 2 tablespoons olive oil
Instructions
- Preheat your oven to 375°F (190°C). Position the rack in the middle of the oven.
- Prepare the bell peppers: Wash and dry the peppers. Cut the top off each pepper (about ½ inch from the stem). Remove seeds and membranes. If a pepper wobbles, slice a thin piece off the bottom to make it flat.
- Blanch the peppers (optional but recommended): Bring a large pot of water to a boil. Submerge the hollowed peppers for 3 minutes. Drain upside down on a paper towel.
- Make the filling: Heat a large skillet over medium-high heat. Add the ground beef and cook, breaking it apart, until browned (6-8 minutes). Drain excess fat. Add diced onion and cook for 3 minutes until softened. Stir in minced garlic and cook for 1 minute.
- Season the filling: Reduce heat to low. Stir in cooked rice, tomato sauce, oregano, smoked paprika, salt, and black pepper. Simmer for 2-3 minutes. Remove from heat.
- Stuff the peppers: Place the blanched peppers upright in a baking dish. Spoon the filling into each pepper, pressing down gently. Fill to the top.
- Bake the peppers: Cover the baking dish tightly with aluminum foil. Bake for 25 minutes.
- Create the mummy wraps: While the peppers bake, slice the block of mozzarella into thin strips, about ¼-inch thick and 3-4 inches long. Aim for 8-10 strips per pepper.
- Wrap the mummies: After 25 minutes, remove the peppers from the oven. Increase oven temperature to broil (high heat). Let the peppers cool for 2-3 minutes. Wrap mozzarella strips around each pepper, crossing them over the top like bandages. Leave a small gap near the top front for the eyes.
- Add the eyes: Place two olive slices in the gap on each pepper. Press them gently into the filling.
- Broil the mummies: Place the baking dish under the broiler for 2-4 minutes, watching closely, until the cheese is bubbly and lightly browned.
- Rest and serve: Remove from the oven and let the peppers rest for 5 minutes before serving.
Notes
For best results, use a block of low-moisture mozzarella, not pre-shredded. Let the baked peppers cool slightly before adding cheese bandages to prevent them from sliding off. Press olive eyes gently into the filling to keep them in place. Watch the broiler closely to avoid burning the cheese.
Nutrition
- Serving Size: 1 stuffed pepper
- Calories: 420
- Sugar: 8
- Sodium: 680
- Fat: 18
- Saturated Fat: 8
- Carbohydrates: 28
- Fiber: 4
- Protein: 32
Keywords: Halloween, stuffed peppers, mummy, ground beef, mozzarella, easy dinner, spooky


