Love this? Save it for later!
Share the inspiration with your friends
I figured a good pumpkin scone was something you needed a pastry chef and a cold butter cutter for. It took about one fall morning of digging through my pantry for a can of pumpkin that had been hiding behind the black beans to realize that was probably overthinking it.
The thing about fall baking is that it always sounds like more work than it actually is. You picture flour everywhere, a sink full of bowls, and that moment where you question if you really needed scones at all. But this recipe? It uses one bowl. One. And the dough comes together so fast you will barely have time to preheat the oven before it is ready to go.
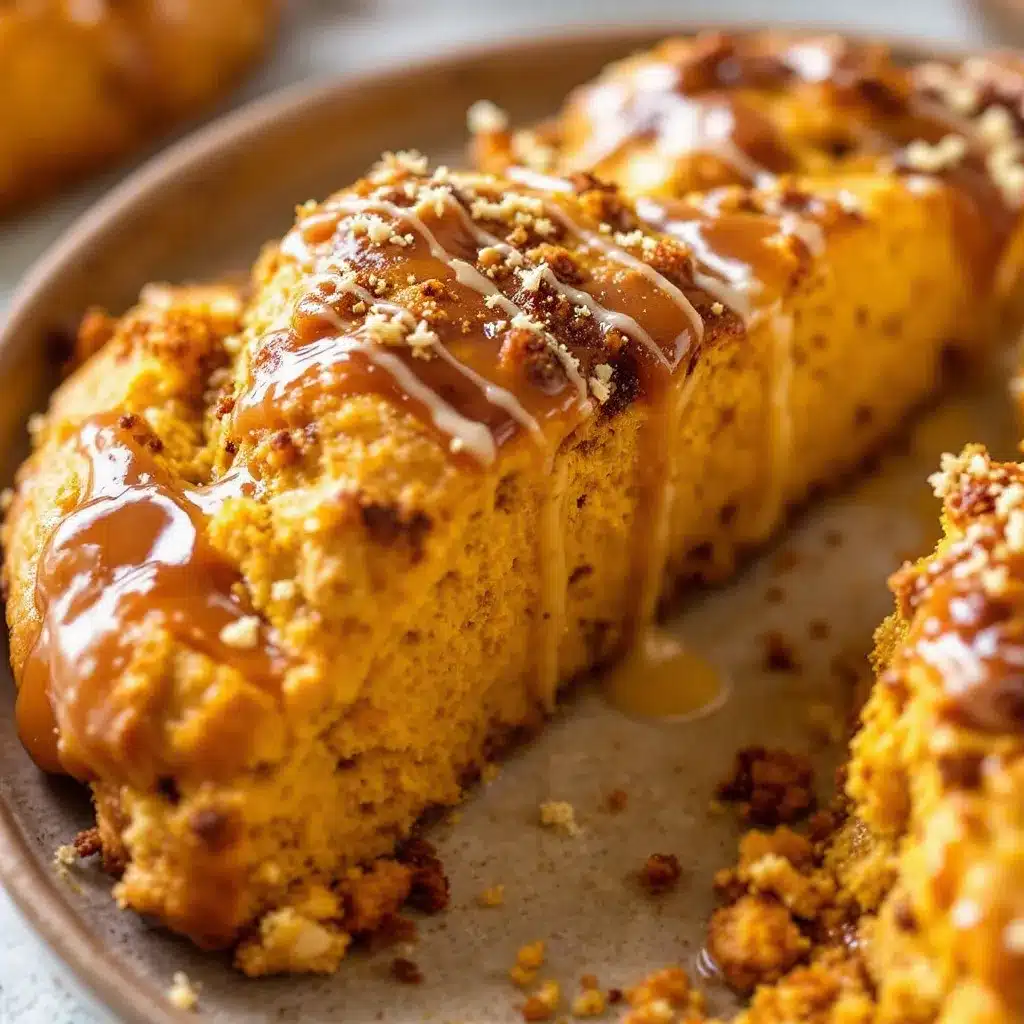
I remember pulling the first batch out of the oven and just standing there, holding the baking sheet, thinking about how the kitchen smelled like a candle but better—warm, spiced, honest. The maple glaze dripped down the sides in a way that felt accidental but actually kind of perfect. And I thought, “This is the kind of baking I actually want to do on a Tuesday.”
These scones are tender without being fragile, sweet without being cloying, and they come together with the kind of ease that makes you feel like you tricked the system. They are exactly what a fall morning needs.
Why You Will Love This Recipe
Let me tell you what makes these pumpkin scones different from every other recipe you have bookmarked and then ignored. It is not about fancy techniques or ingredients you have to hunt down at three different stores. It is about a recipe that actually works for real life.
- One Bowl, Zero Drama: You mix the wet ingredients, add the dry, and you are done. No separate bowl for dry ingredients. No sifting. No nonsense.
- Pantry-Friendly Ingredients: Canned pumpkin, basic flour, butter, sugar, and spices. That is it. You probably have most of this already.
- Perfect for Fall Mornings: These scones pair beautifully with coffee, tea, or a hot apple cider. They are great for brunch, Thanksgiving morning, or just a Tuesday that needs a little warmth.
- Maple Glaze That Steals the Show: The glaze is simple—powdered sugar, maple syrup, and a splash of milk—but it transforms these scones from good to “can I have another one?”
- Foolproof Texture: These scones are soft in the center with slightly crisp edges. They do not turn into hockey pucks, and they do not crumble apart the second you pick them up.
I have tested this recipe about five times to get the texture exactly right. The first batch was too dry. The second was too flat. But by the third, I knew I had something worth sharing. This is that version—the one that makes you close your eyes after the first bite and forget about everything else for a second.
What Ingredients You Will Need
This recipe uses simple, wholesome ingredients that come together to create something that tastes far more complicated than it actually is. Here is everything you need and a little bit about why each ingredient matters.
For the Scones
- All-purpose flour: 2 cups (240g). This gives the scones structure without making them heavy. Spoon and level your flour—do not scoop straight from the bag or you will end up with dry scones.
- Granulated sugar: 1/3 cup (65g). Just enough sweetness to balance the pumpkin and spices.
- Baking powder: 1 tablespoon. This is your leavening agent. Make sure it is fresh—if it has been sitting in your cabinet for a year, it might not give you the rise you want.
- Pumpkin pie spice: 1 teaspoon. You can use store-bought or make your own with cinnamon, nutmeg, ginger, and cloves.
- Cinnamon: 1/2 teaspoon. Because you can never have too much cinnamon in fall baking.
- Salt: 1/4 teaspoon. It balances the sweetness and brings out the warm spices.
- Cold unsalted butter: 6 tablespoons (85g), cut into small cubes. Cold butter is the secret to flaky scones. It creates little pockets of steam as the scones bake, giving you that tender, layered texture. I like to pop my butter in the freezer for 10 minutes before cutting it in.
- Pumpkin puree: 1/2 cup (120g). Not pumpkin pie filling—make sure you grab the plain, unsweetened puree. Libby’s is my go-to brand for consistent texture and flavor.
- Heavy cream: 1/4 cup (60ml), plus extra for brushing. The cream adds richness and helps the scones brown beautifully on top.
- Vanilla extract: 1 teaspoon. A little vanilla rounds out all the warm, spicy flavors.
For the Maple Glaze
- Powdered sugar: 1 cup (120g), sifted if you want a super smooth glaze.
- Pure maple syrup: 2 tablespoons. Do not use pancake syrup here—real maple syrup makes a noticeable difference in flavor.
- Milk or heavy cream: 1 to 2 tablespoons, to thin the glaze to your desired consistency.
- Pinch of salt: Just a tiny pinch to cut the sweetness.
Equipment Needed
You do not need a stand mixer or a food processor for this recipe. Here is what you will actually use:
- Large mixing bowl: One bowl. That is it. I use a standard ceramic mixing bowl, but any large bowl works.
- Pastry cutter or two forks: To cut the cold butter into the flour. If you do not have a pastry cutter, two forks work surprisingly well. You can also use your fingertips, just work quickly so the butter stays cold.
- Baking sheet: Line it with parchment paper for easy cleanup. I recommend a light-colored baking sheet for even browning.
- Bench scraper or sharp knife: To cut the dough into triangles. A bench scraper is ideal because it cuts cleanly without dragging through the dough.
- Pastry brush: For brushing the tops with cream before baking. A silicone brush works great.
- Wire rack: For cooling the scones before glazing. If you glaze them while they are still warm, the glaze will just slide right off.
Preparation Method
Here is how to make these scones without breaking a sweat. The key is to work quickly and keep everything cold. Set a timer if you need to—this whole process takes about 15 minutes of active time.
- Preheat your oven to 400°F (200°C). Line a baking sheet with parchment paper and set it aside. Getting the oven hot before you start mixing is important because the cold butter needs to hit heat immediately for the best rise.
- Mix the dry ingredients. In your large mixing bowl, whisk together the flour, sugar, baking powder, pumpkin pie spice, cinnamon, and salt. Make sure the baking powder is evenly distributed—nobody wants a pocket of baking powder in their scone.
- Cut in the cold butter. Add the cold butter cubes to the flour mixture. Using a pastry cutter or two forks, cut the butter into the flour until the mixture looks like coarse crumbs with some pea-sized butter pieces remaining. Do not overdo it—those little butter bits are what make the scones flaky. If the butter starts to soften, pop the bowl in the fridge for 5 minutes.
- Add the wet ingredients. In a small bowl or measuring cup, whisk together the pumpkin puree, heavy cream, and vanilla extract. Pour this mixture into the flour-butter mixture and stir with a fork or spatula until just combined. The dough will look shaggy and a little dry—that is exactly what you want. If it looks too dry to come together, add another tablespoon of cream.
- Bring the dough together. Turn the dough out onto a lightly floured surface. Gently bring it together with your hands, kneading just 2 or 3 times until it holds together. Do not overwork the dough or your scones will be tough. If the dough is sticky, dust your hands with a little flour.
- Shape the dough. Pat the dough into a 3/4-inch thick circle, about 8 inches across. Use a bench scraper or sharp knife to cut the circle into 8 equal wedges, like a pizza. Transfer the wedges to the prepared baking sheet, spacing them about 2 inches apart.
- Brush with cream. Brush the tops of the scones with a little extra heavy cream. This helps them develop that golden-brown crust. If you want a little sparkle, sprinkle a pinch of coarse sugar on top before baking.
- Bake. Bake for 14 to 18 minutes, until the scones are golden brown around the edges and a toothpick inserted into the center comes out clean. The tops should feel firm but not hard. Rotate the baking sheet halfway through if your oven bakes unevenly.
- Cool. Let the scones cool on the baking sheet for 5 minutes, then transfer them to a wire rack to cool completely before glazing. If you glaze them while they are still warm, the glaze will melt into a puddle.
- Make the glaze. While the scones cool, whisk together the powdered sugar, maple syrup, and 1 tablespoon of milk in a small bowl. Add more milk, 1 teaspoon at a time, until the glaze is thick but pourable. Drizzle the glaze over the cooled scones using a spoon or a piping bag with the tip snipped off. Let the glaze set for about 10 minutes before serving.
Cooking Tips & Techniques
I learned a few things the hard way so you do not have to. Here are the tips that make the difference between good scones and great scones.
Keep everything cold. This is the number one rule of scone-making. Cold butter creates steam as it bakes, which creates those flaky layers. If your butter softens before the scones hit the oven, you will end up with dense, flat scones. I sometimes pop my mixing bowl in the fridge for 10 minutes between steps if my kitchen is warm.
Do not overmix. I know it is tempting to keep stirring until the dough looks smooth and perfect, but stop as soon as the flour is incorporated. Overmixing develops gluten, and too much gluten makes scones tough. Shaggy dough is good dough.
Use a light hand when shaping. When you pat the dough into a circle, press gently. You are not trying to compress the dough—you just want it to hold together. If you smash it down, you will lose all those beautiful butter pockets.
Check your baking powder. This is one of those things nobody thinks about until their scones come out flat and sad. Baking powder loses its potency over time. If yours has been open for more than six months, test it by dropping a teaspoon into hot water—if it fizzes vigorously, it is still good.
Let them cool completely. I know the smell is intoxicating and you want to eat one immediately, but glazing warm scones is a disaster. The glaze will slide right off and pool on the cooling rack. Give them at least 20 minutes on the wire rack before you even think about drizzling.
Variations & Adaptations
One of the best things about this recipe is how easy it is to tweak. Here are some ways to make it your own.
Gluten-free version: Substitute the all-purpose flour with a 1:1 gluten-free baking flour blend that contains xanthan gum. I have tested this with Bob’s Red Mill 1-to-1 Baking Flour and it works beautifully. The texture is slightly more tender, but the flavor is spot on.
Dairy-free option: Use cold vegan butter or coconut oil in place of the butter, and swap the heavy cream for full-fat coconut cream or a dairy-free milk alternative. The scones will be a little less rich, but still delicious.
Add mix-ins: Fold in 1/2 cup of dried cranberries, chopped pecans, or white chocolate chips after you add the wet ingredients. Cranberry-pumpkin scones with maple glaze? Yes, please.
Spice it up: If you like a stronger spice profile, add an extra 1/2 teaspoon of ginger or a pinch of cloves. I have also made these with a teaspoon of chai spice blend instead of pumpkin pie spice, and it was fantastic.
Savory twist: Skip the sugar, reduce the pumpkin pie spice to 1/2 teaspoon, and add 1/2 cup of shredded sharp cheddar and a tablespoon of chopped fresh sage. Omit the maple glaze and brush with melted butter after baking. These are incredible with a bowl of soup.
Make them mini: Pat the dough into a 1/2-inch thick circle and cut into 12 smaller wedges. Reduce the baking time to 10 to 12 minutes. Perfect for brunch buffets or snacking without commitment.
Serving & Storage Suggestions
These scones are best the day they are made, but they still hold up well for a day or two if stored properly.
Serving: Serve the scones slightly warm or at room temperature. If you want to reheat them, pop them in a 300°F (150°C) oven for 5 minutes—this revives the texture without drying them out. The maple glaze is optional but highly recommended. I like to drizzle it in a zigzag pattern for that bakery-style look.
Storage: Store unglazed scones in an airtight container at room temperature for up to 2 days. If you have already glazed them, store them in a single layer in an airtight container, with parchment paper between layers if you stack them. The glaze can get a little sticky, but it still tastes great.
Freezing: You can freeze the unbaked scone wedges on a baking sheet until solid, then transfer them to a freezer bag. Bake from frozen, adding 2 to 3 minutes to the baking time. You can also freeze baked, unglazed scones for up to 3 months. Thaw at room temperature and reheat in the oven before glazing.
Make-ahead tip: Mix the dry ingredients and cut in the butter up to a day ahead. Store the mixture in the fridge, then add the wet ingredients and bake when you are ready. This is a great trick for holiday mornings when you want fresh scones without the early-morning work.
Nutritional Information & Benefits
Here is the approximate nutritional breakdown for one scone with glaze. Keep in mind that these numbers are estimates and will vary based on specific brands and substitutions.
- Calories: 290
- Fat: 11g
- Carbohydrates: 44g
- Protein: 4g
- Fiber: 2g
- Sugar: 24g
Pumpkin is a great source of vitamin A and fiber, which helps keep you full and supports healthy digestion. The warm spices like cinnamon and ginger also have anti-inflammatory properties. While these scones are certainly a treat, they offer a little more nutritional value than a standard pastry. If you want to lighten them up, you can reduce the sugar in the scone dough to 1/4 cup and use a lighter hand with the glaze.
These scones are vegetarian and can easily be made dairy-free or gluten-free with the substitutions mentioned above. They do contain wheat and dairy in their standard form, so keep that in mind if you are serving guests with dietary restrictions.
Conclusion
These one-bowl pumpkin scones with maple glaze are the kind of recipe that makes you wonder why you ever thought baking was complicated. They are simple, forgiving, and absolutely delicious. The pumpkin keeps them tender, the spices make the kitchen smell like autumn, and that maple glaze is the perfect finishing touch.
I love this recipe because it feels like a hug in food form. It is the thing I make when I want to slow down and enjoy the season without spending all day in the kitchen. Whether you are making them for a holiday brunch, a cozy weekend breakfast, or just because you have a can of pumpkin and a craving, these scones deliver every single time.
Try them and let me know how they turn out. Did you add any mix-ins? Did you double the glaze? I want to hear about it. Drop a comment below or tag me in your photos—I love seeing your baking adventures. And if you are looking for more easy fall recipes, check out this cozy one-bowl banana bread or these savory brown butter chocolate chip cookies for more simple, satisfying treats.
Frequently Asked Questions
Can I use fresh pumpkin instead of canned?
Yes, you can use fresh pumpkin puree. Just make sure to strain it well after blending to remove excess water. Fresh pumpkin tends to be more watery than canned, which can make the dough too sticky. If your puree seems thin, let it drain in a fine-mesh strainer for 30 minutes before using.
Why did my scones turn out dry?
Dry scones usually come from either overmixing the dough or using too much flour. Make sure you spoon and level your flour instead of scooping directly from the bag. Also, stop mixing as soon as the dough comes together. If your dough feels dry before baking, add another tablespoon of cream.
Can I make the dough ahead of time?
Absolutely. You can cut the scones into wedges and freeze them on a baking sheet. Once frozen, transfer them to a freezer bag. Bake from frozen, adding a few extra minutes to the baking time. You can also refrigerate the shaped scones for up to 24 hours before baking.
What can I use instead of pumpkin pie spice?
You can make your own blend with 1/2 teaspoon cinnamon, 1/4 teaspoon nutmeg, 1/4 teaspoon ginger, and a pinch of cloves. This is actually what I do most of the time because I never remember to buy the pre-mixed spice.
How do I get a thicker glaze?
If your glaze is too thin, add more powdered sugar, one tablespoon at a time, until it reaches your desired consistency. If it is too thick, add milk or maple syrup a teaspoon at a time. The glaze should be thick enough to coat the back of a spoon but still drizzle smoothly.
Pin This Recipe!
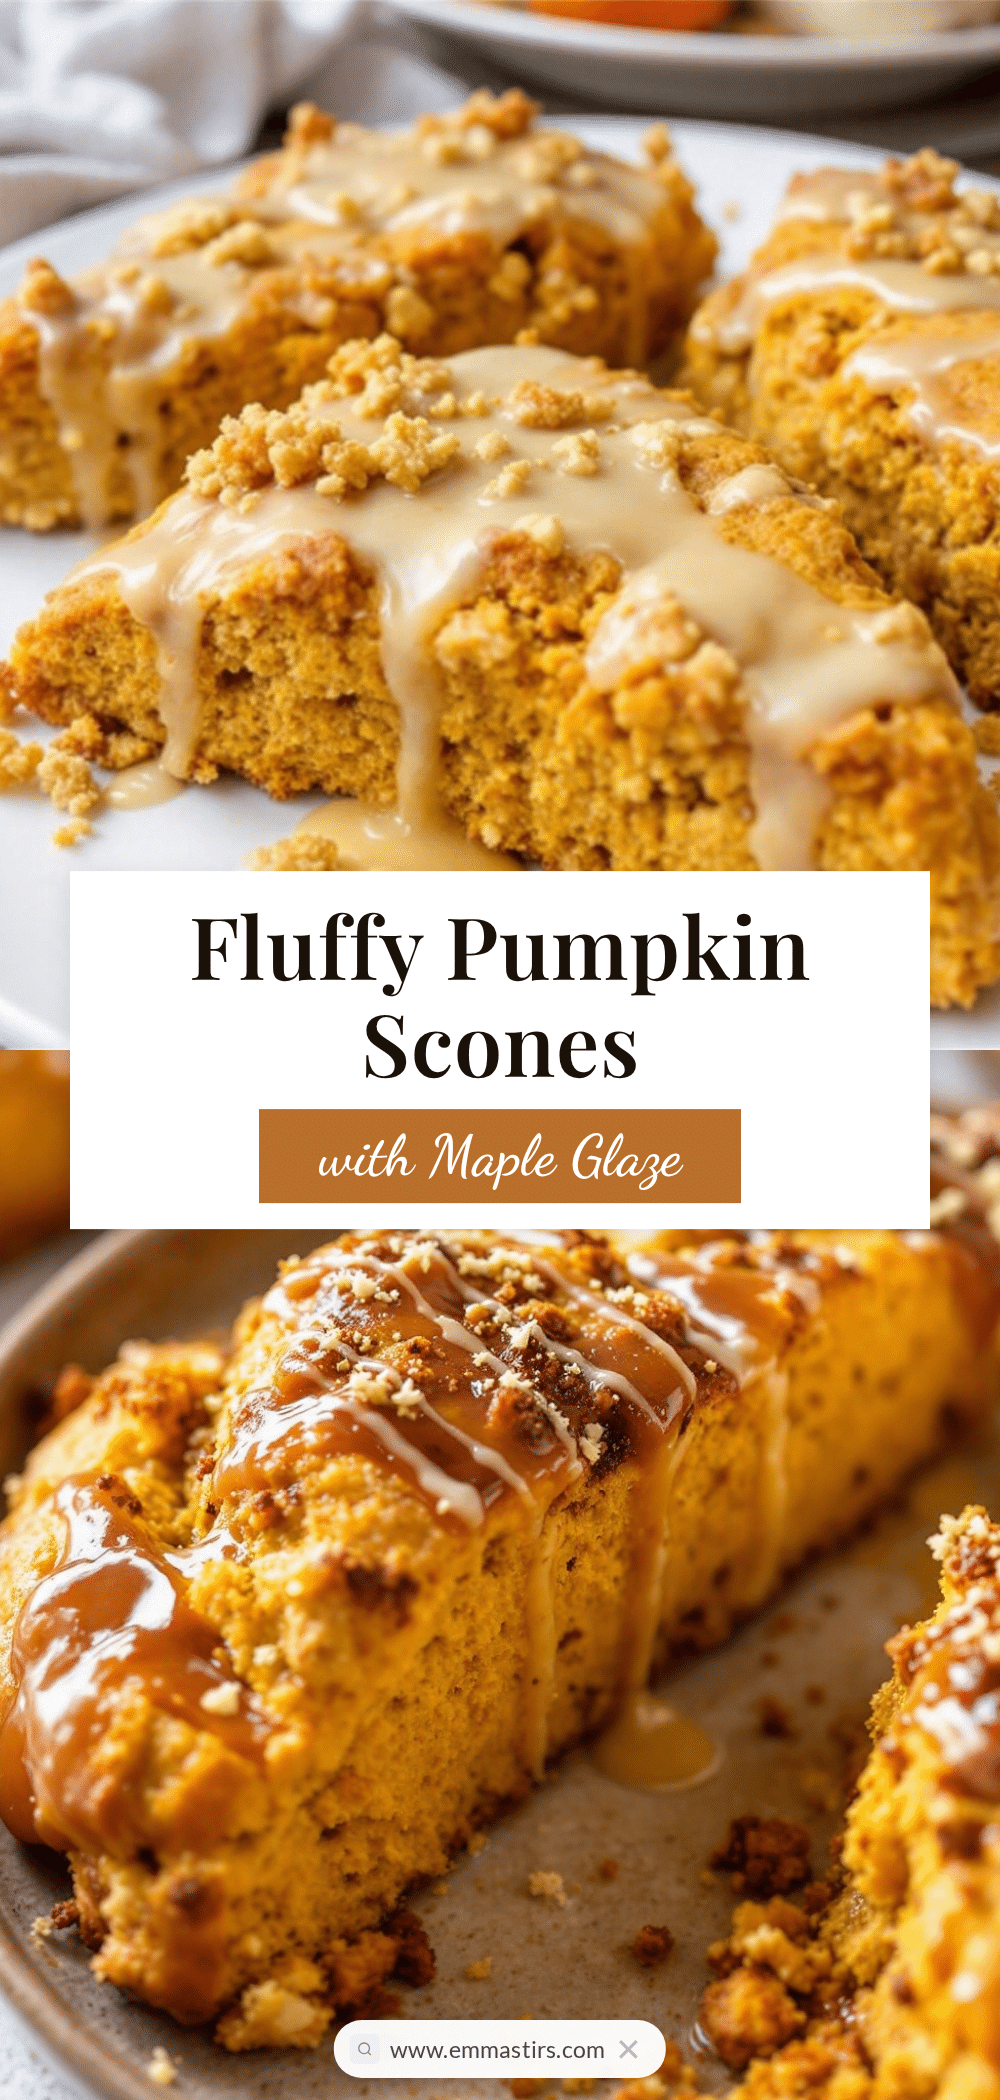
Easy One-Bowl Pumpkin Scones with Maple Glaze
These tender, spiced pumpkin scones come together in one bowl with simple pantry ingredients. Topped with a sweet maple glaze, they are perfect for fall mornings, brunch, or a cozy Tuesday treat.
- Prep Time: 15 minutes
- Cook Time: 16 minutes
- Total Time: 31 minutes
- Yield: 8 servings 1x
- Category: Breakfast, Brunch, Dessert
- Cuisine: American
Ingredients
- 2 cups (240g) all-purpose flour
- 1/3 cup (65g) granulated sugar
- 1 tablespoon baking powder
- 1 teaspoon pumpkin pie spice
- 1/2 teaspoon cinnamon
- 1/4 teaspoon salt
- 6 tablespoons (85g) cold unsalted butter, cut into small cubes
- 1/2 cup (120g) pumpkin puree (not pumpkin pie filling)
- 1/4 cup (60ml) heavy cream, plus extra for brushing
- 1 teaspoon vanilla extract
- 1 cup (120g) powdered sugar, sifted if desired
- 2 tablespoons pure maple syrup
- 1 to 2 tablespoons milk or heavy cream (for glaze)
- Pinch of salt (for glaze)
Instructions
- Preheat your oven to 400°F (200°C). Line a baking sheet with parchment paper.
- In a large mixing bowl, whisk together the flour, sugar, baking powder, pumpkin pie spice, cinnamon, and salt.
- Add the cold butter cubes to the flour mixture. Using a pastry cutter or two forks, cut the butter into the flour until the mixture looks like coarse crumbs with some pea-sized butter pieces remaining.
- In a small bowl or measuring cup, whisk together the pumpkin puree, heavy cream, and vanilla extract. Pour into the flour-butter mixture and stir with a fork or spatula until just combined. The dough will look shaggy and slightly dry.
- Turn the dough out onto a lightly floured surface. Gently bring it together with your hands, kneading just 2 or 3 times until it holds together. Do not overwork.
- Pat the dough into a 3/4-inch thick circle, about 8 inches across. Use a bench scraper or sharp knife to cut the circle into 8 equal wedges. Transfer to the prepared baking sheet, spacing them about 2 inches apart.
- Brush the tops of the scones with a little extra heavy cream.
- Bake for 14 to 18 minutes, until golden brown around the edges and a toothpick inserted into the center comes out clean. Rotate the baking sheet halfway through if needed.
- Let the scones cool on the baking sheet for 5 minutes, then transfer to a wire rack to cool completely before glazing.
- While the scones cool, whisk together the powdered sugar, maple syrup, and 1 tablespoon of milk in a small bowl. Add more milk, 1 teaspoon at a time, until the glaze is thick but pourable. Drizzle over cooled scones. Let glaze set for about 10 minutes before serving.
Notes
Keep all ingredients cold for flaky scones. Do not overmix the dough. Let scones cool completely before glazing. For best results, use fresh baking powder. Scones are best the day they are made but can be stored in an airtight container for up to 2 days. Unbaked scones can be frozen and baked from frozen, adding 2-3 minutes to baking time.
Nutrition
- Serving Size: 1 scone with glaze
- Calories: 290
- Sugar: 24
- Sodium: 220
- Fat: 11
- Saturated Fat: 7
- Carbohydrates: 44
- Fiber: 2
- Protein: 4
Keywords: pumpkin scones, maple glaze, one-bowl scones, fall baking, easy scone recipe, pumpkin recipe


