Love this? Save it for later!
Share the inspiration with your friends
Third time in ten days and I finally stopped overthinking it. The first batch came out soggy—too much pumpkin, not enough structure. The second was dry, because I panicked and added an extra egg like it was some kind of insurance policy. But the third? That one had the crackly, buttery top that shattered when you pressed a fork into it, with that soft, almost pudding-like pumpkin layer underneath that somehow stayed exactly where it belonged. I stood over the pan eating it straight from the dish at 10 p.m., which is not my finest moment, but also kind of is.
Here’s the thing about dump cakes—they’re supposed to be the easiest thing you’ll ever make. And they are. But easy doesn’t always mean foolproof, and I learned that the hard way. The difference between a great pumpkin dump cake and a sad, gluey one comes down to a few small choices: how you distribute the dry cake mix, what kind of butter you use, and whether you actually let it rest before serving. This version nails all of it. The crunchy topping forms a golden shell that contrasts with the silky pumpkin beneath, and somehow it manages to taste both rustic and completely indulgent at the same time.
I didn’t grow up eating this. A friend brought one to a fall potluck a few years back, and I remember watching people hover around the pan like it was the last food on earth. I asked for the recipe, made it once, forgot about it, and then rediscovered it last month when I had a can of pumpkin staring at me from the pantry. Now I can’t stop. There’s something about the simplicity that gets me—no mixer, no bowls of separate dry and wet ingredients, no fussing. Just dump, spread, pour, and bake. And that crunchy top? It’s the kind of texture that makes you close your eyes on the first bite. You deserve that.
Why You’ll Love This Recipe
I’ve tested this pumpkin dump cake more times than I care to admit, and I can tell you with confidence—this version works every single time. Here’s why it stands out:
- Incredibly Easy: No mixer, no complicated steps. If you can open a can and sprinkle cake mix over pumpkin, you can make this. It takes about 10 minutes of active time.
- Simple Pantry Ingredients: You probably already have most of what you need. Canned pumpkin, yellow cake mix, butter, eggs, and a few spices. No fancy grocery runs required.
- Perfect for Fall Gatherings: This is the dessert you bring to Thanksgiving, Friendsgiving, or a cozy weekend dinner. It feeds a crowd and disappears fast.
- Crowd-Pleaser for All Ages: Kids love the sweet, buttery crunch, and adults appreciate that it’s not overly sweet or heavy. I’ve seen people who “don’t like pumpkin” go back for seconds.
- Unbelievably Delicious Texture: The contrast between the crunchy, golden topping and the soft, almost custard-like pumpkin layer is pure magic. It’s comfort food at its finest.
What makes this recipe different from the dozens of other pumpkin dump cakes out there? It’s the technique. Most recipes tell you to just dump everything in a pan and hope for the best. I tested the ratios, the butter distribution, and the resting time until I got that perfect crunchy top every time. This isn’t just another version—it’s the one I’d make for my own Thanksgiving table.
Honestly, this is the kind of dessert that makes you feel like a hero with almost zero effort. It’s warm, spiced, and comforting, with that satisfying crunch that keeps your fork going back for more. Perfect for impressing guests without breaking a sweat.
What Ingredients You Will Need
This recipe uses simple, everyday ingredients to create something that tastes far more complicated than it is. The magic comes from how they layer together in the pan.
- Canned pumpkin puree (15 oz can) — Not pumpkin pie filling. Make sure you grab 100% pure pumpkin. The texture and flavor are completely different.
- Evaporated milk (12 oz can) — Adds richness without making the pumpkin layer too heavy. I’ve used both regular and low-fat with good results.
- Large eggs (2) — Room temperature works best, but I’ve used them straight from the fridge and it was fine.
- Granulated sugar (¾ cup) — Just enough to sweeten the pumpkin layer without overpowering the spices.
- Pumpkin pie spice (2 teaspoons) — You can use store-bought or make your own with cinnamon, nutmeg, ginger, and cloves.
- Ground cinnamon (1 teaspoon) — Because you can never have too much cinnamon in a pumpkin dessert.
- Vanilla extract (1 teaspoon) — Adds warmth and rounds out the flavors.
- Yellow cake mix (15.25 oz box) — This is the star of the crunchy topping. I prefer Betty Crocker or Duncan Hines for consistent results. Do not use a mix with pudding in the mix—it changes the texture.
- Salted butter (1 cup, or 2 sticks) — Melted and cooled slightly. If you only have unsalted, add a pinch of salt to the topping.
- Chopped pecans or walnuts (½ cup, optional but highly recommended) — Adds extra crunch and nutty flavor. I use pecans most of the time.
- Toffee bits (¼ cup, optional) — A little indulgence that takes the topping over the top. I add these when I’m feeling fancy.
For the best texture, I recommend using full-fat evaporated milk—it gives the pumpkin layer a creamier consistency. If you’re dairy-free, you can substitute with canned coconut milk (full-fat, not light), though the flavor will shift slightly. I’ve tried it with oat milk and it worked, but the texture was a bit thinner.
One thing I learned the hard way—don’t skip the spices. If you’re out of pumpkin pie spice, mix 1 teaspoon cinnamon, ½ teaspoon nutmeg, ¼ teaspoon ginger, and ¼ teaspoon cloves. It’s not exactly the same, but it gets the job done.
Equipment Needed
You don’t need much for this recipe, which is part of the appeal. Here’s what you’ll need:
- 9×13-inch baking dish — Glass or ceramic works best. Metal can work too, but keep an eye on the baking time as it may cook faster.
- Large mixing bowl — For whisking together the pumpkin mixture.
- Whisk — A simple whisk is all you need. No electric mixer required.
- Measuring cups and spoons — For accuracy, especially with the spices.
- Spatula — For spreading the pumpkin mixture evenly.
- Small saucepan or microwave-safe bowl — For melting the butter.
If you don’t have a 9×13 dish, you can use two 8×8 square pans, but reduce the baking time by about 10 minutes and check for doneness earlier. I’ve also made this in a disposable aluminum pan for potlucks—works perfectly and makes cleanup a breeze.
One tip: spray your baking dish with non-stick cooking spray even if it’s non-stick. The pumpkin layer can be stubborn, and you don’t want to lose any of that goodness to the pan.
Preparation Method
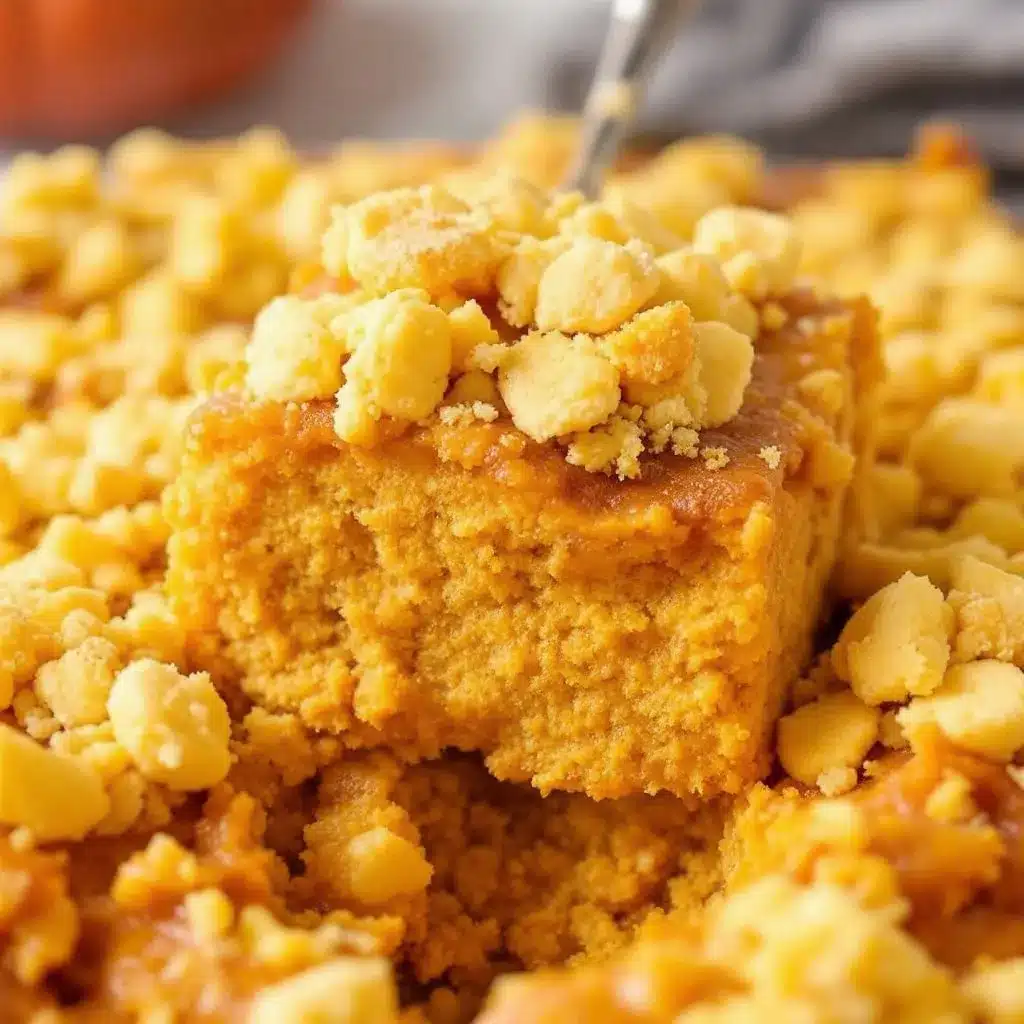
This is where the magic happens. Follow these steps, and you’ll have a pumpkin dump cake with a crunchy topping that will make you look like a baking pro.
- Preheat your oven to 350°F (175°C). Position the rack in the center of the oven. Spray your 9×13-inch baking dish with non-stick cooking spray.
- Make the pumpkin layer. In a large mixing bowl, whisk together the canned pumpkin puree, evaporated milk, eggs, granulated sugar, pumpkin pie spice, cinnamon, and vanilla extract. Whisk until smooth and well combined. The mixture should be thick but pourable—like a loose pudding.
- Pour the pumpkin mixture into the prepared baking dish. Use a spatula to spread it evenly across the bottom. Don’t worry if it looks thin—it will thicken as it bakes.
- Sprinkle the dry cake mix evenly over the pumpkin layer. This is the most important step. Open the box of yellow cake mix and sprinkle the dry powder evenly over the entire surface. Do not stir it in. Do not mix it. Just let it sit on top. I like to tap the dish gently to help it settle into an even layer.
- Add the nuts and toffee bits (if using). Sprinkle the chopped pecans and toffee bits evenly over the dry cake mix. This adds texture and flavor to the crunchy topping.
- Pour the melted butter evenly over the top. Melt your butter in a small saucepan or microwave-safe bowl. Drizzle it slowly and as evenly as possible over the entire surface. Try to cover all the dry cake mix—any spots that stay dry won’t form that beautiful crunchy crust. I use a spoon to spread the butter around if needed.
- Bake for 45-55 minutes. Place the dish in the preheated oven and bake until the top is golden brown and the edges are bubbling. The center should be set but still slightly jiggly—it will continue to set as it cools. I start checking at 45 minutes and add time in 5-minute increments if needed.
- Let it rest for at least 20 minutes before serving. This is the hardest part, I know. But letting it rest allows the pumpkin layer to set properly and the topping to firm up. If you dig in too soon, it will be soupy. Trust me on this—I’ve made that mistake.
- Serve warm or at room temperature. Spoon into bowls and top with whipped cream or vanilla ice cream if desired.
A few things to watch for: If your topping is browning too quickly but the center isn’t set yet, tent the dish loosely with aluminum foil for the last 10-15 minutes of baking. If the top isn’t crunchy enough after baking, you can place it under the broiler for 1-2 minutes—but watch it like a hawk, because it can burn fast.
One more tip from my many trials—if you want an extra-thick crunchy topping, use 1½ boxes of cake mix and 1½ cups of butter. It’s decadent, but sometimes you need that.
Cooking Tips & Techniques
I’ve made this pumpkin dump cake at least a dozen times, and I’ve picked up a few tricks along the way that make a real difference.
Don’t overmix the pumpkin layer. Whisk just until the ingredients are combined. Overmixing can incorporate too much air and make the texture less creamy. You want it smooth, not frothy.
The butter distribution is everything. If you pour all the butter in one spot, you’ll end up with a soggy, uneven topping. Drizzle it slowly and use a spoon to guide it over any dry patches. I sometimes tilt the dish slightly to help the butter spread.
Use cold butter for a different texture. Some recipes call for slicing cold butter and placing it over the cake mix instead of using melted butter. I’ve tried both, and here’s my take—melted butter gives you a more even, crackly crust, while cold butter creates more of a crumbly, streusel-like texture. Both are delicious, so go with whatever feels right.
Let it rest, seriously. I know I said this already, but it’s worth repeating. The first time I made this, I was so excited I scooped it straight out of the oven. It was a soupy mess. After 20 minutes of resting, it transformed into a perfectly sliceable dessert. Patience pays off.
Watch for visual cues. The top should be deep golden brown and the edges should be bubbling with caramelized butter. If you see the center still looks wet and pale, give it more time. Every oven runs a little differently.
One mistake I made early on—using a dark metal pan. It caused the bottom to brown too quickly while the top was still underdone. Stick with glass or ceramic for the most even baking.
If you’re making this ahead, bake it completely, let it cool, and cover it tightly with foil. Reheat in a 300°F oven for about 15 minutes to revive the crunchy topping.
Variations & Adaptations
This recipe is incredibly forgiving and easy to adapt. Here are some of my favorite variations:
- Gluten-Free Version: Use a gluten-free yellow cake mix. I’ve tried several brands, and King Arthur’s works best for texture. Everything else stays the same.
- Dairy-Free Version: Substitute the evaporated milk with full-fat canned coconut milk and use a dairy-free butter alternative like Miyoko’s or Earth Balance. The topping won’t be quite as crunchy, but it’s still delicious.
- Spiced-Up Version: Add ¼ teaspoon of cardamom and a pinch of black pepper to the pumpkin mixture. The pepper adds a subtle warmth that’s surprisingly good.
- Chocolate Lover’s Version: Sprinkle ½ cup of semi-sweet chocolate chips over the pumpkin layer before adding the cake mix. The chocolate melts into the pumpkin and creates pockets of richness.
- Apple Pumpkin Version: Layer 1 cup of finely diced apples (I prefer Honeycrisp or Granny Smith) over the pumpkin mixture before adding the cake mix. It adds texture and a fresh fruit flavor.
- Low-Sugar Version: Use a sugar-free yellow cake mix and reduce the sugar in the pumpkin layer to ½ cup. You can also use a sugar substitute like monk fruit sweetener.
I once made a version with a spice cake mix instead of yellow cake mix, and it was incredible. The extra spices in the mix complemented the pumpkin beautifully. If you try that, reduce the pumpkin pie spice to 1 teaspoon so it doesn’t become overwhelming.
For a fun twist, try adding a layer of cream cheese dollops over the pumpkin mixture before adding the cake mix. Just soften 4 oz of cream cheese, mix with 2 tablespoons of sugar, and drop spoonfuls over the pumpkin. It creates these creamy pockets that are absolutely divine.
Serving & Storage Suggestions
This pumpkin dump cake is best served warm, when the topping is still crunchy and the pumpkin layer is soft and luscious. Spoon it into bowls and top with a generous dollop of whipped cream or a scoop of vanilla ice cream. The contrast between the warm cake and cold topping is pure heaven.
For a more elegant presentation, dust the top with a little powdered sugar and a sprinkle of cinnamon before serving. You can also drizzle caramel sauce over each serving for extra indulgence.
This dessert pairs beautifully with a cup of hot coffee or spiced apple cider. If you’re serving it after a big meal, keep the portions modest—it’s rich and satisfying.
Storage: Cover the baking dish tightly with foil or transfer leftovers to an airtight container. Store in the refrigerator for up to 5 days. The topping will lose some of its crunch over time, but the flavor remains fantastic.
Reheating: To revive the crunchy topping, reheat individual portions in a 300°F oven for 10 minutes, or in an air fryer at 300°F for 5 minutes. The microwave works in a pinch, but the topping will be soft. I actually enjoy it cold straight from the fridge—it firms up and almost becomes like a pumpkin pie bar.
Freezing: This cake freezes beautifully. Let it cool completely, then wrap the entire dish tightly in plastic wrap and foil. Freeze for up to 3 months. Thaw overnight in the refrigerator and reheat in a 300°F oven until warmed through.
One thing I love about this recipe—the flavors actually deepen after a day in the fridge. The spices meld together, and the pumpkin layer becomes even more luscious. So don’t be afraid to make it a day ahead.
Nutritional Information & Benefits
Here’s the estimated nutritional breakdown per serving (based on 12 servings):
- Calories: 385
- Total Fat: 19g
- Saturated Fat: 10g
- Cholesterol: 65mg
- Sodium: 410mg
- Total Carbohydrates: 50g
- Dietary Fiber: 3g
- Sugars: 32g
- Protein: 5g
Pumpkin is a nutritional powerhouse—it’s packed with vitamin A, which supports eye health, and fiber, which aids digestion. The spices like cinnamon and ginger have anti-inflammatory properties. And while this isn’t a health food by any stretch, it’s a dessert made with real ingredients, which I feel good about serving to my family.
If you’re watching your sugar intake, you can reduce the sugar in the pumpkin layer to ½ cup without sacrificing much. The cake mix already adds sweetness, so the pumpkin layer doesn’t need to be overly sweet.
For a lighter option, serve smaller portions with a side of fresh fruit. The fresh low-calorie fruit salad with mint from this site would be a perfect complement—bright, refreshing, and a nice contrast to the rich cake.
This recipe contains gluten, dairy, eggs, and tree nuts (if you add pecans). For allergen-friendly versions, check the variations section above.
Conclusion
This easy pumpkin dump cake with crunchy topping is the kind of dessert that makes you look like a hero with almost no effort. It’s warm, spiced, and comforting, with that irresistible crunchy top that keeps you coming back for just one more bite. Whether you’re bringing it to a fall gathering, serving it at Thanksgiving, or just making it for a cozy night in, it never disappoints.
What I love most about this recipe is how forgiving it is. You can customize it, adapt it, and make it your own without worrying about ruining it. Add nuts, skip the nuts, throw in some chocolate chips, or go wild with a cream cheese layer—it all works. That’s the beauty of a dump cake.
I’d love to hear how yours turns out. Did you add any fun variations? Serve it with something unexpected? Leave a comment below and let me know—I read every single one. And if you share a photo on social media, tag me so I can see your beautiful creation. Happy baking, friend!
Frequently Asked Questions
Can I use fresh pumpkin instead of canned?
Yes, you can. Roast a small sugar pumpkin until tender, scoop out the flesh, and puree it until smooth. You’ll need about 1¾ cups of fresh pumpkin puree. Keep in mind that fresh pumpkin has more water content than canned, so your pumpkin layer may be slightly thinner. To compensate, reduce the evaporated milk by 2 tablespoons.
Why is my pumpkin dump cake soupy in the middle?
This usually happens for one of two reasons—either it wasn’t baked long enough, or it wasn’t allowed to rest after baking. The center should be set but still slightly jiggly when you take it out of the oven. The resting time (at least 20 minutes) is crucial for the structure to firm up. If it’s still soupy after resting, it likely needs more baking time next time.
Can I make this recipe in a slow cooker?
You can, but the topping won’t get as crunchy. To make it in a slow cooker, prepare the pumpkin layer as directed and pour it into a greased slow cooker. Sprinkle the cake mix and nuts on top, then drizzle with melted butter. Cook on low for 3-4 hours or on high for 1½-2 hours, until the edges are bubbling and the center is set. For a crunchier top, remove the lid for the last 30 minutes of cooking.
Can I use a different flavor of cake mix?
Absolutely. Spice cake mix is my favorite alternative—it adds extra warmth and complements the pumpkin beautifully. White cake mix, butter pecan cake mix, or even carrot cake mix all work well. Avoid chocolate cake mix unless you’re going for a very different flavor profile—it can overwhelm the pumpkin.
How do I know when the pumpkin dump cake is done?
Look for these signs: the top should be deep golden brown and slightly crackly, the edges should be bubbling with caramelized butter, and the center should be set but still slightly jiggly when you gently shake the dish. If you insert a toothpick into the center, it should come out with a few moist crumbs attached—not wet batter. The internal temperature should be around 190°F if you want to use a thermometer.
Pin This Recipe!
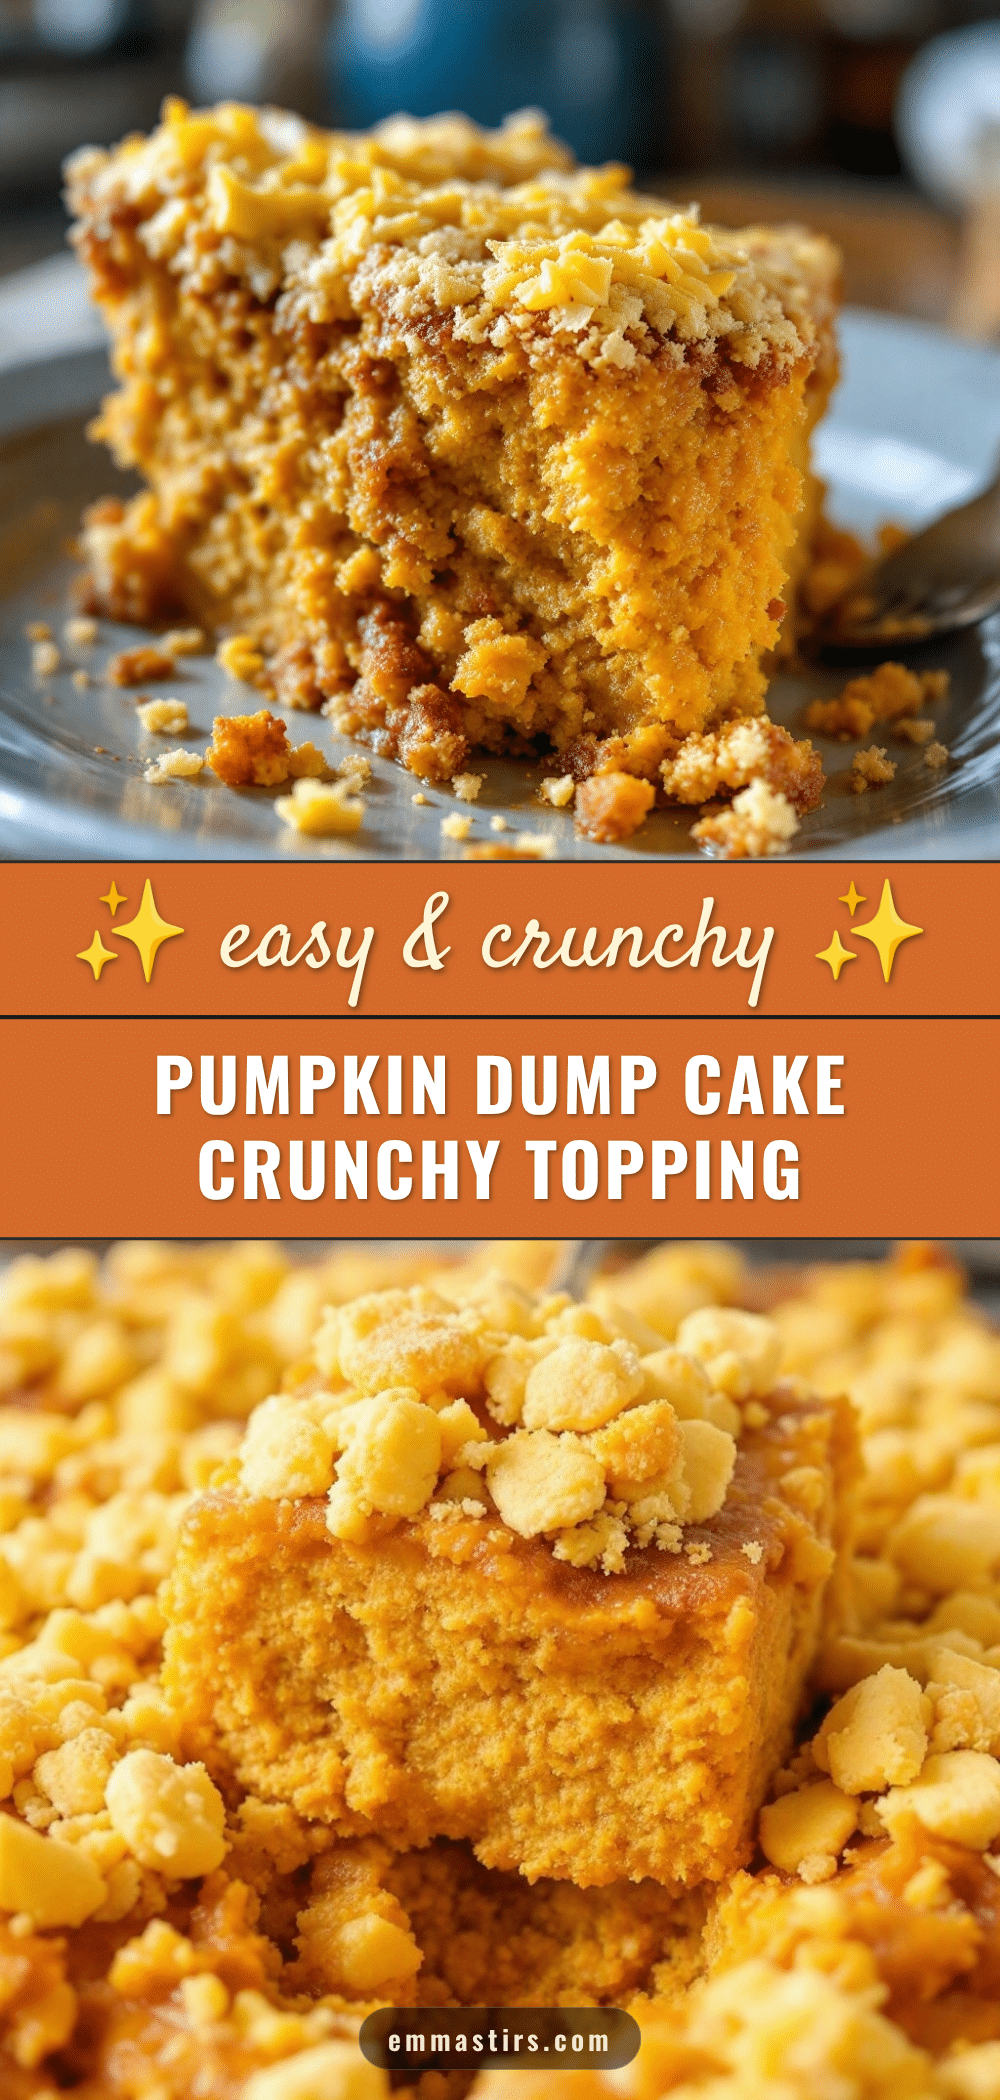
Easy Pumpkin Dump Cake: Best Crunchy Topping Recipe
This easy pumpkin dump cake features a buttery, crunchy topping and a soft, pudding-like pumpkin layer. It’s a simple, crowd-pleasing dessert perfect for fall gatherings.
- Prep Time: 10 minutes
- Cook Time: 50 minutes
- Total Time: 1 hour 20 minutes
- Yield: 12 servings 1x
- Category: Dessert
- Cuisine: American
Ingredients
- 1 (15 oz) can pumpkin puree
- 1 (12 oz) can evaporated milk
- 2 large eggs
- 3/4 cup granulated sugar
- 2 teaspoons pumpkin pie spice
- 1 teaspoon ground cinnamon
- 1 teaspoon vanilla extract
- 1 (15.25 oz) box yellow cake mix
- 1 cup (2 sticks) salted butter, melted
- 1/2 cup chopped pecans or walnuts (optional)
- 1/4 cup toffee bits (optional)
Instructions
- Preheat oven to 350°F (175°C). Spray a 9×13-inch baking dish with non-stick cooking spray.
- In a large mixing bowl, whisk together pumpkin puree, evaporated milk, eggs, sugar, pumpkin pie spice, cinnamon, and vanilla extract until smooth.
- Pour the pumpkin mixture into the prepared baking dish and spread evenly.
- Sprinkle the dry cake mix evenly over the pumpkin layer. Do not stir.
- Sprinkle chopped nuts and toffee bits (if using) over the cake mix.
- Drizzle melted butter evenly over the entire surface, covering all the dry cake mix.
- Bake for 45-55 minutes, until the top is golden brown and the edges are bubbling. The center should be set but slightly jiggly.
- Let rest for at least 20 minutes before serving.
- Serve warm or at room temperature, optionally topped with whipped cream or vanilla ice cream.
Notes
For best results, use full-fat evaporated milk and let the cake rest for at least 20 minutes before serving. If topping browns too quickly, tent with foil. For extra crunch, use 1.5 boxes of cake mix and 1.5 cups of butter.
Nutrition
- Serving Size: 1 serving
- Calories: 385
- Sugar: 32
- Sodium: 410
- Fat: 19
- Saturated Fat: 10
- Carbohydrates: 50
- Fiber: 3
- Protein: 5
Keywords: pumpkin dump cake, easy pumpkin dessert, fall dessert, crunchy topping, dump cake


