Love this? Save it for later!
Share the inspiration with your friends
Three bags of candy sitting on the counter, a block of cream cheese still in its foil, and my niece walking through the door in a tiny ghost costume — that’s how this whole thing started. I had promised a Halloween snack for the family gathering, but somewhere between the pumpkin carving and the last-minute costume adjustments, I completely forgot to plan anything real. You know those moments where you just stare into the fridge hoping something magical happens? That was me, with a bag of grapes staring back.
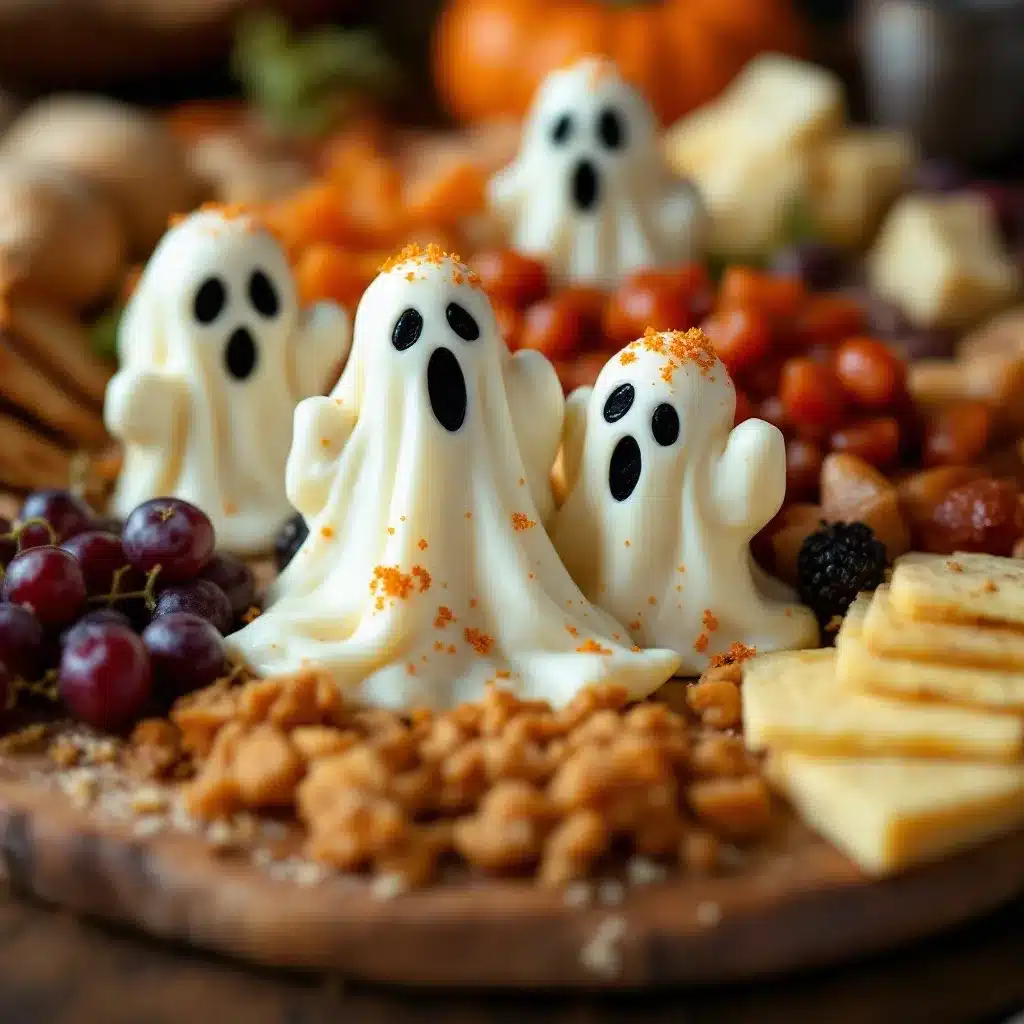
I grabbed the cream cheese, some crackers I found in the back of the pantry, and a few seasonal things I’d picked up at the store earlier. Honestly, I was just trying to throw something together that didn’t look like a total afterthought. But then I cut the cream cheese into little rounds, used a paring knife to shape them into ghosts, and suddenly the whole board came together in a way that felt intentional. My sister walked in and asked when I’d had time to plan this, and I just laughed because the truth is way more chaotic than that.
That night, the board sat in the middle of the table with those little cheese ghosts peeking out between the apples and the pretzels, and it was the first thing to disappear. Not the candy. Not the store-bought cookies. The cheese ghosts. And honestly? That’s when I knew this wasn’t just a last-minute save — it was something I’d actually want to make again on purpose. This easy Halloween fall charcuterie board with cheese ghosts has become my go-to for every October gathering since.
Why You’ll Love This Recipe
Let me tell you why this board works so well — it’s the kind of thing that looks impressive without requiring you to actually be impressive in the kitchen. I’ve tested this setup at three different Halloween events now, and every single time, the cheese ghosts steal the show. Here’s what makes it worth your time:
- Quick & Easy : This whole board comes together in about 15 minutes flat. No cooking, no baking, no complicated steps. Just slice, arrange, and serve.
- Simple Ingredients : You probably already have most of what you need. Cream cheese, crackers, seasonal fruit, and a few savory snacks. No special orders or fancy grocery runs required.
- Perfect for Halloween Gatherings : Whether it’s a costume party, a family movie night, or just a fun snack before trick-or-treating, this board fits right in. It’s festive without being fussy.
- Crowd-Pleaser : Kids love the cheese ghosts, adults appreciate the savory-sweet balance, and everyone goes back for seconds. I’ve watched people pick around the candy to grab another ghost.
- Unbelievably Delicious : There’s something about the creamy, mild cheese against the crunch of apples and the saltiness of pretzels that just works. It’s comfort food in board form.
What makes this different from other Halloween snack boards is the cheese ghosts themselves. Most people just arrange things on a platter and call it a day. But shaping cream cheese into little ghost figures adds that playful, handmade touch that makes people smile. It’s not just another snack board — it’s the one with the ghosts. And once you make it, you’ll understand why it’s become my most-requested fall recipe.
This is the kind of board that makes you feel like you actually have your act together, even when you’re winging it. Perfect for those nights when you want something festive but don’t have the energy for anything complicated.
What Ingredients You Will Need
This recipe uses simple, everyday ingredients that come together to create something that looks way more elaborate than it actually is. The beauty of this board is that you can customize it based on what you have or what’s on sale, but here’s what I’ve found works best after making it multiple times.
For the Cheese Ghosts
- 8 ounces cream cheese, cold (I use Philadelphia because it holds its shape better than store brands, but any full-fat block will work)
- Black sesame seeds or poppy seeds for eyes (about 1 teaspoon)
- Small cookie cutters or a sharp paring knife for shaping
For the Savory Elements
- 8 ounces sharp cheddar cheese, sliced into thin squares or cut into Halloween shapes using cookie cutters (pumpkin shapes are especially fun)
- 6 ounces salami or prosciutto, folded into ribbons or rosettes
- 1 cup mixed olives (I like kalamata and castelvetrano together for color contrast)
- 1 cup roasted almonds or other nuts (unsalted is better so the salt levels don’t get overwhelming)
- 1 cup pretzel sticks or mini pretzels
For the Sweet Elements
- 2 medium apples, sliced (Honeycrisp or Fuji hold their color longer and don’t brown as fast)
- 1 cup red grapes, washed and left in small clusters
- 1/2 cup dried apricots or dried figs (adds a chewy sweetness that balances the salt)
- 1/4 cup honey for drizzling (optional but highly recommended, especially over the brie or cream cheese)
For the Dippers and Spreads
- 1 box of crackers (I prefer water crackers or something neutral that won’t compete with the flavors)
- 1 baguette, sliced into thin rounds and lightly toasted if you have time
- 1 small jar of fig jam or pumpkin butter (trust me on this one — it pairs beautifully with the cheese ghosts)
When I make this easy Halloween fall charcuterie board with cheese ghosts for a crowd, I usually double the cream cheese because those ghosts go fast. Also, a quick tip on the apples — toss them in a little lemon juice if you’re making the board more than an hour ahead. It keeps them from turning brown and looking sad. And for the grapes, leaving them in small clusters instead of pulling them apart makes the board look fuller and more abundant.
If you’re looking for a protein-packed addition that fits the fall theme, I’ve also added some of the flavorful grazing board recipe with whipped feta honey seasonal fruit elements to this board before, and the whipped feta adds another creamy element that complements the cheese ghosts perfectly.
Equipment Needed
You don’t need much for this board, which is honestly one of the best things about it. Here’s what I use:
- Large wooden cutting board or serving platter — at least 12 by 18 inches if you have it. A baking sheet lined with parchment paper works in a pinch, and I’ve done that more times than I’d like to admit.
- Small paring knife for shaping the cream cheese ghosts. A butter knife will work, but the paring knife gives you more control for the ghost shapes.
- Small cookie cutters in Halloween shapes if you want to cut the cheddar into pumpkins or bats. Not essential, but fun.
- Small bowls for olives, nuts, and jam. I use ramekins or little dipping bowls to keep things contained.
- Cheese knife or spreader for the cream cheese ghosts once people start eating them.
- Parchment paper if you want to line the board for easy cleanup (I always do this now after learning the hard way).
I picked up a set of tiny Halloween cookie cutters at a dollar store a few years ago, and they’ve been worth every penny. But honestly, the first time I made this board, I just used a knife to freehand the ghost shapes, and they looked charmingly imperfect. So don’t stress about having the perfect tools.
Preparation Method
Alright, let’s get to the fun part. Here’s how I put this board together step by step.
- Make the cheese ghosts first. Take the cold cream cheese block and cut it into 6 to 8 equal slices, about 1/2 inch thick. Using your paring knife, shape each slice into a ghost form — round at the top, tapering slightly at the bottom. Don’t worry about making them perfect. The slightly uneven shapes actually look more like real ghosts. Place the ghosts on a small plate and refrigerate while you prepare everything else.
- Add the ghost faces. Just before serving, take the ghosts out of the fridge and press two black sesame seeds into each one for eyes. For the mouth, you can either use a tiny dot of the seed or just leave it off — I actually prefer them without mouths because they look cuter. If the cream cheese has softened too much, pop them back in the fridge for 5 minutes to firm up.
- Prepare the fruits and vegetables. Wash the grapes and leave them in small clusters. Slice the apples into thin wedges and toss them with a squeeze of lemon juice if you’re making the board ahead. Arrange the dried apricots or figs in a small pile nearby.
- Slice the baguette and arrange the crackers. If you’re toasting the baguette slices, do that now and let them cool completely before adding them to the board. Arrange the crackers in a fan pattern or in small clusters around the board.
- Fold the salami or prosciutto. For salami, fold each slice in half, then in half again, and stand them up on the board so they look like little rosettes. For prosciutto, simply drape the slices in loose ribbons. This adds height and texture to the board.
- Cut the cheddar cheese. Slice the cheddar into thin squares, or use your Halloween cookie cutters to make pumpkin or bat shapes. Arrange these in a separate section of the board, away from the cream cheese ghosts so the flavors don’t blend.
- Fill the small bowls. Put the olives in one bowl, the almonds in another, and the fig jam or pumpkin butter in a third. Place these bowls strategically around the board to break up the visual space and add structure.
- Assemble the board. Start by placing the small bowls first — they act as anchors. Then arrange the cheese ghosts in a row or scattered around the board. Add the cheddar shapes, salami rosettes, and fruit clusters in the spaces between. Finally, fill in any gaps with crackers, pretzels, and nuts. You want the board to look full and abundant, so don’t be shy about piling things up.
- Drizzle the honey. If you’re using honey, drizzle a small amount over the brie or over one or two of the cheese ghosts. This adds a beautiful glossy finish and a touch of sweetness that balances the saltiness of the meats and olives.
- Serve immediately or refrigerate. If you’re not serving right away, cover the board loosely with plastic wrap and refrigerate for up to 2 hours. Take it out 15 minutes before serving to let the cheeses come to room temperature for the best flavor and texture.
A quick note from personal experience — don’t arrange the cheese ghosts too close to the grapes or apples. The moisture from the fruit can make the cream cheese edges get a little soft and messy. Give them a little breathing room, and they’ll hold their shape much better throughout the evening.
If you’re planning a full Halloween spread, this board pairs beautifully with something like the cozy campfire banana s’mores boats recipe easy Nutella marshmallow treats for dessert — the smoky sweetness is a perfect contrast to the savory board.
Cooking Tips & Techniques
After making this board more times than I can count, I’ve picked up a few tricks that make a real difference. Let me share what I’ve learned the hard way so you don’t have to.
Keep the cream cheese cold. This is the most important tip I can give you. If the cream cheese is even slightly warm when you try to shape it, it’ll stick to your knife and turn into a mess. Work with it straight from the fridge, and if your hands are warm, run them under cold water first. I learned this after one particularly frustrating attempt where my ghosts looked more like sad blobs.
Use a template if you’re nervous about shaping. The first time I made these, I drew a little ghost shape on a piece of paper and used it as a guide. Sounds silly, but it helped me get the proportions right. After a few tries, you’ll be able to freehand them without even thinking about it.
Layer your ingredients strategically. Put the heavier items like cheese and meat on the board first, then add the lighter items like crackers and nuts on top. This keeps everything stable and prevents the crackers from sliding around when people reach for things.
Don’t overcrowd the board. I know it’s tempting to pile everything on, but leaving a little negative space actually makes the board look more intentional and elegant. Plus, people need room to grab things without knocking everything over.
Make extra ghosts. Seriously. I always double the cream cheese ghosts because they’re the first thing to go. People love them, and they add such a fun, festive touch that you’ll want plenty to go around.
Prep everything before you start arranging. Have all your ingredients washed, sliced, and ready to go before you touch the board. Once you start arranging, you want to work quickly so the cheese doesn’t warm up and the fruit doesn’t start to brown.
Variations & Adaptations
One of the best things about this board is how flexible it is. Here are some variations I’ve tried and loved.
Dietary Variations
Vegetarian version — Simply skip the salami and prosciutto, and add more cheese varieties or roasted vegetables. I’ve done this for vegetarian friends and added roasted red peppers and marinated artichoke hearts instead, and nobody missed the meat.
Gluten-free version — Swap the crackers and baguette for gluten-free crackers, rice cakes, or vegetable sticks like cucumber rounds and bell pepper strips. Everything else on the board is naturally gluten-free.
Dairy-free version — Use dairy-free cream cheese for the ghosts (I’ve found the brand Violife works best for shaping) and skip the cheddar. Add more nuts, olives, and dried fruit to make up for the lost cheese elements.
Seasonal Adaptations
Fall harvest version — Add sliced pears, pomegranate seeds, and candied pecans. Swap the fig jam for apple butter. This version feels extra cozy and autumnal.
Winter holiday version — Use the same cheese ghost technique but add cranberries, roasted chestnuts, and a spiced wine jam. The ghosts work for any spooky or playful occasion, not just Halloween.
Flavor Twists
Spicy version — Add pepper jack cheese instead of cheddar, use spicy salami, and include pickled jalapeños. The heat contrasts nicely with the cool, creamy cheese ghosts.
Sweet and savory version — Add dark chocolate pieces, honeycomb, and fresh figs alongside the salty elements. The combination of sweet and savory is always a crowd-pleaser.
I once made a version of this board for a friend’s fall birthday party and added elements from the fresh low-calorie fruit salad with mint easy healthy summer recipe — the mint added a surprising freshness that cut through all the rich cheese and meat. It was an unexpected combination that everyone loved.
Serving & Storage Suggestions
This board is best served at room temperature, so take it out of the fridge about 15 to 20 minutes before you plan to serve it. The cheeses will be creamier and the flavors will be more pronounced. I like to arrange everything on the board, then let it sit while I get drinks ready and people start arriving.
For presentation, I arrange the cheese ghosts in a diagonal line across the center of the board, with the cheddar shapes and salami rosettes on one side and the fruits, nuts, and crackers on the other. This creates a nice visual flow and makes it easy for people to grab what they want without reaching across the whole board.
As for what to serve alongside, this board pairs beautifully with sparkling apple cider or a dry rosé. For a non-alcoholic option, I love serving it with a warm spiced apple cider — the contrast between the cold cheese and the warm drink is perfect for a crisp fall evening.
Storage instructions: If you have leftovers (which honestly doesn’t happen often in my house), separate the components and store them individually. The cream cheese ghosts will keep in an airtight container in the fridge for up to 3 days, but they won’t look as pretty after the first day. The cheddar, meats, and crackers will keep for several days in their own containers. The fruit should be eaten within a day or two.
Reheating tips: This is a cold board, so there’s nothing to reheat. But if you’ve refrigerated the cheese ghosts and want to serve them again, let them sit at room temperature for about 10 minutes before serving so they soften up a bit.
The flavors actually develop nicely over time — the cheese ghosts absorb a bit of the honey if you’ve drizzled it, and the crackers soften slightly from the moisture in the fruit. Some people prefer the board fresh, but I actually like it better after it’s been sitting out for an hour or so.
Nutritional Information & Benefits
While this board is definitely a treat, it does have some redeeming nutritional qualities. Here’s a rough estimate per serving (assuming the board serves 8 to 10 people):
- Calories: Approximately 350-400 per serving
- Protein: 12-15 grams (from the cheese, meat, and nuts)
- Carbohydrates: 25-30 grams (mostly from fruit and crackers)
- Fat: 22-28 grams (from cheese, nuts, and meats)
- Fiber: 4-6 grams (from apples, grapes, and nuts)
The cream cheese ghosts are actually a decent source of calcium and protein, and the apples and grapes provide natural sweetness along with fiber and vitamins. The almonds add healthy fats and vitamin E, while the olives contribute heart-healthy monounsaturated fats.
If you’re watching your sodium intake, go easy on the olives and pretzels, and choose unsalted nuts. For a lower-calorie version, load up on the fresh fruit and vegetables and go lighter on the cheese and cured meats.
I personally love that this board offers a balance of indulgence and nutrition — you get the fun, festive elements that make Halloween special, but you’re also getting real food that will actually satisfy you. It’s not just empty calories from candy.
For a protein-packed addition that fits the board theme, consider adding a side of the wholesome high-protein Greek yogurt chicken salad easy healthy recipe with fresh dill — it adds another savory element and bumps up the protein content significantly.
Conclusion
This easy Halloween fall charcuterie board with cheese ghosts has honestly become one of my favorite things to make all year. It’s the kind of recipe that looks like you spent hours on it when really, you just threw some things on a board and made a few cute ghost shapes. And that’s exactly the kind of cooking I love — impressive results without the stress.
The cheese ghosts are the star of the show, but the real magic is how everything comes together. The creamy cheese, the salty meat, the sweet fruit, the crunchy crackers — every bite is a little different, and that variety is what makes a grazing board so satisfying. Plus, it’s impossible to look at those little ghost faces without smiling.
I’d love to hear how yours turns out. Did you add any fun variations? Did your kids help shape the ghosts? Drop a comment below and let me know — I read every single one, and your ideas often inspire my next creation. And if you snap a photo of your board, tag me so I can see your beautiful work.
Here’s to a Halloween filled with good food, good company, and maybe a little bit of chaos. Because honestly, that’s where the best recipes come from anyway.
Frequently Asked Questions
Can I make the cheese ghosts ahead of time?
Yes, you can shape the cheese ghosts up to 24 hours in advance. Keep them covered in the refrigerator, and add the sesame seed eyes just before serving so they don’t get smudged or fall off.
What if I can’t find black sesame seeds for the eyes?
No problem at all. You can use poppy seeds, chia seeds, or even tiny dots of black food coloring. I’ve also used small pieces of black olive before in a pinch, and they worked great.
How do I keep the apple slices from turning brown?
Toss the apple slices in a little lemon juice or lime juice right after slicing. This will keep them looking fresh for several hours. Alternatively, you can use apple varieties like Honeycrisp or Fuji that naturally resist browning better than others.
Can I use other types of cheese for the ghosts?
Cream cheese works best because it’s soft enough to shape but firm enough to hold its form. However, you could try using a soft goat cheese log for a tangier flavor. Just note that goat cheese is a bit softer and may not hold the ghost shape as cleanly.
How long can the board sit out at room temperature?
For food safety, the board should not sit out for more than 2 hours. If you’re serving it over a longer period, consider making two smaller boards and rotating them, keeping one in the refrigerator while the other is out.
Pin This Recipe!
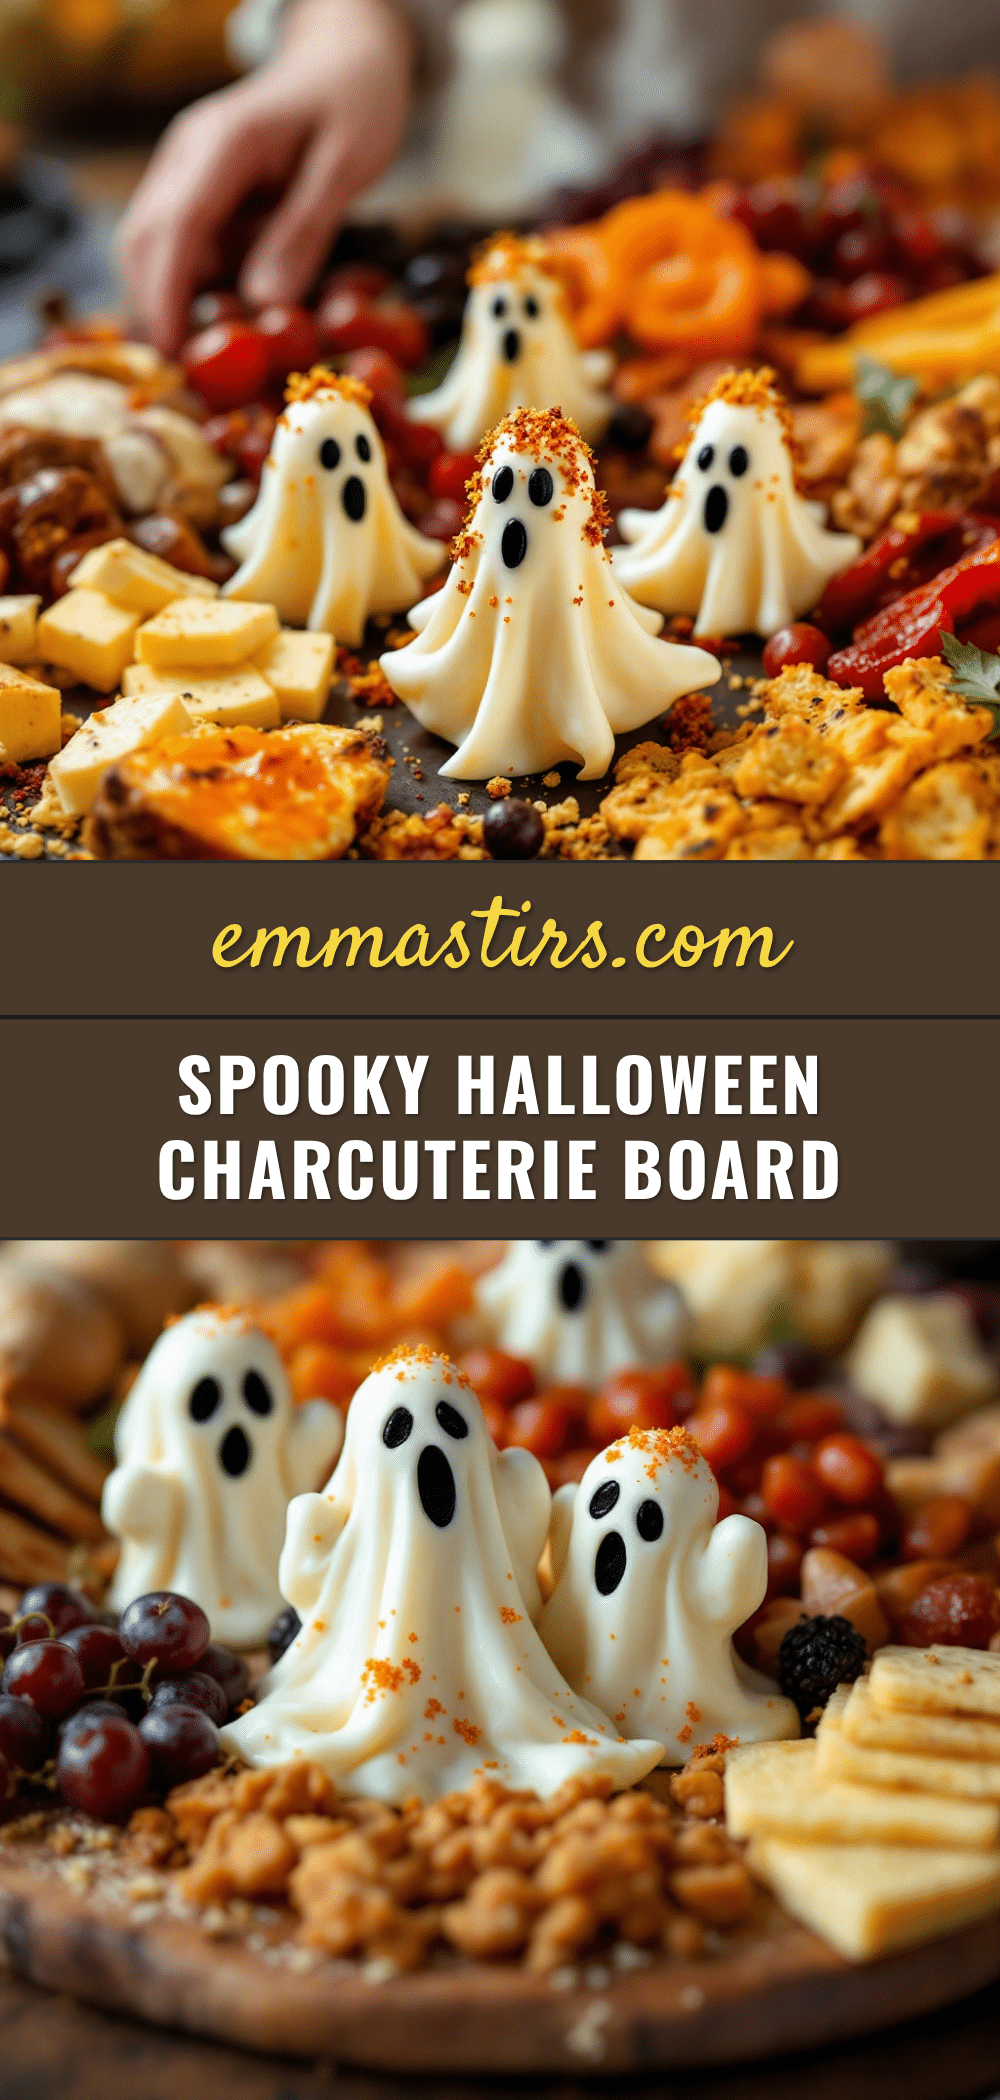
Easy Halloween Fall Charcuterie Board with Cheese Ghosts

A festive and easy Halloween charcuterie board featuring adorable cream cheese ghosts, savory meats, seasonal fruits, and crunchy crackers. Perfect for parties, movie nights, or trick-or-treat gatherings, this board comes together in just 15 minutes and is always the first thing to disappear.
- Prep Time: 15 minutes
- Cook Time: 0 minutes
- Total Time: 15 minutes
- Yield: 8-10 servings 1x
- Category: Appetizer
- Cuisine: American
Ingredients
- 8 ounces cream cheese, cold
- 1 teaspoon black sesame seeds or poppy seeds
- Small cookie cutters or a sharp paring knife
- 8 ounces sharp cheddar cheese, sliced into thin squares or Halloween shapes
- 6 ounces salami or prosciutto
- 1 cup mixed olives (kalamata and castelvetrano)
- 1 cup roasted almonds (unsalted)
- 1 cup pretzel sticks or mini pretzels
- 2 medium apples (Honeycrisp or Fuji), sliced
- 1 cup red grapes, washed and in small clusters
- 1/2 cup dried apricots or dried figs
- 1/4 cup honey (optional)
- 1 box of crackers (water crackers or neutral)
- 1 baguette, sliced into thin rounds and lightly toasted
- 1 small jar of fig jam or pumpkin butter
Instructions
- Make the cheese ghosts first. Take the cold cream cheese block and cut it into 6 to 8 equal slices, about 1/2 inch thick. Using your paring knife, shape each slice into a ghost form — round at the top, tapering slightly at the bottom. Place the ghosts on a small plate and refrigerate while you prepare everything else.
- Add the ghost faces. Just before serving, take the ghosts out of the fridge and press two black sesame seeds into each one for eyes. For the mouth, you can either use a tiny dot of the seed or just leave it off.
- Prepare the fruits and vegetables. Wash the grapes and leave them in small clusters. Slice the apples into thin wedges and toss them with a squeeze of lemon juice if making ahead. Arrange the dried apricots or figs in a small pile nearby.
- Slice the baguette and arrange the crackers. If toasting the baguette slices, do that now and let them cool completely. Arrange the crackers in a fan pattern or in small clusters around the board.
- Fold the salami or prosciutto. For salami, fold each slice in half, then in half again, and stand them up on the board so they look like little rosettes. For prosciutto, simply drape the slices in loose ribbons.
- Cut the cheddar cheese. Slice the cheddar into thin squares, or use Halloween cookie cutters to make pumpkin or bat shapes. Arrange these in a separate section of the board.
- Fill the small bowls. Put the olives in one bowl, the almonds in another, and the fig jam or pumpkin butter in a third. Place these bowls strategically around the board.
- Assemble the board. Start by placing the small bowls first. Then arrange the cheese ghosts in a row or scattered around the board. Add the cheddar shapes, salami rosettes, and fruit clusters in the spaces between. Finally, fill in any gaps with crackers, pretzels, and nuts.
- Drizzle the honey. If using honey, drizzle a small amount over the brie or over one or two of the cheese ghosts.
- Serve immediately or refrigerate. If not serving right away, cover the board loosely with plastic wrap and refrigerate for up to 2 hours. Take it out 15 minutes before serving to let the cheeses come to room temperature.
Notes
Keep the cream cheese cold for easier shaping. Double the cream cheese ghosts if serving a crowd. Toss apple slices in lemon juice to prevent browning. Leave grapes in small clusters for a fuller look. Don’t overcrowd the board; leave some negative space. Prep all ingredients before arranging. The board can be refrigerated for up to 2 hours before serving; remove 15 minutes before serving.
Nutrition
- Serving Size: 1 serving (based on
- Calories: 375
- Sugar: 15
- Sodium: 600
- Fat: 25
- Saturated Fat: 10
- Carbohydrates: 28
- Fiber: 5
- Protein: 14
Keywords: Halloween charcuterie board, cheese ghosts, easy Halloween snack, fall charcuterie board, cream cheese ghosts, Halloween appetizer, grazing board


