Love this? Save it for later!
Share the inspiration with your friends
The first weekend of October, when the air finally gets that crisp bite to it and the grocery store has already shoved the candy corn to the front of aisle five. I was standing in my kitchen, a little tired from a long week, staring at a box of Rice Krispies that I’d bought for absolutely no reason. And I just wanted something simple. Something that felt like fall but didn’t require turning on the oven or digging out my stand mixer. That’s when I grabbed the bag of marshmallows, the butter, and on a whim, a few orange candy melts I’d spotted near the checkout. These Easy Halloween Rice Krispie Treat Pumpkins weren’t planned. They kind of just happened. And honestly? They’re the best kind of recipe—the one you make while listening to a podcast, not thinking too hard, and they turn out exactly right.
There’s a specific kind of satisfaction in making something that looks like you tried really hard when you actually didn’t. These little pumpkins are that. They have that nostalgic, buttery marshmallow chew we all grew up on, but shaped into something that feels festive without being fussy. No fancy piping bags. No complicated decorating. Just a little orange candy melt, a pretzel stick, and a few minutes of your time.
I’ve made these for Halloween parties, for my niece’s classroom treat, and for that random Tuesday in October when I just needed a little joy. They always make people smile. And that’s the whole point, isn’t it?
Why You’ll Love This Recipe
Look, I’ve tested a lot of Halloween desserts over the years. Some are gorgeous but take three hours. Others are quick but taste like cardboard. These Easy Halloween Rice Krispie Treat Pumpkins hit that sweet spot where they’re genuinely simple to make and genuinely delicious to eat. Here’s why they work:
- No-Bake and Foolproof: You don’t need an oven, a mixer, or any special skills. If you can melt butter and marshmallows, you can make these. It’s that easy.
- Minimal Ingredients: You probably have most of these in your pantry right now. Rice Krispies, marshmallows, butter, and a few decorations. No weird specialty items.
- Perfect for Kids (and Adults): This is a great recipe to make with little ones. They can help shape the balls, dip them, and add the pretzel stems. My niece calls them “pumpkin pillows.” I’m not arguing.
- Customizable for Any Fall Occasion: Halloween party? Check. Thanksgiving dessert table? Sure. Just a cozy weekend treat? Absolutely. They work for all of it.
- They Look Impressive (But They’re Not): This is my favorite kind of recipe. People see these little orange pumpkins and think you spent hours. You didn’t. And that’s our little secret.
I’ve made these for a grazing board before, and they were gone in minutes. They’re the kind of treat that disappears before you even get a chance to take a proper photo.
What Ingredients You Will Need
This recipe uses simple, pantry-friendly ingredients to create something that feels special. No complicated shopping list here—just the basics that come together beautifully.
- 6 cups Rice Krispies cereal (or any crispy rice cereal—store brands work fine too)
- 4 tablespoons unsalted butter (salted butter works if that’s what you have, just skip the extra salt)
- 1 package (10 oz) mini marshmallows (or about 4 cups of regular marshmallows, but mini melt faster and more evenly)
- 1/2 teaspoon vanilla extract (pure or imitation—both work, but pure adds a nicer depth)
- Pinch of salt (balances the sweetness, trust me on this one)
- Orange candy melts (about 1 cup—I prefer Wilton or Ghirardelli for smooth melting)
- 1 tablespoon coconut oil or vegetable shortening (helps thin the candy melts for easier dipping)
- Pretzel sticks (for the pumpkin stems—break them in half or use mini pretzel sticks)
- Green candy melts or green icing (for the little vine or leaf on top—optional but cute)
- Black icing or edible marker (for jack-o’-lantern faces—totally optional, but fun for Halloween)
A quick note on the candy melts: I’ve tried a few brands, and I really do recommend Wilton for this. They melt smoothly, they’re a nice bright orange, and they set up firm without getting greasy. If you’re using a different brand, just add the coconut oil slowly—you want it thin enough to dip but not so thin it runs off completely.
For the marshmallows, I’ve used both name-brand Jet-Puffed and store brands. The store brand works fine, but I find Jet-Puffed gives a slightly fluffier texture. Not a dealbreaker either way.
Equipment Needed
You don’t need much for this recipe, which is part of the beauty. Here’s what you’ll want to have on hand:
- Large pot or Dutch oven: You need room to stir the marshmallows and cereal together without making a mess. A 5-quart pot works well.
- Wooden spoon or silicone spatula: Something sturdy that won’t bend when you’re mixing the cereal into the sticky marshmallow mixture.
- Buttered 9×13-inch baking dish: For pressing the cereal mixture into. You could also use a sheet pan if you want thinner treats.
- Parchment paper or wax paper: For lining the dish and for setting the dipped pumpkins on to dry.
- Microwave-safe bowl or double boiler: For melting the candy melts. A microwave is faster, but a double boiler gives you more control.
- Small cookie scoop or melon baller: For portioning the cereal mixture into uniform balls. A 1.5-tablespoon scoop is perfect.
- Fork or dipping tool: For dipping the pumpkin balls into the melted candy. A regular fork works fine.
- Baking sheet lined with parchment: For letting the dipped pumpkins set.
If you don’t have a cookie scoop, just use your hands—butter them well first to prevent sticking. I’ve done it both ways, and honestly, the scoop is faster, but hands work just fine.
Preparation Method
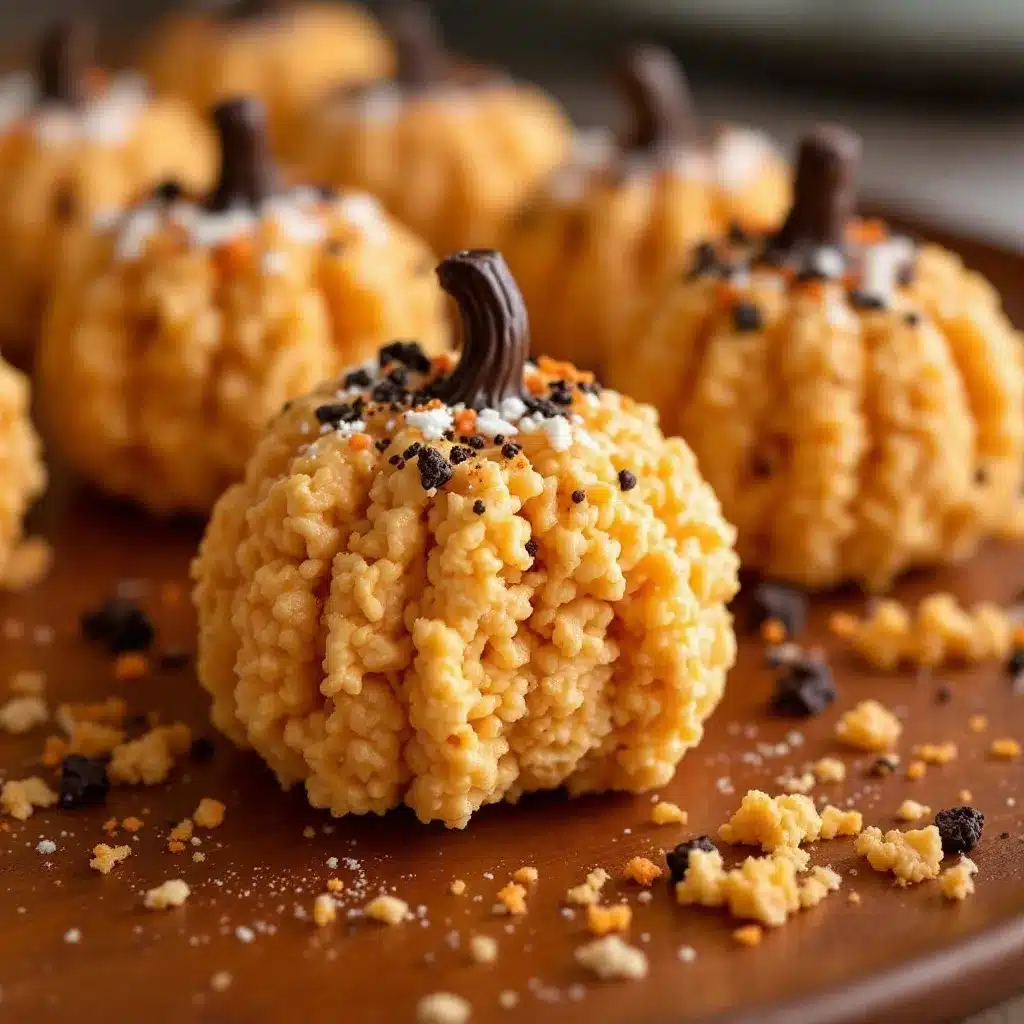
Alright, let’s make these little guys. I’ve broken this down step-by-step so you don’t miss anything.
Step 1: Make the Rice Krispie Treat Base
Butter your 9×13-inch baking dish generously. Set it aside. In a large pot over medium-low heat, melt the 4 tablespoons of butter. Once it’s melted, add the entire bag of mini marshmallows. Stir constantly until the marshmallows are completely melted and smooth. This takes about 3-4 minutes. Don’t walk away—marshmallows can burn quickly if you’re not paying attention.
Remove the pot from the heat. Stir in the vanilla extract and pinch of salt. Then add the 6 cups of Rice Krispies cereal. Fold everything together gently but thoroughly. You want every piece of cereal coated in that marshmallow goodness.
Step 2: Press and Cool
Transfer the mixture to your buttered baking dish. Press it down evenly. I use a piece of parchment paper or wax paper to press—it keeps your hands from getting sticky. You want it about 3/4 inch thick. Let it cool at room temperature for about 20-30 minutes, or until it’s firm enough to cut without falling apart.
Don’t refrigerate it to speed this up. I’ve tried that, and the treats get a little too hard and lose that soft, chewy texture. Room temperature is the way to go.
Step 3: Cut and Shape
Once the treats are cool and firm, use a sharp knife or a round cookie cutter (about 1.5 inches) to cut out circles. If you’re using a knife, cut the treats into squares first, then gently round the edges with your hands. This is where the butter on your hands comes in handy—literally. Butter your palms lightly, then roll each piece into a smooth ball. You should get about 20-24 balls, depending on size.
Place the balls on a parchment-lined baking sheet. Pop them in the fridge for about 10 minutes to firm up. This makes them easier to dip without falling apart.
Step 4: Melt the Candy Coating
In a microwave-safe bowl, combine the orange candy melts and 1 tablespoon of coconut oil. Microwave in 30-second intervals, stirring well after each, until completely smooth. Be careful not to overheat—candy melts can seize up if they get too hot. If it’s too thick, add another teaspoon of coconut oil and stir.
Let the melted candy sit for a minute or two to cool slightly. You want it warm but not hot, so it coats the pumpkin balls evenly without melting them.
Step 5: Dip and Decorate
Using a fork, gently dip each pumpkin ball into the melted orange candy. Let the excess drip off, then place it back on the parchment-lined baking sheet. While the coating is still wet, gently press a pretzel stick half into the top for the stem. If you’re adding a green leaf or vine, use a toothpick to dab a little green candy melt next to the stem.
Work in small batches—the candy coating will start to set, so don’t try to dip all 20 at once unless you’re very fast.
Step 6: Set and Serve
Let the dipped pumpkins set at room temperature for about 15-20 minutes, or until the coating is firm. If you’re in a hurry, pop them in the fridge for 5 minutes, but let them come back to room temperature before serving for the best texture.
If you want to add jack-o’-lantern faces, use black icing or an edible marker once the orange coating is fully set. I like to do a few with faces and leave the rest plain—it gives a nice variety.
Cooking Tips & Techniques
I’ve made these Easy Halloween Rice Krispie Treat Pumpkins more times than I can count, and I’ve learned a few things along the way. Here’s what I wish someone had told me the first time:
Don’t overheat the marshmallows. This is the number one mistake. Low and slow is the key. If you rush it, the marshmallows can become tough and the treats will be hard instead of soft and chewy. Trust me, I’ve had a batch turn into edible hockey pucks. Not fun.
Butter your hands generously. When you’re rolling the treats into balls, the mixture is sticky. Like, really sticky. Butter your palms well, and if it starts sticking again, just add more butter. A light coating of cooking spray works too, but I find butter gives a better flavor.
Work quickly with the candy coating. The melted candy starts to set as soon as it’s off the heat. If it thickens up while you’re dipping, just pop it back in the microwave for 10-15 seconds and stir. Don’t add more liquid—just a quick reheat will do.
Use a fork for dipping, not tongs. Tongs can break the delicate pumpkin balls. A fork lets you gently lower and lift them without crushing the shape. Let the excess drip off over the bowl before setting them down.
Let the treats cool completely before dipping. If they’re still warm from the fridge, the candy coating can crack or slide off. Let them sit at room temperature for a few minutes after chilling before you start dipping.
I also recommend making these a day ahead if you’re planning for a party. They actually taste better the next day—the flavors meld together, and the texture gets even more perfect.
Variations & Adaptations
One of the best things about this recipe is how easy it is to adapt. Here are a few ways I’ve switched it up over the years:
Chocolate-Dipped Pumpkins
Instead of orange candy melts, use dark or milk chocolate. Dip the tops of the pumpkin balls in chocolate, then add a pretzel stem. It’s like a chocolate-covered marshmallow treat, but cuter. I’ve done this for a campfire dessert board before, and it was a huge hit.
Gluten-Free Version
Rice Krispies are naturally gluten-free, but check the label on your cereal to make sure it’s certified gluten-free if that’s a concern. The rest of the ingredients are already gluten-free, so this is an easy swap.
Vegan Option
Use vegan marshmallows (Dandies are my favorite) and vegan butter. Most candy melts are accidentally vegan, but check the label. Coconut oil works perfectly for thinning the coating.
Different Shapes
Don’t limit yourself to pumpkins. Use the same base recipe to make ghost shapes (white candy melts, black icing faces), bats (black candy melts, pretzel wing pieces), or even little monsters (green or purple candy melts, candy eyes). This is a great way to use up leftover candy melts from other projects.
Spiced Version
Add 1/2 teaspoon of pumpkin pie spice or cinnamon to the marshmallow mixture before adding the cereal. It gives the treats a warm, fall flavor that pairs beautifully with the orange coating. I tried this on a whim last year, and now I can’t go back.
Serving & Storage Suggestions
These Easy Halloween Rice Krispie Treat Pumpkins are best served at room temperature. The texture is soft and chewy, and the candy coating has a nice snap. If you’ve added jack-o’-lantern faces, they’re extra fun for kids.
I like to arrange them on a platter with a few fall leaves or mini gourds for a festive look. They’re perfect for Halloween parties, school treats, or just a fun weekend project. I’ve also brought them to a grazing board and they were the first thing to disappear.
For storage, keep them in an airtight container at room temperature. They’ll stay fresh for up to 5 days. Don’t refrigerate them—the cold makes the treats hard and the coating can get sticky. If you’re stacking them, place a piece of parchment paper between layers to prevent sticking.
You can also freeze them for up to 2 months. Place them in a single layer on a baking sheet and freeze until solid, then transfer to a freezer-safe bag or container. Thaw at room temperature for about 30 minutes before serving. The texture might be slightly softer, but they’re still delicious.
One thing I’ve noticed: the flavors actually develop overnight. If you can wait, make them a day ahead. The marshmallow-cereal base gets a little more cohesive, and the candy coating sets perfectly. They’re even better the next day.
Nutritional Information & Benefits
Let’s be real—these are a treat, not a health food. But here’s the estimated nutritional breakdown per pumpkin (based on 20 servings):
- Calories: ~180
- Fat: 8g
- Carbohydrates: 26g
- Sugar: 14g
- Protein: 1g
- Sodium: 120mg
The Rice Krispies provide a small amount of iron and B vitamins, and the butter adds a bit of vitamin A. But honestly, this is about joy, not nutrition. If you’re looking for a healthier option, you could try using a lower-sugar cereal or reducing the candy coating, but I think the magic is in the full experience.
For those with dietary restrictions, this recipe is naturally nut-free (check your cereal label) and can easily be made gluten-free or vegan as mentioned above. The main allergens are dairy (butter, candy melts) and wheat (some cereals contain malt flavoring).
I like to balance these out with something like a savory cottage cheese bowl for lunch. It’s all about balance, right?
Conclusion
These Easy Halloween Rice Krispie Treat Pumpkins are exactly what a Halloween dessert should be: fun, simple, and genuinely delicious. They don’t require any fancy equipment or skills, and they look like you put in way more effort than you actually did. That’s my favorite kind of recipe.
I love that I can make these with my niece on a rainy October afternoon, or whip up a batch for a party without stressing. They’re forgiving, adaptable, and always bring a smile. Whether you add jack-o’-lantern faces, keep them plain, or experiment with different colors, they’re a guaranteed hit.
So go ahead—grab a box of Rice Krispies, a bag of marshmallows, and a little orange candy. Make a mess in your kitchen. Lick the spoon. And enjoy every single bite. If you make these, I’d love to hear about it. Drop a comment below or tag me in your photos. Happy Halloween, friends!
Frequently Asked Questions
Can I use store-brand cereal instead of Rice Krispies?
Absolutely. Store-brand crispy rice cereal works just fine. The texture might be slightly different, but the results are still delicious. Just make sure it’s fresh—stale cereal won’t give you that perfect crunch.
How do I keep the candy coating from cracking?
Make sure your pumpkin balls are at room temperature before dipping. If they’re too cold from the fridge, the warm candy can crack as it sets. Also, don’t overheat the candy melts—gentle melting is key.
Can I make these ahead of time?
Yes! These actually taste better the next day. Make them up to 2 days in advance and store them in an airtight container at room temperature. For longer storage, freeze them for up to 2 months.
My marshmallow mixture is too hard. What went wrong?
You probably overheated the marshmallows. They should be melted over low heat and stirred constantly. If they get too hot, the sugar can crystallize and make the treats tough. Next time, go slow and low.
Can I use chocolate instead of candy melts?
Yes, but chocolate needs to be tempered to set properly at room temperature. Candy melts are designed to set without tempering, which is why they’re easier. If you use chocolate, you can add a little coconut oil to thin it, but it might not set as firmly.
Pin This Recipe!
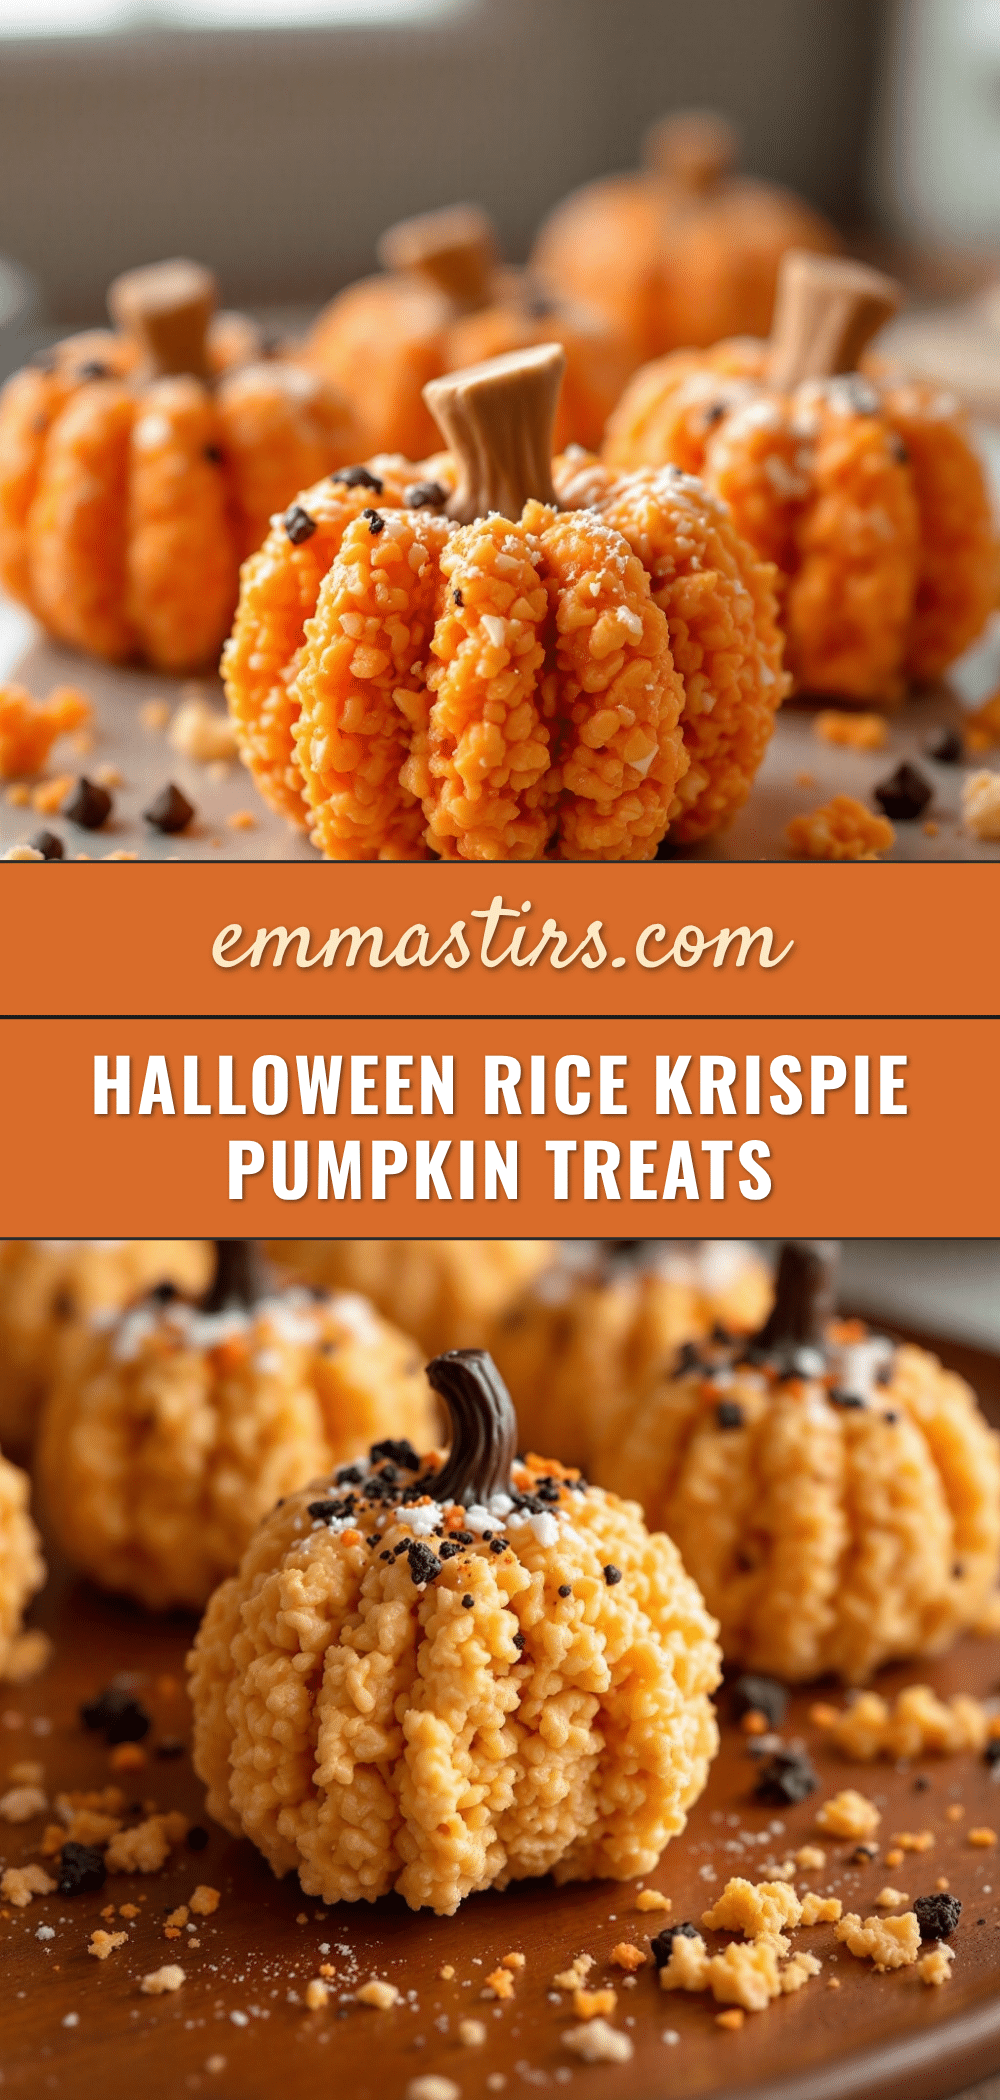
Easy Halloween Rice Krispie Treat Pumpkins: Best No-Bake Fall Dessert

These Easy Halloween Rice Krispie Treat Pumpkins are a no-bake, foolproof fall dessert that looks impressive but is incredibly simple to make. Made with just a few pantry ingredients, they’re perfect for Halloween parties, school treats, or a cozy weekend project.
- Prep Time: 20 minutes
- Cook Time: 10 minutes
- Total Time: 1 hour 10 minutes
- Yield: 20-24 servings 1x
- Category: Dessert
- Cuisine: American
Ingredients
- 6 cups Rice Krispies cereal
- 4 tablespoons unsalted butter
- 1 package (10 oz) mini marshmallows
- 1/2 teaspoon vanilla extract
- Pinch of salt
- 1 cup orange candy melts
- 1 tablespoon coconut oil or vegetable shortening
- Pretzel sticks
- Green candy melts or green icing (optional)
- Black icing or edible marker (optional)
Instructions
- Butter a 9×13-inch baking dish generously. Set aside.
- In a large pot over medium-low heat, melt the 4 tablespoons of butter. Add the entire bag of mini marshmallows and stir constantly until completely melted and smooth, about 3-4 minutes.
- Remove the pot from the heat. Stir in the vanilla extract and pinch of salt. Add the 6 cups of Rice Krispies cereal and fold together gently but thoroughly until every piece is coated.
- Transfer the mixture to the buttered baking dish and press it down evenly to about 3/4 inch thick using a piece of parchment paper or wax paper. Let cool at room temperature for 20-30 minutes until firm.
- Once cool and firm, use a sharp knife or a 1.5-inch round cookie cutter to cut out circles. Butter your palms lightly and roll each piece into a smooth ball. You should get about 20-24 balls.
- Place the balls on a parchment-lined baking sheet and refrigerate for 10 minutes to firm up.
- In a microwave-safe bowl, combine the orange candy melts and 1 tablespoon of coconut oil. Microwave in 30-second intervals, stirring well after each, until completely smooth. Let cool slightly.
- Using a fork, gently dip each pumpkin ball into the melted orange candy. Let excess drip off, then place back on the parchment-lined baking sheet. While the coating is still wet, gently press a pretzel stick half into the top for the stem. Optionally, add a small dab of green candy melt for a leaf or vine.
- Let the dipped pumpkins set at room temperature for 15-20 minutes until the coating is firm. If desired, add jack-o’-lantern faces using black icing or an edible marker once the coating is fully set.
Notes
Don’t overheat the marshmallows—low and slow is key. Butter your hands generously when rolling the balls. Work quickly with the candy coating as it sets fast. Let the treats cool completely before dipping to prevent cracking. These taste even better the next day. Store in an airtight container at room temperature for up to 5 days, or freeze for up to 2 months.
Nutrition
- Serving Size: 1 pumpkin
- Calories: 180
- Sugar: 14
- Sodium: 120
- Fat: 8
- Saturated Fat: 5
- Carbohydrates: 26
- Protein: 1
Keywords: Halloween, Rice Krispie treats, pumpkins, no-bake, fall dessert, easy, kids, party treat


