Love this? Save it for later!
Share the inspiration with your friends
Third time in five days and I finally stopped overthinking the butter. The first batch turned out fine—good, even—but the crust had this faint, almost imperceptible sogginess on the bottom that bothered me more than it should have. The second batch? I got impatient and didn’t let the pecans toast long enough before pouring the filling over them. They softened into something that tasted fine but lacked that little snap, that textural contrast that makes a pecan bar feel special. By the third attempt, I stopped guessing and started paying attention. I cold-pressed the crust into the pan with my fingertips until it felt like packed sand at the beach, let it pre-bake until the edges just started to turn golden, and toasted the pecans separately until the kitchen smelled like a fall candle that actually delivers.
These easy maple pecan pie bars with no-roll crust aren’t complicated. That’s the thing—they’re not supposed to be. But there’s a difference between simple and careless, and this recipe finally landed somewhere in that sweet spot where the effort matches the payoff. No rolling pin, no chilling the dough for hours, no wrestling with sticky pastry that tears the second you look away. Just a sturdy, buttery shortbread base that presses into the pan in under five minutes, a glossy maple-sweetened filling that comes together in one bowl, and a generous layer of toasted pecans that stay crunchy even after baking.
What kept me coming back wasn’t some grand culinary ambition. It was the way the maple syrup caramelized around the edges of the bars, creating these little chewy pockets that tasted like the best part of a pecan pie without the fuss of a full crust. It was the fact that my neighbor, who claims she doesn’t like dessert, ate three of them standing at the counter. It was realizing that I could make a dessert that felt special enough for Thanksgiving but easy enough for a random Tuesday when you just want something sweet with your coffee. That’s the kind of recipe worth making more than once.
Why You’ll Love This Recipe
Let’s be honest—pecan pie is incredible, but the crust situation can be a real headache. Traditional pie dough requires chilling, rolling, and a fair amount of patience. These bars skip all of that without sacrificing anything. The no-roll crust is pressed directly into the pan, which means less mess, less stress, and more time enjoying the actual eating part.
- No Rolling Pin Required — The crust is a simple press-in shortbread that comes together with melted butter and a fork. No flour on your counter, no cold butter cubes, no anxiety about shrinkage.
- Maple Syrup Does the Heavy Lifting — Instead of relying solely on corn syrup, this recipe uses pure maple syrup for a more complex, less cloying sweetness. The flavor is deeper, almost woodsy, and it pairs beautifully with the toasted pecans.
- Perfect Texture Contrast — The crust stays firm and buttery, the filling sets into a soft, almost custard-like layer, and the pecans on top stay crunchy. Every bite has three distinct textures, which is exactly what you want in a bar dessert.
- Make-Ahead Friendly — These bars actually taste better the next day. The filling sets up perfectly overnight, and the flavors have time to meld together. You can bake them a day or two ahead of a gathering and still impress everyone.
- Portable and Crowd-Ready — Unlike a traditional pie that requires plates and forks, these bars are handheld, stackable, and perfect for potlucks, holiday cookie exchanges, or packing in lunchboxes. Just cut, wrap, and go.
I’ve tested this recipe with different sweeteners, different baking times, and different pan sizes. This version is the one that consistently delivers that nostalgic pecan pie flavor with a fraction of the effort. It’s the kind of dessert that makes you look like you spent hours in the kitchen when really, you just pressed some dough into a pan and let the oven do the rest.
What Ingredients You Will Need
This recipe relies on simple, pantry-friendly ingredients, but a few key choices make a real difference in the final texture and flavor. Here’s what you’ll need and why each ingredient matters.
For the No-Roll Crust
- All-purpose flour, 1 ½ cups (180g) — Standard all-purpose flour gives the crust structure without making it tough. Spoon and level your flour for accuracy; scooping directly from the bag can pack in too much and lead to a dense crust.
- Unsalted butter, ½ cup (113g), melted — Melted butter is what makes this crust pressable. It coats the flour evenly and creates a tender, shortbread-like texture. I prefer unsalted so I can control the salt level.
- Granulated sugar, ¼ cup (50g) — A modest amount of sugar adds just enough sweetness to balance the buttery crust without competing with the filling.
- Vanilla extract, 1 teaspoon — A little vanilla in the crust adds warmth and depth. It’s subtle, but you’d notice if it were missing.
- Salt, ¼ teaspoon — Salt enhances the butter flavor and prevents the crust from tasting flat.
For the Maple Pecan Filling
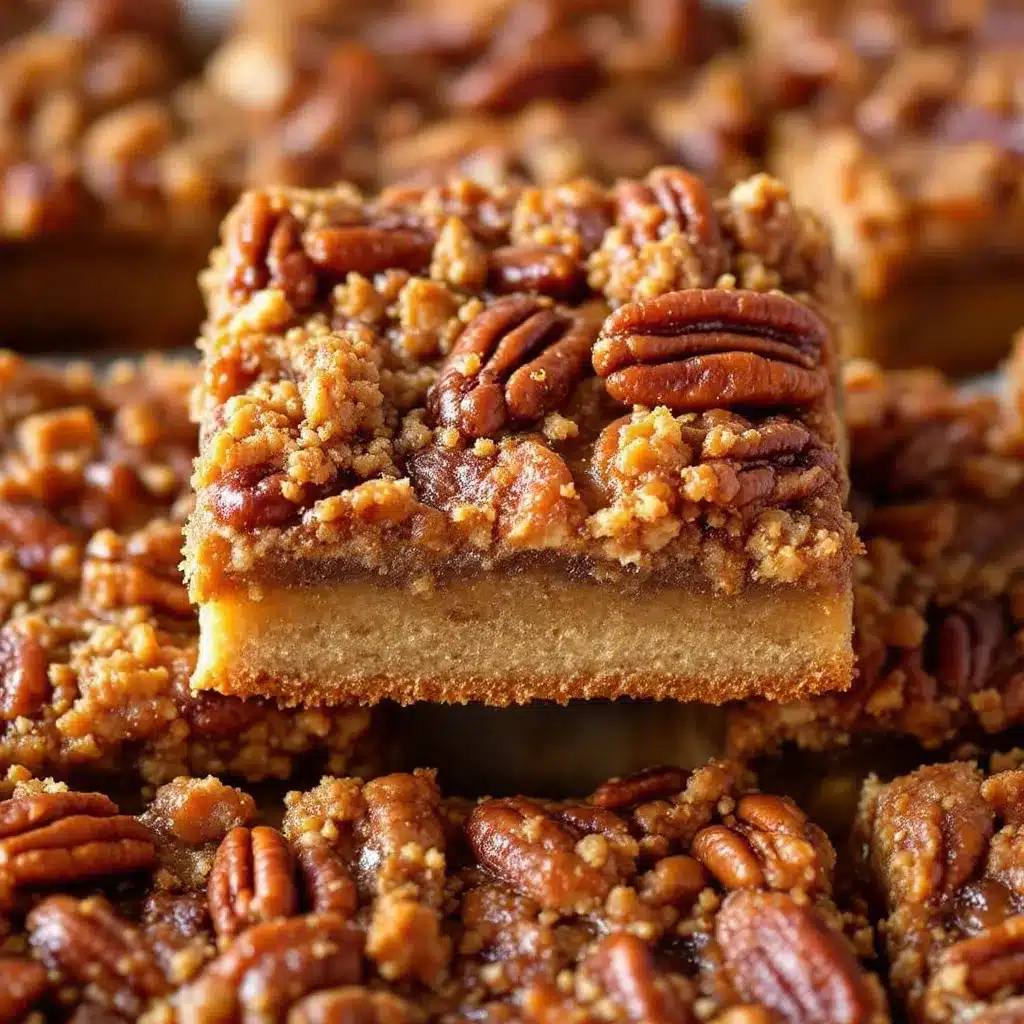
- Pecan halves, 2 cups (200g) — Use raw pecan halves, not pieces. Halves give the bars a more attractive appearance and better texture. Toast them lightly before using to deepen their flavor—more on that in the method section.
- Pure maple syrup, ¾ cup (180ml) — This is not the place for pancake syrup. Use real maple syrup, preferably Grade A dark amber for a more robust flavor. The maple syrup is the star here, so its quality matters.
- Light brown sugar, ½ cup (100g), packed — Brown sugar adds molasses notes that complement the maple syrup and create a softer, chewier filling.
- Large eggs, 2 — Eggs provide structure and help the filling set into a custard-like consistency. Let them come to room temperature before mixing so they incorporate more smoothly.
- Unsalted butter, 3 tablespoons (42g), melted — A small amount of melted butter in the filling adds richness and a silky mouthfeel.
- Vanilla extract, 1 teaspoon — Vanilla rounds out the sweetness and enhances the maple flavor.
- Salt, ¼ teaspoon — Don’t skip this. Salt balances the sweetness and makes the maple flavor pop.
Ingredient Tips and Substitutions
If you’re out of light brown sugar, you can substitute dark brown sugar for a deeper molasses flavor, or use coconut sugar for a less refined option. For a gluten-free version, replace the all-purpose flour with a 1:1 gluten-free baking flour blend that contains xanthan gum. I’ve tested this with Bob’s Red Mill 1:1 and the crust holds up beautifully. If you need a dairy-free option, use a plant-based butter stick (not margarine from a tub) in both the crust and the filling. The texture will be slightly less tender but still delicious.
For the pecans, try to buy them from a store with high turnover so they’re fresh. Rancid pecans can ruin an entire batch, and trust me, you’ll taste it. Store any leftover pecans in the freezer to keep them fresh longer.
Equipment Needed
You don’t need a fancy bakery setup for these bars, but a few specific tools make the process smoother and the results more consistent.
- 9×9-inch square baking pan — This size is ideal for bars that are thick enough to feel substantial but not so thick that they take forever to bake. An 8×8 pan will work, but the bars will be taller and may need a few extra minutes in the oven.
- Parchment paper — Line the pan with parchment paper, leaving an overhang on two opposite sides. This creates handles that let you lift the entire slab of bars out of the pan for clean, even cutting. I’ve tried greasing the pan directly, and the bars always stick. Parchment is non-negotiable here.
- Mixing bowls — You’ll need one medium bowl for the crust and one medium bowl for the filling. Nothing fancy.
- Whisk and fork — A fork works best for combining the melted butter with the flour mixture for the crust. A whisk is perfect for smoothing out the filling.
- Baking sheet — To toast the pecans before adding them to the bars. A rimmed baking sheet prevents any stray pecans from rolling off.
- Sharp knife — A chef’s knife or a long serrated knife works best for cutting clean bars. Wipe the blade between cuts to keep the edges neat.
If you don’t have a 9×9 pan, you can use a 9×13 pan instead—just know the bars will be thinner and will bake faster, about 20-22 minutes. Keep an eye on them starting at the 18-minute mark.
Preparation Method
Step 1: Preheat and Prep the Pan
Preheat your oven to 350°F (175°C). Line a 9×9-inch baking pan with parchment paper, leaving about 2 inches of overhang on two opposite sides. Lightly spray the parchment with nonstick cooking spray for extra insurance.
Step 2: Toast the Pecans
Spread the pecan halves in a single layer on a rimmed baking sheet. Toast them in the preheated oven for 6-8 minutes, stirring halfway through, until they smell fragrant and are slightly darkened. Watch them carefully—pecans can go from toasted to burnt in less than a minute. Remove them from the oven and let them cool while you make the crust. Leave the oven on.
Step 3: Make the No-Roll Crust
In a medium bowl, whisk together the flour, granulated sugar, and salt. Pour in the melted butter and vanilla extract, then stir with a fork until the mixture looks like damp sand and holds together when pressed between your fingers. Don’t overmix—you just want everything evenly moistened.
Transfer the mixture to the prepared pan. Press it firmly and evenly into the bottom of the pan. Use the bottom of a flat measuring cup or a glass to really compact it. A loose crust will crumble when you cut the bars later, so take your time here. Press until the surface is smooth and even.
Bake the crust for 12-14 minutes, until the edges are just starting to turn golden and the center looks set. It shouldn’t be deeply browned. Remove from the oven and let it cool on a wire rack for 10 minutes while you make the filling.
Step 4: Make the Maple Pecan Filling
In a medium bowl, whisk together the maple syrup, packed brown sugar, eggs, melted butter, vanilla extract, and salt. Whisk until the mixture is smooth and the brown sugar has dissolved, about 30 seconds. The filling will look thin—that’s normal.
Spread the toasted pecans evenly over the pre-baked crust. Pour the maple filling over the pecans, making sure it flows into all the gaps. The pecans will float a bit, and that’s exactly what you want. They’ll rise to the top during baking and create that beautiful pecan-studded top layer.
Step 5: Bake the Bars
Place the pan back in the oven and bake for 28-32 minutes. The filling should be set around the edges but still have a slight jiggle in the center when you gently shake the pan. If the center looks liquid, give it another 2-3 minutes. The filling will continue to set as it cools, so it’s better to pull it slightly early than to overbake it.
Let the bars cool completely in the pan on a wire rack. This takes about 2 hours. For the cleanest cuts, refrigerate the pan for at least 1 hour after cooling. The filling firms up beautifully when chilled, making it much easier to slice.
Step 6: Cut and Serve
Use the parchment overhang to lift the entire slab out of the pan. Place it on a cutting board. Use a sharp knife to cut into 16 squares (4 rows by 4 rows). Wipe the knife clean between cuts for neat edges. If the bars feel sticky, chill them for another 15 minutes before cutting.
Cooking Tips & Techniques
I’ve made enough mistakes with these bars to fill a small notebook. Here are the lessons that actually matter.
Don’t skip toasting the pecans. I know it feels like an extra step, but raw pecans are soft and almost bland. Toasting transforms them—they become crunchy, nutty, and infinitely more flavorful. If you add untoasted pecans to the filling, they’ll absorb moisture from the syrup and stay soft. Toasted pecans retain their crunch even after baking, which is the whole point.
Press the crust firmly. This is the most common mistake I see in comments on similar recipes. A loosely pressed crust will crumble into a million pieces when you try to cut the bars. Use the bottom of a measuring cup and really lean into it. The crust should feel like a solid, compact layer, not loose crumbs.
Watch the baking time closely. Ovens vary, and the difference between perfectly set bars and dry, overbaked ones is about 3 minutes. Start checking at the 28-minute mark. The edges should be puffed and golden, and the center should jiggle just slightly when you shake the pan. If you insert a toothpick near the center, it should come out with a few moist crumbs attached, not wet batter.
Let them cool completely. I know it’s tempting to cut into warm bars, but warm filling is runny filling. If you cut too soon, the bars will ooze and collapse. Patience pays off here. After they’ve cooled to room temperature, pop them in the fridge for an hour. The difference in texture is night and day.
Use a sharp knife and wipe it clean. This sounds like a small thing, but it makes the difference between bars that look bakery-perfect and bars that look like they’ve been through a fight. A clean cut every time.
Variations & Adaptations
One of the best things about this recipe is how easily it adapts to different tastes and dietary needs. Here are a few variations I’ve tried and loved.
Chocolate Maple Pecan Bars
Melt ½ cup of dark chocolate chips and drizzle it over the cooled bars. The bitterness of the dark chocolate cuts through the sweetness of the maple filling beautifully. I made this version for a holiday party and they disappeared faster than the original.
Gluten-Free Version
Substitute the all-purpose flour with a 1:1 gluten-free baking flour blend that contains xanthan gum. I’ve tested this with King Arthur Measure for Measure and Cup4Cup, and both work perfectly. The crust will be slightly more crumbly, so press it firmly and handle the bars gently when cutting.
Bourbon Maple Pecan Bars
Add 2 tablespoons of bourbon to the filling along with the vanilla. The bourbon adds a warm, smoky depth that pairs incredibly well with the maple and pecans. If you’re serving these to kids, you can use bourbon extract instead for the flavor without the alcohol.
Vegan Adaptation
Use a flax egg (1 tablespoon ground flaxseed mixed with 3 tablespoons water, let sit for 5 minutes) in place of the eggs, and use a plant-based butter stick. The texture will be slightly less custard-like, but the flavor is still spot-on. I’d recommend adding an extra tablespoon of maple syrup to compensate for the reduced moisture.
Spiced Maple Pecan Bars
Add 1 teaspoon of cinnamon and ¼ teaspoon of nutmeg to the filling. The warm spices make these bars taste even more like fall. I sometimes add a pinch of cardamom too, which adds an unexpected floral note that keeps people guessing.
Serving & Storage Suggestions
These bars are incredibly versatile when it comes to serving. They’re delicious at room temperature, but I actually prefer them slightly chilled—the filling firms up into a dense, almost fudge-like texture that’s incredibly satisfying. If you’re serving them at a gathering, let them sit at room temperature for about 15 minutes after taking them out of the fridge so they soften just a touch.
For an extra-special presentation, serve each bar with a small dollop of lightly sweetened whipped cream or a scoop of vanilla bean ice cream. The cold, creamy element contrasts beautifully with the rich, nutty bars. A drizzle of extra maple syrup over the top never hurts either.
These bars also pair wonderfully with coffee or tea. The bitterness of black coffee cuts through the sweetness, making each bite taste balanced. If you’re serving them for brunch, try them alongside a cozy one-bowl banana bread for a full spread of handheld sweets.
Storage: Store the bars in an airtight container at room temperature for up to 3 days, or in the refrigerator for up to a week. I actually prefer the texture after a day in the fridge—the flavors meld together and the filling becomes even more cohesive. If you’re stacking them, place a sheet of parchment paper between layers to prevent sticking.
Freezing: These bars freeze beautifully. Wrap individual bars tightly in plastic wrap, then place them in a freezer-safe bag or container. They’ll keep for up to 3 months. To thaw, let them sit at room temperature for about 30 minutes, or pop them in the microwave for 15-20 seconds for a warm treat. I often make a double batch and freeze half for unexpected guests or late-night cravings.
Nutritional Information & Benefits
Let’s be real—these are dessert bars, not health food. But they do have a few redeeming qualities worth noting. Pecans are packed with healthy monounsaturated fats, fiber, and essential minerals like magnesium and zinc. They’re also one of the best nut sources of antioxidants, which help fight inflammation in the body. Maple syrup, while still sugar, contains small amounts of minerals like manganese and zinc that refined sugar lacks.
Here’s the estimated nutritional breakdown per bar (based on 16 servings):
- Calories: 245
- Total Fat: 16g
- Saturated Fat: 6g
- Carbohydrates: 24g
- Fiber: 2g
- Sugar: 17g
- Protein: 3g
If you’re looking for a lighter option, you could try these alongside a fresh low-calorie fruit salad with mint for a balanced dessert plate. For a protein-packed breakfast that balances out the indulgence, consider starting your day with a fluffy cottage cheese pancake recipe.
These bars are vegetarian and can be made gluten-free, dairy-free, or vegan with the substitutions listed above. They contain eggs, dairy, and tree nuts (pecans), so keep that in mind if you’re serving guests with allergies.
Conclusion
These easy maple pecan pie bars with no-roll crust are the kind of recipe that earns a permanent spot in your rotation. They’re simple enough for a weekday baking project, impressive enough for holiday gatherings, and adaptable enough to fit almost any dietary need. The no-roll crust eliminates the biggest barrier to making pecan pie at home, and the maple-forward filling gives the whole thing a sophisticated flavor that feels special without being fussy.
What I love most about this recipe is how forgiving it is. You don’t need to be an experienced baker to nail it. The crust presses in, the filling stirs together, and the oven does the rest. It’s the kind of dessert that builds confidence in the kitchen—and tastes incredible while doing it.
I’d love to hear how these turn out for you. Did you try one of the variations? Add your own twist? Drop a comment below and let me know. And if you’re looking for more easy, crowd-pleasing desserts, don’t miss our savory brown butter salted chocolate chip cookies or the easy overnight crockpot French toast casserole for another pecan-filled treat.
Happy baking, friends. Go make something delicious.
Frequently Asked Questions
Can I use light corn syrup instead of maple syrup?
You can, but the flavor will be noticeably different. Maple syrup gives these bars a complex, woodsy sweetness that corn syrup simply can’t replicate. If you’re in a pinch, use a 50/50 blend of corn syrup and maple syrup to keep some of that maple flavor while reducing the cost.
Why did my crust turn out crumbly?
This usually happens when the crust isn’t pressed firmly enough into the pan, or when the butter-to-flour ratio is off. Make sure you’re using exactly ½ cup of melted butter and pressing the crust down with the bottom of a flat measuring cup until it feels compact. If your crust still crumbles, try adding an extra tablespoon of melted butter next time.
Can I make these bars in a different size pan?
Yes, but the baking time will change. In a 9×13 pan, the bars will be thinner and bake in about 20-22 minutes. In an 8×8 pan, they’ll be thicker and may need 35-38 minutes. Keep an eye on the center jiggle test regardless of pan size.
How do I know when the bars are done baking?
The edges should be puffed and golden, and the center should have a slight jiggle when you gently shake the pan—think Jell-O, not liquid. If the center looks wobbly like soup, give it more time. The filling will continue to set as it cools, so it’s better to underbake slightly than to overbake.
Can I use pre-chopped pecans instead of pecan halves?
You can, but the texture won’t be as nice. Pecan halves create a more attractive top layer and stay crunchier during baking. Pre-chopped pecans tend to be smaller and can get lost in the filling. If you only have chopped pecans, use them, but expect a less dramatic visual result.
Pin This Recipe!
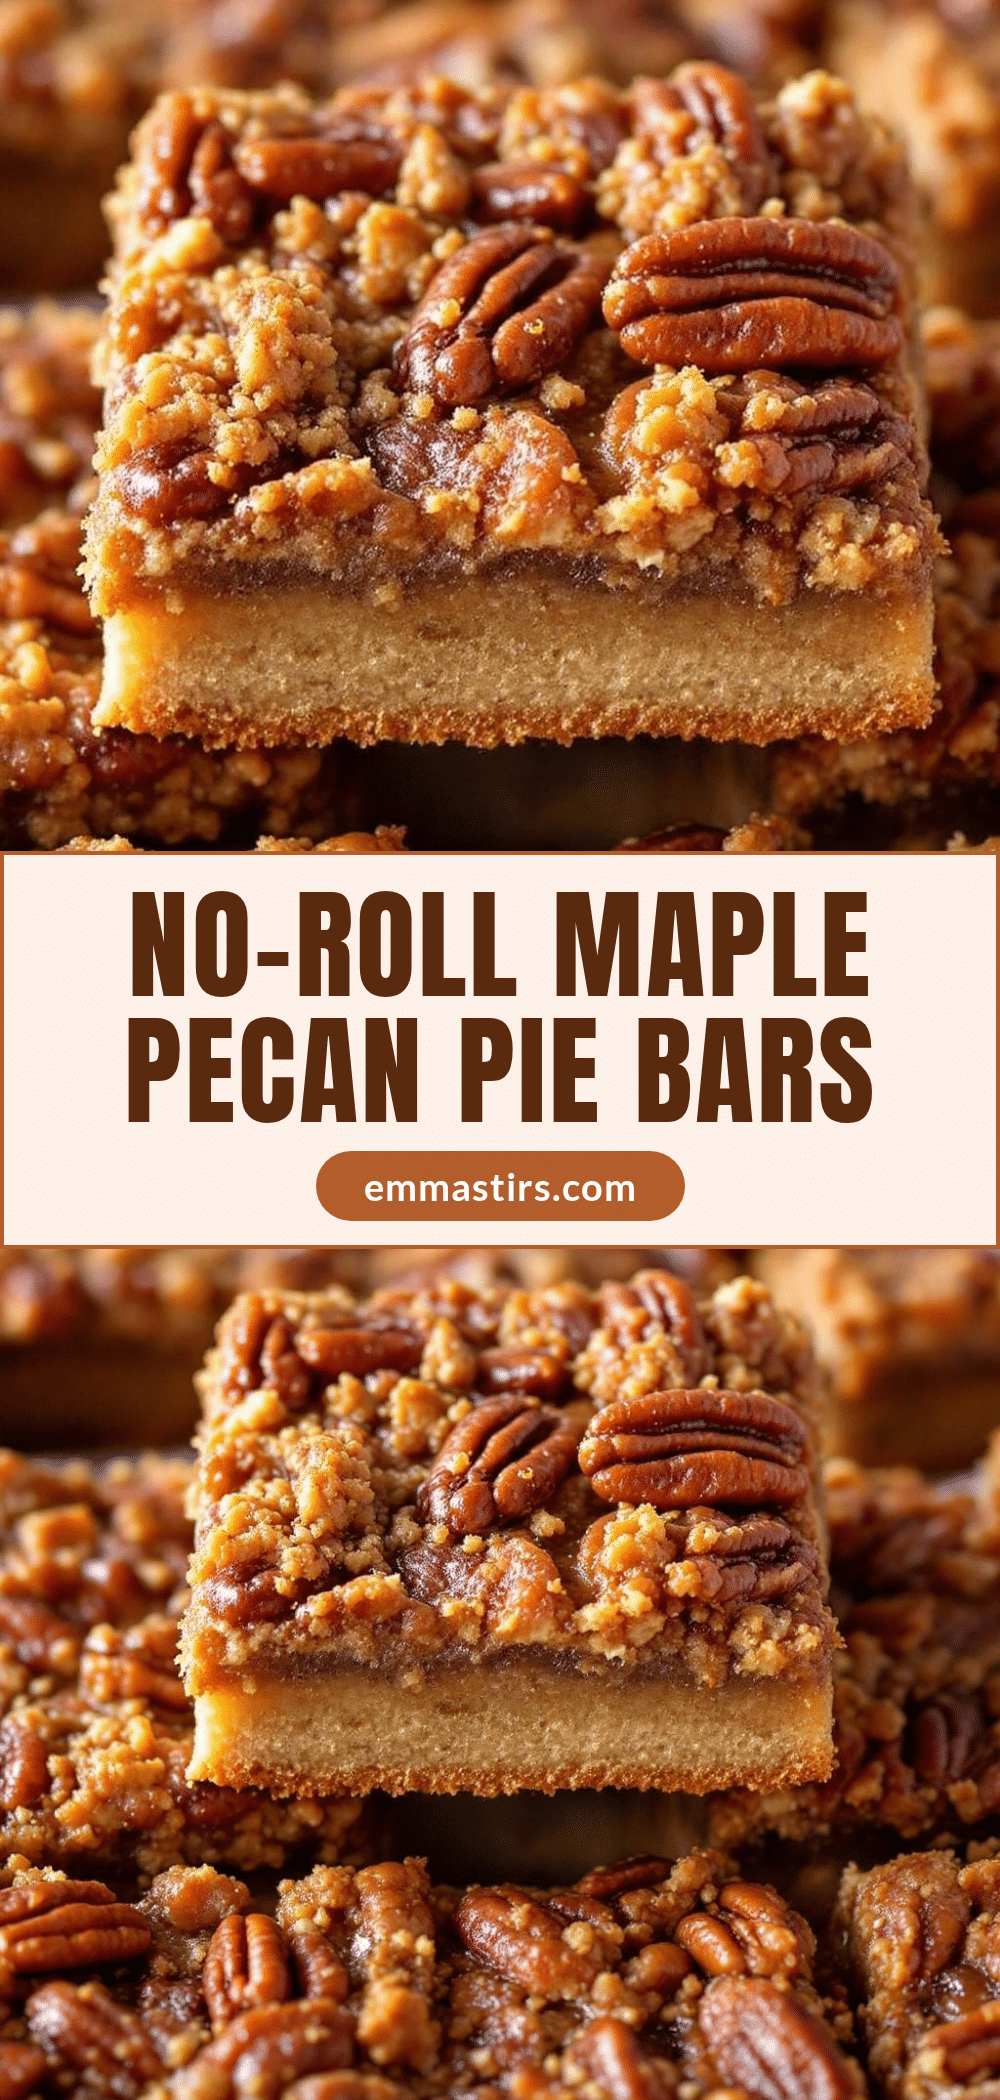
Best Easy Maple Pecan Pie Bars with No-Roll Crust
These easy maple pecan pie bars with no-roll crust are simple enough for a weekday baking project, impressive enough for holiday gatherings, and adaptable enough to fit almost any dietary need. The no-roll crust eliminates the biggest barrier to making pecan pie at home, and the maple-forward filling gives the whole thing a sophisticated flavor that feels special without being fussy.
- Prep Time: 15 minutes
- Cook Time: 30 minutes
- Total Time: 45 minutes
- Yield: 16 servings 1x
- Category: Dessert
- Cuisine: American
Ingredients
- 1 ½ cups (180g) all-purpose flour
- ½ cup (113g) unsalted butter, melted
- ¼ cup (50g) granulated sugar
- 1 teaspoon vanilla extract
- ¼ teaspoon salt
- 2 cups (200g) pecan halves
- ¾ cup (180ml) pure maple syrup
- ½ cup (100g) light brown sugar, packed
- 2 large eggs
- 3 tablespoons (42g) unsalted butter, melted
- 1 teaspoon vanilla extract
- ¼ teaspoon salt
Instructions
- Preheat your oven to 350°F (175°C). Line a 9×9-inch baking pan with parchment paper, leaving about 2 inches of overhang on two opposite sides. Lightly spray the parchment with nonstick cooking spray.
- Spread the pecan halves in a single layer on a rimmed baking sheet. Toast them in the preheated oven for 6-8 minutes, stirring halfway through, until fragrant and slightly darkened. Remove and let cool. Leave the oven on.
- In a medium bowl, whisk together the flour, granulated sugar, and salt. Pour in the melted butter and vanilla extract, then stir with a fork until the mixture looks like damp sand and holds together when pressed. Transfer to the prepared pan and press firmly and evenly into the bottom. Bake for 12-14 minutes, until the edges are just starting to turn golden. Remove and let cool on a wire rack for 10 minutes.
- In a medium bowl, whisk together the maple syrup, packed brown sugar, eggs, melted butter, vanilla extract, and salt until smooth, about 30 seconds. Spread the toasted pecans evenly over the pre-baked crust. Pour the maple filling over the pecans.
- Bake for 28-32 minutes. The filling should be set around the edges but still have a slight jiggle in the center. Let cool completely in the pan on a wire rack (about 2 hours). For cleanest cuts, refrigerate for at least 1 hour after cooling.
- Use the parchment overhang to lift the slab out of the pan. Place on a cutting board and cut into 16 squares (4 rows by 4 rows) with a sharp knife, wiping the blade clean between cuts.
Notes
Don’t skip toasting the pecans; it enhances crunch and flavor. Press the crust firmly to prevent crumbling. Watch baking time closely; start checking at 28 minutes. Let bars cool completely before cutting for best results. For clean cuts, refrigerate after cooling and wipe knife between cuts.
Nutrition
- Serving Size: 1 bar
- Calories: 245
- Sugar: 17
- Fat: 16
- Saturated Fat: 6
- Carbohydrates: 24
- Fiber: 2
- Protein: 3
Keywords: maple pecan pie bars, no-roll crust, easy dessert, pecan bars, Thanksgiving dessert, fall baking


