Love this? Save it for later!
Share the inspiration with your friends
“Wait—did you put butter in the banana bread?” My husband asked this halfway through his second slice, fork hovering mid-air. I just smiled. Because honestly, that moment is exactly why I started making banana bread this way in the first place.
I used to think banana bread was just banana bread. You know, the standard loaf you throw together when the bananas on your counter start looking sad and spotty. It’s good. It’s fine. But it never felt like something worth writing home about. Then one afternoon, I was melting butter for something else entirely, and the nutty, toasty smell filled my kitchen. I thought—what if I browned it first? What if I treated the butter like an ingredient, not just a mixer?
That was the moment everything changed. The browned butter gives this classic banana bread a deep, almost caramel-like warmth that regular butter just can’t touch. It’s subtle but unmistakable. Like the difference between a good song and one that gives you chills.
This recipe isn’t complicated. It uses the same basic ingredients you probably already have. But that one little twist—browning the butter—turns an everyday loaf into something you’ll actually crave. And trust me, once you try it, you won’t go back.
Why You’ll Love This Recipe
Let me tell you why this banana bread has become my most-requested bake. It’s not just because it tastes incredible—though it absolutely does. It’s because this recipe actually works, every single time, without fuss or fancy techniques.
- Deep, Nutty Flavor : The browned butter adds a rich, toasty depth that makes this banana bread taste like you spent hours on it. You didn’t. But nobody needs to know that.
- Perfectly Moist Texture : Thanks to the combination of ripe bananas and browned butter, this loaf stays tender and moist for days. No dry crumb here.
- Simple Pantry Ingredients : Flour, sugar, eggs, butter, bananas—that’s really it. You probably have everything right now.
- No Mixer Required : Just a bowl and a whisk. Less cleanup, more banana bread. That’s a win in my book.
- Freezer-Friendly : Make two loaves. Eat one now, freeze one for later. Future you will be very grateful.
- Crowd-Pleaser : I’ve brought this to brunches, potlucks, and casual get-togethers. It disappears fast. Kids love it. Adults love it more.
What makes this recipe different from the dozens of banana bread recipes out there? It’s the browned butter. That one extra step—melting the butter until it turns golden and smells like toasted nuts—completely transforms the flavor profile. It’s not just banana bread anymore. It’s banana bread with soul.
This is the kind of recipe that makes you close your eyes after the first bite. It’s comfort food at its finest—familiar, warm, and just a little bit special.
What Ingredients You Will Need
This recipe uses simple, honest ingredients to create something truly memorable. Most of these are pantry staples, which makes this perfect for those mornings when you’re staring at overripe bananas and wondering what to do.
- Unsalted butter (½ cup / 1 stick / 113g) : This is the star of the show. Use unsalted so you can control the salt level. I recommend a good quality brand like Kerrygold or Plugrà for the richest flavor. You’ll be browning it, so don’t skip this step!
- Ripe bananas (3 medium, about 1½ cups mashed / 340g) : The riper, the better. Look for bananas with lots of brown spots—they’re sweeter and easier to mash. If your bananas aren’t ripe enough, you can roast them in the oven at 300°F for 15-20 minutes to speed things up.
- All-purpose flour (1½ cups / 190g) : Spoon and level your flour for the most accurate measurement. Scooping directly from the bag can pack in too much flour and make your bread dense.
- Granulated sugar (½ cup / 100g) : Adds sweetness and helps create a tender crumb. You can reduce this slightly if your bananas are very ripe.
- Light brown sugar (½ cup / 100g, packed) : This adds moisture and a hint of molasses flavor that pairs beautifully with the browned butter.
- Large eggs (2, room temperature) : Room temperature eggs incorporate more easily into the batter. If you forgot to take them out early, place them in a bowl of warm water for 5 minutes.
- Plain yogurt or sour cream (¼ cup / 60g) : This is my secret for extra moist banana bread. Greek yogurt works great too. It adds tenderness without making the bread heavy.
- Vanilla extract (1 teaspoon) : Pure vanilla extract makes a difference. Imitation vanilla works in a pinch, but pure adds a deeper flavor.
- Baking soda (1 teaspoon) : This helps the bread rise and creates a light texture. Make sure it’s fresh—test it by dropping a bit in vinegar; it should bubble vigorously.
- Salt (½ teaspoon) : Don’t skip this! Salt balances the sweetness and enhances all the other flavors.
- Walnuts or pecans (½ cup / 60g, optional) : I love adding chopped nuts for texture. Toast them first for extra crunch and flavor. You can leave them out if you prefer a nut-free loaf.
For ingredient substitutions, if you’re out of yogurt, you can use an equal amount of buttermilk or even milk with a teaspoon of lemon juice added. For a dairy-free version, use a plant-based butter and coconut yogurt. I’ve tested this with both, and it works beautifully.
Equipment Needed
You don’t need a fancy kitchen to make this banana bread. Here’s what you’ll actually use:
- 9×5-inch loaf pan : This is the standard size for banana bread. If you only have an 8×4-inch pan, the bread will take a bit longer to bake and be slightly taller.
- Medium saucepan : For browning the butter. Light-colored pans work best because you can see the butter change color.
- Large mixing bowl : Any bowl will do. I use a ceramic one because it doesn’t absorb odors.
- Whisk : For mixing the wet ingredients. A fork works in a pinch.
- Rubber spatula : For folding everything together without overmixing. This is important.
- Parchment paper : Lining your pan makes cleanup effortless and ensures the loaf comes out cleanly. You can also grease the pan with butter and flour, but parchment is easier.
- Cooling rack : Allows air to circulate around the loaf so it cools evenly. If you don’t have one, you can use the inverted loaf pan to prop it up.
- Measuring cups and spoons : For accurate measurements. A kitchen scale is even better for precision.
I’ve made this banana bread in a glass loaf pan, a metal one, and even a disposable aluminum pan. They all work, but metal pans tend to give the most even browning. If you use glass, reduce the oven temperature by 25°F to prevent the edges from over-browning.
Preparation Method
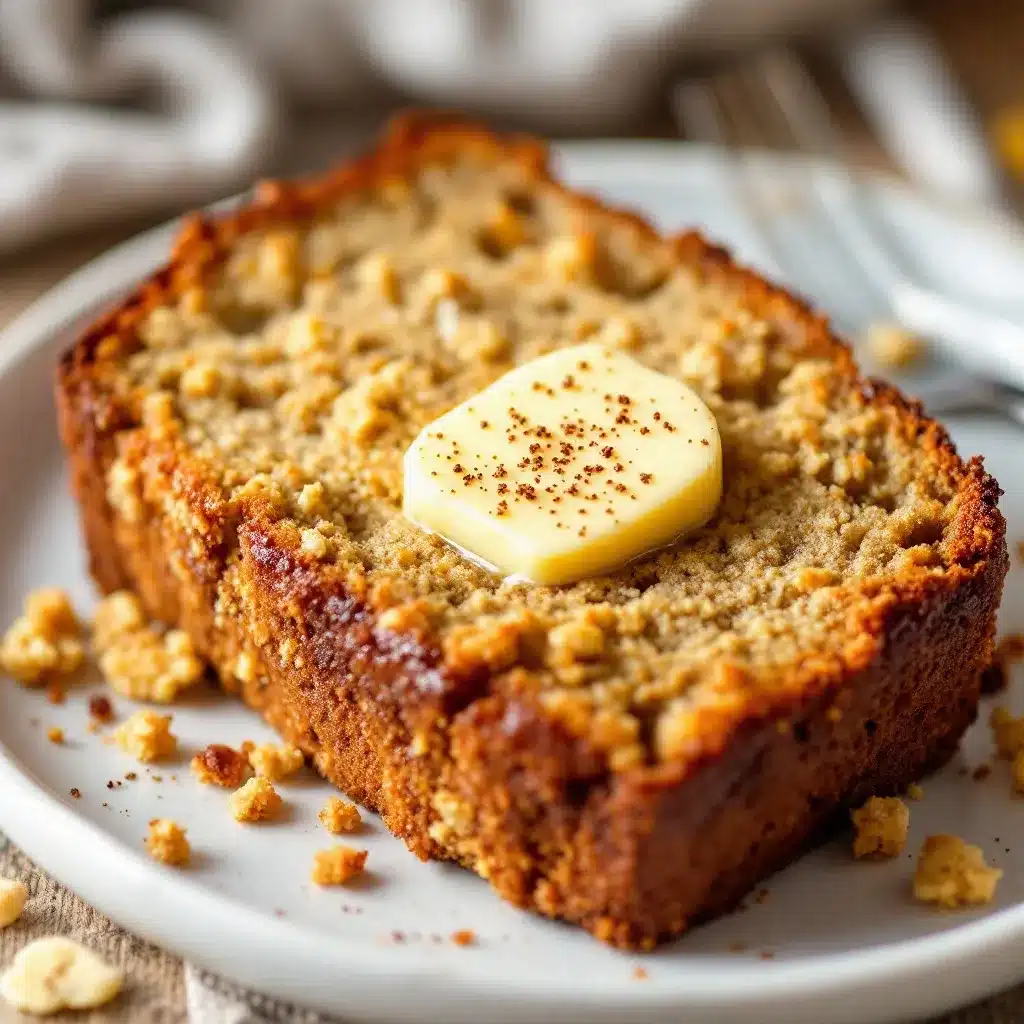
Let’s walk through this step by step. I promise, it’s easier than you think.
Step 1: Brown the Butter
Place the butter in a medium saucepan over medium heat. Stir occasionally as it melts. The butter will foam up, then the foam will subside, and you’ll see golden brown specks forming at the bottom. This takes about 5-7 minutes. Swirl the pan occasionally to help it brown evenly.
When the butter smells nutty and looks like liquid gold, remove it from the heat immediately. Pour it into a heat-safe bowl to stop the cooking process. Let it cool for about 10 minutes—you want it warm but not hot when you add it to the other ingredients.
Sensory cue: The butter will go from bright yellow to golden amber with dark brown specks. The smell shifts from creamy to intensely nutty, almost like toasted hazelnuts.
Step 2: Preheat and Prep
Preheat your oven to 350°F (175°C). Line your loaf pan with parchment paper, leaving some overhang on the long sides. This creates handles that make lifting the bread out super easy.
Step 3: Mash the Bananas
In a large bowl, mash the bananas with a fork until mostly smooth. A few small lumps are fine—they add texture. You want about 1½ cups of mashed banana.
Step 4: Mix the Wet Ingredients
Add the cooled browned butter, both sugars, eggs, yogurt, and vanilla extract to the mashed bananas. Whisk until everything is well combined and smooth. The mixture should look glossy and slightly thick.
Step 5: Combine the Dry Ingredients
In a separate bowl, whisk together the flour, baking soda, and salt. This ensures the baking soda is evenly distributed so your bread rises evenly.
Step 6: Fold Everything Together
Add the dry ingredients to the wet ingredients. Use a rubber spatula to fold gently—just until you no longer see streaks of flour. Overmixing develops gluten and makes the bread tough. A few lumps are totally okay.
If you’re adding nuts, fold them in at this point. Reserve a handful to sprinkle on top if you like.
Step 7: Bake
Pour the batter into your prepared loaf pan and spread it evenly. Bake for 55-65 minutes, or until a toothpick inserted in the center comes out clean or with just a few moist crumbs.
Troubleshooting tip: If the top is browning too quickly (after about 40 minutes), tent the loaf loosely with aluminum foil. This prevents the crust from burning while the center finishes baking.
Step 8: Cool
Let the bread cool in the pan for 10-15 minutes. Then use the parchment handles to lift it out and transfer it to a cooling rack. Let it cool completely before slicing—about 1 hour. I know it’s hard to wait, but slicing too early can make the bread crumbly.
Cooking Tips & Techniques
After making this banana bread more times than I can count, I’ve learned a few things the hard way. Here are my best tips to set you up for success.
Don’t rush the browning process. The first time I tried browning butter, I walked away to check my phone. Big mistake. Burnt butter smells acrid and bitter, and there’s no saving it. Stay close to the stove, keep the heat at medium, and watch for that golden color. The moment you see brown specks, pull it off the heat.
Use room temperature ingredients. Cold eggs and cold yogurt can seize the browned butter and create a lumpy batter. Take everything out of the fridge 30 minutes before you start. If you’re impatient (I get it), place the eggs in a bowl of warm water for 5 minutes.
Measure your flour correctly. This is the most common mistake in baking. Spoon the flour into your measuring cup, then level it off with a knife. Scooping directly from the bag can add up to 25% more flour, which makes your bread dry and dense.
Let the bananas do the work. Really ripe bananas are naturally sweet and easy to mash. If your bananas are only slightly spotty, they’ll still work, but the bread won’t be as flavorful. I’ve even frozen overripe bananas and thawed them later—they release extra liquid, which makes the bread even more moist.
Test for doneness properly. A toothpick test is reliable, but also look for the edges pulling away from the pan and a deep golden brown top. If the bread feels firm when you gently press the center, it’s done.
One mistake I made early on: I once substituted melted butter for browned butter thinking it would be close enough. It wasn’t. The flavor was flat and one-dimensional. That nutty, toasted quality is what makes this recipe special. Don’t skip it.
Variations & Adaptations
This banana bread is incredibly forgiving and easy to customize. Here are some of my favorite variations.
Chocolate Chip Banana Bread: Fold in ½ cup of semi-sweet or dark chocolate chips along with the dry ingredients. The chocolate pairs beautifully with the nutty browned butter. I’ve also used white chocolate chips when I wanted something sweeter.
Gluten-Free Version: Substitute the all-purpose flour with a 1:1 gluten-free baking flour blend. I’ve tested this with Bob’s Red Mill and King Arthur brands, and both worked perfectly. Add an extra tablespoon of yogurt to help with moisture.
Vegan Banana Bread: Use a plant-based butter for browning (I like Miyoko’s or Country Crock Plant Butter). Replace the eggs with two flax eggs (2 tablespoons ground flaxseed mixed with 6 tablespoons water, let sit for 5 minutes). Use coconut yogurt instead of dairy yogurt. The texture will be slightly denser but still delicious.
Spiced Banana Bread: Add 1 teaspoon of cinnamon, ½ teaspoon of nutmeg, and ¼ teaspoon of ground ginger to the flour mixture. This gives the bread a cozy, fall-inspired flavor that’s perfect with a cup of coffee.
Banana Bread Muffins: Divide the batter into a lined muffin tin and bake at 350°F for 18-22 minutes. This is great for portion control or for sending in lunchboxes. You’ll get about 12 muffins.
My personal favorite variation: I once added a swirl of Nutella right before baking. I dropped spoonfuls on top of the batter and used a knife to create swirls. It was messy but absolutely incredible. If you try this, reduce the sugar slightly to balance the sweetness.
Serving & Storage Suggestions
This banana bread is wonderful on its own, but here are some ways to make it even better.
Serving temperature: I love it warm, straight from the oven with a pat of butter melting into the slice. But room temperature is also fantastic—the flavors seem more pronounced. If you’re serving it to guests, toast slices lightly and serve with a dollop of whipped cream or a drizzle of honey.
What to serve with it: A cup of strong coffee or a cold glass of milk are classic pairings. For brunch, serve it alongside a savory cottage cheese bowl for a balanced spread. The creamy, tangy cottage cheese contrasts beautifully with the sweet, nutty banana bread.
Storage: Wrap the cooled loaf tightly in plastic wrap or aluminum foil. Store at room temperature for up to 4 days. Do not refrigerate—it will dry out the bread faster.
Freezing: This banana bread freezes beautifully. Wrap the cooled loaf (or individual slices) in plastic wrap, then place in a freezer-safe bag. Freeze for up to 3 months. To thaw, leave at room temperature for a few hours or microwave a slice for 20-30 seconds.
Reheating: For that fresh-from-the-oven taste, warm slices in a toaster or in a 300°F oven for 5-7 minutes. The edges get slightly crisp while the center stays soft.
Flavor development: Honestly, this banana bread tastes even better on day two. The flavors meld together and the browned butter becomes more pronounced. If you can resist eating it all on day one, you’re in for a treat.
Nutritional Information & Benefits
While banana bread is definitely a treat, it does have some redeeming qualities. Here’s a rough estimate per slice (based on 10 slices):
- Calories: Approximately 280-320
- Fat: 14g
- Carbohydrates: 38g
- Protein: 5g
- Fiber: 2g
- Sugar: 22g
Health benefits: Bananas are rich in potassium, vitamin B6, and vitamin C. They also contain fiber, which aids digestion. The yogurt adds calcium and protein, while the walnuts (if you use them) provide healthy omega-3 fatty acids.
Dietary considerations: This recipe can be made gluten-free and vegan with the substitutions mentioned above. It contains dairy, eggs, and gluten in its standard form. If you’re watching your sugar intake, you can reduce the total sugar by ¼ cup without significantly affecting the texture.
My perspective: I believe in balance. This banana bread is not health food, but it’s made with real ingredients and shared with people you love. That counts for something. Enjoy a slice without guilt, and maybe pair it with a high-protein cottage cheese bowl for breakfast the next morning to balance things out.
Conclusion
This classic banana bread with browned butter has become a staple in my kitchen for good reason. It’s simple enough for a weekday baking session, but special enough to bring to a holiday brunch. The browned butter adds a depth of flavor that makes people stop and ask, “What did you put in this?”
I hope you give this recipe a try. Don’t be afraid to make it your own—add chocolate chips, swap in different nuts, or experiment with spices. That’s the beauty of banana bread. It’s forgiving, adaptable, and always rewarding.
If you make this, I’d love to hear about it. Leave a comment below and let me know how it turned out. Did you add something unexpected? Did you double the batch? Share your banana bread story—I read every single comment.
Now go brown that butter. Your kitchen is about to smell amazing.
Frequently Asked Questions
Can I use frozen bananas for this recipe?
Absolutely! Thaw frozen bananas at room temperature, then drain off any excess liquid before mashing. The thawed bananas are often even sweeter and more flavorful than fresh ones. Just don’t skip the draining step, or your batter might be too wet.
Why did my banana bread turn out dry?
Dry banana bread usually means one of three things: you used too much flour (remember to spoon and level), you overbaked it, or your bananas weren’t ripe enough. Check your oven temperature with an oven thermometer—many run hotter than they say.
Can I make this recipe without browning the butter?
You can, but honestly, it won’t be the same. The browned butter is what gives this banana bread its signature nutty, caramel-like flavor. If you’re short on time, use melted butter instead, but know that you’ll be missing out on that extra layer of deliciousness.
How do I know when the banana bread is fully baked?
Insert a toothpick into the center of the loaf. If it comes out clean or with just a few moist crumbs, it’s done. You can also check that the edges have pulled away from the pan slightly and the top is a deep golden brown. If the top is browning too fast, tent with foil.
Can I double this recipe?
Yes! This recipe doubles beautifully. Use a larger bowl and bake in two separate loaf pans. You can also bake one loaf and turn the other into muffins for variety. Just adjust the baking time for muffins to 18-22 minutes.
Pin This Recipe!
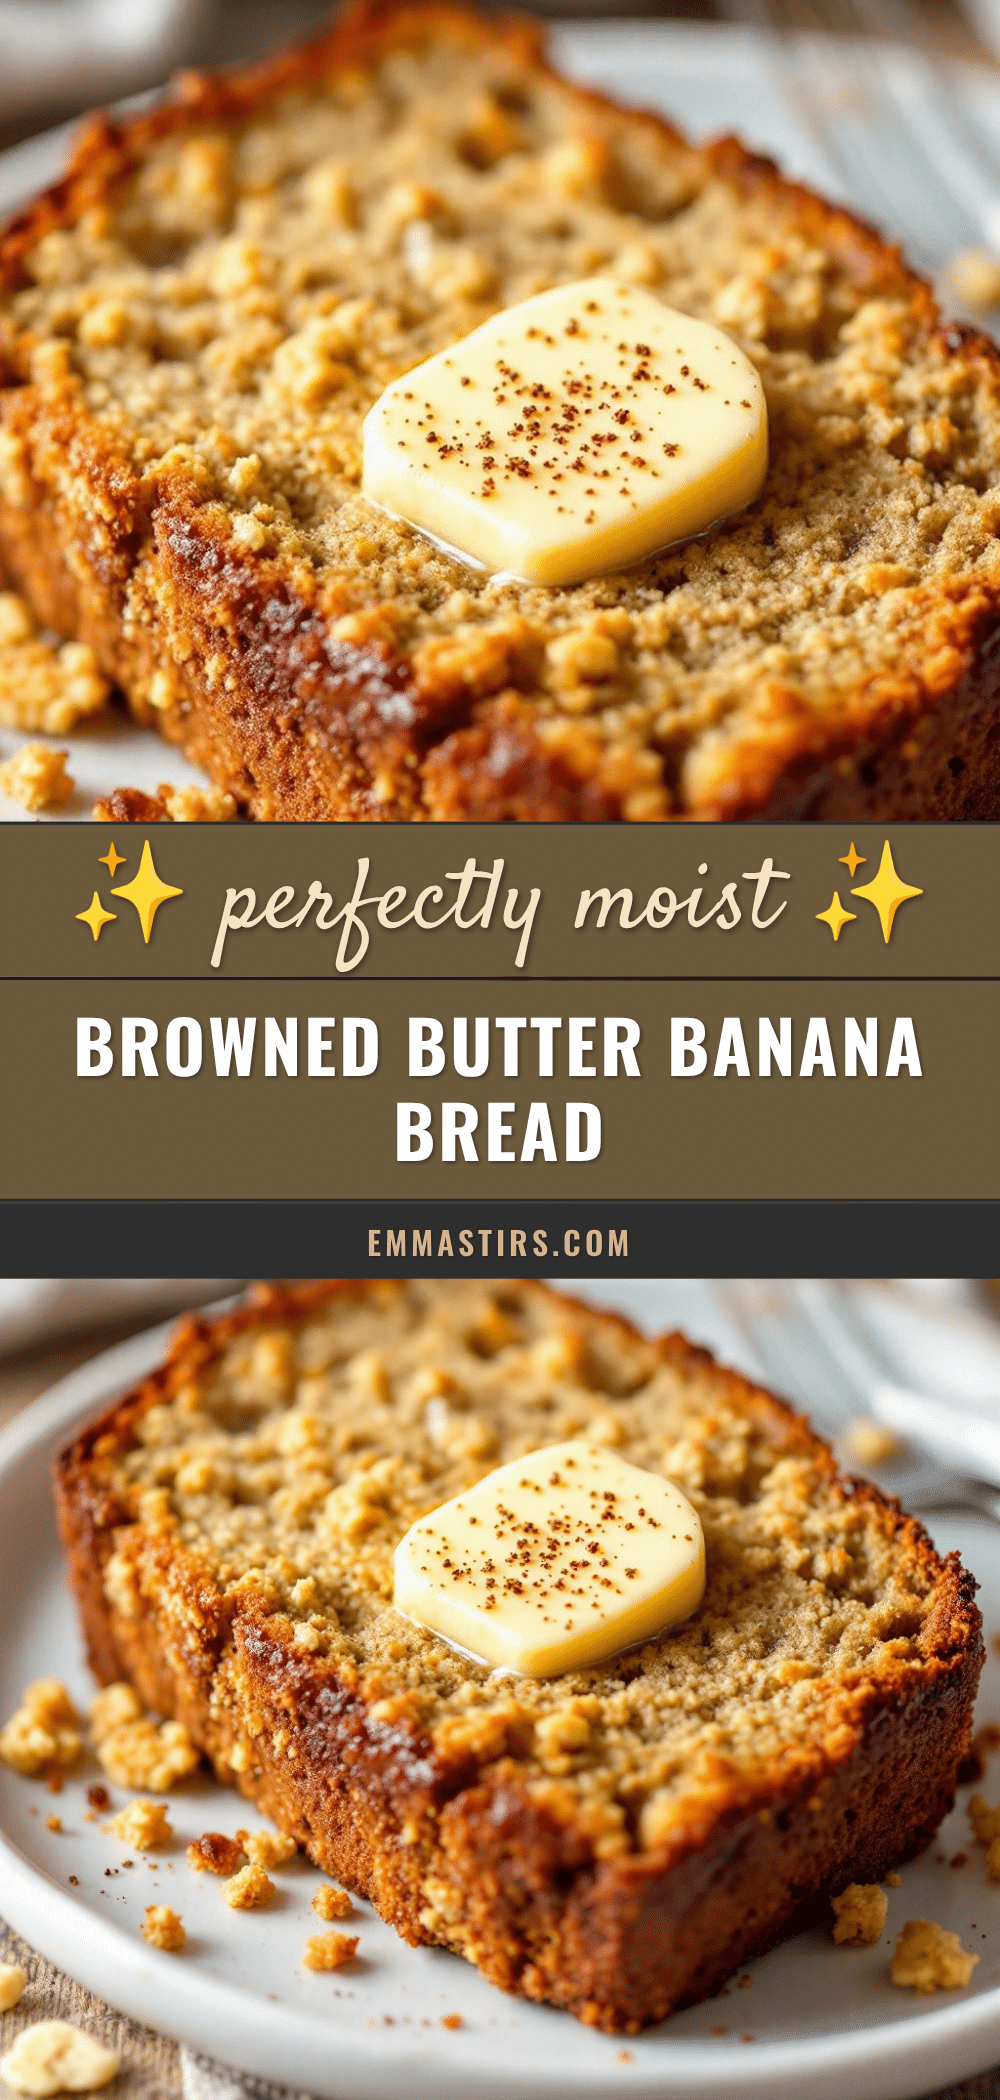
Best Classic Banana Bread with Browned Butter: Easy Recipe
This classic banana bread gets a flavor upgrade with browned butter, adding a deep, nutty warmth that makes it irresistible. It’s simple to make with pantry ingredients and stays moist for days.
- Prep Time: 15 minutes
- Cook Time: 55-65 minutes
- Total Time: 1 hour 20 minutes
- Yield: 10 servings 1x
- Category: Dessert
- Cuisine: American
Ingredients
- ½ cup (1 stick / 113g) unsalted butter
- 3 medium ripe bananas (about 1½ cups / 340g mashed)
- 1½ cups (190g) all-purpose flour
- ½ cup (100g) granulated sugar
- ½ cup (100g) packed light brown sugar
- 2 large eggs, room temperature
- ¼ cup (60g) plain yogurt or sour cream
- 1 teaspoon vanilla extract
- 1 teaspoon baking soda
- ½ teaspoon salt
- ½ cup (60g) walnuts or pecans (optional)
Instructions
- Brown the butter: Place butter in a medium saucepan over medium heat. Stir occasionally as it melts. The butter will foam, then subside, and golden brown specks will form at the bottom (about 5-7 minutes). Remove from heat immediately and pour into a heat-safe bowl. Let cool for 10 minutes.
- Preheat oven to 350°F (175°C). Line a 9×5-inch loaf pan with parchment paper, leaving overhang on the long sides.
- In a large bowl, mash bananas with a fork until mostly smooth (about 1½ cups).
- Add cooled browned butter, granulated sugar, brown sugar, eggs, yogurt, and vanilla to the mashed bananas. Whisk until well combined and smooth.
- In a separate bowl, whisk together flour, baking soda, and salt.
- Add dry ingredients to wet ingredients. Fold gently with a rubber spatula until just combined (a few lumps are okay). If using nuts, fold them in now.
- Pour batter into prepared loaf pan and spread evenly. Bake for 55-65 minutes, until a toothpick inserted in the center comes out clean or with a few moist crumbs. If top browns too quickly, tent with foil after 40 minutes.
- Cool in pan for 10-15 minutes, then lift out using parchment handles and transfer to a cooling rack. Cool completely before slicing (about 1 hour).
Notes
For best results, use very ripe bananas with brown spots. Room temperature ingredients help create a smooth batter. Do not overmix to avoid tough bread. The bread tastes even better on day two.
Nutrition
- Serving Size: 1 slice
- Calories: 300
- Sugar: 22
- Sodium: 250
- Fat: 14
- Saturated Fat: 8
- Carbohydrates: 38
- Fiber: 2
- Protein: 5
Keywords: banana bread, browned butter, easy banana bread, classic banana bread, moist banana bread


