Love this? Save it for later!
Share the inspiration with your friends
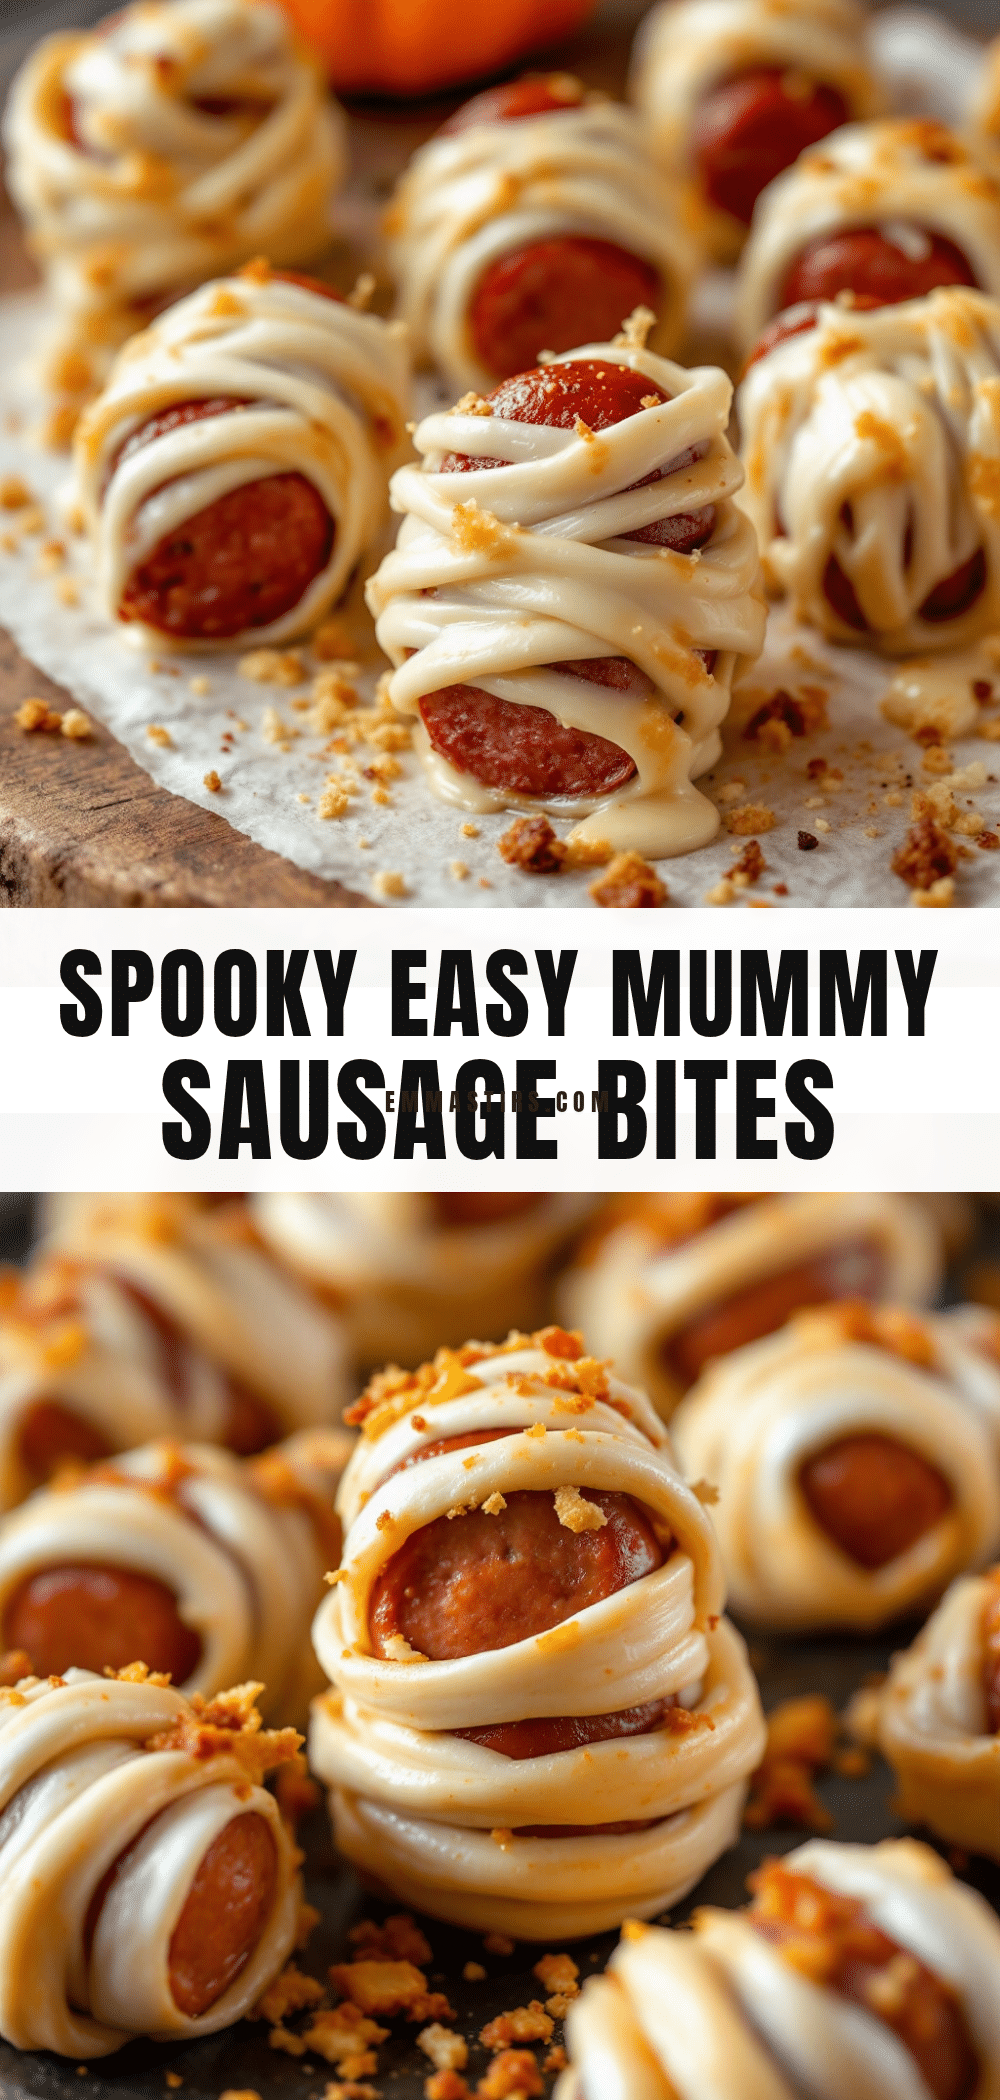
There used to be a little deli on the corner of Elm and 4th that made the most incredible pigs in a blanket I have ever tasted. When they closed suddenly last spring, I was genuinely heartbroken. I mean, I actually stood outside their shuttered door for a full minute, holding my reusable bag like an idiot. After about six tries — some burnt, some soggy, one that fell apart completely on the platter — I finally got it. But then Halloween rolled around, and my nephew looked at me with those big eyes and asked for “monster snacks.” That’s when it hit me: what if I gave those perfect little sausages a spooky makeover? This Easy Mummy-Wrapped Sausage Halloween Party Bites recipe was born from a broken heart and a kid’s imagination, and honestly? It might be the best thing I’ve ever created. The dough is flaky, the sausage is juicy, and those tiny little mustard eyes staring up at you? Pure Halloween magic. I think that deli would approve.
Why You’ll Love This Recipe
Look, I’ve tested this recipe more times than I care to admit. I’ve burned my fingers on hot pastry, I’ve used the wrong kind of sausage (lesson learned), and I’ve even had a batch where the “bandages” completely unraveled. But through all that trial and error, I landed on something truly special. Here is why these mummy bites deserve a spot on your Halloween table:
- Quick & Easy: From fridge to table in under 30 minutes. Perfect for when the doorbell starts ringing and you haven’t even started prepping.
- Simple Ingredients: You only need four things. Four! And you probably already have three of them in your kitchen right now.
- Perfect for Halloween Parties: Whether it’s a spooky soiree for adults or a classroom party for kids, these little guys steal the show every single time.
- Crowd-Pleaser: I have yet to meet a person who can eat just one. They disappear faster than candy on November 1st.
- Unbelievably Adorable: Let’s face it, the scare factor is low, but the cute factor is off the charts. Those little mustard eyes get me every time.
What makes this recipe different from all the others out there? It’s the dough. I use a specific brand of crescent roll dough that gives you the flakiest, most buttery wrap without getting soggy. I’ve tested three different brands, and trust me, the texture difference is real. Plus, I’ve perfected the baking time so the sausage stays juicy while the “bandages” get that perfect golden brown. This isn’t just another Halloween snack — it’s the one your friends will ask you to bring every year.
What Ingredients You Will Need
This recipe uses incredibly simple, everyday ingredients to create something that looks way more complicated than it actually is. The beauty of these mummy bites is that you don’t need any fancy specialty items — just good old-fashioned pantry staples and a little creativity.
- 1 can (8 oz) refrigerated crescent roll dough — I strongly recommend Pillsbury for the best flaky texture. The store brands tend to be thinner and tear more easily when you’re wrapping. Make sure it’s the original style, not the flaky layers or grand-size.
- 12 cocktail sausages or mini hot dogs — Look for the little smoked sausages, about 2 inches long. I prefer Hillshire Farm Lit’l Smokies because they have a nice snap when you bite into them. You can also use mini hot dogs if that’s what you find.
- Mustard for the eyes — Regular yellow mustard works best because the color pops against the golden pastry. I’ve tried Dijon and it’s too pale. You’ll need just a tiny dab per mummy, so a single packet from a takeout order is plenty.
- Optional: Everything bagel seasoning or poppy seeds — This is my secret trick! A light sprinkle adds a savory crunch that takes these from good to “what did you put in these?”
That’s it. Four ingredients. I told you it was simple. The crescent dough is the real hero here — it bakes up golden and flaky, wrapping around the sausage like a cozy little blanket. I always keep a can or two in my fridge during October because you never know when you’ll need a last-minute Halloween snack.
Equipment Needed
You don’t need any special equipment for this recipe, which is part of why I love it so much. Here’s what you’ll need:
- Baking sheet — A standard half-sheet pan works perfectly. Line it with parchment paper for easy cleanup.
- Sharp knife or pizza cutter — You’ll be cutting the crescent dough into thin strips. A pizza cutter makes this step super fast and gives you nice straight lines.
- Small bowl — For the mustard. You’ll dip a toothpick into it to make the eyes.
- Toothpicks — These are crucial for applying the mustard dots. A regular toothpick gives you the perfect tiny dab.
- Pastry brush (optional) — If you want to brush the dough with egg wash for extra golden color. Not required, but it does make them look prettier.
- Cooling rack — Lets the mummies cool evenly so the bottoms don’t get soggy.
Honestly, if you have a baking sheet and a knife, you can make these. I’ve made them in a friend’s kitchen with zero prep tools and they turned out just fine. The toothpick for the mustard eyes is the only non-negotiable item, and you can raid your junk drawer for that.
Preparation Method

Alright, let’s get these little mummies assembled. The whole process takes about 20 minutes of active time, plus 10-12 minutes of baking. I promise it’s easier than it looks.
- Preheat your oven to 375°F (190°C). Line your baking sheet with parchment paper. Don’t skip the parchment — the dough can stick, and nothing ruins a mummy’s face like a torn bandage.
- Open the crescent roll can. I know that pop can be startling! Unroll the dough and separate it along the perforated lines. You’ll have 8 triangles. Pinch the seams together on each triangle so you have a solid piece of dough.
- Cut the dough into strips. Using your pizza cutter or knife, cut each triangle lengthwise into thin strips. Aim for about 4-5 strips per triangle, roughly 1/4 inch wide. Don’t stress about perfection — mummies are supposed to look a little messy! The strips should be long and skinny, like little bandages.
- Wrap the sausages. Take one cocktail sausage and start wrapping a dough strip around it. Leave a small gap near the top where the eyes will go. Overlap the dough slightly as you go, like you’re wrapping a real mummy. The ends of the strip should tuck underneath the sausage. Don’t wrap too tightly — the dough needs room to expand as it bakes.
- Place on the baking sheet. Set each wrapped mummy on the prepared baking sheet, seam side down. Leave about an inch between each one. At this point, they might look a little sad and unraveled, but trust the process.
- Bake for 10-12 minutes. Pop them in the preheated oven and bake until the dough is golden brown and puffed. The sausages should be heated through. Keep an eye on them after 10 minutes — ovens vary, and you want them golden, not burnt.
- Cool for 2 minutes. Let the mummies rest on the baking sheet for a couple of minutes. They’re very hot straight out of the oven, and the dough needs a moment to set.
- Add the eyes. Dip the tip of a toothpick into the yellow mustard. Gently dab two small dots on the exposed sausage at the top of each mummy. Don’t press too hard or the mustard will smear. If you want spooky eyes, make one dot slightly larger than the other for that classic mummy squint.
- Serve warm. Transfer to a serving platter and watch them disappear. They’re best eaten within 30 minutes of baking.
One thing I learned the hard way: don’t let the wrapped mummies sit on the counter before baking. The dough can get sticky and the strips might start to separate. Get them in the oven as soon as possible after wrapping.
Cooking Tips & Techniques
After making these mummy bites for every Halloween party, classroom celebration, and spooky movie night for the past three years, I’ve collected a few tricks that make the process smoother and the results better.
The dough temperature matters. Cold dough is much easier to work with. If your kitchen is warm and the dough starts getting sticky, pop it in the fridge for 5 minutes. I once tried to rush through this step on a hot September afternoon, and the dough turned into a sticky mess that tore every time I tried to wrap a sausage.
Don’t overwork the dough. When you’re cutting the strips, use a gentle hand. Pressing too hard can fuse the layers together, and you won’t get that beautiful flaky texture. A light touch is your friend here.
Leave that gap for the eyes. I cannot stress this enough. If you wrap the dough all the way to the top, you won’t have anywhere to put the mustard eyes, and your mummies will look like sad, featureless blobs. Leave about a quarter-inch of sausage exposed at the top.
The toothpick technique. For perfectly round mustard dots, dip the toothpick straight into the mustard and then press it straight onto the sausage. Don’t drag the toothpick or you’ll get a smear instead of a dot. If you mess up, just wipe it off and try again — the mustard doesn’t stain the cooked sausage.
Batch size matters. If you’re making a double batch, work in batches. Don’t try to wrap all 24 sausages at once — the dough will warm up and become harder to handle. Wrap one can’s worth, bake them, then start on the next can.
I once forgot to preheat the oven before I started wrapping. Don’t be me. Get that oven going first thing so it’s ready when you are.
Variations & Adaptations
One of the best things about this recipe is how easy it is to customize. Here are some variations I’ve tried over the years:
Spicy Mummies: Use spicy smoked sausages or add a tiny drop of sriracha to the mustard before dotting the eyes. The heat pairs surprisingly well with the buttery dough. My brother-in-law requests this version every year.
Cheesy Mummies: Before wrapping the sausage, wrap a thin strip of cheddar or mozzarella around it. The cheese melts into the dough and creates this gooey, delicious surprise. Just be careful — the cheese gets volcanic hot, so let them cool a bit before serving to kids.
Veggie Mummies: For a vegetarian option, swap the cocktail sausages for mini veggie dogs or even thick carrot sticks that have been parboiled. The carrot version is surprisingly good — the natural sweetness of the carrot plays nicely with the salty dough.
Gluten-Free Mummies: Use gluten-free crescent roll dough. I’ve tested this with two different brands, and while the texture is slightly different (a bit more crumbly), the flavor is still fantastic. Just handle the dough gently because it’s more fragile.
Breakfast Mummies: Swap the cocktail sausages for breakfast sausage links and serve them at a Halloween morning brunch. I did this last year and my kids thought it was the best school morning ever.
Dip it: Serve with a side of ketchup, ranch dressing, or honey mustard for dipping. The little mummies look hilarious sitting in a puddle of “blood” (ketchup).
Serving & Storage Suggestions
These little guys are best served warm, straight from the oven. The contrast between the hot, flaky dough and the juicy sausage is what makes them so addictive. I like to arrange them on a black platter with some fake spider webs draped around the edges for a spooky presentation. For a Halloween party, I’ll sometimes scatter candy eyeballs around the platter as decoration (don’t eat those, though).
If you’re serving them at a party, keep them warm in a slow cooker on the “warm” setting. Just don’t stack them too high or the bottoms might get soggy. A single layer works best. They’ll hold for about an hour this way.
Storage: Leftover mummy bites (if you somehow have any!) can be stored in an airtight container in the refrigerator for up to 3 days. The dough will soften slightly, but they’re still delicious cold or reheated.
Reheating: The best way to reheat them is in the oven or air fryer. Pop them in a 350°F (175°C) oven for 5 minutes, or in the air fryer at 350°F for 3 minutes. The microwave works in a pinch, but the dough will lose its crispiness. I’ve definitely eaten them cold straight from the fridge at 11 PM, and I have no regrets.
Make-Ahead Tip: You can assemble the mummies up to 4 hours ahead of time. Keep them on the baking sheet, covered with plastic wrap, in the refrigerator. Bake them just before serving. The dough might be slightly less flaky, but it’s a huge time-saver when you’re hosting a party.
Nutritional Information & Benefits
Let’s be real — these are party snacks, not health food. But here’s the nutritional breakdown per mummy bite (based on 12 servings):
- Calories: Approximately 110-130 calories per bite
- Protein: 4-5 grams
- Carbohydrates: 8-10 grams
- Fat: 7-9 grams
- Sodium: 280-320 mg
The cocktail sausages do provide a decent amount of protein, which makes these slightly more filling than your typical party snack. The crescent dough is primarily refined flour, so if you’re watching your carbs, this might be more of a “treat yourself” recipe.
For a slightly healthier version, you can use turkey cocktail sausages or chicken sausages. The flavor is a bit milder, but the protein content is similar with less saturated fat. I’ve also tried whole wheat crescent dough, and while the texture is denser, it works in a pinch.
As always, check your ingredient labels if you have specific dietary concerns. The cocktail sausages may contain gluten or other allergens depending on the brand. The crescent dough is typically vegetarian but not vegan (it contains butter).
Conclusion
These Easy Mummy-Wrapped Sausage Halloween Party Bites have become a non-negotiable part of my October rotation. They’re simple enough to throw together on a busy weeknight, cute enough to impress at a party, and delicious enough that people forget they’re eating something shaped like a monster. I love how they bring a little bit of whimsy to the table without requiring hours of prep work or fancy ingredients.
I’d love to see how your mummies turn out! Did you add any fun variations? Did your kids help with the wrapping? Drop a comment below and let me know. And if you’re looking for more Halloween snack ideas, be sure to check out my Spooky Pizza Dip and Witch Hat Cookies — they make the perfect trio for any Halloween spread.
Happy Halloween, and happy snacking!
Frequently Asked Questions
Can I use puff pastry instead of crescent roll dough?
Yes, you absolutely can! Puff pastry will give you an even flakier, more buttery result. Just thaw the pastry sheets according to the package directions, then cut them into thin strips. The baking time might increase by a minute or two, so keep an eye on them.
How do I keep the dough from unraveling while baking?
Make sure you tuck the end of the dough strip underneath the sausage when you finish wrapping. The weight of the sausage will hold it in place. Also, placing them seam-side down on the baking sheet helps keep everything secure. If you’re really worried, you can use a tiny dab of water to “glue” the end of the strip down.
Can I make these in an air fryer?
Absolutely! Preheat your air fryer to 350°F (175°C). Place the wrapped mummies in a single layer in the basket (you might need to work in batches). Cook for 6-8 minutes, or until the dough is golden brown. The air fryer gives them an extra crispy exterior that I actually prefer over the oven version.
What can I use instead of mustard for the eyes?
If you’re not a mustard fan, you have options! Tiny dots of ketchup work well, or you can use a food-safe marker to draw on eyes. For a less traditional approach, try using small candy eyes (the kind you find at baking supply stores) — just press them onto the dough before baking. They’ll stick as the dough bakes.
How far in advance can I prepare these?
You can assemble the mummies up to 4 hours ahead of time and keep them covered in the refrigerator. Bake them just before serving for the best texture. You can also freeze the unbaked mummies on a baking sheet, then transfer them to a freezer bag. Bake from frozen, adding 2-3 minutes to the baking time.
Pin This Recipe!
Easy Mummy Sausage Bites Best Halloween Party Appetizer

These Easy Mummy-Wrapped Sausage Halloween Party Bites are flaky, juicy, and adorable with tiny mustard eyes. Perfect for Halloween parties, they come together in under 30 minutes with just four simple ingredients.
- Prep Time: 20 minutes
- Cook Time: 12 minutes
- Total Time: 32 minutes
- Yield: 12 servings 1x
- Category: Appetizer
- Cuisine: American
Ingredients
- 1 can (8 oz) refrigerated crescent roll dough (Pillsbury recommended)
- 12 cocktail sausages or mini hot dogs (e.g., Hillshire Farm Lit’l Smokies)
- Yellow mustard (for the eyes)
- Optional: Everything bagel seasoning or poppy seeds
Instructions
- Preheat your oven to 375°F (190°C). Line your baking sheet with parchment paper.
- Open the crescent roll can, unroll the dough, and separate along the perforated lines to get 8 triangles. Pinch the seams together on each triangle to form a solid piece.
- Using a pizza cutter or knife, cut each triangle lengthwise into thin strips (about 4-5 strips per triangle, roughly 1/4 inch wide).
- Take one cocktail sausage and wrap a dough strip around it, leaving a small gap near the top for the eyes. Overlap the dough slightly and tuck the ends underneath the sausage. Do not wrap too tightly.
- Place each wrapped mummy on the prepared baking sheet, seam side down, leaving about an inch between each.
- Bake for 10-12 minutes until the dough is golden brown and puffed.
- Let the mummies rest on the baking sheet for 2 minutes to cool slightly.
- Dip the tip of a toothpick into yellow mustard and dab two small dots on the exposed sausage at the top of each mummy to create eyes.
- Serve warm. Best eaten within 30 minutes of baking.
Notes
Cold dough is easier to work with. Leave a gap at the top for the eyes. Don’t let wrapped mummies sit before baking. For best results, bake immediately after wrapping. Can be assembled up to 4 hours ahead and refrigerated.
Nutrition
- Serving Size: 1 mummy bite
- Calories: 120
- Sugar: 2
- Sodium: 300
- Fat: 8
- Saturated Fat: 3
- Carbohydrates: 9
- Protein: 4.5
Keywords: Halloween appetizer, mummy sausage bites, pigs in a blanket, party snack, easy Halloween recipe


