Love this? Save it for later!
Share the inspiration with your friends
The lunchbox came back empty. Not just the container—the whole bag. My son handed it to me with a shrug and said, “Can you make those roll things again tomorrow?” That was the first time I’d packed something that didn’t come home half-eaten or traded away at the lunch table. Third time that week, actually. I’d stumbled onto something so simple I almost didn’t believe it worked.
These Easy Cheese Quesadilla Lunchbox Rolls started as a desperate Tuesday morning experiment. I had leftover tortillas, a block of cheddar, and exactly nine minutes before the bus arrived. I figured if I rolled them tight enough and sliced them into pinwheels, they might look more appealing than a sad, flat quesadilla shoved into a container. Turns out, kids (and honestly, adults too) will eat almost anything that looks like a tiny spiral.
The first batch was messy—some unrolled, the cheese leaked out, and I burned my fingers trying to seal the edges. But the second batch? Perfect. And the third? I started making extras for my own lunch. There’s something quietly satisfying about opening your container at noon and seeing those little golden spirals staring back at you. They’re not fancy. They’re not complicated. But they work. And that’s really what matters when you’re trying to get out the door on time.
These rolls have become our go-to for school lunches, road trips, and even picnic snacks. They hold up better than you’d expect, taste great cold or warm, and take almost no effort to throw together. If you’ve been struggling with lunchbox ideas that actually get eaten, this might be the one that changes things.
Why You’ll Love This Recipe
I’ve tested this recipe more times than I care to admit—burned tortillas, overstuffed rolls, cheese that escaped and turned into crispy little puddles on the pan. But after all that trial and error, I landed on a version that works every single time. Here’s why these Easy Cheese Quesadilla Lunchbox Rolls deserve a spot in your weekly rotation:
- Ready in 15 Minutes: From fridge to lunchbox in a quarter of an hour. That includes the time it takes to heat the pan and let them cool slightly before slicing. Perfect for those mornings when every minute counts.
- Simple Ingredients: You need tortillas, cheese, and maybe a little butter or oil. No fancy grocery store trips, no obscure spices, no specialty equipment. Chances are you have everything right now.
- Perfect for Meal Prep: Make a batch on Sunday and portion them out for the week. They stay good in the fridge for up to four days and taste just as delicious on Thursday as they did on Monday.
- Kid-Approved and Adult-Friendly: My kids devour these, but I’ve also packed them for my own work lunches more times than I’ll admit. They’re satisfying without being heavy, and the portability factor is unbeatable.
- Endlessly Customizable: Once you master the basic technique, you can swap in different cheeses, add proteins, or sneak in veggies. I’ve made versions with pepper jack and ham, mozzarella and basil, even leftover taco meat.
What makes these different from every other quesadilla recipe out there is the rolling technique. I spent weeks figuring out how to get them tight enough that they don’t unroll during cooking but loose enough that the cheese melts evenly. The secret? A light hand with the filling and a quick pan-sear before rolling. It sounds counterintuitive, but trust me—it works.
These rolls have saved me on more hectic mornings than I can count. There’s something about opening a lunchbox and seeing those little spirals that just feels right. They’re comfort food in portable form, and honestly, isn’t that what we all need sometimes?
What Ingredients You Will Need
This recipe keeps things simple. You don’t need a long list of ingredients or specialty items—just a few basics that come together beautifully. Here’s what you’ll need and why each one matters:
For the Quesadilla Rolls
- Flour tortillas (8-inch): Go for soft, pliable tortillas—not the crispy taco shells or the super thin ones. I prefer Mission or Guerrero brand for their flexibility. Corn tortillas work too but tend to crack when rolling, so stick with flour if you can. You’ll need about 4 tortillas for a standard batch.
- Shredded cheddar cheese (1 cup): Sharp cheddar gives the best flavor, but mild works fine too. Pre-shredded cheese is okay in a pinch, but freshly shredded melts much smoother. I’ve tested both, and fresh really does make a difference in texture. (About 120g if you’re weighing it.)
- Shredded mozzarella cheese (½ cup): This adds that stretchy, gooey texture that kids love. Low-moisture mozzarella works best—fresh mozzarella releases too much water and makes the tortillas soggy. (Around 60g.)
- Butter or olive oil (2 tablespoons): For cooking the tortillas. Butter gives a richer flavor and helps achieve that golden-brown crust. Olive oil works if you’re dairy-free or want a lighter option. I use salted butter because I like the little extra flavor.
Optional Add-Ins
- Cooked chicken or turkey (½ cup, diced): Great for adding protein and turning these into a more substantial meal. Leftover rotisserie chicken works perfectly. Just make sure it’s finely diced so it rolls easily.
- Black beans (¼ cup, rinsed and drained): Adds fiber and makes the rolls more filling. Mash them slightly with a fork before adding to help them stay in place.
- Chopped bell peppers or spinach (¼ cup): Sneaky way to add veggies. Finely dice the peppers so they don’t create bumps in the roll. Spinach wilts down nicely and adds color without changing the flavor much.
- Sour cream or Greek yogurt (for dipping): Not in the rolls themselves, but perfect for serving. Greek yogurt adds protein and a tangy contrast to the cheesy rolls.
Ingredient Selection Tips: When choosing tortillas, look for ones that are soft and flexible—if they crack when you bend them, they’ll be hard to roll. For cheese, I recommend Tillamook or Cabot for cheddar and Polly-O for mozzarella. These brands melt consistently and have great flavor. If you’re using add-ins, make sure everything is at room temperature before assembling; cold ingredients can prevent the cheese from melting evenly.
Substitution Guidance: For a gluten-free version, use gluten-free tortillas (look for ones labeled “soft” or “flexible”). For dairy-free, use vegan cheese shreds and coconut oil instead of butter. The texture won’t be exactly the same, but the flavor is still solid. If you want to boost protein without meat, try adding a scoop of cottage cheese—it blends right in and adds creaminess. I’ve used this trick in my fresh savory cottage cheese bowl with great results.
Equipment Needed
You don’t need a fancy kitchen to make these rolls. Here’s what you’ll actually use:
- Large non-stick skillet or griddle (10-12 inches): This is your main tool. Non-stick is ideal because it prevents the tortillas from sticking and helps achieve even browning. I use a 12-inch Calphalon skillet and it works perfectly. If you don’t have non-stick, a well-seasoned cast iron pan works too—just add a little extra butter.
- Spatula: A thin, flexible spatula makes flipping the rolls easier. I prefer a fish spatula for its slotted design, but any flat spatula will do.
- Cutting board and sharp knife: For slicing the rolls into pinwheels. A serrated knife works best to avoid squishing the rolls, but a sharp chef’s knife is fine too.
- Mixing bowl (small): For combining the cheeses if you’re mixing varieties. Honestly, you can just sprinkle them directly onto the tortillas, but mixing first ensures even distribution.
- Measuring cups and spoons: For portioning cheese and other ingredients. Eyeballing works once you’ve made these a few times, but measuring helps when you’re starting out.
- Paper towels or clean kitchen towel: For blotting excess moisture from any add-ins (especially if using beans or veggies). Wet ingredients can make the tortillas soggy.
- Toothpicks (optional): If you’re worried about the rolls unraveling during cooking, toothpicks can hold them in place. I don’t usually need them, but they’re handy for beginners.
Budget-Friendly Alternatives: No non-stick skillet? Use a regular pan with a bit more oil. No serrated knife? A sharp chef’s knife works—just use a gentle sawing motion. No toothpicks? Skip them; the cheese will act as glue once it melts. I’ve made these in a college dorm kitchen with a single pan and a butter knife, and they still turned out great.
Maintenance Tip: If using a non-stick pan, avoid metal utensils—they’ll scratch the surface. Stick with silicone, wood, or plastic spatulas. And never put a hot non-stick pan under cold water; let it cool first to prevent warping.
Preparation Method
Let me walk you through this step by step. I’ve made these rolls dozens of times, so I’ll share every little trick I’ve picked up along the way.
Step 1: Prep Your Ingredients (2 minutes)
Take your tortillas out of the fridge and let them sit on the counter for about 5 minutes. Cold tortillas crack when you roll them—room temperature ones bend beautifully. While they’re warming up, shred your cheese if you’re using blocks. Pre-shredded cheese has anti-caking agents that can affect melting, so fresh is better here. Combine the cheddar and mozzarella in a small bowl and give it a quick toss.
If you’re adding any extras like chicken or veggies, make sure they’re diced small—no bigger than pea-sized. Big chunks create bumps that make rolling difficult and can cause the rolls to split open during cooking.
Step 2: Warm the Pan (2 minutes)
Place your skillet over medium heat and add ½ tablespoon of butter. Let it melt and foam slightly—you want it hot but not smoking. If the butter browns immediately, your pan is too hot. If it just sits there without bubbling, it’s too cold. The sweet spot is when the butter sizzles gently when you tilt the pan.
I learned this the hard way after burning three batches in a row. Medium heat is your friend here. High heat will char the tortilla before the cheese melts, leaving you with a crispy outside and a cold, unmelted center.
Step 3: Cook the First Side (2-3 minutes)
Lay one tortilla flat in the pan. Let it cook for about 30 seconds without moving it—this creates a light golden base. Then sprinkle about ¼ cup of the cheese mixture evenly over the entire surface, leaving a ½-inch border around the edge. If you’re adding extras, sprinkle them over the cheese now.
Here’s the trick: don’t overfill. I know it’s tempting to pile on the cheese, but too much filling makes the roll impossible to seal. The cheese should be a single layer, not a mountain. Think of it as a thin blanket of cheese, not a thick quilt.
Step 4: Fold and Roll (1 minute)
Once the cheese starts to melt (about 1-2 minutes), use your spatula to fold one edge of the tortilla inward, about an inch from the edge. Then start rolling from that folded edge, using the spatula to keep it tight. Roll away from you, tucking the edge as you go. The melted cheese will act as glue, sealing the roll shut.
If the roll starts to unroll, hold it in place with the spatula for 10-15 seconds. The cheese needs a moment to set. I’ve had rolls completely fall apart because I rushed this step—patience pays off here.
Step 5: Brown the Seam (1-2 minutes per side)
Once the roll is sealed, place it seam-side down in the pan. Let it cook for about 1 minute until the seam is golden and crispy. Then roll it over and cook the other side for another minute. You want all sides to have some color—this adds texture and helps the roll hold its shape.
Remove the roll from the pan and place it on a cutting board. Repeat with the remaining tortillas, adding more butter to the pan as needed. I usually get through 4 tortillas before needing to add more fat.
Step 6: Cool and Slice (3-5 minutes)
This is the hardest part—waiting. Let the rolls cool for at least 3 minutes before slicing. If you cut them too soon, the cheese will ooze out and you’ll end up with a mess. I know because I’ve done it. More than once.
Once they’re cool enough to handle, use a serrated knife to slice each roll into 1-inch pinwheels. Use a gentle sawing motion rather than pressing down—this prevents squishing. You should get about 5-6 pieces per roll, depending on how tight you rolled them.
Sensory Cues: The tortilla should be golden brown with darker spots where the butter caramelized. The cheese should be fully melted but not oozing out. When you slice, you should see a clean spiral of cheese and tortilla, not a flattened mess. The rolls should feel firm but not hard, with a slight give when you press them.
Cooking Tips & Techniques
After making these rolls more times than I can count, I’ve collected a few tips that make a real difference. Some I learned from professional cooks, others from my own mistakes.
The Rolling Technique: The most common mistake is rolling too loosely. A tight roll holds its shape and slices cleanly. To get it right, use your fingers to hold the folded edge in place while you roll with the spatula. Think of it like rolling a burrito—tuck, roll, and seal. If you’re struggling, try using a bamboo sushi mat. It sounds ridiculous, but it actually works perfectly for keeping the roll tight.
Temperature Control: Medium heat is non-negotiable. I’ve ruined more rolls by cranking up the heat to save time. High heat burns the outside and leaves the inside cold. Low heat makes the tortilla soggy before it browns. Medium heat gives you that perfect golden crust and fully melted cheese in about 3 minutes per roll.
Multitasking Strategy: I make these in batches while I’m doing other morning tasks. While the first roll cooks, I prep the next tortilla. While the rolls cool, I pack the rest of the lunch. The whole process takes about 15 minutes start to finish, and I’ve got everything done before the bus arrives.
Common Mistakes to Avoid:
- Overfilling: More cheese doesn’t mean better rolls. Stick to about ¼ cup per tortilla. Too much filling makes rolling difficult and creates unevenly cooked rolls.
- Skipping the rest time: Letting the rolls cool before slicing is crucial. I’ve learned this the hard way multiple times. Three minutes feels like forever when you’re hungry, but it’s worth it.
- Using wet ingredients: If you’re adding beans or veggies, pat them dry first. Moisture makes the tortilla soggy and prevents proper browning.
- Cutting with a dull knife: A sharp knife (serrated works best) makes clean cuts. Dull knives squish the roll and create ragged edges.
Consistency Tip: If you’re making these for meal prep, undercook them slightly. They’ll finish cooking when you reheat them, and they won’t dry out in the fridge. I learned this from making healthy egg white breakfast burritos—slightly undercooked reheats better than fully cooked.
Variations & Adaptations
One of the best things about this recipe is how adaptable it is. Here are some of my favorite variations:
Southwest Style
Swap the cheddar for pepper jack cheese and add 2 tablespoons of canned corn and 2 tablespoons of black beans (rinsed and drained). The pepper jack adds a nice kick without being overwhelming. My husband loves these with a side of salsa for dipping. I’ve also added a pinch of cumin and chili powder to the cheese mixture for extra flavor.
Italian-Inspired
Use mozzarella and provolone instead of cheddar. Add 2 tablespoons of finely chopped sun-dried tomatoes and a teaspoon of dried oregano. These taste amazing with marinara sauce for dipping. I sometimes add a few slices of pepperoni for a pizza-inspired version that my kids go crazy over.
Breakfast Version
Use the same technique but fill with scrambled eggs, cheese, and cooked breakfast sausage or bacon. These are perfect for busy mornings when you need breakfast on the go. I’ve made them with leftover healthy egg white frittata crumbled up, and they turned out great.
Veggie-Packed
Finely dice bell peppers, mushrooms, and spinach. Sauté them briefly to remove excess moisture, then add them to the cheese mixture. The veggies add color and nutrients without changing the flavor much. My kids don’t even notice the spinach in these.
Gluten-Free Adaptation
Use gluten-free tortillas (look for ones labeled “soft” or “flexible”). The rolling technique is the same, but gluten-free tortillas can be more delicate, so handle them gently. I’ve found that warming them slightly in the microwave before filling makes them more pliable.
Dairy-Free Version
Use vegan cheese shreds and coconut oil instead of butter. The texture won’t be as stretchy, but the flavor is still good. Look for vegan cheeses that melt well—some brands are better than others. I’ve had the best luck with Daiya and Violife.
Serving & Storage Suggestions
These rolls are versatile when it comes to serving. Here’s how I handle them:
Serving Temperature: They’re delicious warm, at room temperature, or even cold from the fridge. For lunchboxes, I pack them cold and they’re perfectly fine by lunchtime. If you want them warm, reheat in a skillet for 1-2 minutes per side or in the microwave for 20-30 seconds.
Presentation: Arrange the pinwheels in a single layer in a lunchbox or on a plate. They look beautiful when the spirals are visible. For parties, I arrange them on a platter with a small bowl of dipping sauce in the center. They’re great for potlucks because they travel well and don’t require reheating.
Complementary Dishes: Serve with salsa, sour cream, guacamole, or Greek yogurt for dipping. They also pair well with a side of fresh fruit, a simple salad, or some crunchy vegetables. For a complete lunch, I pack these with some cherry tomatoes and cucumber slices. They also go great with a fresh watermelon cucumber feta salad for a light summer meal.
Storage Instructions: Store leftover rolls in an airtight container in the refrigerator for up to 4 days. Place a paper towel in the container to absorb excess moisture—this keeps them from getting soggy. For longer storage, freeze the uncooked rolls (before slicing) for up to 3 months. Wrap each roll individually in plastic wrap, then place in a freezer bag. To cook from frozen, add 2-3 minutes to the cooking time.
Reheating Methods: For best results, reheat in a skillet over medium heat for 1-2 minutes per side. This restores the crispy exterior. The microwave works in a pinch (20-30 seconds), but the tortilla will be softer. If reheating from frozen, thaw in the refrigerator overnight, then reheat in a skillet.
Flavor Development: These rolls actually taste better the next day. The flavors meld together overnight, and the texture becomes more cohesive. I often make a double batch specifically for leftovers. They’re one of those rare recipes that improves with time.
Nutritional Information & Benefits
Here’s the nutritional breakdown for one serving (about 5-6 pinwheels, made with 2 tortillas worth of filling):
| Nutrient | Amount Per Serving |
|---|---|
| Calories | 310 |
| Protein | 16g |
| Carbohydrates | 28g |
| Fat | 16g |
| Saturated Fat | 9g |
| Fiber | 2g |
| Sodium | 520mg |
These numbers are estimates and will vary based on the specific brands and quantities you use. If you’re watching your sodium, opt for low-sodium cheese and tortillas.
Health Benefits: Cheese provides calcium and protein, which are essential for bone health and muscle repair. The tortillas offer carbohydrates for energy, making these a balanced option for active kids and adults. If you add beans or chicken, you’ll boost the protein and fiber content significantly.
Dietary Considerations: This recipe can be made gluten-free (with GF tortillas) and dairy-free (with vegan cheese). It’s naturally vegetarian if you skip the meat add-ins. For a lower-carb version, use low-carb tortillas and reduce the cheese slightly. I’ve tested this with keto-friendly tortillas and they work well—just be aware that they’re smaller, so you’ll get fewer pinwheels per roll.
Potential Allergens: This recipe contains dairy (cheese, butter) and gluten (tortillas). If you’re serving these at a gathering, label them clearly so guests with allergies can make informed choices. The vegan and gluten-free versions are safe alternatives for most dietary restrictions.
Personal Wellness Perspective: I love that these rolls feel indulgent but aren’t terrible for you. They’re satisfying without being heavy, and the portion control is built in—each roll makes about 5-6 pinwheels, which is a perfect snack or light meal. For me, that balance between delicious and nutritious is exactly what I look for in a recipe.
Conclusion
These Easy Cheese Quesadilla Lunchbox Rolls have become a staple in our house for good reason. They’re quick, simple, and genuinely satisfying. Whether you’re packing school lunches, prepping for a busy week, or just looking for a snack that hits the spot, these little spirals deliver every time.
What I love most about this recipe is how forgiving it is. You can mess up the rolling, overstuff the tortilla, or burn the first batch—and the second one will still turn out great. It’s not a fussy recipe. It’s the kind of thing you can throw together without thinking, and somehow it always works.
I’d love to hear how these turn out for you. Did you add anything fun? Did your kids eat them? Did you figure out a trick I haven’t tried yet? Drop a comment below and let me know. And if you share these on social media, tag me—I love seeing your creations. Until next time, happy cooking, and may your lunchboxes always come back empty.
Frequently Asked Questions
Can I make these quesadilla rolls ahead of time?
Absolutely. You can cook them, slice them, and store them in an airtight container in the fridge for up to 4 days. They’re actually one of those rare recipes that tastes better the next day. For meal prep, I recommend undercooking them slightly so they don’t dry out when reheated.
Why are my rolls falling apart when I slice them?
This usually happens for one of two reasons: you didn’t let them cool long enough before slicing, or you overfilled them. Let the rolls rest for at least 3 minutes after cooking. The cheese needs time to set and act as glue. Also, stick to about ¼ cup of cheese per tortilla—more than that and the roll won’t seal properly.
Can I freeze these quesadilla rolls?
Yes! Freeze them before slicing for best results. Wrap each cooked roll individually in plastic wrap, then place them in a freezer bag. They’ll keep for up to 3 months. To serve, thaw in the refrigerator overnight, then slice and reheat in a skillet. If you’re in a rush, you can reheat from frozen in the microwave, but the texture won’t be as crispy.
What’s the best cheese for these rolls?
I recommend a combination of sharp cheddar and low-moisture mozzarella. The cheddar adds flavor, and the mozzarella provides that stretchy, gooey texture. You can experiment with other cheeses—pepper jack for heat, provolone for an Italian twist, or even gouda for a smoky flavor. Just avoid cheeses that are too soft or watery, like fresh mozzarella or brie, as they can make the tortillas soggy.
How do I keep the rolls from getting soggy in the lunchbox?
Make sure the rolls are completely cool before packing them. Warm rolls create condensation inside the container, which leads to sogginess. Also, add a paper towel to the container to absorb any excess moisture. If you’re adding dipping sauce, pack it separately and add it just before eating. I’ve found that packing the rolls in a single layer (not stacked) also helps them stay crisp.
Pin This Recipe!
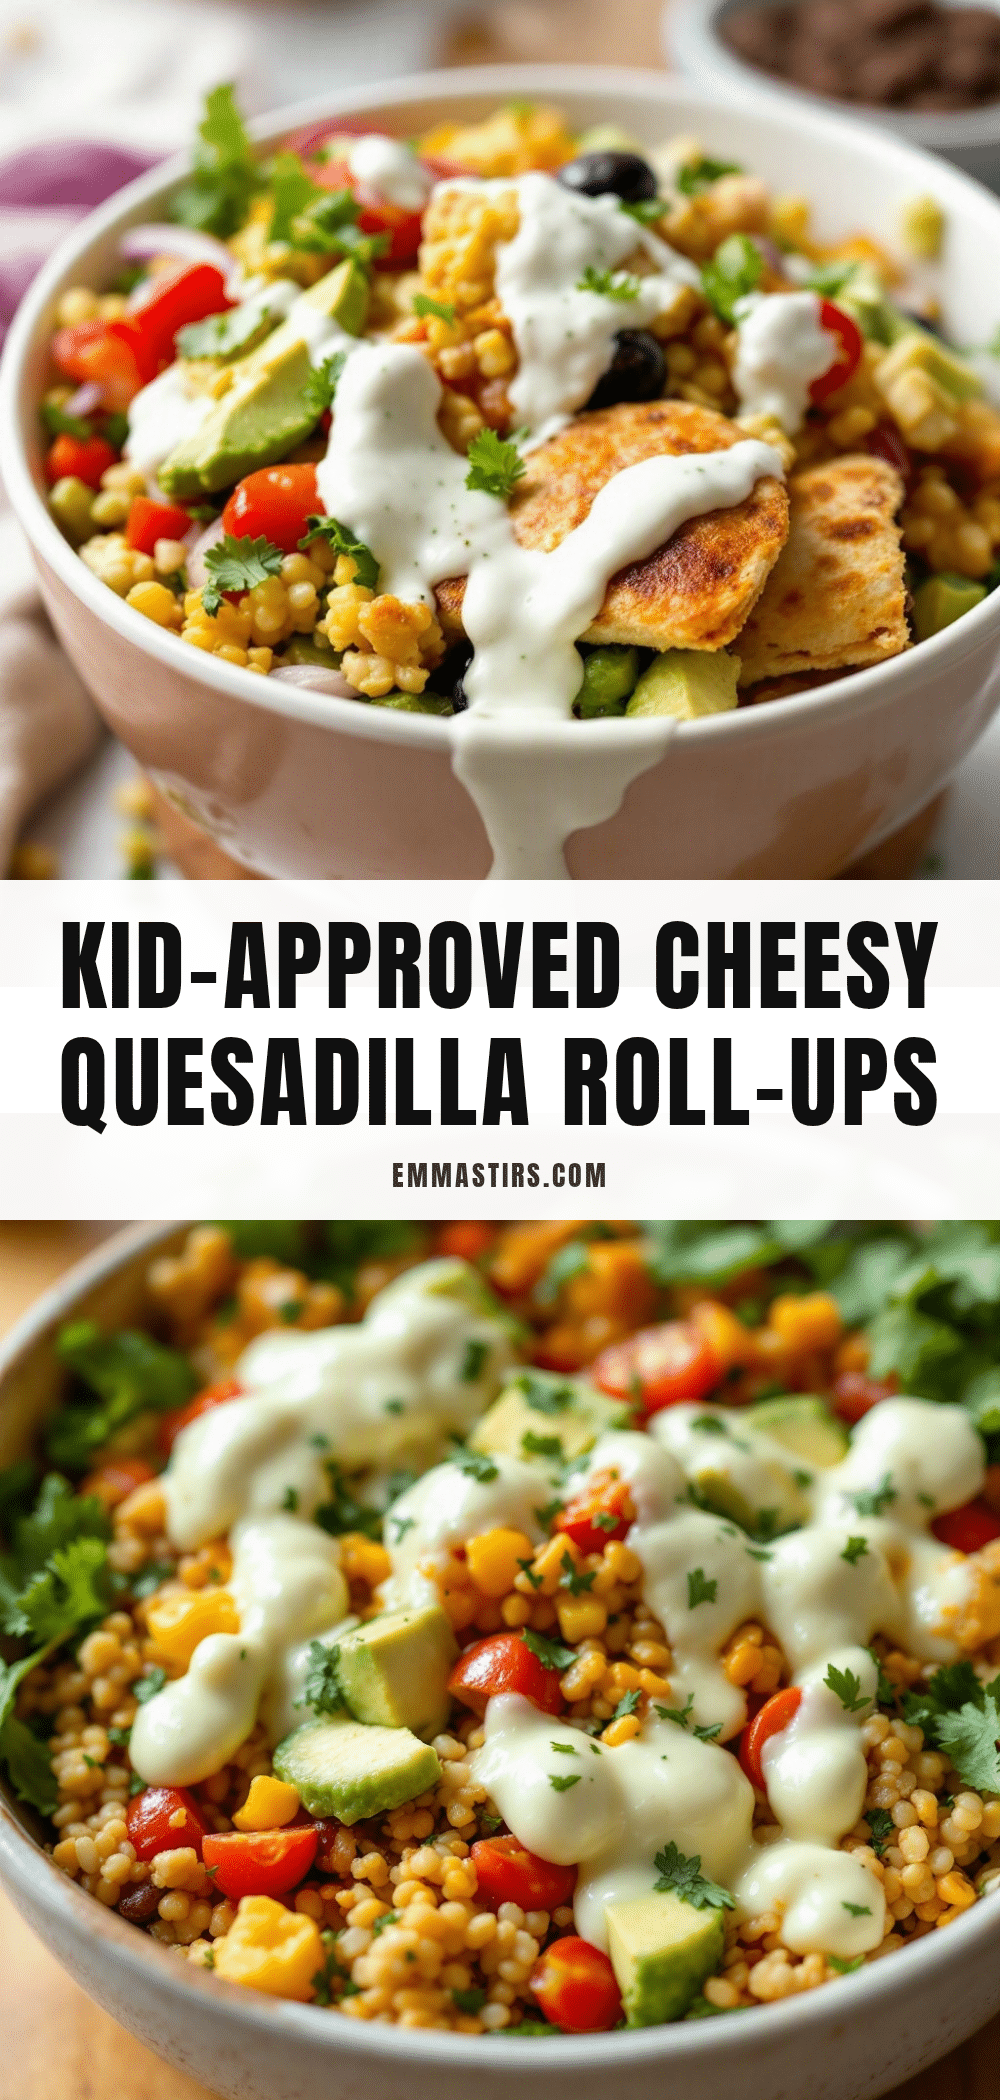
Easy Cheese Quesadilla Lunchbox Rolls: Best 15-Minute Recipe
Quick and simple cheese quesadilla rolls cut into pinwheels, perfect for lunchboxes, road trips, or picnic snacks. Ready in 15 minutes with basic ingredients.
- Prep Time: 5 minutes
- Cook Time: 10 minutes
- Total Time: 15 minutes
- Yield: 4 servings 1x
- Category: Snack
- Cuisine: Mexican-American
Ingredients
- 4 (8-inch) flour tortillas
- 1 cup shredded cheddar cheese (about 120g)
- ½ cup shredded low-moisture mozzarella cheese (about 60g)
- 2 tablespoons butter or olive oil
- Optional: ½ cup cooked chicken or turkey, diced
- Optional: ¼ cup black beans, rinsed and drained
- Optional: ¼ cup chopped bell peppers or spinach
Instructions
- Let tortillas sit at room temperature for 5 minutes. Shred cheese if using blocks; combine cheddar and mozzarella in a small bowl.
- Place a large non-stick skillet over medium heat and add ½ tablespoon butter. Let it melt and foam slightly.
- Lay one tortilla flat in the pan. Cook for 30 seconds without moving. Sprinkle about ¼ cup of the cheese mixture evenly over the tortilla, leaving a ½-inch border. Add any optional fillings now.
- Once cheese starts to melt (1-2 minutes), fold one edge of the tortilla inward about 1 inch. Roll tightly from that edge, using a spatula to keep it snug. Hold the roll in place for 10-15 seconds to seal.
- Place the roll seam-side down in the pan. Cook for 1 minute until golden, then turn and cook the other side for 1 minute. Remove to a cutting board. Repeat with remaining tortillas, adding more butter as needed.
- Let rolls cool for at least 3 minutes. Use a serrated knife to slice each roll into 1-inch pinwheels (about 5-6 per roll).
Notes
Let rolls cool before slicing to prevent cheese from oozing out. For meal prep, undercook slightly; they’ll finish when reheated. Store in an airtight container in the fridge for up to 4 days. Freeze uncooked rolls (before slicing) for up to 3 months.
Nutrition
- Serving Size: 5-6 pinwheels (about
- Calories: 310
- Sugar: 1
- Sodium: 520
- Fat: 16
- Saturated Fat: 9
- Carbohydrates: 28
- Fiber: 2
- Protein: 16
Keywords: quesadilla rolls, lunchbox, cheese, pinwheels, easy, 15-minute, kid-friendly