Love this? Save it for later!
Share the inspiration with your friends
Third batch of mummy dogs in six days and I finally stopped overthinking the eyes. The first two rounds looked like anxious little ghosts—too much dough, not enough wrap tension, and I used those fancy mustard dots that just bled into everything. But this time, with a toothpick dab of regular yellow mustard on each tiny head, they actually stared back at me from the baking sheet. And I laughed. That’s the thing nobody tells you about Halloween cooking—sometimes the recipe that looks the silliest on Pinterest is the one that makes your kid forget about the candy bowl for fifteen whole minutes.
These easy mummy-wrapped Halloween hot dogs started as a panic idea. I had leftover crescent dough from a failed breakfast experiment (don’t ask about the cinnamon-sugar disaster) and a pack of hot dogs that were dangerously close to their expiration date. My six-year-old was bouncing off the walls in her witch costume two weeks early, and I needed something—anything—that would let her help without involving a knife. So I handed her a butter knife, a strip of dough, and said, “Wrap this like a bandage.” She took it seriously. Like, too seriously. We ended up with one hot dog that had seventeen layers of dough and zero visible meat. But she was proud, and honestly, that was the moment I knew this recipe was going to stick.
There’s something about the simplicity of it that keeps pulling me back. No complicated fillings, no fancy pastry work, no chasing down obscure ingredients at three different stores. Just hot dogs, canned dough, and a little creativity. The kind of recipe that works for a last-minute classroom party or a Friday night when you’ve got nothing planned but want to make the ordinary feel special. It’s not gourmet—it’s not supposed to be. It’s the kind of food that makes people smile before they even take a bite.
Why You’ll Love This Recipe
I’ve tested this recipe more times than I care to admit—through burnt edges, undercooked centers, and one truly tragic incident where the dough unraveled completely in the oven. Each failure taught me something. And what I’ve landed on is a version that actually works, every single time, without stress or special skills.
- Kid-Friendly Fun : This is the recipe you pull out when you need a guaranteed win with little ones. My daughter now insists on being the “mummy wrapper” every time, and I’ve watched her confidence grow with each batch. It’s hands-on, forgiving, and the payoff is immediate.
- Quick & Easy : From fridge to table in under 25 minutes. No marinating, no chilling, no complicated steps. Perfect for Halloween parties where you’re already juggling a dozen other things.
- Simple Ingredients : You probably have everything already. Hot dogs, crescent roll dough, and a little mustard or ketchup for the eyes. That’s it. No special grocery run required.
- Perfect for Halloween : Whether it’s a school party, a trunk-or-treat event, or just a spooky movie night at home, these little guys fit right in. They’re festive without being fussy.
- Crowd-Pleaser : I’ve brought these to three different gatherings now, and they disappear faster than anything else on the table. Adults pretend they’re just being polite, but I’ve caught more than a few going back for thirds.
What makes this version different from all the others? It’s the technique. Most recipes tell you to wrap the dough loosely, but I’ve learned that a snug wrap—with just a tiny gap between each strip—is what keeps everything together. And the mustard eyes? They’re not just decoration. The slight tang cuts through the richness of the hot dog and dough in a way that makes each bite more interesting. It’s a small tweak, but it changes everything.
This isn’t just a snack—it’s the kind of thing that turns an ordinary October evening into a memory. The kind where flour ends up on the floor and someone’s wearing a costume that’s two sizes too big and everyone’s laughing at the one mummy that looks like it’s doing a yoga pose. That’s the real magic here.
What Ingredients You Will Need
This recipe relies on a short list of everyday ingredients. Nothing fancy, nothing hard to find. Just the basics, used in a way that makes them feel fresh and fun.
- Hot dogs (8-10 standard-size) – I prefer beef hot dogs for their fuller flavor, but turkey or chicken versions work just as well. Look for ones that are uniform in size so they cook evenly. If you’re using jumbo hot dogs, you’ll need to adjust the bake time by a few minutes.
- Refrigerated crescent roll dough (1 can, 8-count) – This is the shortcut that makes the recipe doable on a school night. I’ve tried making my own dough from scratch, and while it’s possible, the canned version gives a flakier, more consistent result. Pillsbury is my go-to, but store brands work fine too. Just make sure it’s the original, not the flaky layers version—those tend to separate too easily.
- Yellow mustard (for eyes) – A little dab on each mummy head brings them to life. You can also use ketchup, but mustard holds its shape better during baking and doesn’t spread as much. For a milder option, try honey mustard.
- Egg wash (1 egg + 1 tablespoon water, beaten) – This gives the dough that gorgeous golden-brown color. If you’re out of eggs, a splash of milk works in a pinch, though the color won’t be as deep.
- Sesame seeds or poppy seeds (optional, for extra texture) – Not necessary, but they add a nice little crunch and make the mummies look even more authentic. Think of them as tiny bandage details.
- Cooking spray or parchment paper – For lining your baking sheet. I prefer parchment because cleanup is effortless, but a light spray works fine if that’s what you have.
One thing I’ve learned through all my testing: the quality of the hot dog matters more than you’d think. Cheap ones tend to split and curl during baking, which makes the dough shift around. Spend a little extra on a brand you trust—it makes a noticeable difference in both appearance and taste.
Equipment Needed
You don’t need a fully stocked kitchen for this one. Here’s what I use every single time:
- Baking sheet – A standard half-sheet pan works perfectly. No need for anything fancy.
- Parchment paper – My preferred lining. It prevents sticking without adding extra grease.
- Sharp knife or pizza cutter – For cutting the crescent dough into strips. A pizza cutter gives cleaner, more even cuts, but a knife works fine.
- Pastry brush – For applying the egg wash. A silicone brush is easiest to clean, but a regular one works too.
- Toothpicks – For applying the mustard eyes. You could use a piping bag, but honestly, a toothpick gives you more control and is way easier to clean up.
- Small bowl – For beating the egg wash.
- Cooling rack – Optional, but helps keep the bottoms from getting soggy if you’re making a big batch.
If you don’t have a pizza cutter, don’t stress. I’ve used scissors before—just cut the dough while it’s still in the can’s wrapper. It’s not elegant, but it works. And if you’re making these with kids, let them use a butter knife for the wrapping part. It’s safer and they feel more involved.
Preparation Method
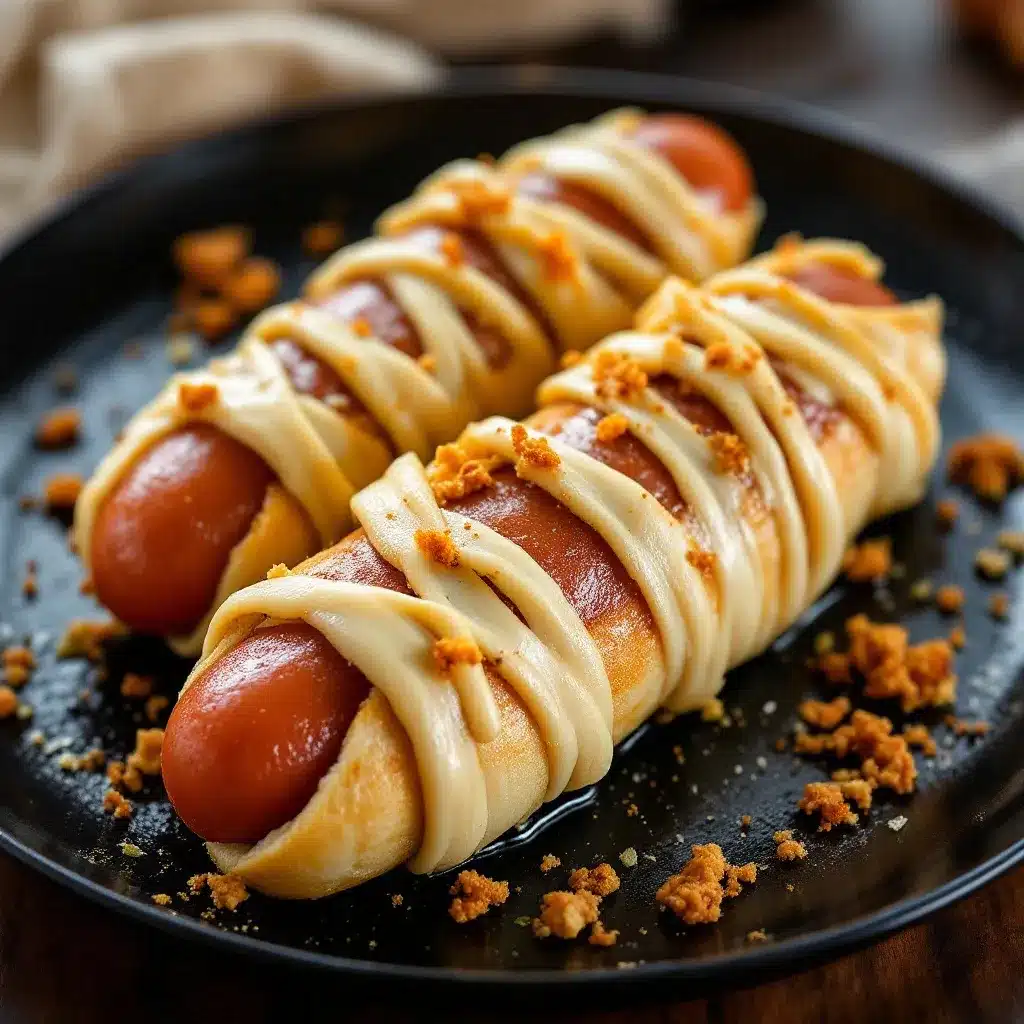
- Preheat your oven to 375°F (190°C) and line a baking sheet with parchment paper. Give it a few minutes to come fully to temperature—a hot oven is key for getting that flaky, golden crust.
- Unroll the crescent dough and separate it along the perforated lines into 8 triangles. Place them flat on a clean cutting board. If the dough feels too cold and stiff, let it sit at room temperature for 5 minutes—it’ll be much easier to work with.
- Cut each triangle into thin strips using a pizza cutter or sharp knife. Aim for strips about 1/4 to 1/2 inch wide. You want them thin enough to wrap easily but thick enough that they won’t tear. I usually get 4-5 strips per triangle, depending on how precise I’m feeling.
- Pat the hot dogs dry with a paper towel. This is a small step that makes a big difference—excess moisture can make the dough slide around and prevent it from browning properly.
- Wrap each hot dog with the dough strips, starting at one end and working your way to the other. Leave a small gap (about 1/4 inch) between each strip so the hot dog peeks through—that’s what gives it the mummy look. Wrap snugly but not too tight; you want the dough to have room to puff up as it bakes.
- Place the wrapped hot dogs on the prepared baking sheet, seam-side down. This helps keep the dough from unraveling during baking. Space them about 2 inches apart so they have room to expand.
- Brush each mummy with the egg wash using a pastry brush. Be thorough but gentle—you don’t want to knock the strips out of place. This step is what gives them that beautiful golden-brown finish.
- Bake for 12-15 minutes, or until the dough is puffed and golden and the hot dogs are heated through. Keep an eye on them after the 10-minute mark; ovens vary, and you want them golden, not burnt.
- Remove from the oven and let them cool on the baking sheet for 2-3 minutes. This gives the dough a chance to set so it doesn’t fall apart when you move them.
- Add the eyes using a toothpick dipped in mustard. Dab a small dot on each mummy’s “head” (the end where you finished wrapping). Don’t overthink it—two little dots is all you need. If you want to get fancy, you can add a tiny dot of ketchup in the center for a pupil effect.
- Transfer to a serving platter and serve warm. They’re best fresh out of the oven, but they hold up well at room temperature for about an hour.
Cooking Tips & Techniques
After making these more times than I can count, I’ve picked up a few tricks that make the process smoother and the results more consistent.
Don’t overwork the dough. Crescent dough is delicate, and the more you handle it, the tougher it gets. If the strips start sticking to your fingers, dust them lightly with flour or just wash your hands and dry them thoroughly. Cold hands help too—run them under cold water before you start wrapping.
The spacing matters more than you think. I learned this the hard way after a batch where I wrapped the strips too tightly together. They baked into a solid mass of dough, and you couldn’t even tell they were supposed to be mummies. Leave those little gaps. They’re not just for looks—they let steam escape, which keeps the dough from getting soggy.
Watch your oven like a hawk. I’ve had batches go from perfectly golden to borderline burnt in under two minutes. Every oven has hot spots, so if yours runs hot, check at the 10-minute mark. You can always add more time, but you can’t undo burnt dough.
Make the eyes after baking. I tried putting the mustard on before baking once, thinking it would save time. It bled into the dough and looked like sad, blurry messes. Trust me—wait until they come out of the oven. The contrast is so much better.
Double the batch if you’re feeding a crowd. These disappear fast. I’ve learned to make at least 16 for a party of 10 people, and even that’s cutting it close. The good news is they’re easy to scale—just buy extra hot dogs and another can of dough.
Variations & Adaptations
One of the best things about this recipe is how easy it is to tweak. Here are a few variations I’ve tried and loved:
- Cheesy Mummy Dogs : Before wrapping, slice the hot dog lengthwise (not all the way through) and stuff a thin strip of cheddar or mozzarella cheese inside. The cheese melts into the hot dog as it bakes, and it’s absolutely ridiculous in the best way.
- Spicy Version : Swap the yellow mustard for sriracha or sriracha mayo on the eyes. You can also use spicy hot dogs or add a pinch of cayenne to the egg wash for a subtle kick.
- Pigs in a Blanket Style : Instead of cutting the dough into thin strips, leave the triangles whole and wrap each hot dog in a single piece of dough. They won’t look like mummies, but they’ll taste just as good—and they’re even faster to assemble.
- Vegetarian Option : Use plant-based hot dogs or even cheese sticks wrapped the same way. The bake time stays roughly the same, though cheese sticks might need a minute or two less.
- Breakfast Mummies : Swap the hot dogs for breakfast sausages and serve them with a side of maple syrup for dipping. I made these for a Halloween morning breakfast, and my daughter still talks about it.
I’ve also experimented with different doughs. Puff pastry gives a flakier, more buttery result, but it’s harder to work with and takes longer to bake. For a gluten-free version, use gluten-free crescent dough—it’s not as stretchy, so handle it gently and expect a slightly different texture.
Serving & Storage Suggestions
These are best served warm, straight from the oven, when the dough is at its flakiest and the hot dog is still juicy. Arrange them on a platter with a small bowl of extra mustard or ketchup for dipping. For a full Halloween spread, pair them with campfire banana s’mores boats for dessert—the contrast between savory and sweet is perfect for a party menu.
If you’re serving them at a party, they hold up well at room temperature for about an hour. After that, the dough starts to soften. To reheat, pop them in a 350°F oven for 3-5 minutes—the microwave works in a pinch but will make the dough chewy.
For storage, let them cool completely, then place them in an airtight container in the refrigerator for up to 3 days. To freeze, arrange them in a single layer on a baking sheet and freeze until solid, then transfer to a freezer bag. They’ll keep for up to 2 months. Reheat frozen mummies directly in a 375°F oven for 8-10 minutes—no need to thaw first.
One thing I’ve noticed: the flavors actually develop a bit overnight. The mustard soaks into the dough just slightly, and the hot dog’s smokiness becomes more pronounced. They’re not quite as good as fresh, but they’re still pretty great for a quick lunch the next day.
Nutritional Information & Benefits
Let’s be real—these aren’t health food. But they’re not meant to be. They’re a fun, festive treat for a special occasion. That said, here’s what you’re looking at per serving (one mummy dog):
- Calories : Approximately 220-250 calories
- Protein : 8-10 grams
- Carbohydrates : 18-22 grams
- Fat : 12-15 grams
- Sodium : 600-700 mg
The hot dogs provide a decent amount of protein, and the crescent dough offers quick energy from carbs. If you’re looking to lighten things up, use turkey hot dogs and low-fat crescent dough—you’ll save about 50 calories and a few grams of fat per serving.
For those with dietary restrictions, note that crescent dough typically contains wheat and dairy (in the form of butter), and hot dogs may contain soy or other allergens. Always check labels, especially if you’re serving kids with food sensitivities. For a completely different kind of Halloween treat that’s lighter on the stomach, try watermelon cucumber feta salad as a refreshing counterpoint to all the indulgence.
Conclusion
These easy mummy-wrapped Halloween hot dogs have become a tradition in our house, and I think they’ll become one in yours too. They’re not complicated, they’re not fancy, and they’re definitely not healthy—but they are fun. The kind of fun that makes a Tuesday night in October feel like a party. The kind that gets your kids into the kitchen without begging. The kind that makes you realize that sometimes the best recipes are the simplest ones.
I’d love to see how yours turn out. Did your kids come up with their own wrapping style? Did you try a variation I haven’t thought of? Drop a comment below and let me know—I read every single one, and your ideas might end up in my next batch. And if you’re looking for more easy, crowd-pleasing recipes, don’t miss creamy cheeseburger soup for another weeknight win that feels like comfort food without the fuss.
Happy Halloween, and happy cooking. May your dough stay flaky and your mustard dots stay put.
Frequently Asked Questions
Can I make these ahead of time?
Yes! You can assemble the mummy dogs up to 24 hours in advance. Just wrap them, place them on the baking sheet, cover with plastic wrap, and refrigerate. Add the egg wash right before baking. If they’re cold from the fridge, add 2-3 minutes to the bake time.
Can I use homemade dough instead of canned crescent rolls?
Absolutely. Use your favorite pizza dough or a basic yeast dough recipe. Roll it out thin (about 1/8 inch) and cut into strips. The bake time may increase slightly since homemade dough is denser, so keep an eye on them.
Why did my dough unravel during baking?
This usually happens when the dough isn’t wrapped snugly enough, or when the strips are too wide. Make sure you’re wrapping with a little tension and placing the mummies seam-side down on the baking sheet. Also, make sure your oven is fully preheated—a hot oven helps the dough set quickly before it has a chance to shift.
Can I use hot dog buns instead of dough?
You could, but they won’t have the same mummy look. If you’re in a hurry, slice the buns into strips and wrap them around the hot dogs, then toast in the oven for 5 minutes. It’s a different texture entirely, but it works in a pinch.
How do I keep the mustard eyes from smudging?
Let the mummy dogs cool for 2-3 minutes after baking before adding the eyes. The residual heat will help the mustard set quickly. Use a toothpick for precision, and don’t use too much mustard—a tiny dab is all you need. If you’re transporting them, wait until you arrive to add the eyes so they stay pristine.
Pin This Recipe!
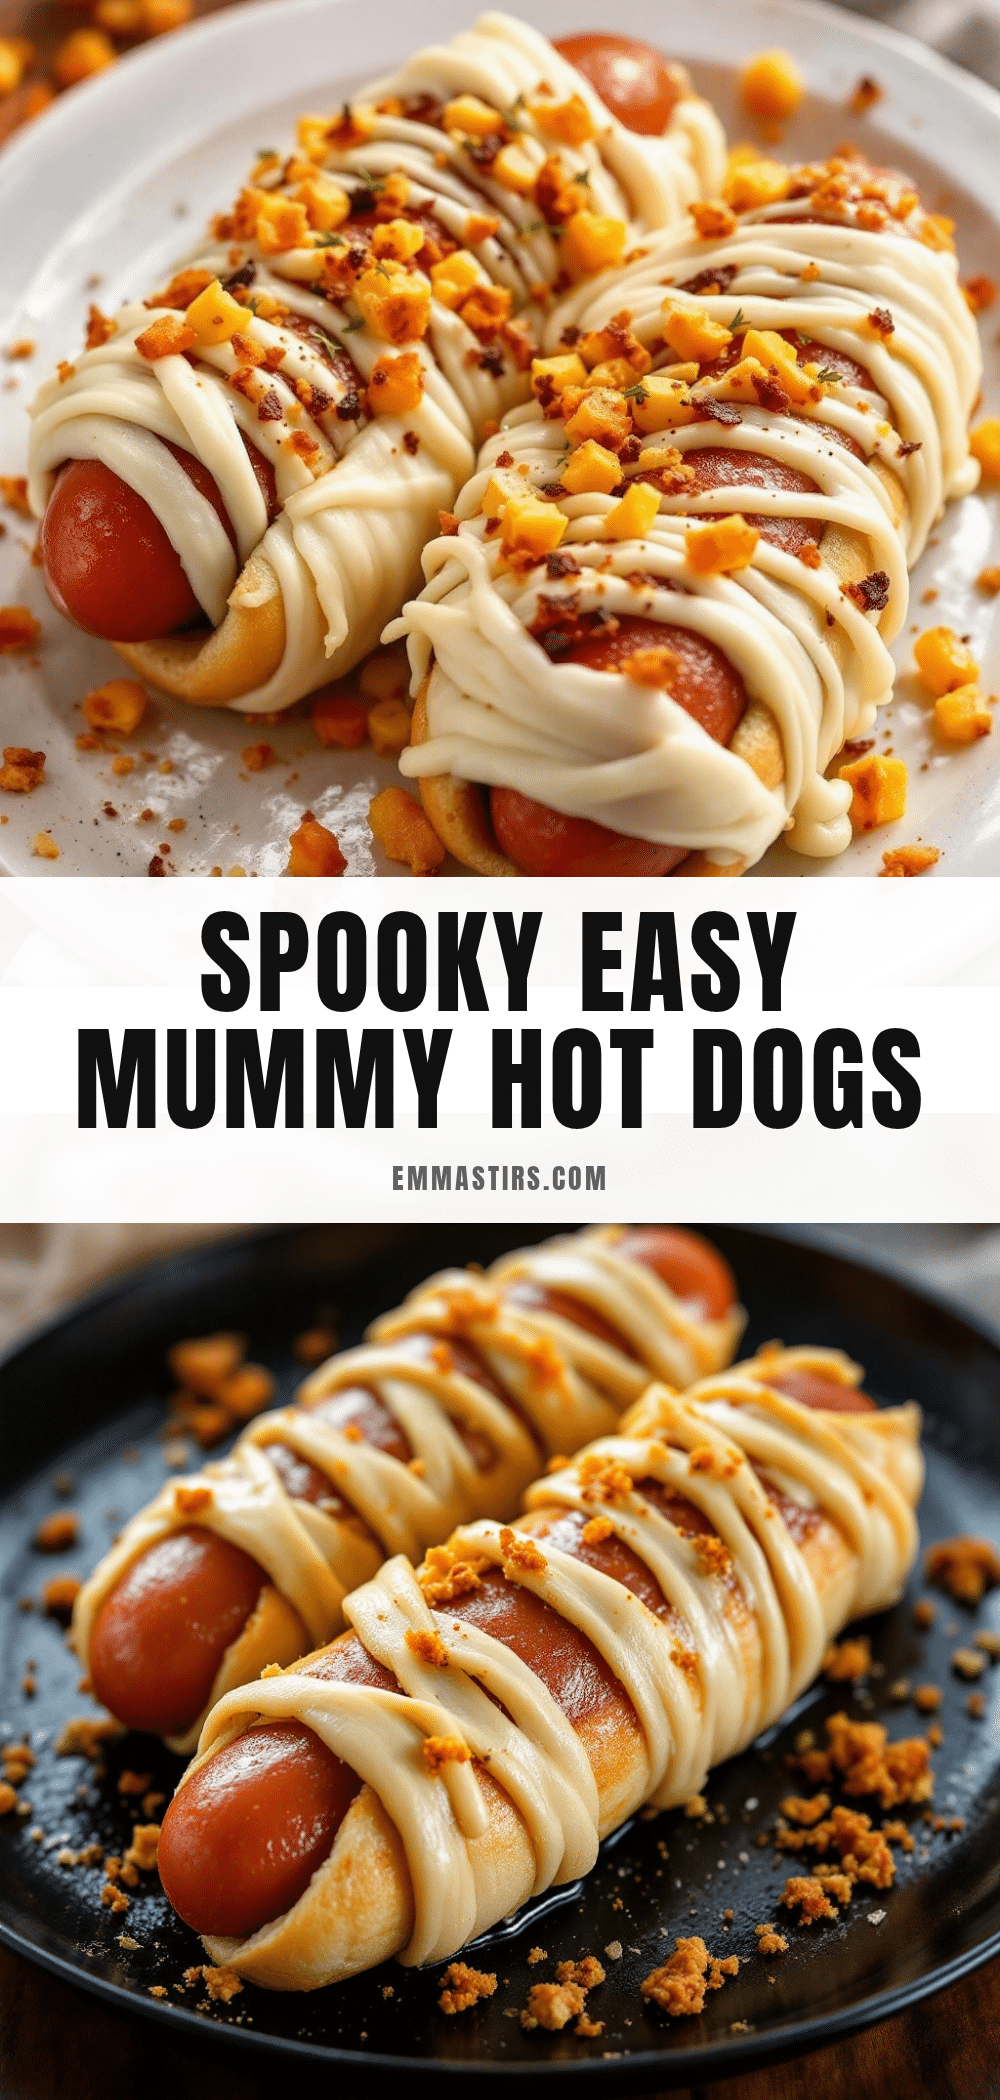
Easy Mummy Hot Dogs: Best Halloween Recipe for Kids

These easy mummy-wrapped Halloween hot dogs are a fun, kid-friendly treat that comes together in under 25 minutes. With simple ingredients like hot dogs and crescent roll dough, they’re perfect for Halloween parties, school events, or a spooky movie night.
- Prep Time: 10 minutes
- Cook Time: 15 minutes
- Total Time: 25 minutes
- Yield: 8-10 servings 1x
- Category: Appetizer
- Cuisine: American
Ingredients
- 8–10 standard-size hot dogs (beef, turkey, or chicken)
- 1 can (8-count) refrigerated crescent roll dough (original, not flaky layers)
- Yellow mustard (for eyes)
- 1 egg (for egg wash)
- 1 tablespoon water (for egg wash)
- Sesame seeds or poppy seeds (optional, for extra texture)
- Cooking spray or parchment paper (for lining baking sheet)
Instructions
- Preheat your oven to 375°F (190°C) and line a baking sheet with parchment paper.
- Unroll the crescent dough and separate it along the perforated lines into 8 triangles. Place them flat on a clean cutting board. If the dough feels too cold and stiff, let it sit at room temperature for 5 minutes.
- Cut each triangle into thin strips using a pizza cutter or sharp knife. Aim for strips about 1/4 to 1/2 inch wide. You should get 4-5 strips per triangle.
- Pat the hot dogs dry with a paper towel to remove excess moisture.
- Wrap each hot dog with the dough strips, starting at one end and working your way to the other. Leave a small gap (about 1/4 inch) between each strip so the hot dog peeks through. Wrap snugly but not too tight.
- Place the wrapped hot dogs on the prepared baking sheet, seam-side down. Space them about 2 inches apart.
- In a small bowl, beat the egg with 1 tablespoon of water to make an egg wash. Brush each mummy with the egg wash using a pastry brush.
- Bake for 12-15 minutes, or until the dough is puffed and golden and the hot dogs are heated through. Check after 10 minutes to prevent burning.
- Remove from the oven and let them cool on the baking sheet for 2-3 minutes.
- Add the eyes using a toothpick dipped in mustard. Dab a small dot on each mummy’s ‘head’ (the end where you finished wrapping).
- Transfer to a serving platter and serve warm.
Notes
For best results, wrap dough snugly but not too tight, and leave small gaps between strips for the mummy look. Add mustard eyes after baking to prevent bleeding. Double the batch for crowds. To reheat, use a 350°F oven for 3-5 minutes. Store in an airtight container in the refrigerator for up to 3 days, or freeze for up to 2 months.
Nutrition
- Serving Size: 1 mummy dog
- Calories: 235
- Sugar: 3
- Sodium: 650
- Fat: 13.5
- Saturated Fat: 4.5
- Carbohydrates: 20
- Protein: 9
Keywords: Halloween recipe, mummy hot dogs, kid-friendly, easy appetizer, crescent roll recipe, spooky snacks, party food


