Love this? Save it for later!
Share the inspiration with your friends
“You’ve got to taste this soup I made,” my neighbor texted me, along with a photo of a steaming bowl that looked like liquid autumn. And that was it. I’d been meaning to perfect a butternut squash soup for years, but something about that grainy, slightly blurry picture—the way the steam curled up against her kitchen window on a rainy Tuesday—made me finally commit. I walked over with a spoon in my pocket (literally) and took one sip of her version. It was good. Really good. But it was missing something. That something, I realized after a week of testing, was the deep, almost nutty flavor you only get from roasting the squash first, plus the subtle piney warmth of fresh sage.
This cozy roasted butternut squash soup with sage is the result of that rainy-day text and about six subsequent batches. It’s the kind of soup that makes you want to light a candle, put on a sweater, and cancel any plans you had for the evening. The roasting process does the heavy lifting here—it caramelizes the natural sugars in the squash and gives the soup a richness you just can’t get from boiling. And the sage? It’s not just a garnish. It’s the quiet hero, infusing every spoonful with an earthy, comforting aroma that feels like a hug in a bowl.
Honestly, I didn’t think I’d ever get the balance right. But after a few burnt batches of garlic and one memorable incident involving a blender lid that wasn’t secured properly (let’s just say my kitchen ceiling got a seasonal makeover), I landed on a method that’s foolproof. This is that recipe. It’s simple, forgiving, and tastes like you spent hours fussing when really, the oven does most of the work. Trust me on this one.
Why You’ll Love This Recipe
This isn’t just another squash soup recipe floating around the internet. I’ve tested this version more times than I care to count, tweaking the roast time, the herb ratio, and even the type of onion. What I landed on is a soup that’s creamy without a drop of heavy cream, deeply savory, and just sweet enough from the natural caramelization of the roasted vegetables. Here’s why it’ll become your go-to:
- Rich, Complex Flavor Without the Work: Roasting the butternut squash, onion, and garlic together concentrates their flavors and adds a caramelized depth that simmering alone can’t achieve. The fresh sage ties it all together with its warm, slightly peppery notes.
- Surprisingly Healthy & Satisfying: This soup is naturally gluten-free, dairy-free (if you use vegetable broth and skip the optional cream swirl), and packed with fiber, vitamin A, and antioxidants. It’s comfort food that actually makes you feel good.
- Perfect for Meal Prep: The flavors actually get better after a day or two in the fridge. Make a big batch on Sunday, and you’ve got cozy lunches or quick dinners all week. It also freezes beautifully.
- Simple, Whole-Food Ingredients: You probably already have most of these in your kitchen. No weird additives, no cream-of-anything cans—just real food that tastes incredible.
- Customizable to Your Pantry: Don’t have fresh sage? Use dried. Want a touch of heat? Add a pinch of cayenne. Need it extra creamy? Stir in a splash of coconut milk. This recipe is built to adapt.
What makes this version different from the rest is the technique. I roast the garlic whole—skin on—so it gets soft and mellow, almost sweet, without any bitterness. And instead of blending in raw sage, I let a few whole leaves roast with the vegetables, then add a chiffonade of fresh sage at the very end. The result is a layered sage flavor that’s both subtle and unmistakable. It’s the kind of soup that makes you close your eyes after the first bite. Perfect for impressing guests without stress, or turning a simple Tuesday dinner into something memorable.
What Ingredients You Will Need
This recipe uses simple, wholesome ingredients to deliver bold flavor and satisfying texture without any fuss. Most are pantry staples, especially in the fall, and each one plays a specific role in building that deep, cozy flavor profile.
- Butternut Squash (1 large, about 3 pounds): Look for one that feels heavy for its size with a matte, beige skin. You’ll peel, seed, and cube it into 1-inch chunks. For a shortcut, you can buy pre-cut squash, but the cubes are often smaller and can dry out faster during roasting. If using pre-cut, reduce roasting time by about 5 minutes.
- Yellow Onion (1 medium, roughly chopped): Adds a savory base note. A sweet onion like Vidalia works too, but a standard yellow onion gives the best balance.
- Garlic (1 whole head): Don’t skip roasting the whole head. It transforms sharp, pungent garlic into a sweet, spreadable paste that adds incredible depth. I recommend using fresh garlic heads, not pre-peeled cloves.
- Fresh Sage (about 10-12 large leaves): This is the star herb. You’ll use some for roasting and some for finishing. Dried sage can be substituted in a pinch (use 1 teaspoon), but fresh really makes a difference here.
- Olive Oil (3 tablespoons, plus more for drizzling): A good quality extra-virgin olive oil adds richness and helps the vegetables caramelize. Avocado oil works well too.
- Vegetable Broth (4 cups, low-sodium): The base of the soup. A good-quality broth matters here—I prefer a rich, herbed broth for the best flavor. Chicken broth also works if you’re not keeping it vegetarian.
- Salt (1 teaspoon, plus more to taste): I use fine sea salt. Kosher salt works too, but you may need a bit more.
- Black Pepper (½ teaspoon, freshly ground): Adds a gentle warmth.
- Maple Syrup (1 tablespoon, optional): A tiny touch of sweetness balances the savory notes and enhances the squash’s natural flavor. Leave it out if you prefer a purely savory soup.
- Coconut Milk or Heavy Cream (¼ cup, optional): For an extra creamy finish. I often use full-fat coconut milk for a dairy-free version, but a swirl of heavy cream is lovely if you’re not avoiding dairy.
Ingredient Selection Tip: When picking butternut squash, avoid any with soft spots or green patches, which indicate under-ripeness. A fully ripe squash will have a deep orange flesh that’s dense and sweet. For the sage, look for leaves that are vibrant green and fragrant—if they smell like nothing, they’ll taste like nothing.
Equipment Needed
You don’t need a fancy kitchen to make this soup, but a few key tools will make the process smoother and safer. Here’s what I use:
- Large Baking Sheet (rimmed): A half-sheet pan is ideal for roasting the vegetables in a single layer. If your pan is too small, the squash will steam instead of caramelize.
- Parchment Paper or Silicone Baking Mat: Makes cleanup a breeze and prevents sticking. Totally optional but highly recommended.
- Chef’s Knife: A sharp, heavy knife is crucial for cutting through the tough skin of a butternut squash. A dull knife is dangerous here—trust me, I’ve learned the hard way.
- Vegetable Peeler: For removing the squash skin. A Y-shaped peeler works best for the curves of a butternut.
- Large Soup Pot or Dutch Oven: For simmering the roasted vegetables with broth. A 5- to 6-quart pot is perfect.
- Immersion Blender or Countertop Blender: An immersion blender is easier and less messy—you blend right in the pot. If using a countertop blender, work in batches and never fill it more than halfway with hot liquid (the steam can blow the lid off).
- Measuring Spoons and Cups: For accuracy, especially with the salt and maple syrup.
If you don’t have an immersion blender, a standard blender works fine. Just let the soup cool for a few minutes before blending, and hold the lid down with a kitchen towel. I’ve used a $20 immersion blender for years and it works perfectly—no need for anything fancy.
Preparation Method

This method breaks down into two main parts: roasting the vegetables and blending the soup. Each step is simple, but the roasting part is where the magic really happens. Take your time here—it’s worth it.
- Preheat your oven to 400°F (200°C). Line a large rimmed baking sheet with parchment paper for easy cleanup.
- Prepare the butternut squash: Using a sharp chef’s knife, carefully cut off the top and bottom of the squash. Stand it upright on a flat end and slice it in half lengthwise. Scoop out the seeds and stringy pulp with a spoon (save the seeds for roasting if you like!). Use a vegetable peeler to remove the skin, then cut the flesh into 1-inch cubes. You should have about 6 to 7 cups of cubed squash.
- Prepare the garlic: Slice about ¼ inch off the top of the whole garlic head to expose the cloves. Drizzle the cut surface with a little olive oil and wrap the head loosely in a small piece of foil. This keeps the garlic from drying out while it roasts.
- Roast the vegetables: On the prepared baking sheet, toss the cubed squash and chopped onion with 2 tablespoons of olive oil, ½ teaspoon of salt, and ¼ teaspoon of black pepper. Spread everything in a single, even layer. Tuck 4 to 5 whole sage leaves in among the vegetables. Place the foil-wrapped garlic head on the sheet as well. Roast for 30 to 35 minutes, stirring halfway through, until the squash is tender and caramelized at the edges. The garlic should feel soft when squeezed.
- Cool slightly: Remove the baking sheet from the oven. Let the garlic cool for a few minutes until it’s safe to handle. Then, squeeze the soft roasted garlic cloves out of their skins into a small bowl. Discard the skins and the roasted sage leaves (they’ve given their flavor).
- Sauté the remaining sage: In your large soup pot or Dutch oven, heat the remaining 1 tablespoon of olive oil over medium heat. Add 4 to 5 fresh sage leaves (chiffonaded or roughly chopped) and cook for about 30 seconds, just until fragrant. Be careful not to burn them—they turn bitter quickly.
- Combine and simmer: Add the roasted squash, onion, and roasted garlic paste to the pot. Pour in the 4 cups of vegetable broth. Stir in the remaining ½ teaspoon of salt and ¼ teaspoon of pepper, plus the maple syrup if using. Bring the soup to a gentle simmer over medium-high heat, then reduce the heat to low and let it cook for 10 minutes to meld the flavors.
- Blend until smooth: Remove the pot from the heat. Using an immersion blender, blend the soup directly in the pot until it’s completely smooth and velvety. If using a countertop blender, work in batches. Fill the blender no more than halfway, hold the lid down with a towel, and blend until smooth. Pour each batch into a clean bowl or pot.
- Finish and adjust: If you’re adding coconut milk or heavy cream, stir it in now. Taste the soup and adjust the seasoning—you might want another pinch of salt or a crack of black pepper. If the soup is too thick for your liking, stir in a little more broth or water until it reaches your desired consistency.
- Serve: Ladle the soup into bowls. Garnish with a few fresh sage leaves, a drizzle of olive oil or cream, and maybe a sprinkle of black pepper. A handful of roasted squash seeds on top adds a nice crunch if you saved them.
Personal Tip: The soup will look slightly grainy right after blending, but don’t worry. Let it sit for 5 minutes off the heat, and it will magically smooth out as it settles. I have no idea why this happens, but it works every time.
Cooking Tips & Techniques
Over the years, I’ve made every mistake in the book with this soup. Here’s what I’ve learned so you don’t have to repeat my blunders:
- Don’t overcrowd the baking sheet: The single most important tip for deep flavor. If the squash pieces are touching or overlapping, they’ll steam instead of roast. Use two sheets if needed, and rotate them halfway through.
- Cut the squash into uniform pieces: Aim for 1-inch cubes. If some pieces are much smaller, they’ll burn before the larger ones are tender. Consistency is key for even caramelization.
- Roast the garlic whole: I cannot stress this enough. Roasted garlic paste is worlds apart from raw or even sautéed garlic. It’s sweet, mellow, and almost buttery. It adds a complexity that makes the soup taste like it simmered for hours.
- Toast the sage briefly: When you sauté the fresh sage in olive oil at the beginning of step 6, keep it moving. Thirty seconds is plenty. Burnt sage tastes like a campfire that’s been rained on—not in a good way.
- Blend with caution: Hot soup expands in a blender. If using a countertop blender, always remove the center cap from the lid and cover it with a folded kitchen towel. This lets steam escape and prevents the lid from popping off. I learned this the messy way.
- Season in layers: Add salt at the roasting stage, not just at the end. Salt helps draw out moisture from the vegetables, which concentrates their flavor during roasting. Just don’t overdo it—you can always add more later.
- Let it rest: The soup’s flavor deepens as it sits. If you have time, make it a day ahead. Reheat gently over low heat, adding a splash of broth if it’s thickened too much.
Variations & Adaptations
This soup is incredibly flexible. Here are a few ways I’ve adapted it depending on my mood, what’s in the fridge, or who I’m cooking for:
- Spicy Roasted Butternut Squash Soup: Add ½ teaspoon of smoked paprika and a pinch of cayenne pepper to the vegetables before roasting. The smokiness pairs beautifully with the sage, and the heat warms you from the inside out. I love this version on a chilly, damp day.
- Coconut-Turmeric Variation: Swap the olive oil for coconut oil when sautéing the sage. Use full-fat coconut milk instead of cream, and add 1 teaspoon of ground turmeric and ½ teaspoon of ginger (fresh, grated) to the pot before simmering. This version is incredibly vibrant and has a lovely anti-inflammatory boost.
- Apple & Squash Combo: Add one peeled, chopped apple (like Honeycrisp or Fuji) to the baking sheet with the squash. The apple adds a subtle sweetness and a hint of acidity that brightens the whole soup. Omit the maple syrup if using a very sweet apple.
- Dairy-Free & Vegan: This recipe is already dairy-free if you skip the cream swirl. Use vegetable broth and coconut milk for an extra-rich, fully plant-based version. The coconut milk adds a lovely silkiness without any dairy flavor.
- Change the Herb: If you don’t have fresh sage, try fresh thyme or rosemary. Use 4 to 5 sprigs of thyme or 2 sprigs of rosemary during roasting, and remove them before blending. Each herb gives the soup a completely different personality.
I once made a version with a whole roasted red bell pepper thrown in with the squash, and it was surprisingly good—added a subtle smokiness and a gorgeous orange-red color. Don’t be afraid to experiment!
Serving & Storage Suggestions
This soup is a meal in itself, but it also plays well with others. Here’s how I like to serve and store it:
- Serving Temperature: Serve hot, but not boiling. Let it cool for a minute or two after ladling so the flavors settle.
- Toppings: A drizzle of good olive oil or a swirl of coconut cream adds richness. Toasted pumpkin seeds, crumbled bacon (for non-vegetarian versions), or a few crispy sage leaves (fried in a little butter for 30 seconds) add texture and visual appeal.
- What to Serve With It: A crusty piece of sourdough or a simple green salad with a tangy vinaigrette is all you need. For a heartier meal, serve it alongside a grilled chicken Caesar salad or a fresh Mediterranean chickpea bowl. It also pairs beautifully with a grilled lemon herb chicken breast for a complete, cozy dinner.
- Refrigerator Storage: Store in an airtight container in the fridge for up to 5 days. The flavors will meld and deepen, making day-two soup even better than day-one.
- Freezer Storage: This soup freezes like a dream. Let it cool completely, then transfer to freezer-safe containers or zip-top bags. Leave about an inch of headspace for expansion. It will keep for up to 3 months. Thaw overnight in the fridge before reheating.
- Reheating: Reheat gently on the stovetop over medium-low heat, stirring occasionally. If the soup has thickened, stir in a splash of broth, water, or milk until it reaches your desired consistency. You can also reheat individual portions in the microwave, but the stovetop gives a better texture.
Flavor Note: The soup will thicken as it sits in the fridge, especially if you added coconut milk or cream. This is normal. Just thin it out with a little liquid when you reheat it, and it’ll be as good as new.
Nutritional Information & Benefits
This soup is as nourishing as it is delicious. Here’s a rough estimate per serving (based on 6 servings, without optional cream or coconut milk):
- Calories: ~180
- Protein: 3g
- Fat: 8g
- Carbohydrates: 28g
- Fiber: 6g
- Sugar: 8g (naturally occurring)
- Vitamin A: Over 400% of the Daily Value
- Vitamin C: 35% of the Daily Value
- Potassium: 600mg
Health Highlights: Butternut squash is a powerhouse of beta-carotene, which your body converts into vitamin A for healthy vision and immune function. It’s also rich in fiber, which supports digestion and keeps you full. Sage is known for its antioxidant and anti-inflammatory properties. This soup is naturally gluten-free, low in saturated fat, and can easily be made vegan. The only potential allergen to note is the optional coconut milk (tree nut) or heavy cream (dairy).
I love that this soup feels indulgent—creamy, rich, satisfying—but it’s actually packed with vegetables and fiber. It’s the kind of meal that makes you feel good from the inside out, without any heavy, sluggish feeling afterward.
Conclusion
This cozy roasted butternut squash soup with sage is one of those recipes that proves simple ingredients, treated with a little care, can create something truly special. The roasting process does the heavy lifting, transforming humble squash and garlic into a silky, deeply flavorful soup that tastes like autumn in a bowl. It’s forgiving enough for a weeknight, elegant enough for company, and healthy enough to feel good about eating every single day.
I love how customizable it is—you can make it spicy, smoky, creamy, or completely plant-based, and it always works. It’s become my go-to for chilly evenings, lazy Sundays, and any time I need a little edible comfort. I hope you’ll make it your own, too. Maybe add a little extra sage, or a pinch of cayenne, or a handful of roasted pumpkin seeds on top. Whatever you do, don’t skip the roasted garlic. Trust me on that.
I’d love to hear how it turns out for you! Leave a comment below and let me know what variations you tried, or tag me in your photos if you share them. And if you’re looking for more cozy, healthy meals, check out my creamy one-pan Tuscan chicken or cozy one-bowl banana bread for more comforting recipes. Happy cooking, friends!
Frequently Asked Questions
Can I use frozen butternut squash for this soup?
Yes, you can, but the texture won’t be quite the same. Frozen squash releases a lot of water as it thaws, which can prevent it from caramelizing properly during roasting. If using frozen, thaw it first and pat it very dry with paper towels. You may also need to roast it for a little longer to evaporate the excess moisture. The soup will still be tasty, just not quite as deeply flavored.
How do I make this soup in an Instant Pot?
To make this in a pressure cooker, skip the roasting step. Sauté the onion and garlic in the Instant Pot using the sauté function, then add the cubed squash, broth, and sage. Cook on high pressure for 10 minutes, then do a natural release for 10 minutes. Blend as directed. The flavor won’t be as caramelized as the roasted version, but it’s a great shortcut for busy nights.
Can I make this soup ahead of time?
Absolutely. In fact, I often recommend it. The flavors deepen and meld beautifully after a day in the fridge. Make the soup completely, let it cool, and store it in an airtight container for up to 5 days. Reheat gently on the stovetop, adding a splash of broth to thin it out if needed.
Is this soup freezer-friendly?
Yes, it freezes wonderfully. Let the soup cool completely, then transfer it to freezer-safe containers or zip-top bags. Leave about an inch of headspace for expansion. It will keep for up to 3 months. Thaw overnight in the refrigerator before reheating. The texture remains smooth and creamy after thawing.
What can I use instead of fresh sage?
If you don’t have fresh sage, dried sage is the best substitute. Use about 1 teaspoon of dried sage, rubbed between your palms to release its oils, and add it when you sauté the aromatics. You can also use fresh thyme (4-5 sprigs) or fresh rosemary (2 sprigs). Each will give the soup a different but equally delicious herbaceous note.
Pin This Recipe!
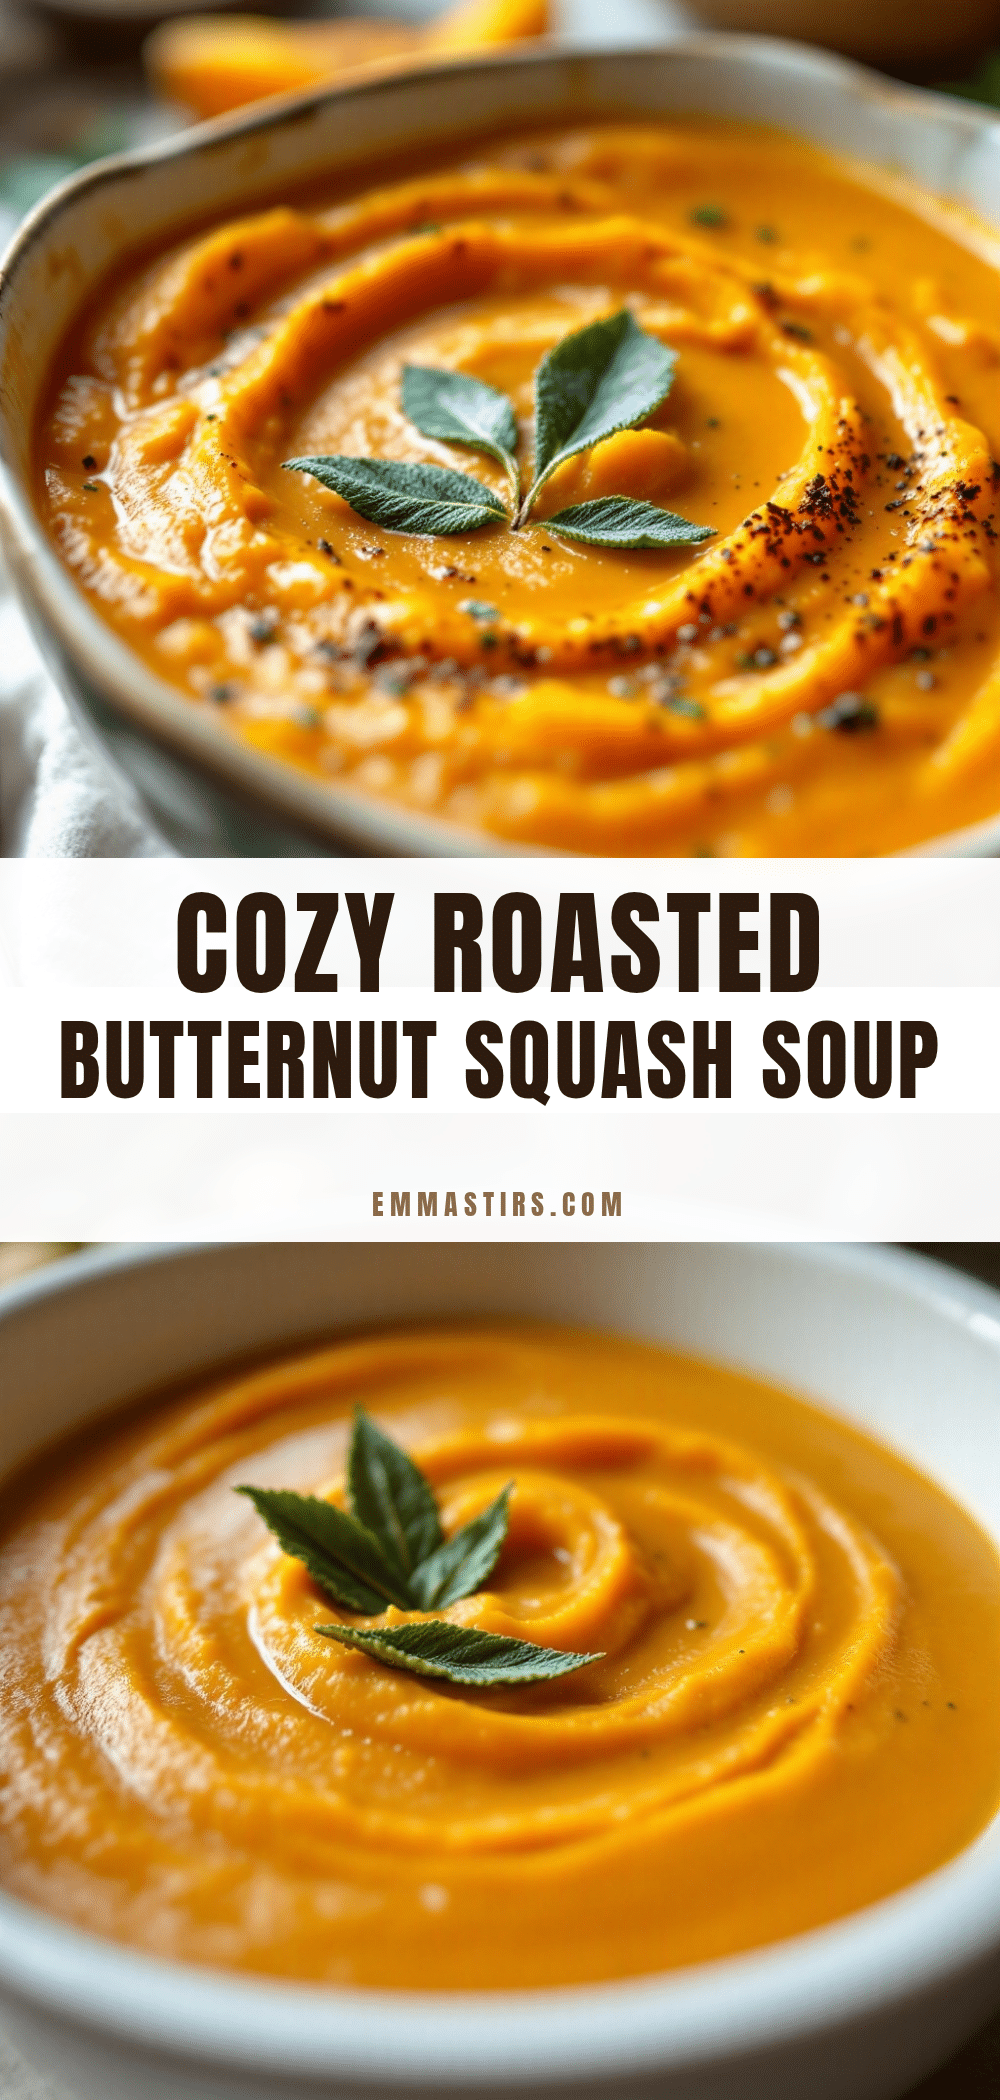
Cozy Roasted Butternut Squash Soup Recipe with Sage

This cozy roasted butternut squash soup with sage is the result of a rainy-day text and about six subsequent batches. It’s the kind of soup that makes you want to light a candle, put on a sweater, and cancel any plans you had for the evening.
- Prep Time: 15 minutes
- Cook Time: 45 minutes
- Total Time: 1 hour
- Yield: 6 servings 1x
- Category: Soup
- Cuisine: American
Ingredients
- 1 large butternut squash (about 3 pounds), peeled, seeded, and cubed into 1-inch pieces
- 1 medium yellow onion, roughly chopped
- 1 whole head garlic
- 10–12 large fresh sage leaves
- 3 tablespoons olive oil, plus more for drizzling
- 4 cups low-sodium vegetable broth
- 1 teaspoon fine sea salt, plus more to taste
- ½ teaspoon freshly ground black pepper
- 1 tablespoon maple syrup (optional)
- ¼ cup coconut milk or heavy cream (optional)
Instructions
- Preheat your oven to 400°F (200°C). Line a large rimmed baking sheet with parchment paper.
- Prepare the butternut squash: Cut off the top and bottom, stand upright, and slice in half lengthwise. Scoop out seeds and stringy pulp. Use a vegetable peeler to remove the skin, then cut the flesh into 1-inch cubes (about 6-7 cups).
- Prepare the garlic: Slice about ¼ inch off the top of the whole garlic head to expose the cloves. Drizzle the cut surface with a little olive oil and wrap the head loosely in a small piece of foil.
- Roast the vegetables: On the prepared baking sheet, toss the cubed squash and chopped onion with 2 tablespoons olive oil, ½ teaspoon salt, and ¼ teaspoon black pepper. Spread in a single layer. Tuck 4-5 whole sage leaves among the vegetables. Place the foil-wrapped garlic head on the sheet. Roast for 30-35 minutes, stirring halfway, until squash is tender and caramelized. Garlic should feel soft when squeezed.
- Cool slightly: Remove from oven. Let garlic cool a few minutes, then squeeze the soft roasted garlic cloves out of their skins into a small bowl. Discard skins and roasted sage leaves.
- Sauté remaining sage: In a large soup pot or Dutch oven, heat the remaining 1 tablespoon olive oil over medium heat. Add 4-5 fresh sage leaves (chiffonaded or roughly chopped) and cook for about 30 seconds until fragrant.
- Combine and simmer: Add roasted squash, onion, and roasted garlic paste to the pot. Pour in 4 cups vegetable broth. Stir in remaining ½ teaspoon salt, ¼ teaspoon pepper, and maple syrup if using. Bring to a gentle simmer, then reduce heat to low and cook for 10 minutes.
- Blend until smooth: Remove from heat. Use an immersion blender to blend soup directly in the pot until smooth and velvety. If using a countertop blender, work in batches, filling no more than halfway, holding lid down with a towel.
- Finish and adjust: If adding coconut milk or heavy cream, stir it in now. Taste and adjust seasoning. If too thick, stir in more broth or water to reach desired consistency.
- Serve: Ladle into bowls. Garnish with fresh sage leaves, a drizzle of olive oil or cream, and a sprinkle of black pepper. Optional: top with roasted squash seeds.
Notes
The soup will look slightly grainy right after blending, but let it sit for 5 minutes off the heat and it will smooth out. For best flavor, make a day ahead. The soup freezes well for up to 3 months. If using frozen squash, thaw and pat dry before roasting. For Instant Pot version, skip roasting and sauté onion and garlic, then pressure cook with squash, broth, and sage for 10 minutes.
Nutrition
- Serving Size: 1 serving (about 1.5
- Calories: 180
- Sugar: 8
- Sodium: 600
- Fat: 8
- Saturated Fat: 1
- Carbohydrates: 28
- Fiber: 6
- Protein: 3
Keywords: butternut squash soup, roasted butternut squash soup, sage soup, fall soup, cozy soup, healthy soup, gluten-free soup, vegan soup option