Love this? Save it for later!
Share the inspiration with your friends
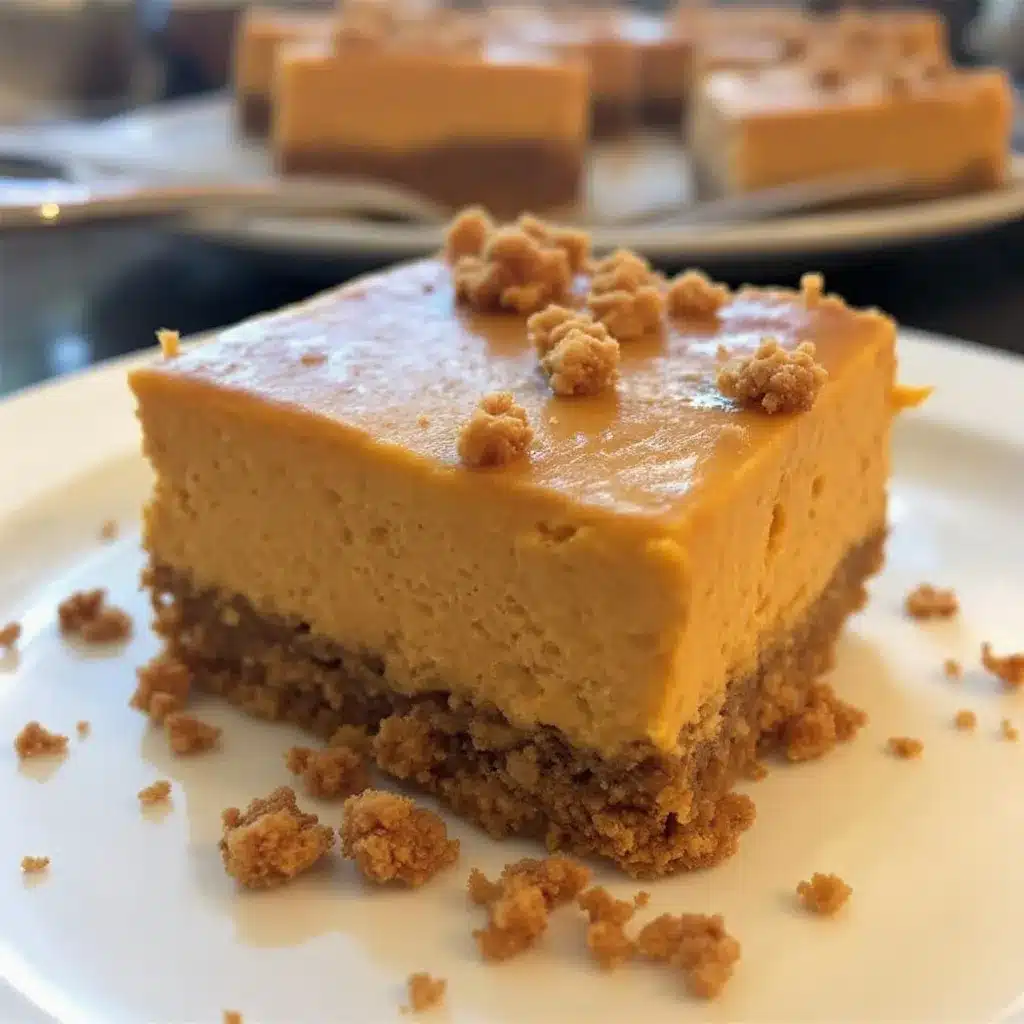
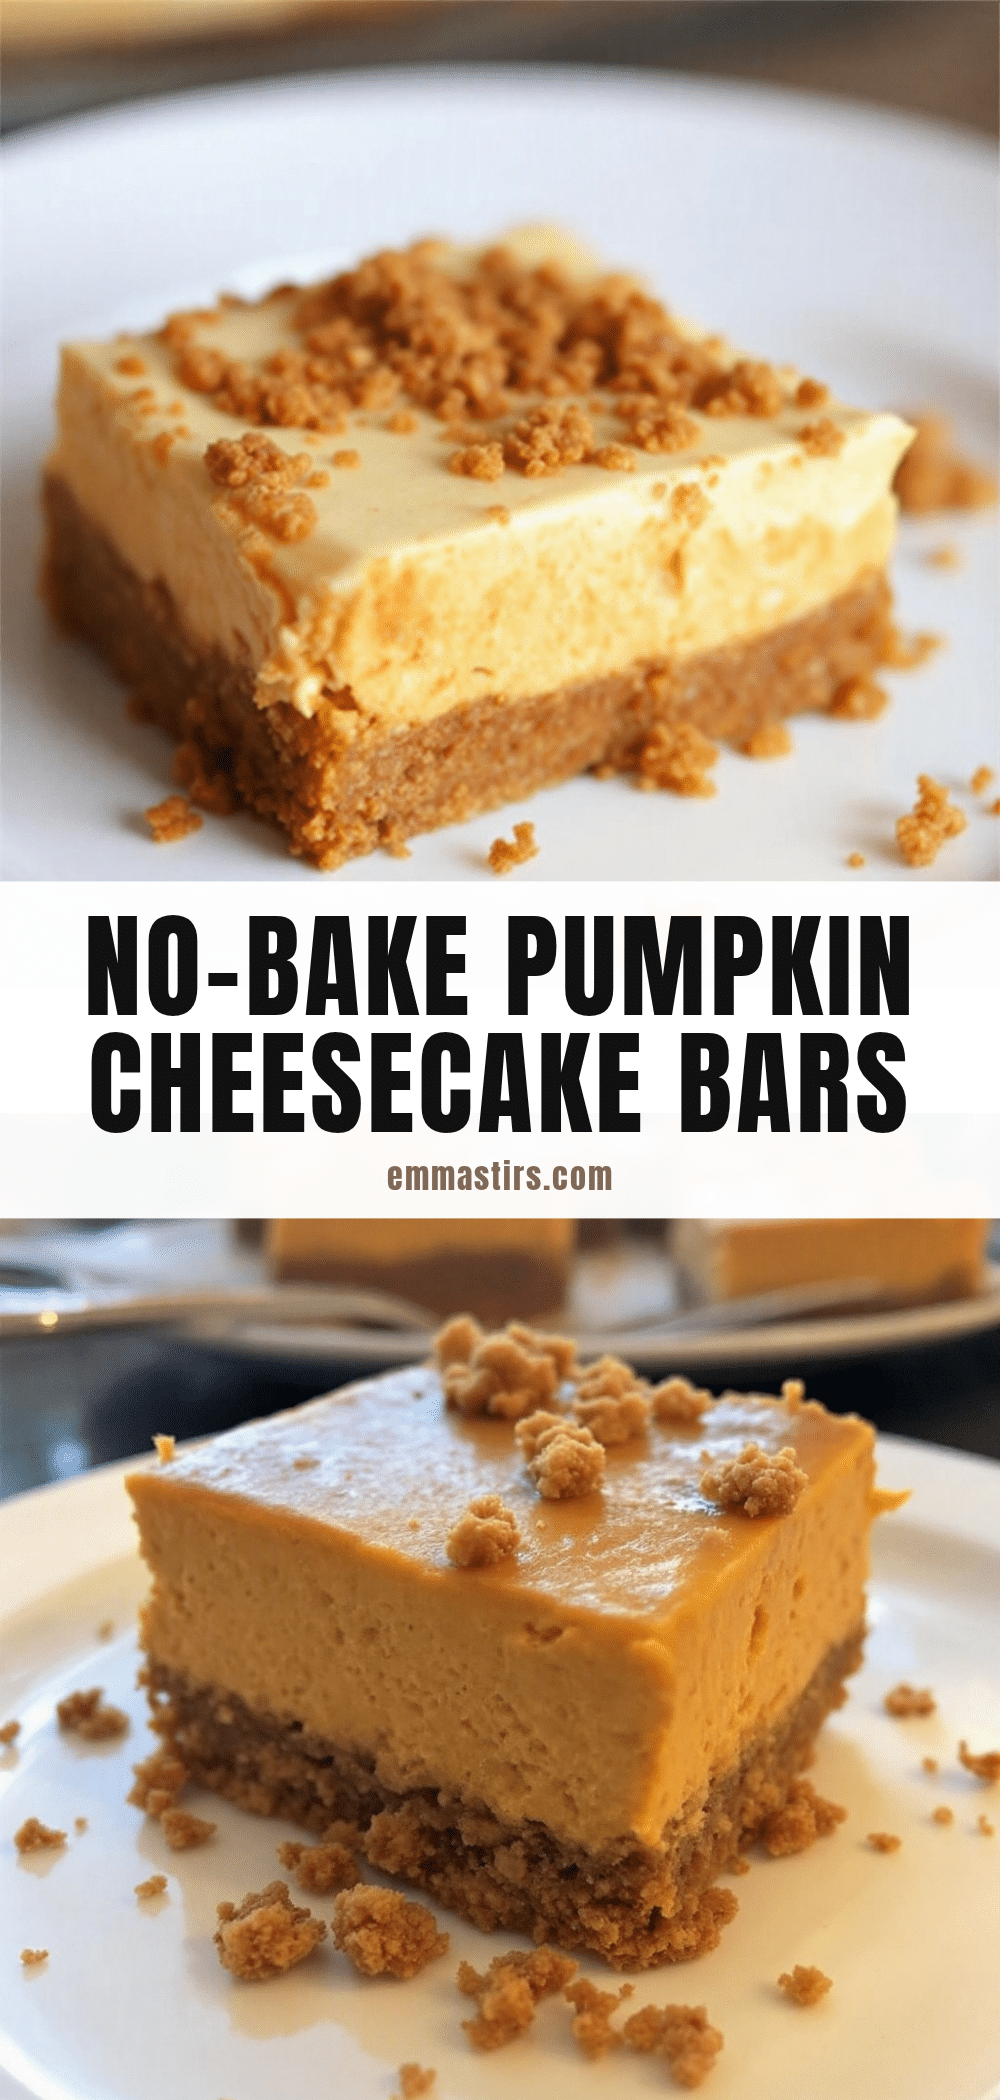
The way the fork slides through that top layer of silky, spiced pumpkin filling—it’s almost obscene how smooth it is. Not a single crack, not a hint of graininess, just a clean, velvety cut that meets the crunch of a dark, molasses-y gingersnap crust. That’s the whole point of these bars. No oven, no water bath, no worrying about whether the center jiggles just right. You get that perfect, cloud-like cheesecake texture without ever turning on the heat, which honestly feels like a life hack I wish I’d discovered years ago. I made these for a Friendsgiving potluck last November, and someone actually asked if I’d hidden a bakery box in my bag. I just smiled and said, “Nope, just my food processor and a lot of patience while the fridge did the work.” That moment—when people assume you spent hours on something that took maybe twenty minutes of hands-on effort—is pure magic. These no-bake pumpkin cheesecake bars are that magic, every single time.
Why You’ll Love This Recipe
Let’s be real—fall baking is wonderful, but turning on the oven for an hour just for dessert? Sometimes it feels like a commitment. These no-bake pumpkin cheesecake bars skip all that drama while delivering a dessert that looks and tastes like you fussed. I’ve tested this recipe six times to get that balance just right. The first batch was too soft, the second too sweet, and the third had a crust that crumbled into a sad pile of crumbs. But the fourth? That was the one.
- No Oven Required: Perfect for those days when your kitchen is already warm from roasting a turkey or when you just don’t feel like heating things up. The fridge does all the heavy lifting here.
- Simple Ingredients: Cream cheese, pumpkin puree, heavy cream, and a box of gingersnaps—that’s basically your shopping list. No weird stabilizers or hard-to-find extracts.
- Perfect for Make-Ahead: These bars actually get better after a day in the fridge. The flavors meld, the crust sets firmly, and slicing becomes effortless. You can make them two days ahead of a party with zero stress.
- Crowd-Pleaser: I’ve served these to kids, adults, and even a friend who swore she didn’t like pumpkin desserts. She asked for the recipe before she finished her first bite.
- That Texture Contrast: The creamy, almost mousse-like filling against the crunchy, spiced crust—it’s the kind of contrast that makes you close your eyes on the second bite. Not the first. The second.
What Ingredients You Will Need
This recipe relies on a few key players that each bring something essential to the table. The cream cheese provides structure and tang, the pumpkin adds color and earthy sweetness, and the gingersnaps deliver that warm, spicy crunch that makes this dessert feel like autumn on a plate. Here’s what you’ll need:
For the Gingersnap Crust
- 2 cups (about 200g) gingersnap cookie crumbs — I use Nabisco or Anna’s ginger thins. You can pulse them in a food processor or crush them in a sealed bag with a rolling pin. (Pro tip: remove any whole cloves if your gingersnaps have them—biting into one is not pleasant.)
- 6 tablespoons (85g) unsalted butter, melted — Use real butter here, not margarine. The butter binds the crumbs and adds richness that makes the crust taste almost like a shortbread.
- 2 tablespoons (25g) granulated sugar — Just a touch to balance the bitterness of the molasses in the gingersnaps.
- ¼ teaspoon salt — If your butter is salted, skip this. But a tiny pinch of salt really makes the spices pop.
For the Pumpkin Cheesecake Filling
- 16 ounces (450g) full-fat cream cheese, softened — This is non-negotiable. Low-fat cream cheese contains more water and will make your filling weepy. Let it sit on the counter for a full hour before starting.
- 1 cup (200g) packed light brown sugar — Brown sugar adds moisture and a subtle molasses note that pairs beautifully with the gingersnaps. Dark brown sugar works too, but the flavor will be more intense.
- 1 cup (245g) pumpkin puree — Not pumpkin pie filling. Just pure pumpkin. Libby’s is my go-to because it’s consistently thick and not watery.
- 1 teaspoon vanilla extract — Pure vanilla, not imitation. It makes a difference in a no-bake recipe where flavors aren’t concentrated by heat.
- 1½ teaspoons pumpkin pie spice — Or make your own: ½ teaspoon cinnamon, ¼ teaspoon nutmeg, ¼ teaspoon ginger, ⅛ teaspoon cloves, ⅛ teaspoon allspice.
- ¼ teaspoon salt — Brings everything into focus.
- 1 cup (240ml) heavy cream, cold — This gets whipped to stiff peaks and folded in, giving the cheesecake its light, airy texture without needing gelatin.
Optional Topping
- ½ cup (120ml) heavy cream — For whipping into a cloud-like topping.
- 2 tablespoons powdered sugar — Just enough to sweeten the whipped cream without making it heavy.
- ¼ teaspoon vanilla extract
- Crushed gingersnaps or a dusting of cinnamon — For garnish.
Equipment Needed
You don’t need a lot of fancy gear for this recipe, which is part of its charm. Here’s what you’ll want on hand:
- 9×9-inch square baking pan — An 8×8 works too, but your bars will be slightly thicker. Line it with parchment paper so you can lift the whole block out for clean slicing.
- Food processor — For crushing the gingersnaps into fine crumbs. A rolling pin and a zip-top bag work in a pinch, but the processor gives you a more uniform texture.
- Electric hand mixer or stand mixer — You’ll need this to whip the cream cheese until smooth and to whip the heavy cream to stiff peaks. A whisk and some serious arm strength could work, but I wouldn’t recommend it.
- Large mixing bowls — At least two. One for the crust, one for the filling.
- Rubber spatula — For folding the whipped cream into the cream cheese mixture without deflating all that air you just worked for.
- Sharp knife — For clean slices. Run it under hot water and wipe it clean between cuts for the best presentation.
Preparation Method
This is one of those recipes where patience during the chilling stages pays off big time. Rushing it means a sloppy slice, so trust the process.
- Make the crust. In a food processor, pulse the gingersnaps until they become fine crumbs. You should have about 2 cups. Transfer to a medium bowl, then pour in the melted butter, sugar, and salt. Stir with a fork until every crumb is moistened and the mixture looks like wet sand. Press this firmly into the bottom of your parchment-lined 9×9 pan. Use the bottom of a measuring cup or a flat glass to really pack it down. Pop it in the fridge while you make the filling—at least 15 minutes.
- Whip the cream. In a clean, chilled bowl, pour the cold heavy cream. Using an electric mixer on medium-high speed, whip until stiff peaks form. This takes about 3-4 minutes. You want peaks that stand straight up when you lift the beaters, not flop over. Set this bowl in the fridge while you work on the cream cheese mixture. (Trust me on this—cold whipped cream holds its shape better when you fold it in later.)
- Beat the cream cheese. In a large bowl, beat the softened cream cheese with an electric mixer on medium speed until completely smooth—about 2 minutes. Scrape down the sides and bottom of the bowl with a spatula. Add the brown sugar and beat for another minute until the mixture is fluffy and no sugar granules remain.
- Add the pumpkin and spices. Add the pumpkin puree, vanilla extract, pumpkin pie spice, and salt. Beat on medium-low until everything is combined and the color is uniform—a gorgeous burnt orange. Scrape the bowl again. (I can’t stress enough how important scraping is in no-bake cheesecakes. Lumps of unincorporated cream cheese will ruin the texture.)
- Fold in the whipped cream. Remove the whipped cream from the fridge. Add about one-third of it to the pumpkin mixture and fold gently with a rubber spatula—cut through the center, scrape the bottom, and turn the mixture over. This first addition loosens the batter. Add the remaining whipped cream and fold until no white streaks remain. The mixture should look like a thick, silky mousse.
- Assemble and chill. Pour the filling over the chilled crust and spread it evenly with an offset spatula or the back of a spoon. Give the pan a few gentle taps on the counter to release any air bubbles. Cover with plastic wrap and refrigerate for at least 6 hours, but preferably overnight. Overnight is better—the filling firms up perfectly and the crust sets so it doesn’t crumble when you cut it.
- Slice and serve. When ready to serve, lift the parchment paper to remove the entire block from the pan. Place it on a cutting board. Use a sharp knife to trim the edges (those are for the cook, obviously), then slice into 9 or 16 bars. Wipe the knife clean between cuts for the neatest edges.
Cooking Tips & Techniques
I learned a few of these the hard way, so you don’t have to. My first batch of these bars was a sad, soupy mess because I didn’t let the cream cheese soften properly. Cold cream cheese creates lumps that no amount of beating can fully fix, and those lumps trap water, making the filling weepy. Let your cream cheese sit out for at least an hour. If you’re in a hurry, cut it into cubes and microwave on low power for 10-second intervals, but honestly, patience works better.
Another thing—don’t skip whipping the cream to stiff peaks. Soft peaks will deflate when you fold them into the pumpkin mixture, and you’ll end up with a dense, heavy cheesecake instead of that light, airy texture. When you think you’ve whipped it enough, whip it another 30 seconds. You want it almost over-whipped, just shy of turning into butter.
For the crust, press it firmly and evenly. If there are thin spots, the filling can seep through and make the bottom soggy. I use the bottom of a flat measuring cup to really compact it. And let the crust chill for at least 15 minutes before adding the filling—this helps it hold together when you slice.
If your bars are still a little soft after 6 hours, don’t panic. Give them more time. Some refrigerators run colder than others, and humidity can affect setting time. I’ve left mine in the fridge for up to 24 hours with excellent results.
Variations & Adaptations
This recipe is surprisingly flexible. Here are a few ways I’ve tweaked it over the years:
- Gluten-Free Version: Use gluten-free gingersnaps or gluten-free graham crackers mixed with a teaspoon of ground ginger and a pinch of cloves. The texture is slightly more delicate, but the flavor is spot-on.
- Dairy-Free Adaptation: Substitute the cream cheese with a high-quality dairy-free version (I like Miyoko’s or Violife) and use coconut cream in place of heavy cream. Chill the can of coconut cream overnight and scoop only the solid white part—the liquid will make the filling too loose. The flavor is a little different, but still delicious.
- Pecan Praline Topping: Toast ½ cup chopped pecans in a dry skillet until fragrant. In a small bowl, mix them with 2 tablespoons melted butter, 2 tablespoons brown sugar, and a pinch of salt. Sprinkle over the bars before serving for a crunchy, caramelized finish.
- Chocolate Drizzle: Melt ¼ cup dark chocolate chips with 1 teaspoon coconut oil and drizzle over the set bars. The chocolate pairs beautifully with the ginger and pumpkin.
- Pumpkin-Gingersnap Trifle: Layer crumbled gingersnaps, the cheesecake filling, and whipped cream in small glasses for an easy individual dessert. No slicing required!
Serving & Storage Suggestions
These bars are best served cold, straight from the fridge. The filling is firm but creamy, and the crust has that satisfying snap. I like to top each bar with a dollop of lightly sweetened whipped cream and a sprinkle of cinnamon or crushed gingersnaps. If you’re feeling extra, a drizzle of caramel sauce is never a bad idea.
For storage, keep the bars in an airtight container in the refrigerator for up to 5 days. They actually improve after a day—the flavors meld and the texture becomes even more uniform. To freeze, wrap individual bars tightly in plastic wrap, then place them in a freezer-safe bag. They’ll keep for up to 3 months. Thaw in the refrigerator overnight before serving. Don’t microwave them—the texture will suffer.
These bars pair beautifully with a hot cup of coffee or a spiced chai latte. They’re also fantastic after a hearty fall meal like creamy cheeseburger soup or one-pan Tuscan chicken. The lightness of the cheesecake balances out those richer, savory dishes.
Nutritional Information & Benefits
Per bar (based on 16 servings): Approximately 290 calories, 22g fat, 24g carbohydrates, 4g protein, 16g sugar. These numbers are estimates and will vary based on your specific ingredients.
While these are definitely a treat, there are a few redeeming qualities. Pumpkin is packed with vitamin A and fiber, and the gingersnaps provide a small dose of molasses, which contains iron and calcium. The cream cheese and heavy cream offer protein and calcium too, though let’s be honest—we’re eating these for the joy, not the nutritional profile. And that’s okay. Dessert is supposed to be delicious, and these bars deliver on that promise without the stress of a traditional baked cheesecake.
Conclusion
These no-bake pumpkin cheesecake bars with gingersnap crust are the kind of dessert that makes you look like a hero with almost no effort. The creamy, spiced filling against that crunchy, molasses-y crust is a combination that feels both familiar and special—like the best parts of fall in one bite. Whether you’re bringing them to a holiday gathering, a potluck, or just making them for a quiet Tuesday night treat, they never disappoint. I’ve made these for Thanksgiving, for random October dinners, and even for a Halloween party, and they’ve always been the first thing to disappear. Give them a try, and don’t forget to customize them to your taste. If you make them, I’d love to hear how they turned out—drop a comment below or tag me in your photos!
Frequently Asked Questions
Can I use a different crust instead of gingersnaps?
Absolutely! Graham crackers, vanilla wafers, or even shortbread cookies work well. If you use a milder cookie, consider adding ½ teaspoon each of ground ginger and cinnamon to the crust mixture to keep that warm, spicy flavor.
Why is my cheesecake filling too soft?
This usually happens for one of two reasons: the cream cheese wasn’t fully softened before mixing, or the whipped cream wasn’t whipped to stiff peaks. Make sure your cream cheese is at room temperature and your heavy cream is very cold. Also, be gentle when folding—over-mixing can deflate the air you worked so hard to incorporate.
Can I make these bars vegan?
Yes, with a few swaps. Use dairy-free cream cheese and replace the heavy cream with full-fat coconut cream (chilled and scooped from the top of a can). Use a vegan butter for the crust. The texture will be slightly different—a bit less firm—but the flavor is still delicious.
How far in advance can I make these?
You can make them up to 3 days ahead. Store them covered in the refrigerator. They actually taste better after a day or two because the flavors have time to meld. Just make sure to keep them well-wrapped so they don’t absorb any fridge odors.
Can I use pumpkin pie filling instead of pumpkin puree?
I wouldn’t recommend it. Pumpkin pie filling is pre-sweetened and pre-spiced, so it will throw off the sugar and spice balance in this recipe. Stick with 100% pure pumpkin puree for the best results. If you have leftover puree, try it in brown butter banana bread or swirl it into cottage cheese pancakes for a seasonal twist.
Pin This Recipe!
Easy No-Bake Pumpkin Cheesecake Bars with Gingersnap Crust
These no-bake pumpkin cheesecake bars feature a silky, spiced pumpkin filling on a crunchy gingersnap crust. No oven required, just a food processor and patience while the fridge does the work.
- Prep Time: 20 minutes
- Cook Time: 0 minutes
- Total Time: 6 hours 20 minutes (includes chilling)
- Yield: 16 servings 1x
- Category: Dessert
- Cuisine: American
Ingredients
- 2 cups (about 200g) gingersnap cookie crumbs
- 6 tablespoons (85g) unsalted butter, melted
- 2 tablespoons (25g) granulated sugar
- ¼ teaspoon salt
- 16 ounces (450g) full-fat cream cheese, softened
- 1 cup (200g) packed light brown sugar
- 1 cup (245g) pumpkin puree
- 1 teaspoon vanilla extract
- 1½ teaspoons pumpkin pie spice
- ¼ teaspoon salt
- 1 cup (240ml) heavy cream, cold
- ½ cup (120ml) heavy cream (for topping)
- 2 tablespoons powdered sugar (for topping)
- ¼ teaspoon vanilla extract (for topping)
- Crushed gingersnaps or cinnamon (for garnish)
Instructions
- Make the crust: In a food processor, pulse the gingersnaps until fine crumbs. Transfer to a medium bowl, add melted butter, sugar, and salt. Stir until moistened. Press firmly into the bottom of a parchment-lined 9×9-inch pan. Refrigerate for at least 15 minutes.
- Whip the cream: In a clean, chilled bowl, whip the cold heavy cream with an electric mixer on medium-high until stiff peaks form, about 3-4 minutes. Refrigerate.
- Beat the cream cheese: In a large bowl, beat softened cream cheese on medium speed until smooth, about 2 minutes. Add brown sugar and beat until fluffy, about 1 minute.
- Add pumpkin and spices: Add pumpkin puree, vanilla extract, pumpkin pie spice, and salt. Beat on medium-low until combined and uniform in color. Scrape bowl.
- Fold in whipped cream: Add one-third of the whipped cream to the pumpkin mixture and fold gently with a rubber spatula. Add remaining whipped cream and fold until no white streaks remain.
- Assemble and chill: Pour filling over chilled crust and spread evenly. Tap pan gently to release air bubbles. Cover with plastic wrap and refrigerate for at least 6 hours, preferably overnight.
- Slice and serve: Lift parchment to remove block from pan. Trim edges, then slice into 9 or 16 bars. Wipe knife clean between cuts.
Notes
Let cream cheese soften for at least 1 hour. Whip cream to stiff peaks. Press crust firmly. Chill overnight for best results. Bars keep in fridge up to 5 days or freeze up to 3 months.
Nutrition
- Serving Size: 1 bar
- Calories: 290
- Sugar: 16
- Sodium: 220
- Fat: 22
- Saturated Fat: 13
- Carbohydrates: 24
- Fiber: 1
- Protein: 4
Keywords: no-bake pumpkin cheesecake bars, gingersnap crust, pumpkin dessert, fall dessert, no-bake cheesecake