Love this? Save it for later!
Share the inspiration with your friends
My nephew Leo took one bite, stopped mid-chew, and just stared at the cup in his hands. Then he looked up at me with the kind of serious expression only a six-year-old can pull off and whispered, “Auntie, these are the best things you’ve ever made. The worms taste like candy.” I laughed so hard I nearly knocked over the bowl of crushed Oreos sitting on my counter.
That moment—that quiet, chocolate-mustached moment of pure kid-approved victory—is exactly why I keep coming back to this recipe. It’s not fancy, and honestly, that’s the point. These Easy Halloween Dirt Cups with Gummy Worms are the no-fuss, no-bake dessert that saves you when you realize the school Halloween party is tomorrow morning and you have zero time to bake. They look like a spooky little garden of creepy-crawly goodness, but they come together in about fifteen minutes flat.
I’ve made these dirt cups for three different Halloween parties now, and every single time, the kids devour them before I even set the tray down. The adults sneak them too—I’ve caught more than a few dads hovering near the dessert table, trying to look casual while grabbing a second cup. There’s something about that combination of creamy chocolate pudding, crunchy Oreo “dirt,” and those wiggly, squiggly gummy worms that just works. It’s nostalgic without trying too hard. It’s Halloween fun without the stress.
And honestly? That’s the kind of recipe I want in my back pocket. The one that doesn’t require a trip to three different stores or a degree in pastry arts. Just simple ingredients, a few minutes of your time, and a payoff that makes everyone smile.
Why You’ll Love This Recipe
Let me tell you why these Easy Halloween Dirt Cups have become my go-to for every October gathering. I’ve tested this recipe through multiple batches—some with homemade pudding, some with store-bought, some with different cookie brands—and I’ve landed on the version that delivers every single time.
- No-Bake and Ready in 15 Minutes : You don’t even need to turn on the oven. This is the kind of recipe you can throw together while your kid is finishing their homework or while you’re half-watching the news. No fuss, no stress.
- Simple Pantry Ingredients : Chocolate pudding mix, milk, Oreos, gummy worms, and a few optional extras. That’s it. You probably already have most of this stuff in your kitchen right now.
- Perfect for Halloween Parties and Classroom Treats : These little cups are portable, individual-sized, and they look absolutely adorable sitting on a dessert table. Kids go wild for them.
- Totally Kid-Friendly to Make : This is one of those rare recipes where the mess is part of the fun. Let the kids crush the Oreos, stick the worms in, and watch their faces light up.
- Customizable for Dietary Needs : I’ve made gluten-free versions using gluten-free chocolate cookies, and dairy-free versions using coconut milk pudding. It works beautifully.
What makes these dirt cups different from every other recipe out there? It’s the texture. I use a specific ratio of pudding to crushed cookies that gives you that perfect “dirt” feel—crumbly on top, creamy underneath—without turning into a soggy mess. The gummy worms stay chewy, the pudding stays silky, and the whole thing tastes like the best chocolate dessert you’ve ever eaten out of a plastic cup.
This is the kind of recipe that makes you feel like a hero parent or a star party host without actually doing much work. And honestly, isn’t that the best kind of recipe?
What Ingredients You Will Need
This recipe uses simple, everyday ingredients to create something that feels way more special than it should. Here’s what you’ll need to grab:
For the Chocolate Pudding Base
- 1 box (3.9 oz) instant chocolate pudding mix – I prefer Jell-O brand for consistent results, but any brand works. Make sure it’s the instant kind, not cook-and-serve, or you’ll be standing at the stove for way too long.
- 2 cups cold whole milk – Whole milk gives the richest, creamiest texture. You can use 2% or even oat milk, but the pudding won’t be quite as luscious. (If you’re looking for a protein-packed breakfast option, you could swap in some of the techniques from our healthy egg white scramble for a completely different meal!)
For the “Dirt” Layer
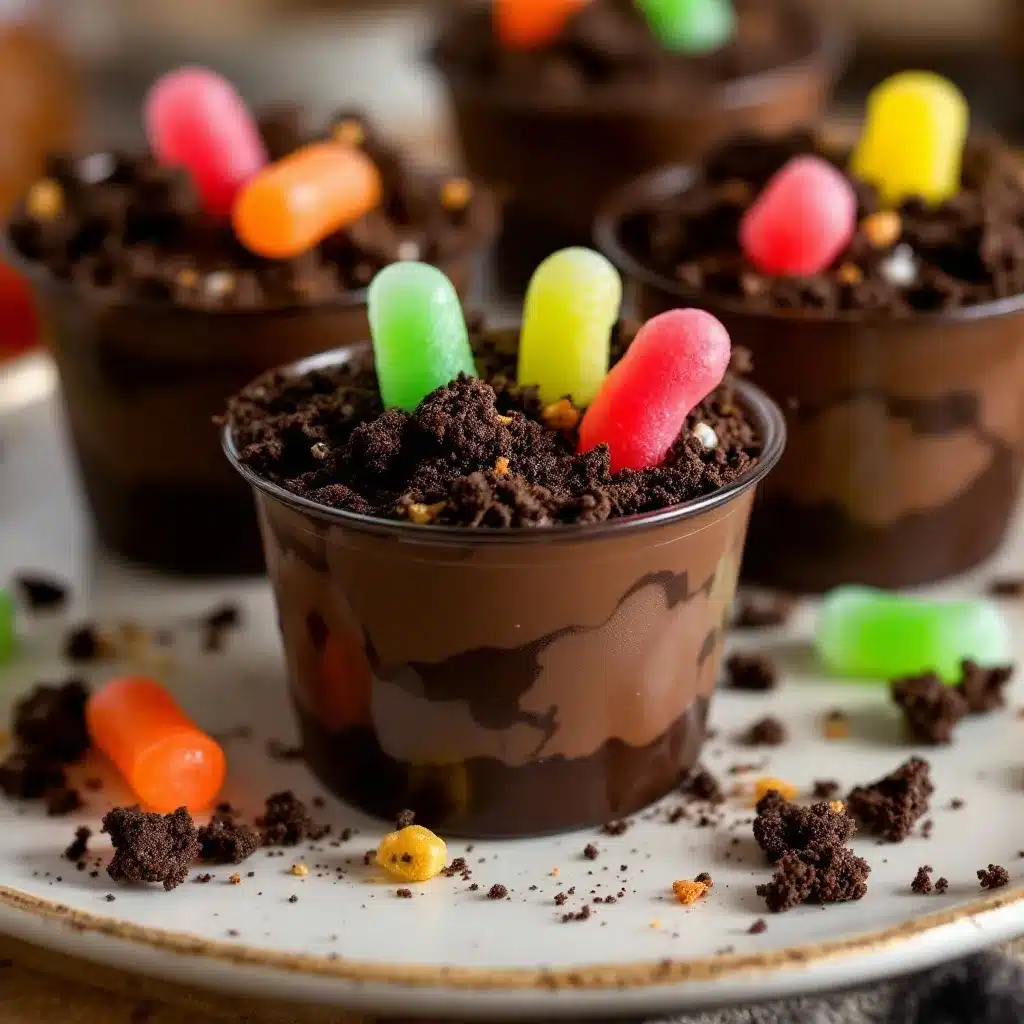
- 1 family-size package (about 36 cookies) Oreo cookies – Regular Oreos work best. Double Stuf is fine too, but you’ll get a slightly lighter “dirt” color since there’s more cream filling. I’ve tested both, and regular Oreos give that perfect dark, earthy look.
- Optional: 2 tablespoons melted butter – This helps the crushed cookies hold together a bit more if you want a slightly clumpier dirt texture. Totally optional, but I like it.
For the Spooky Decorations
- 1 bag gummy worms – Get the bright, colorful ones for maximum Halloween effect. I like the Trolli brand because they’re extra wiggly and have that perfect chewy texture.
- Optional: Halloween-themed sprinkles, candy eyeballs, or crushed graham crackers for “sand” – These are fun extras but not necessary. The worms do all the heavy lifting visually.
Ingredient Selection Tips : When you’re picking out your Oreos, look for packages that aren’t too crushed already. You want whole cookies so you can control the crumb size. For the gummy worms, avoid the sour-coated ones unless you want a tangy surprise mixed into your chocolate pudding. Learned that one the hard way.
Substitution Guidance : Need this gluten-free? Use gluten-free chocolate sandwich cookies (Glutino makes a great option) and double-check your pudding mix label. For a dairy-free version, use almond milk or coconut milk with the instant pudding—just know the texture will be slightly less thick. And if you’re watching your sugar intake, you can use sugar-free pudding mix and still get a delicious result.
Equipment Needed
You don’t need a fancy kitchen to pull these off. Here’s what you’ll need:
- Clear plastic cups (7-9 ounce size) – The clear cups are non-negotiable for that layered dirt effect. You want people to see the worms peeking through the “soil.” I get mine at the dollar store in packs of 25.
- Mixing bowls – One medium bowl for the pudding, one large bowl for crushing Oreos.
- Whisk or electric mixer – A whisk works fine, but an electric mixer makes the pudding come together in about a minute. Your choice.
- Rolling pin or food processor – For crushing the Oreos. A rolling pin and a zip-top bag is my preferred method because it’s oddly satisfying and the kids can help. A food processor gives you a finer, more uniform crumb.
- Measuring cups and spoons – For the milk and any optional extras.
- Spatula – For scraping every last bit of pudding into the cups. Waste not, want not.
- Small spoon or piping bag – For layering the pudding and dirt. A spoon is easier, but a piping bag gives you cleaner layers if you’re feeling fancy.
Budget-Friendly Tip : Don’t have a food processor? No problem. Put the Oreos in a gallon-sized zip-top bag, squeeze out the air, and let the kids go to town with a rolling pin or even a heavy saucepan. It’s messy, loud, and absolutely perfect for Halloween prep.
Preparation Method
Alright, let’s make these dirt cups. I’ll walk you through every step so you get that perfect layered look every time.
- Make the chocolate pudding : In a medium mixing bowl, whisk together the instant chocolate pudding mix and 2 cups of cold whole milk. Whisk vigorously for about 2 minutes until the mixture thickens. You’ll feel it get heavier and creamier as you go. If you’re using an electric mixer, beat on low speed for 1 minute. The pudding should be thick enough to hold soft peaks when you lift the whisk. Pop it in the fridge while you work on the Oreos.
- Crush the Oreos : Place the entire package of Oreos (cream filling and all) into a large zip-top bag. Seal it up tight, squeezing out as much air as possible. Now get your aggression out—use a rolling pin to crush the cookies into fine crumbs. You want a mix of fine “dirt” and a few slightly larger pieces for texture. If you’re using a food processor, pulse in batches until you get that same crumbly consistency. Don’t over-process or you’ll end up with Oreo dust. Trust me, I’ve done it. (Pro tip: set aside about 1/4 cup of the crushed Oreos for a final garnish on top.)
- Optional butter step : If you’re using the melted butter, drizzle it over the crushed Oreos and toss with a fork until evenly distributed. This gives the dirt a slightly clumpier texture that looks more like real soil. It’s a small touch that makes a big visual difference.
- Layer the cups : Grab your clear plastic cups and start layering. Spoon about 2 tablespoons of crushed Oreos into the bottom of each cup. Press down gently with the back of the spoon to create a firm base layer. This prevents the pudding from seeping all the way through and keeps those distinct layers intact.
- Add the pudding : Retrieve your pudding from the fridge and give it a quick stir. Spoon or pipe about 3-4 tablespoons of pudding over the Oreo layer. You want it to reach about halfway up the cup. Tap the cup gently on the counter to settle the pudding and remove any air bubbles.
- Insert the gummy worms : Here’s where the magic happens. Take 2-3 gummy worms and push them partway into the pudding layer, letting the other ends stick up. You want them to look like they’re crawling out of the dirt. Angle them in different directions for that creepy, wiggly effect. Add a few more worms pressed against the sides of the clear cup so they’re visible from the outside.
- Top with more pudding and dirt : Add another layer of pudding, filling the cup almost to the top. Then sprinkle a generous layer of crushed Oreos over the top. You want it to look like a little pot of soil. Tap the cup again to settle everything.
- Final decorations : Stick one more gummy worm on top, partially buried in the Oreo crumbs. Add any optional sprinkles, candy eyeballs, or crushed graham crackers. The more spooky, the better.
- Chill before serving : Refrigerate the dirt cups for at least 30 minutes before serving. This allows the pudding to fully set and the flavors to meld together. If you’re making them for a party, you can prepare them up to 24 hours in advance—just hold off on adding the top layer of Oreos and the final worm until right before serving to keep everything looking fresh.
- Sensory cues to watch for : The pudding should be thick enough that it doesn’t run when you tilt the cup. The Oreo layer should feel crumbly, not soggy. When you push a gummy worm in, it should stay put without sinking all the way to the bottom. If your worms are disappearing into the pudding abyss, your pudding might be too thin—pop it back in the fridge for another 10 minutes to firm up.
Time-Saving Tip : You can make the pudding and crush the Oreos the night before. Store the pudding in the fridge and the crushed Oreos in an airtight container at room temperature. Then assembly takes about 5 minutes the next day.
Cooking Tips & Techniques
I’ve made these dirt cups more times than I can count, and I’ve learned a few things the hard way. Here’s what I wish someone had told me:
Don’t overmix the pudding . I know it’s tempting to keep whisking until it’s perfectly smooth, but overmixing can actually break down the pudding structure and make it watery. Stop as soon as it thickens—about 2 minutes of whisking is perfect.
Crush the Oreos in stages . If you dump all the cookies in the bag at once, you’ll end up with uneven crumbs. I do mine in two batches, about 18 cookies each. It gives me more control over the texture and prevents the bag from bursting. Yes, I’ve had a bag explode Oreo dust all over my kitchen. It’s not fun.
Let the pudding rest . I know you’re excited, but don’t skip the chilling step. The pudding needs time to fully set, and the flavors need time to meld. If you serve them immediately, the Oreo crumbs will get soggy and the worms will slide around. Patience, my friend.
Use room temperature milk . Cold milk straight from the fridge can make the pudding clumpy. Let it sit on the counter for 10 minutes before mixing. This one small change made a huge difference in my pudding texture.
Multitasking strategy : While the pudding is setting in the fridge, crush your Oreos and set up your assembly station. Line up your cups, have your worms ready, and get your spoons out. The actual assembly takes less than 5 minutes once everything is prepped.
My biggest failure : The first time I made these, I used sugar-free pudding mix and skim milk. The result was a watery, sad mess that looked nothing like dirt. Learn from my mistake—full-fat ingredients give you that rich, creamy texture that makes these cups so addictive.
Variations & Adaptations
One of the best things about this recipe is how easy it is to twist it into something new. Here are some of my favorite variations:
Peanut Butter Cup Dirt Cups : Add a layer of peanut butter between the pudding and the Oreo crumbs. Just warm up 1/4 cup of peanut butter in the microwave for 15 seconds and drizzle it over the first pudding layer. It adds a salty-sweet contrast that’s absolutely incredible.
Pumpkin Spice Dirt Cups : For a fall twist, add 1 teaspoon of pumpkin pie spice and 1/4 cup of canned pumpkin puree to the pudding mix before whisking. Top with crushed graham crackers instead of Oreos for a “sand” effect. It tastes like Thanksgiving in a cup.
Vegan-Friendly Version : Use dairy-free chocolate pudding mix (check the label—many are accidentally vegan) and unsweetened almond milk. For the Oreos, regular Oreos are actually vegan! Just double-check the gummy worms—some brands contain gelatin. Look for vegan gummy worms made with pectin instead.
Low-Sugar Option : Use sugar-free chocolate pudding mix and sugar-free Oreos (yes, they exist). The texture is slightly different, but the flavor is still spot-on. I’ve made these for a friend who’s watching her sugar intake, and she couldn’t tell the difference.
Monster Cookie Cups : Swap the gummy worms for candy eyeballs and orange sprinkles. Layer in some crushed chocolate chip cookies alongside the Oreos. It’s a fun variation for kids who might be scared of worms.
I personally love the peanut butter cup version. I made it for a Halloween potluck last year, and a coworker asked me for the recipe before she even finished her first cup. That’s the kind of endorsement you can’t buy.
Serving & Storage Suggestions
These dirt cups are best served cold, straight from the fridge. The contrast between the cool, creamy pudding and the crunchy Oreo “dirt” is what makes them so satisfying. I like to serve them on a tray lined with orange or black napkins for that extra Halloween touch.
For a Halloween party spread : Pair these with other spooky treats like campfire banana s’mores boats for a fun, no-bake dessert table. The combination of chocolate, marshmallow, and gummy worms is a kid’s dream come true.
Beverage pairings : For kids, serve with cold milk or apple cider. For adults, a glass of red wine or a dark stout beer complements the chocolate beautifully. I’ve also served these at a Halloween brunch alongside a hot cup of coffee, and it was a hit.
Storage instructions : These dirt cups will keep in the refrigerator for up to 3 days. Cover them with plastic wrap or a lid to prevent the Oreo crumbs from absorbing moisture and getting soft. If you’re making them ahead, I recommend storing the crushed Oreos separately and adding them just before serving. The pudding and worms can hang out together in the fridge just fine.
Freezing tips : You can freeze these for up to 2 months, but the texture will change slightly. The pudding will become more like a frozen mousse, and the Oreos will soften. If you’re okay with that, go for it. Just thaw in the fridge overnight before serving.
How flavors develop over time : These dirt cups actually taste better after a few hours in the fridge. The gummy worms soften slightly and release some of their flavor into the pudding, creating a subtle fruity undertone. It’s a happy accident that I’ve come to love.
Nutritional Information & Benefits
Let’s be real—these are a treat, not a health food. But here’s the breakdown so you know what you’re working with:
Estimated nutritional values per serving (1 dirt cup) :
- Calories: 320-380
- Total Fat: 14g
- Saturated Fat: 7g
- Carbohydrates: 48g
- Sugar: 32g
- Protein: 6g
- Fiber: 2g
Health benefits of key ingredients : Believe it or not, there are a few redeeming qualities here. The milk provides calcium and vitamin D for bone health. The cocoa in the pudding contains antioxidants called flavonoids, which can support heart health. And the Oreos? Well, they make people happy. Sometimes that’s enough.
Dietary considerations : This recipe contains gluten (from the Oreos), dairy (from the milk and pudding), and soy (from the Oreos). For a gluten-free version, use gluten-free chocolate sandwich cookies. For dairy-free, use almond milk and check your pudding mix. The gummy worms are typically gluten-free but may contain gelatin, so check the label if that’s a concern.
Potential allergens : Milk, wheat, soy. Some gummy worms may be processed in facilities that handle nuts. Always check labels if you’re serving to someone with allergies.
My personal take? These are a once-in-a-while treat, perfect for celebrations and special occasions. I don’t feel guilty about enjoying them because life is about balance. If you’re looking for a healthier option, pair this with a protein-packed meal like our grilled chicken Caesar salad for a balanced day of eating.
Frequently Asked Questions
Can I make these dirt cups ahead of time?
Absolutely! You can assemble them up to 24 hours in advance. Just wait to add the top layer of crushed Oreos and the final gummy worm until right before serving. This keeps the “dirt” crunchy and the worms looking fresh.
Can I use homemade chocolate pudding instead of instant?
You can, but it changes the texture. Homemade pudding is usually thinner and won’t set up as firmly as instant. If you go that route, cook it a little longer than usual and let it chill for at least 2 hours before assembling. The layers might not be as distinct, but the flavor will be incredible.
How do I keep the gummy worms from sinking?
This is the most common issue I hear about. The trick is to let the pudding set for about 10 minutes in the fridge before adding the worms. Once the pudding has firmed up slightly, the worms will stay put. You can also press them against the sides of the cup for extra stability.
Can I use other types of cookies besides Oreos?
Definitely! Chocolate wafer cookies, chocolate graham crackers, or even crushed brownies work beautifully. Just make sure whatever you use crumbles easily and has a dark color to mimic dirt. Golden Oreos make a “sand” version that’s fun for beach-themed parties.
Are these safe for school Halloween parties?
Yes, but always check with the school about any food allergy policies. I recommend making a few nut-free and dairy-free versions separately if you’re bringing them to a classroom. Clear labeling helps parents feel comfortable letting their kids participate.
Conclusion
These Easy Halloween Dirt Cups with Gummy Worms are the kind of recipe that makes you look like a Halloween hero without breaking a sweat. They’re fun, they’re fast, and they’re absolutely irresistible to kids and adults alike. The best part? You can customize them a hundred different ways and they’ll still come out perfect every time.
I love this recipe because it reminds me that sometimes the simplest things bring the most joy. Watching Leo’s face light up when he saw those wiggly worms poking out of the chocolate “dirt” was worth more than any complicated, hours-long baking project. That’s what Halloween is about—fun, laughter, and a little bit of spooky sweetness.
So go ahead and give these a try. Crush some Oreos, wiggle some worms, and make some memories. And when you do, I’d love to hear about it! Drop a comment below and let me know how your dirt cups turned out, what variations you tried, or if your kids had the same reaction as my nephew. Don’t forget to share a photo on Pinterest and tag me—I can’t wait to see your spooky creations!
Happy Halloween, and happy snacking!
Pin This Recipe!
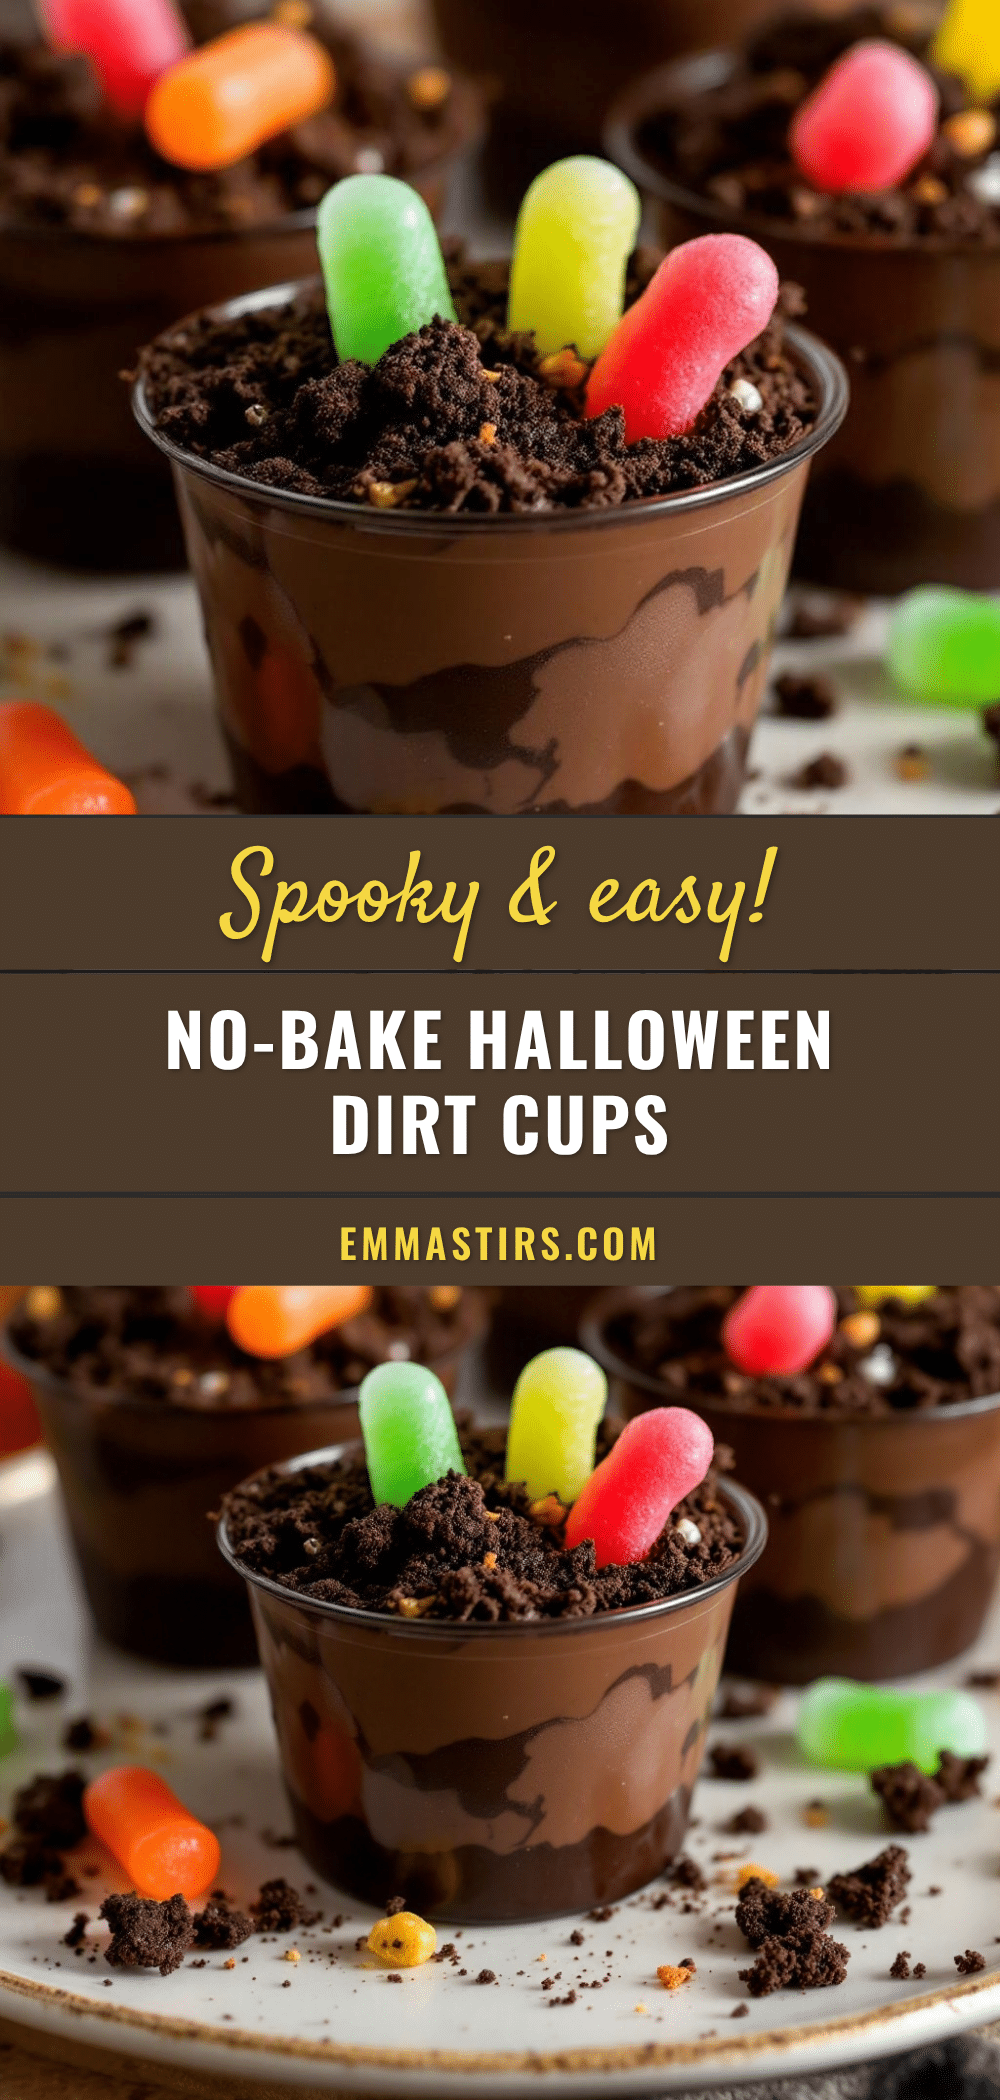
Best Easy Halloween Dirt Cups: No-Bake Gummy Worm Dessert

These no-bake Halloween dirt cups with gummy worms are a quick, kid-friendly dessert that comes together in about 15 minutes. Creamy chocolate pudding, crunchy Oreo “dirt,” and wiggly gummy worms create a spooky treat perfect for parties and classroom celebrations.
- Prep Time: 15 minutes
- Cook Time: 0 minutes
- Total Time: 45 minutes (includes chilling)
- Yield: 8 servings 1x
- Category: Dessert
- Cuisine: American
Ingredients
- 1 box (3.9 oz) instant chocolate pudding mix
- 2 cups cold whole milk
- 1 family-size package (about 36 cookies) Oreo cookies
- 2 tablespoons melted butter (optional)
- 1 bag gummy worms
- Halloween-themed sprinkles, candy eyeballs, or crushed graham crackers (optional)
Instructions
- Make the chocolate pudding: In a medium mixing bowl, whisk together the instant chocolate pudding mix and 2 cups of cold whole milk. Whisk vigorously for about 2 minutes until the mixture thickens. If using an electric mixer, beat on low speed for 1 minute. Refrigerate while preparing the Oreos.
- Crush the Oreos: Place the entire package of Oreos into a large zip-top bag, seal, and crush with a rolling pin into fine crumbs with some larger pieces. Alternatively, pulse in a food processor. Set aside about 1/4 cup for garnish.
- Optional butter step: If using melted butter, drizzle over crushed Oreos and toss with a fork until evenly distributed.
- Layer the cups: Spoon about 2 tablespoons of crushed Oreos into the bottom of each clear plastic cup. Press down gently with the back of a spoon.
- Add the pudding: Spoon or pipe about 3-4 tablespoons of pudding over the Oreo layer, filling the cup about halfway. Tap the cup gently to settle.
- Insert the gummy worms: Push 2-3 gummy worms partway into the pudding, letting the other ends stick up. Add a few worms pressed against the sides of the cup.
- Top with more pudding and dirt: Add another layer of pudding, filling the cup almost to the top. Sprinkle a generous layer of crushed Oreos over the top. Tap again to settle.
- Final decorations: Stick one more gummy worm on top, partially buried in the Oreo crumbs. Add optional sprinkles, candy eyeballs, or crushed graham crackers.
- Chill before serving: Refrigerate for at least 30 minutes before serving. Can be prepared up to 24 hours in advance; add top Oreo layer and final worm just before serving.
- Sensory cues: Pudding should be thick enough not to run when tilted. Oreo layer should be crumbly, not soggy. Worms should stay put without sinking.
Notes
For best texture, use whole milk and regular Oreos. Let pudding set slightly before adding worms to prevent sinking. Can be made gluten-free with gluten-free chocolate sandwich cookies and dairy-free with almond milk. Store in refrigerator for up to 3 days; freeze for up to 2 months (texture will change).
Nutrition
- Serving Size: 1 dirt cup
- Calories: 350
- Sugar: 32
- Sodium: 380
- Fat: 14
- Saturated Fat: 7
- Carbohydrates: 48
- Fiber: 2
- Protein: 6
Keywords: Halloween dirt cups, no-bake dessert, gummy worm dessert, chocolate pudding cups, easy Halloween treat, kid-friendly dessert


