Love this? Save it for later!
Share the inspiration with your friends
It was 10:47 PM on a random Thursday in September, and I was staring at a cardboard box of pears that were definitely not going to make it through the night. My neighbor Linda had dropped them off earlier—her tree had exploded with fruit, and she’d brought over what felt like forty pounds of the things. I didn’t have a proper canning setup, I mean, not one I’d actually used before. My grandmother’s old water bath canner was gathering dust in the basement, and honestly, I’d always been a little intimidated by the whole process. But those pears were sitting there, all golden and fragrant, practically begging me to do something before they turned into compost.
So I did what any reasonable person would do at nearly 11 PM on a work night—I hauled up that canner, wiped off the cobwebs, and decided I was going to figure this out. I had the pears, I had sugar, I had a lemon that was definitely past its prime, and I had this stubborn idea that I could actually pull it off. Maybe you’ve been there—staring down a mountain of produce with no plan and a ticking clock. There’s something about the quiet of late night that makes you brave enough to try things you’d overthink during daylight hours.
The first jar sealed with that satisfying pop around 1 AM, and I’ll be honest, I did a little dance in my kitchen. These homemade canned pear halves in light syrup turned out better than anything I’d ever bought at the store. The syrup is just sweet enough without being cloying, and the pears hold their shape beautifully—firm but tender, with that delicate floral flavor that fresh pears have. I keep making this recipe because it captures a moment, you know? That late-night kitchen adventure where I proved to myself that I could do something I’d always been scared to try. And now I get to enjoy those perfect pears all year long.
Why You’ll Love This Recipe
Let me tell you why this recipe has become my absolute favorite way to preserve pears. After testing it multiple times—and yes, I had a few jars that didn’t seal properly before I got it right—I can confidently say this method works every single time.
- Simple Ingredients: You only need pears, sugar, water, and lemon juice. Nothing fancy, nothing hard to find. I bet you have most of these in your kitchen right now.
- Perfect for Beginners: If you’ve never canned anything before, this is the recipe to start with. Water bath canning is straightforward, and I’ll walk you through every step.
- Year-Round Summer Taste: Opening a jar of these in January feels like magic. The pears taste like they were just picked, and that light syrup is absolute perfection.
- So Versatile: Use them in desserts, on oatmeal, with cheese plates, or straight out of the jar (no judgment here).
- Budget-Friendly: When pears are in season, they’re cheap. Canning them yourself costs a fraction of what you’d pay for fancy jarred pears at the store.
What makes this recipe different from the rest? It’s the balance of the light syrup—not too heavy, not too thin—and the technique for keeping the pears from browning. I learned the hard way that skipping the lemon juice bath leads to sad, brown pears. This version gives you beautiful, golden halves every time.
There’s something deeply satisfying about seeing those jars lined up on your shelf. It’s not just food—it’s a little piece of autumn preserved, ready to brighten your winter days. And honestly, when you take that first bite of a canned pear that you processed yourself? You’ll close your eyes and smile. I promise.
What Ingredients You Will Need
This recipe uses simple, wholesome ingredients to create pear halves that taste fresh and bright all year long. Most of these are pantry staples, and the pears themselves are the real star here.
- Fresh pears (about 5-6 pounds, firm but ripe) – Look for Bartlett or Bosc pears that are ripe but still hold their shape. You want them sweet and fragrant but not mushy. I prefer Bartlett for their classic pear flavor and smooth texture.
- Granulated sugar (2 cups) – This creates the light syrup. You can adjust the amount based on how sweet you like things, but 2 cups for 4 cups of water gives you a perfect light syrup that doesn’t overpower the fruit.
- Water (4 cups) – Filtered water is best if you have it, but tap water works fine. The water quality does affect the taste slightly, so use what tastes good to you.
- Lemon juice (1/4 cup, freshly squeezed) – This is non-negotiable for preventing browning. The acid keeps the pears looking beautiful and adds a tiny brightness to the flavor. I use fresh lemons, but bottled works in a pinch.
- Salt (a pinch, optional) – Some canners swear this helps balance the sweetness. I add it to my syrup, but you can skip it if you prefer.
For the syrup, you can use white sugar or organic cane sugar—both work the same way. I’ve tried honey and agave, but they change the flavor significantly. Stick with sugar for that classic clean taste.
When selecting pears at the market, look for ones that yield slightly when you press near the stem. Rock-hard pears won’t soften enough during processing, and overripe ones will turn to mush. The sweet spot is that perfect ripe-but-firm stage where they smell amazing and feel heavy for their size.
If you’re using pears from a friend’s tree (like I did with Linda’s), let them ripen on the counter for a day or two if needed. Green pears that are still hard need more time before they’re ready for canning.
Equipment Needed
You don’t need a ton of fancy equipment to make these canned pear halves. Here’s what I use, along with some tips from my own trial and error.
- Water bath canner – This is a large pot with a rack that holds your jars. If you don’t have one, any deep pot with a lid will work as long as it’s deep enough to cover the jars by at least an inch of water. I use my grandmother’s old blue enamel one, and it’s perfect.
- Canning jars (pint or quart size) – I prefer wide-mouth pint jars for pear halves because they’re easier to pack. Make sure they’re free of cracks or chips. You’ll need about 4-5 pints for this recipe.
- New lids and bands – Always use fresh lids for a proper seal. The bands can be reused as long as they’re not rusty or bent.
- Jar lifter – This is one tool I wouldn’t skip. Trying to grab hot jars with tongs is a disaster waiting to happen. They’re cheap and worth every penny.
- Large bowl – For the lemon water bath that prevents browning while you work.
- Paring knife – A sharp one makes peeling and coring so much easier. I learned that lesson after fighting with a dull knife for way too long.
- Vegetable peeler – A Y-shaped peeler works best for pears. It hugs the curves nicely.
- Ladle – For filling jars with hot syrup. A wide-mouth funnel helps too, but you can manage without one.
- Clean kitchen towels – For wiping jar rims and handling hot jars.
If you’re just starting out, look for canning starter kits online or at hardware stores. They usually include the jar lifter, funnel, and a magnetic lid wand, which are all nice to have. But honestly, you can get by with a big pot, some jars, and a lot of determination.
Preparation Method
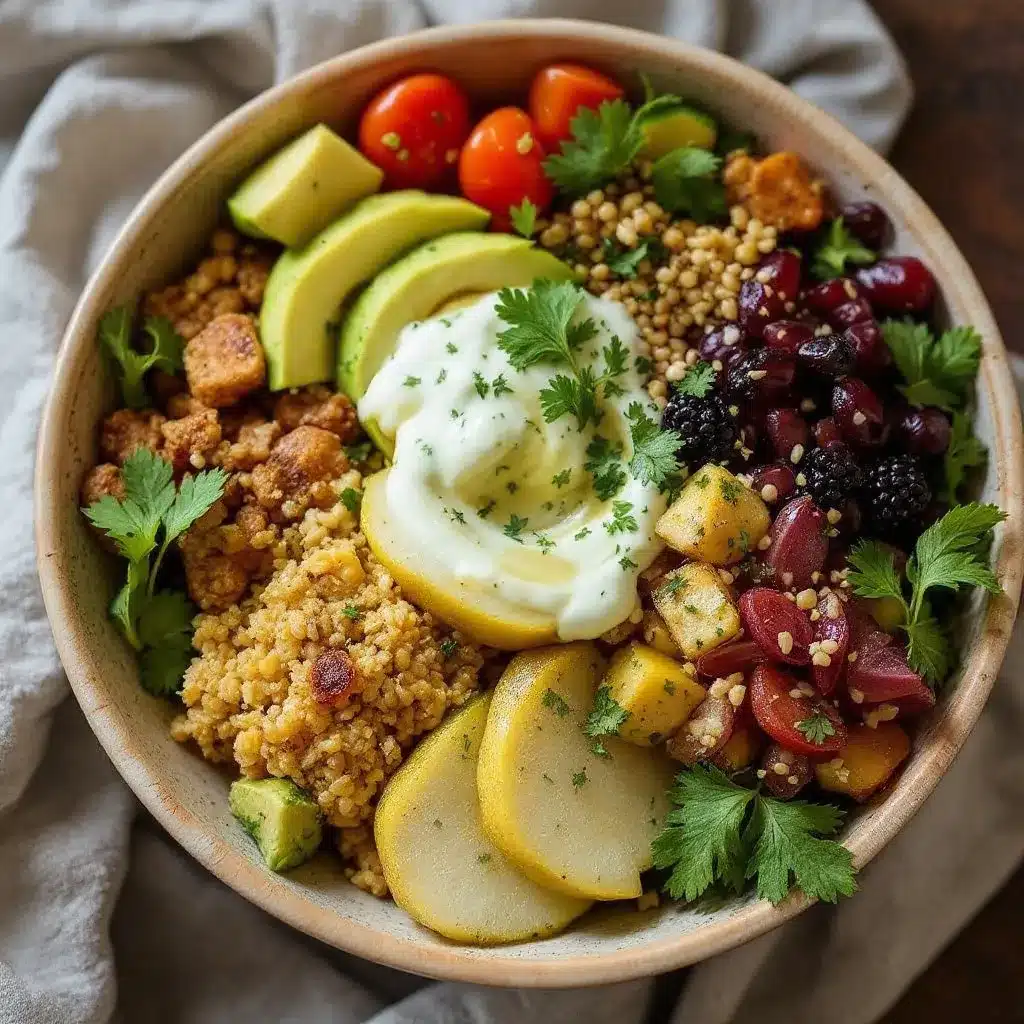
Alright, let’s get to the good part. Here’s exactly how I make these canned pear halves, step by step. I’ve included all the little details that make the difference between good pears and amazing ones.
- Prep your jars and canner (10 minutes)
Wash your jars, lids, and bands in hot soapy water. Rinse well. Place the jars in your canner, cover with water, and bring to a simmer. You want them hot when you fill them—this prevents breakage. Keep the lids in a small pan of hot water (not boiling) to soften the sealing compound. - Make the light syrup (5 minutes)
In a saucepan, combine 4 cups of water and 2 cups of sugar. Add a pinch of salt if you’re using it. Bring to a boil, stirring until the sugar dissolves completely. Reduce the heat to low and keep it warm while you prepare the pears. This syrup is the perfect balance—sweet enough to preserve the fruit but light enough that the pear flavor still shines through. - Prepare the lemon water bath (2 minutes)
Fill a large bowl with cold water and add the 1/4 cup of lemon juice. This is your anti-browning insurance. As you peel each pear, drop it in here immediately. I learned this trick after my first batch turned an unappealing brown color—never again! - Peel and core the pears (20-30 minutes)
Working with one pear at a time, peel it with your vegetable peeler. Cut it in half lengthwise. Use a melon baller or small spoon to scoop out the core and seeds. Remove the stem. Drop the halves into the lemon water. Work quickly but carefully—those pears are slippery little things when they’re peeled! - Prevent browning (ongoing)
Let the pear halves sit in the lemon water for no more than 10 minutes. If you’re working with a large batch, you might need to do this in stages. The lemon juice stops the oxidation process, keeping your pears that beautiful creamy color. - Pack the jars (10 minutes)
Remove a hot jar from the canner using your jar lifter. Drain a pear half and pack it into the jar, cut side down. I fit about 3-4 halves in a pint jar, depending on the size of the pears. Pack them snugly but don’t force them—you need room for the syrup to circulate. - Add the hot syrup (5 minutes)
Using your ladle, pour the hot syrup over the pears, leaving 1/2 inch of headspace at the top. Run a thin spatula or knife around the inside of the jar to release any air bubbles. Add more syrup if needed to maintain that 1/2 inch headspace. - Wipe and seal (2 minutes per jar)
Wipe the rim of each jar with a clean, damp towel. Any little bit of syrup on the rim can prevent a proper seal. Center a lid on the jar and screw on the band until it’s fingertip-tight—not too tight, just snug. - Process in the water bath (20 minutes)
Place the filled jars back into the canner using your jar lifter. Make sure the water covers the jars by at least 1 inch. Bring to a rolling boil, then start your timer. Process pint jars for 20 minutes at altitudes under 1,000 feet. If you’re above that, add 5 minutes for every additional 1,000 feet. - Cool and check seals (12-24 hours)
Turn off the heat and remove the jars carefully. Place them on a towel-lined counter, leaving at least an inch between jars. Let them cool completely without touching them. You’ll hear that beautiful popping sound as the lids seal. After 12-24 hours, press the center of each lid—if it doesn’t flex up and down, you’ve got a good seal. If it pops, refrigerate that jar and use it within a few weeks.
One more thing—label your jars with the date! I thought I’d remember, but three months later I was guessing which batch was which. Trust me, write it down.
Cooking Tips & Techniques
After making these canned pear halves more times than I can count, I’ve collected a few tricks that make the process smoother and the results better. Let me share what I’ve learned the hard way.
Don’t skip the lemon water bath. I know it seems like an extra step, but it’s the difference between beautiful golden pears and sad brown ones. The acid in the lemon juice stops the oxidation process immediately. I once tried to skip it because I was in a hurry, and those pears looked terrible. Never again.
Keep everything hot. The jars need to be hot when you fill them, and the syrup needs to be hot too. If you pour cold syrup into a hot jar, or hot syrup into a cold jar, you risk thermal shock and broken glass. I keep my jars in the warm canner until I’m ready to fill each one, and I keep the syrup simmering on low.
Check your pears for ripeness carefully. This is probably the most common mistake I see new canners make. Underripe pears stay hard and don’t absorb the syrup well. Overripe pears turn to mush during processing. You want that sweet spot where the pear yields slightly to gentle pressure but still feels firm. Think of it like a perfectly ripe avocado—that same kind of give.
Work in small batches. Don’t try to peel all your pears at once. The ones that sit out too long will start to brown, even with the lemon water. I peel and core about 4-5 pears at a time, then pack and process those jars before moving on. It takes a little longer, but the quality is so much better.
Use a timer, not your memory. I can’t tell you how many times I’ve gotten distracted and lost track of processing time. Set a timer on your phone or use a kitchen timer. Those 20 minutes are crucial for food safety, and guessing isn’t good enough.
Let the jars rest undisturbed. I know it’s tempting to check the seals right away, but moving the jars too soon can break the seal. Leave them alone for 12-24 hours. I usually make these in the evening and check them the next morning—it’s like Christmas morning, seeing which ones sealed perfectly.
Variations & Adaptations
One of the best things about this recipe is how easy it is to customize. Here are some variations I’ve tried and loved.
Spiced Pear Halves
Add a cinnamon stick, a star anise, or a vanilla bean to each jar before adding the syrup. The spices infuse during processing and give the pears a warm, aromatic flavor that’s incredible in fall desserts. I made a batch with vanilla beans last year, and they were amazing on vanilla ice cream.
Honey-Sweetened Pears
Replace the sugar with 1 1/2 cups of honey for a different sweetness profile. The flavor is more complex, and it pairs beautifully with the pear’s natural floral notes. Just be aware that honey can make the syrup slightly cloudy—it’s perfectly fine, just not as clear.
Pear Slices Instead of Halves
If you prefer smaller pieces for snacking or baking, slice the pears into quarters or eighths. The processing time stays the same, but you’ll get more pieces per jar. I do this when I know I’ll be using the pears for baking or yogurt toppings.
Light Syrup with Citrus
Add a strip of lemon or orange zest to each jar for a bright, citrusy note. This is especially nice with Bosc pears, which have a more subtle flavor that pairs well with citrus. I tried this on a whim one year, and it’s become one of my favorite variations.
No-Sugar-Added Version
You can process pears in plain water or unsweetened apple juice if you’re watching your sugar intake. The texture will be slightly different—a bit firmer—and the flavor will be more tart. I’ve done this for a friend with diabetes, and she loved having pears she could enjoy without worry.
Serving & Storage Suggestions
These canned pear halves are incredibly versatile, and I love finding new ways to use them throughout the year.
Serving Ideas
- Serve chilled as a simple dessert with a drizzle of the syrup and a dollop of whipped cream
- Add to cheese boards—they pair beautifully with sharp cheddar, blue cheese, or brie
- Use in baking—drain and chop for pear muffins, cakes, or crisps
- Top oatmeal or yogurt with chopped pears for a quick breakfast
- Blend into smoothies for natural sweetness and fiber
- Serve alongside pork chops or roasted chicken for a sweet-savory combo
Storage Guidelines
- Store sealed jars in a cool, dark place like a pantry or basement
- Use within 12-18 months for best quality, though they’re safe indefinitely if sealed properly
- Once opened, refrigerate and use within 1-2 weeks
- If a jar doesn’t seal, refrigerate immediately and use within 3-4 weeks
How Flavors Develop
The pears actually get better over time. After about a month, the syrup has fully penetrated the fruit, and the flavors mellow and blend beautifully. I always try to save a few jars for at least 3 months before opening—the difference is remarkable. The pears become more tender and the syrup takes on a subtle pear essence that’s just lovely.
Reheating Tips
If you want to serve the pears warm, simply heat them in their syrup on the stovetop over low heat. Don’t boil them, or they’ll start to break down. Microwave works too—just use a microwave-safe bowl and heat in 30-second intervals.
Nutritional Information & Benefits
These homemade canned pear halves in light syrup are a treat, but they also offer some nutritional benefits worth mentioning.
Estimated Nutrition Per Serving (1/2 cup, with syrup)
- Calories: 120
- Carbohydrates: 31g
- Fiber: 3g
- Sugar: 26g
- Vitamin C: 4% DV
- Potassium: 2% DV
Health Benefits
- Pears are a good source of dietary fiber, which supports digestive health
- They contain antioxidants that help fight inflammation
- Vitamin C from the lemon juice boosts immune function
- Pears are naturally low in calories and fat-free
Dietary Considerations
- This recipe is naturally vegan, dairy-free, and gluten-free
- For a lower-sugar option, use the no-sugar-added variation
- Always check pears for ripeness to ensure maximum nutrient content
I love that I can enjoy these pears throughout the year and still feel good about what I’m eating. They’re a far healthier option than most store-bought canned fruits, which often have heavy syrup and preservatives. Making them yourself means you control exactly what goes in the jar.
Conclusion
These homemade canned pear halves in light syrup are more than just a recipe—they’re a way to capture the best of autumn and enjoy it all year long. The process is simple, the ingredients are basic, and the results are genuinely impressive. Every time I open a jar, I’m transported back to that late-night kitchen adventure where I proved to myself that I could do something I’d always been nervous about.
I encourage you to make this recipe your own. Adjust the sweetness, add your favorite spices, or experiment with different pear varieties. The beauty of home canning is that you’re in control, and every jar you seal is a little piece of your own creativity preserved for later.
I’d love to hear how your batch turns out! Did you try any variations? Did you have any sealing issues? Drop a comment below and let me know—I read every single one, and I’m always happy to help troubleshoot. And if you share your canned pears on social media, tag me so I can see your beautiful jars. Happy canning, friends!
Frequently Asked Questions
Can I use other types of pears for this recipe?
Absolutely! Bartlett and Bosc are the most common choices, but Anjou, Comice, and Seckel pears all work well. Just make sure they’re ripe but firm. Softer varieties like Comice might get a bit mushier, so keep an eye on them during processing.
How do I know if my jars sealed properly?
After the jars have cooled for 12-24 hours, press the center of each lid. If it’s concave and doesn’t flex up and down, you’ve got a good seal. You can also remove the band and gently lift the jar by the lid—if it holds, you’re golden. If the lid pops up and down, refrigerate that jar and use it within a few weeks.
Can I reuse lids that didn’t seal?
No, you should always use new lids for canning. The sealing compound on used lids may not form a proper seal, which can lead to spoilage. The bands can be reused as long as they’re not rusty or bent, but always use fresh lids for food safety.
What should I do if my pears float in the syrup?
Don’t worry, this is completely normal! Pears naturally contain air, which can cause them to float. They’ll settle over time as the syrup penetrates the fruit. To minimize floating, pack the jars tightly and make sure there are no air bubbles trapped around the pears before sealing.
How long will these canned pears last?
Properly sealed jars of canned pear halves will maintain their best quality for 12-18 months when stored in a cool, dark place. They’re safe to eat indefinitely as long as the seal remains intact and there are no signs of spoilage like mold, off-odors, or leaking. Always check for these signs before eating any home-canned food.
Pin This Recipe!
Best Homemade Canned Pear Halves in Light Syrup

Capture the taste of autumn with these homemade canned pear halves in light syrup. This beginner-friendly recipe yields perfectly preserved pears that are firm, tender, and delicately sweet—ideal for desserts, cheese boards, or enjoying straight from the jar all year long.
- Prep Time: 30 minutes
- Cook Time: 20 minutes
- Total Time: 50 minutes (plus 12-24 hours cooling)
- Yield: 4-5 pint jars 1x
- Category: Preserves
- Cuisine: American
Ingredients
- 5–6 pounds fresh pears (Bartlett or Bosc, firm but ripe)
- 2 cups granulated sugar
- 4 cups water (filtered preferred)
- 1/4 cup lemon juice (freshly squeezed)
- Pinch of salt (optional)
Instructions
- Prep your jars and canner: Wash jars, lids, and bands in hot soapy water. Rinse well. Place jars in canner, cover with water, and bring to a simmer. Keep lids in a small pan of hot water (not boiling) to soften sealing compound.
- Make the light syrup: In a saucepan, combine 4 cups water and 2 cups sugar. Add a pinch of salt if using. Bring to a boil, stirring until sugar dissolves. Reduce heat to low and keep warm.
- Prepare the lemon water bath: Fill a large bowl with cold water and add 1/4 cup lemon juice. This prevents browning.
- Peel and core the pears: Working one at a time, peel with a vegetable peeler. Cut in half lengthwise. Use a melon baller or small spoon to remove core and seeds. Remove stem. Drop halves into lemon water immediately.
- Prevent browning: Let pear halves sit in lemon water for no more than 10 minutes. Work in stages if needed.
- Pack the jars: Remove a hot jar from canner using jar lifter. Drain a pear half and pack into jar, cut side down. Fit about 3-4 halves per pint jar. Pack snugly but leave room for syrup.
- Add the hot syrup: Ladle hot syrup over pears, leaving 1/2 inch headspace. Run a thin spatula around inside to release air bubbles. Add more syrup if needed.
- Wipe and seal: Wipe jar rim with a clean, damp towel. Center a lid on jar and screw on band until fingertip-tight.
- Process in water bath: Place filled jars back into canner. Ensure water covers jars by at least 1 inch. Bring to a rolling boil. Process pint jars for 20 minutes at altitudes under 1,000 feet. Add 5 minutes for each additional 1,000 feet.
- Cool and check seals: Turn off heat and remove jars carefully. Place on a towel-lined counter, leaving space between jars. Cool completely without touching for 12-24 hours. Press center of each lid—if it doesn’t flex, seal is good. If it pops, refrigerate and use within a few weeks.
Notes
Don’t skip the lemon water bath—it prevents browning. Keep jars and syrup hot to avoid thermal shock. Check pears for ripeness: they should yield slightly to pressure but still feel firm. Work in small batches to prevent browning. Use a timer for processing. Let jars rest undisturbed for 12-24 hours. Label jars with date. For altitude adjustments, add 5 minutes per 1,000 feet above sea level.
Nutrition
- Serving Size: 1/2 cup (with syrup)
- Calories: 120
- Sugar: 26
- Carbohydrates: 31
- Fiber: 3
Keywords: canned pears, pear halves, light syrup, home canning, water bath canning, pear preserves, homemade canned fruit, beginner canning


