Love this? Save it for later!
Share the inspiration with your friends
My husband looked up from his plate on a random Tuesday night and said, “These are better than the restaurant ones.” I just stood there, spatula in hand, trying to act like I hadn’t been holding my breath for his reaction. He had asked for chicken tenders three times that week without being prompted—a rare occurrence from someone who usually lets me experiment in the kitchen without comment. And honestly, I had been chasing this particular version for a while.
The thing about baked chicken tenders is they can go so wrong so fast. Dry, sad, flavorless—I’ve made all of those versions. But this batch? The coating stayed on (finally), the inside was actually juicy, and that parmesan-garlic situation happening on top was exactly what I wanted. He didn’t know I had tweaked the recipe four times in two weeks to get here. He just knew he wanted more.
That’s the thing about this crispy baked parmesan garlic chicken tenders recipe. It doesn’t try to be fancy or complicated. It just delivers exactly what you want—real crunch without deep frying, honest garlic flavor that doesn’t fade away, and that salty, nutty parmesan crust that makes you forget you’re eating something baked. I keep coming back to this recipe because it works when I need it to work. No fuss, no stress, just really good chicken tenders that make everyone at the table happy.
Why You Will Love This Recipe
I have tested this recipe more times than I care to count, and here is why it keeps earning a spot in my weekly rotation:
- Quick & Easy: From start to finish, these are ready in about 30 minutes. Perfect for those nights when you need dinner on the table fast.
- Simple Ingredients: You probably have most of these in your kitchen right now. No weird specialty items or trips to three different stores.
- Perfect for Weeknights or Game Day: Works as a quick family dinner or as a snack everyone fights over during the big game.
- Crowd-Pleaser: Kids love them, adults love them, picky eaters clean their plates. I have yet to meet someone who doesn’t go back for seconds.
- Unbelievably Delicious: That parmesan-garlic crust gets genuinely crispy in the oven. No, really—it works.
What makes these different from every other baked chicken tender recipe out there? It is the technique, honestly. Most baked tenders end up with a soggy coating that slides off. I figured out that a quick pre-bake on the panko mixture alone, before adding the chicken, creates this incredible crunchy base that stays put. Plus, the garlic isn’t just sprinkled on top—it gets mixed into the coating and brushed on after baking, so every single bite actually tastes like garlic.
This is the kind of recipe that makes you close your eyes after the first bite. It is comfort food that feels indulgent but isn’t fried. Perfect for impressing guests without breaking a sweat, or turning a regular Tuesday into something worth looking forward to.
What Ingredients You Will Need
This recipe uses simple, honest ingredients to create something genuinely special. No complicated stuff here—just smart combinations that work.
- Chicken Tenders (1.5 lbs or about 680g): Look for fresh, plump tenders. You can also use boneless, skinless chicken breasts cut into strips—just try to keep them uniform in size so they cook evenly. I prefer getting the pre-cut tenders when they are on sale; they save prep time and are usually the perfect size.
- Panko Breadcrumbs (1 cup / 90g): Regular breadcrumbs are too fine and won’t give you that real crunch. Panko is non-negotiable here. The light, flaky texture is what makes the coating actually crispy. I like the Kikkoman brand, but any Japanese-style panko works great.
- Grated Parmesan Cheese (1/2 cup / 50g): Please, for the love of good food, use the real stuff from a block. The green can stuff has anti-caking agents that prevent proper browning. I grate mine fresh using a microplane—it melts into the coating instead of just sitting on top.
- Garlic Powder (2 teaspoons): Not garlic salt. Garlic powder gives you that pure, concentrated flavor without extra sodium. Fresh garlic is great for other things, but for the coating, powder distributes more evenly and won’t burn in the oven.
- Onion Powder (1 teaspoon): This is my secret weapon. It adds a savory depth that makes the tenders taste more complex without anyone being able to pinpoint what it is.
- Dried Italian Seasoning (1 teaspoon): A blend of oregano, basil, thyme, and rosemary works beautifully here. If you don’t have Italian seasoning, use 1/2 teaspoon each of dried oregano and dried basil.
- Salt (1 teaspoon): I use fine sea salt. Kosher salt works too, but you might need slightly more since the crystals are larger.
- Black Pepper (1/2 teaspoon): Freshly ground is always better, but pre-ground works in a pinch.
- Large Eggs (2): These help the coating stick. Make sure they are at room temperature for best results—cold eggs can make the coating clump.
- All-Purpose Flour (1/2 cup / 60g): The flour layer is crucial. It creates a dry surface that the egg wash can grip, which means the panko actually stays on the chicken instead of sliding off in the oven.
- Unsalted Butter (3 tablespoons / 42g): Melted and brushed on after baking. This is what gives the tenders that golden, glossy finish and adds richness without making them greasy.
- Fresh Garlic (3 cloves, minced): Mixed into the melted butter. The heat from the just-baked tenders gently cooks the garlic, releasing its aroma without burning it. This step is what makes the garlic flavor taste fresh and bright, not harsh or bitter.
- Fresh Parsley (2 tablespoons, chopped): Optional but highly recommended for color and a fresh finish. Flat-leaf parsley has more flavor than curly, but either works.
Equipment Needed
You do not need a fancy kitchen to make these tenders. Here is what you will need:
- Baking Sheet: A rimmed baking sheet works best. The rim catches any drips and keeps your oven clean. I use a half-sheet pan (18×13 inches) for even browning.
- Wire Rack: This is the real secret to crispy tenders. Placing a wire rack on your baking sheet allows hot air to circulate underneath the chicken, so the bottom gets crispy too instead of steaming. I got mine for under ten dollars at the grocery store.
- Three Shallow Bowls: For the flour, egg wash, and panko mixture. Pie plates or wide soup bowls work perfectly.
- Tongs: For dredging the chicken without making a huge mess. Trust me on this one.
- Pastry Brush: For brushing on that garlic butter after baking. A silicone brush is easier to clean than a natural bristle one.
- Meat Thermometer: Not strictly necessary if you know your oven well, but it takes the guesswork out. Chicken is done at 165°F (74°C).
- Cutting Board and Knife: For chopping parsley and mincing garlic. Any decent chef’s knife will do.
If you don’t have a wire rack, you can try flipping the tenders halfway through baking. It is not quite the same, but it helps. I learned that the hard way when my rack was in the dishwasher.
Preparation Method
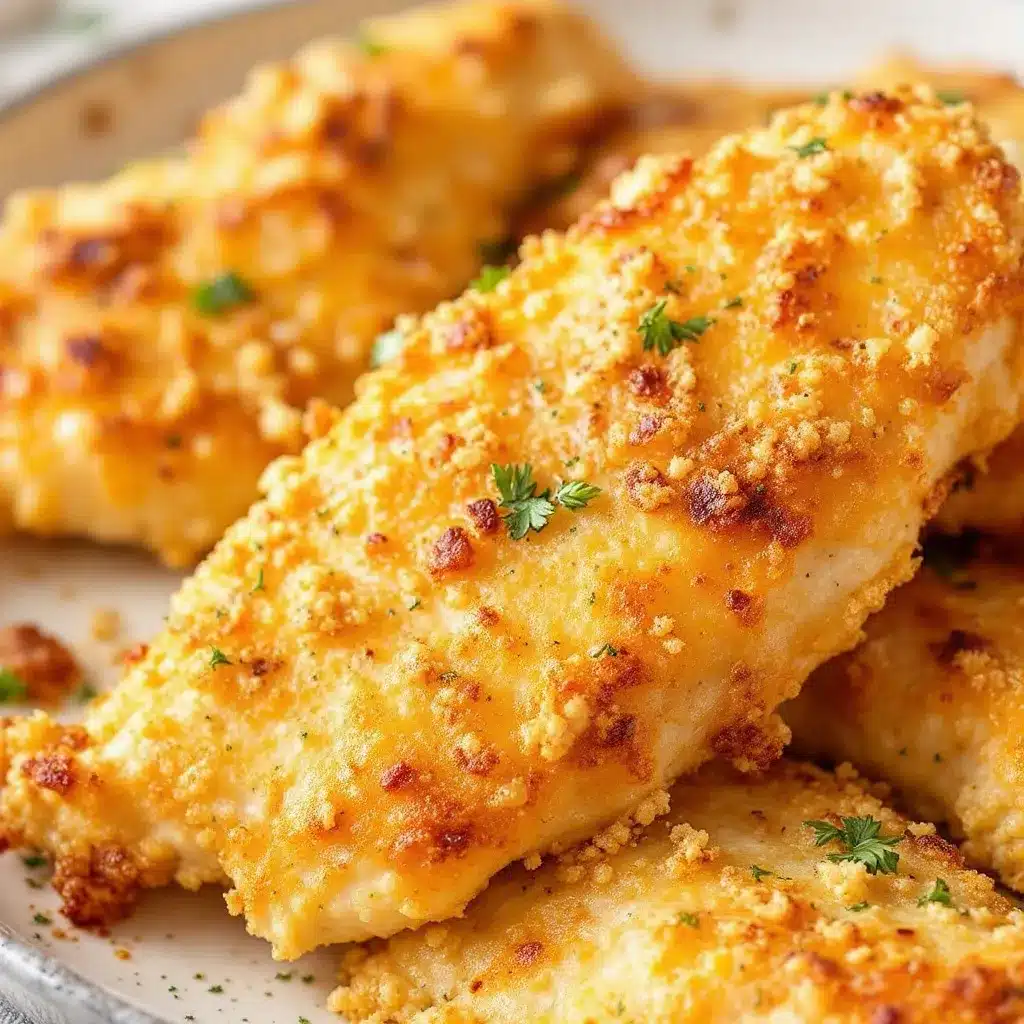
- Preheat your oven to 425°F (220°C). Place a wire rack on a rimmed baking sheet and spray it lightly with cooking spray. This step matters—the rack needs to be greased so the coating doesn’t stick and tear off when you flip the tenders.
- Set up your dredging station. Grab three shallow bowls. In the first bowl, add the 1/2 cup all-purpose flour with 1/2 teaspoon salt and 1/4 teaspoon black pepper. In the second bowl, beat the 2 eggs with 1 tablespoon of water until smooth. In the third bowl, combine the 1 cup panko breadcrumbs, 1/2 cup grated parmesan, 2 teaspoons garlic powder, 1 teaspoon onion powder, 1 teaspoon Italian seasoning, 1/2 teaspoon salt, and 1/4 teaspoon black pepper. Mix the panko mixture well with a fork so everything is evenly distributed.
- Pre-bake the panko coating. Spread the panko mixture in an even layer on a separate baking sheet. Bake for 3-4 minutes, stirring once halfway through, until the breadcrumbs are lightly golden and fragrant. This step is non-negotiable—it toasts the panko and parmesan, which means your coating will stay crunchy even after the chicken releases steam during baking. Let the mixture cool for 2 minutes before using.
- Prepare the chicken. Pat the chicken tenders dry with paper towels. This is important—excess moisture will make the coating soggy and prevent it from sticking. Season the tenders lightly with a pinch of salt and pepper on both sides.
- Dredge the chicken. Working with one piece at a time, coat the chicken in the flour mixture, shaking off any excess. Then dip it into the egg wash, letting any extra drip off. Finally, press it firmly into the toasted panko mixture, making sure it is completely covered on all sides. Place the coated tender on the prepared wire rack. Repeat with all the chicken pieces.
- Bake the tenders. Place the baking sheet in the preheated oven and bake for 12 minutes. Flip each tender carefully using tongs, then bake for another 8-10 minutes, until the internal temperature reaches 165°F (74°C) and the coating is deep golden brown and crispy. The exact time depends on the thickness of your tenders—thicker pieces may need an extra 2-3 minutes.
- Make the garlic butter. While the tenders bake, melt the 3 tablespoons of unsalted butter in a small microwave-safe bowl. Stir in the 3 cloves of minced fresh garlic and let it sit so the flavors meld. Do not microwave the garlic with the butter—just stir it in after melting so the garlic stays slightly raw and fresh-tasting.
- Finish and serve. As soon as the tenders come out of the oven, brush the garlic butter generously over each piece. The residual heat will gently cook the garlic and make the butter soak into the crispy coating. Sprinkle with fresh chopped parsley and a tiny pinch of flaky sea salt if you have it. Let them rest for 2-3 minutes before serving—this helps the coating set and prevents the butter from sliding right off.
A few things I have learned the hard way: Do not overcrowd the rack. Leave at least half an inch between each tender so the hot air can circulate. And please, do not skip the pre-bake step. I tried it once to save time and ended up with pale, sad tenders that took forever to brown. Just do it.
Cooking Tips & Techniques
I have made these tenders more times than I can count, and I have definitely made every mistake possible. Here is what I have learned:
The pre-bake trick is everything. I cannot stress this enough. Toasting the panko and parmesan before coating the chicken creates a head start on browning. Since the coating is already partially cooked, it gets perfectly golden in the oven without drying out the chicken. I learned this after a batch of sad, pale tenders that needed an extra 10 minutes in the oven and came out dry.
Dry chicken matters more than you think. Pat those tenders dry with paper towels before you start. Wet chicken makes the flour turn into paste, which makes the egg wash slide off, which makes the panko fall off. It is a domino effect of sadness. I have ruined more batches this way than I care to admit.
Press the coating on firmly. Do not just roll the chicken in the panko mixture. Press it down with your hands, really pack it on. The coating needs to be compacted so it adheres properly. I use my fingers to gently press the crumbs into the chicken on all sides.
Let them rest after baking. I know it is tempting to eat them immediately, but those 2-3 minutes of resting time are crucial. The coating firms up, the butter soaks in, and the tenders become structurally sound. Eat them too soon and the coating might slide off in one sad piece.
Multitask wisely. While the tenders are baking, set the table, make a dipping sauce, or chop some veggies for a side salad. The active prep time is only about 15 minutes, but the 20-minute bake window is perfect for getting everything else ready.
Variations & Adaptations
This recipe is incredibly forgiving. Here are some ways to make it your own:
- Spicy Version: Add 1/2 teaspoon of cayenne pepper and 1 teaspoon of smoked paprika to the panko mixture. The heat balances beautifully with the parmesan and garlic. I make this version when I want something with a little kick.
- Gluten-Free Option: Use gluten-free panko (I like the Ian’s brand) and swap the all-purpose flour for a 1:1 gluten-free flour blend. Everything else stays the same. The texture is slightly different but still wonderfully crispy.
- Air Fryer Method: Preheat your air fryer to 400°F (200°C). Arrange the coated tenders in a single layer in the basket—do not overcrowd. Cook for 8-10 minutes, flipping halfway through, until golden and cooked through. The air fryer version is even crispier, honestly, and takes less time. Just keep an eye on them because air fryers run hot.
- Herb and Lemon Version: Add the zest of one lemon and 2 tablespoons of fresh chopped thyme to the panko mixture. After baking, skip the garlic butter and brush with melted butter mixed with lemon juice instead. This version is brighter and feels lighter—perfect for spring and summer.
- Dairy-Free Adaptation: Use nutritional yeast instead of parmesan (about 1/4 cup) and substitute the butter with a good quality vegan butter or olive oil. The nutritional yeast gives a similar umami flavor, though the texture is slightly less crispy.
I have tried all of these variations, and honestly, the spicy version is my personal favorite. Something about that heat with the salty parmesan just works.
Serving & Storage Suggestions
These tenders are best served hot, right after that garlic butter goes on. The coating is at its crispiest within the first 15 minutes out of the oven. Serve them with your favorite dipping sauces—honey mustard, ranch, marinara, or a simple garlic aioli all work beautifully.
They pair wonderfully with a fresh shrimp and avocado salad for a lighter meal, or alongside crispy grilled zucchini and squash for a low-carb option. For a heartier dinner, serve them with roasted potatoes or a simple green salad. I also love adding these to a healthy grilled chicken Caesar salad for extra crunch and protein.
For storage, let any leftover tenders cool completely to room temperature. Place them in an airtight container lined with paper towels—the paper towels absorb excess moisture and help keep the coating from getting soggy. Store in the refrigerator for up to 3 days.
To reheat, the oven is your best friend. Place the tenders on a wire rack over a baking sheet and warm them at 375°F (190°C) for 5-7 minutes. The microwave will make them soggy, so avoid it if you can. The air fryer works great too—just 3-4 minutes at 350°F (175°C).
These tenders also freeze beautifully. Arrange them in a single layer on a baking sheet and freeze until solid, then transfer to a freezer-safe bag. They will keep for up to 2 months. Reheat directly from frozen at 375°F (190°C) for 12-15 minutes. The texture won’t be quite as perfect as fresh, but it is still remarkably good for a freezer meal.
Nutritional Information & Benefits
Here is the approximate nutritional breakdown per serving (3-4 tenders, without sauce):
- Calories: 385
- Protein: 38g
- Fat: 16g
- Saturated Fat: 7g
- Carbohydrates: 22g
- Fiber: 1g
- Sugar: 1g
- Sodium: 680mg
These tenders are a solid source of lean protein, which helps keep you full and satisfied. Chicken breast is naturally low in fat and rich in B vitamins, particularly niacin and B6, which support energy metabolism. The parmesan adds calcium and a small amount of protein, while the garlic provides allicin, a compound known for its potential immune-supporting properties.
This recipe is naturally nut-free and can easily be made gluten-free or dairy-free with the substitutions mentioned above. It is relatively low in sugar and carbohydrates compared to traditional fried chicken tenders, making it a better option for those watching their carb intake.
I personally love that I can serve these to my family without feeling like we are eating “diet food.” They are genuinely delicious and happen to be better for you than the fried version. That is a win in my book.
Conclusion
These crispy baked parmesan garlic chicken tenders have become a staple in my kitchen for good reason. They deliver everything you want from a chicken tender—real crunch, bold flavor, juicy meat—without the hassle and mess of deep frying. The technique is simple enough for a weeknight, but the results are impressive enough for company.
I encourage you to make these your own. Adjust the seasoning, try different dipping sauces, experiment with the variations. Cooking should be fun, not rigid. The best recipes are the ones that evolve with you and your family’s tastes.
What I love most about this recipe is how reliable it is. After a long day, when I just want something that works, these tenders deliver. No drama, no complicated steps, just really good food that makes everyone happy. That is the kind of recipe worth holding onto.
I would love to hear how these turn out for you. Drop a comment below and let me know if you tried any variations, what dipping sauce you used, or how your family reacted. And if you have a favorite way to make chicken tenders, share that too—I am always looking for new ideas. Happy cooking!
Frequently Asked Questions
Can I use chicken breasts instead of tenders?
Absolutely. Cut boneless, skinless chicken breasts into uniform strips about 1-inch thick. The cooking time might increase by 2-3 minutes depending on thickness. Just make sure the internal temperature reaches 165°F (74°C).
Why did my coating fall off?
This usually happens for one of three reasons: the chicken was too wet when you started, you didn’t press the coating on firmly enough, or you skipped the pre-bake step. Make sure to pat the chicken dry, press the panko mixture on with some force, and always toast the coating first.
Can I make these ahead of time?
You can prepare the coated tenders up to 4 hours ahead and keep them in the refrigerator on the wire rack. Bake them just before serving for the best texture. I do not recommend baking them fully ahead of time, as they lose their crispiness.
How do I know when the tenders are done?
The most reliable way is to use a meat thermometer. Chicken is safe to eat at 165°F (74°C). If you don’t have a thermometer, cut into the thickest tender—the juices should run clear and there should be no pink in the center.
Can I use this recipe for chicken wings or thighs?
Yes, but cooking times will vary. Chicken wings need about 25-30 minutes at 425°F (220°C), and boneless thighs need 18-22 minutes. Bone-in pieces will take longer. Always check with a meat thermometer to be safe.
Pin This Recipe!
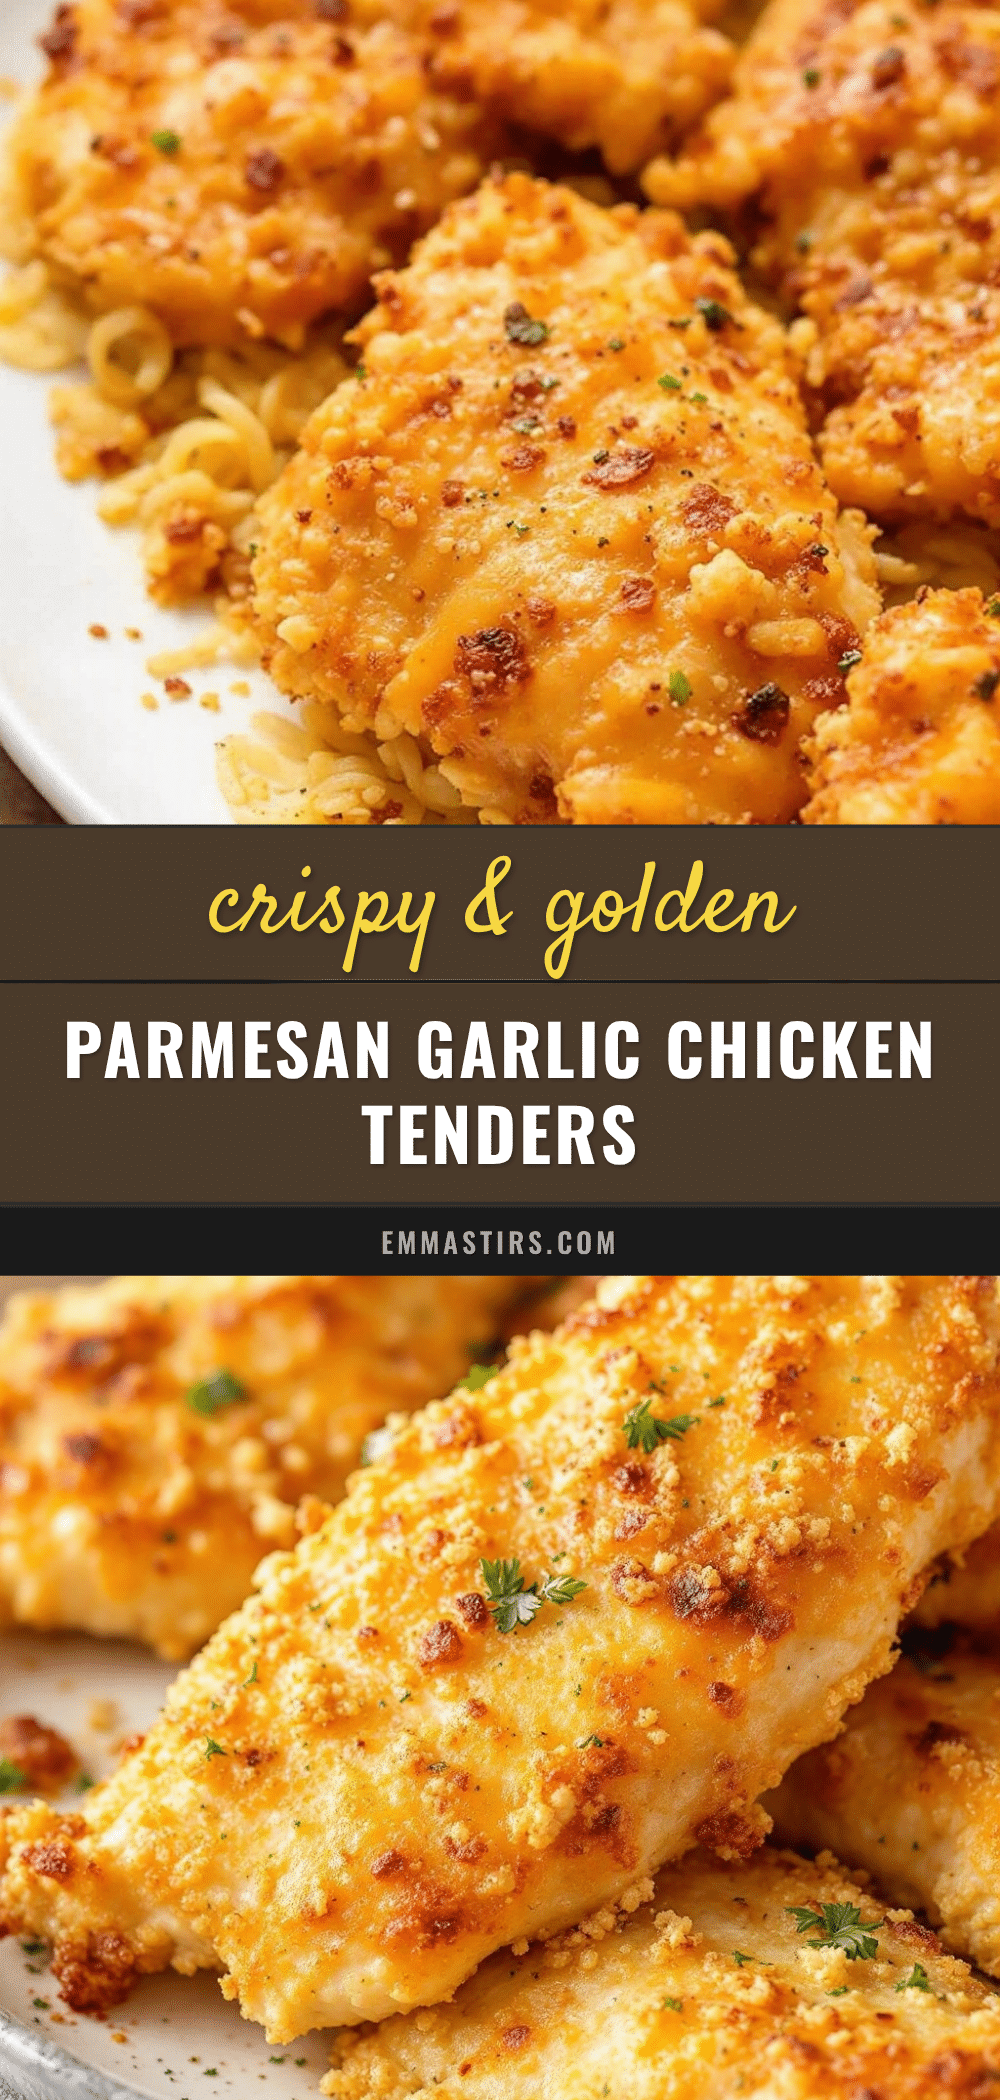
Crispy Baked Parmesan Garlic Chicken Tenders
These crispy baked parmesan garlic chicken tenders deliver real crunch without deep frying, with a juicy interior and a salty, nutty parmesan crust. A quick and easy weeknight dinner that everyone loves.
- Prep Time: 15 minutes
- Cook Time: 20 minutes
- Total Time: 35 minutes
- Yield: 4 servings 1x
- Category: Main Course
- Cuisine: American
Ingredients
- 1.5 lbs (680g) chicken tenders
- 1 cup (90g) panko breadcrumbs
- 1/2 cup (50g) grated Parmesan cheese
- 2 teaspoons garlic powder
- 1 teaspoon onion powder
- 1 teaspoon dried Italian seasoning
- 1 teaspoon fine sea salt
- 1/2 teaspoon black pepper
- 2 large eggs, at room temperature
- 1/2 cup (60g) all-purpose flour
- 3 tablespoons (42g) unsalted butter
- 3 cloves fresh garlic, minced
- 2 tablespoons fresh parsley, chopped
Instructions
- Preheat oven to 425°F (220°C). Place a wire rack on a rimmed baking sheet and spray lightly with cooking spray.
- Set up dredging station: In first bowl, combine 1/2 cup flour, 1/2 tsp salt, and 1/4 tsp black pepper. In second bowl, beat 2 eggs with 1 tablespoon water. In third bowl, combine 1 cup panko, 1/2 cup Parmesan, 2 tsp garlic powder, 1 tsp onion powder, 1 tsp Italian seasoning, 1/2 tsp salt, and 1/4 tsp black pepper.
- Pre-bake panko mixture: Spread on a separate baking sheet and bake for 3-4 minutes, stirring once, until lightly golden. Let cool 2 minutes.
- Pat chicken tenders dry with paper towels. Season lightly with salt and pepper.
- Dredge each tender: coat in flour (shake off excess), dip in egg wash (let drip off), then press firmly into panko mixture. Place on prepared wire rack.
- Bake for 12 minutes. Flip carefully, then bake another 8-10 minutes until internal temperature reaches 165°F (74°C) and coating is deep golden brown.
- While tenders bake, melt 3 tablespoons butter in a small bowl. Stir in 3 minced garlic cloves.
- Brush garlic butter over hot tenders. Sprinkle with parsley and flaky sea salt if desired. Let rest 2-3 minutes before serving.
Notes
Do not skip the pre-bake step for the panko mixture—it ensures a crispy coating. Pat chicken dry to help coating stick. Let tenders rest after baking to set the coating. For best results, use freshly grated Parmesan and room temperature eggs.
Nutrition
- Serving Size: 3-4 tenders
- Calories: 385
- Sugar: 1
- Sodium: 680
- Fat: 16
- Saturated Fat: 7
- Carbohydrates: 22
- Fiber: 1
- Protein: 38
Keywords: chicken tenders, baked chicken tenders, parmesan garlic chicken, crispy chicken, easy chicken recipe, weeknight dinner


