Love this? Save it for later!
Share the inspiration with your friends
Introduction
“It was the summer of 2017, and honestly, I was scrambling—last minute at the grocery store, with a cart full of hot dog buns and charcoal, but no dessert in sight. The family reunion was less than two hours away, and I’d promised something sweet. I wasn’t aiming for fancy, just something easy and affordable to feed everyone from toddlers to grandparents. That’s when I stumbled upon a dusty box of red, white, and blue sprinkles and an idea hit me. Maybe great July 4th desserts don’t have to be complicated or expensive—maybe they just need a little heart and a splash of color.
So, I whipped up a few simple treats that turned out to be crowd-pleasers, even with my notoriously picky Uncle Joe. You know that feeling when a recipe surprises you because it’s so darn good despite being no-fuss? That’s exactly what these desserts do. The best part? They’re budget-friendly, made with ingredients you probably already have, and perfect for sharing with the whole family without breaking a sweat.
Maybe you’ve been there too—last-minute dessert panic, a need for something festive but fuss-free. Let me tell you, these Easy Affordable July 4th Desserts are the kind you’ll keep coming back to every Independence Day because they hit that sweet spot between simple, delicious, and full of celebration spirit. And trust me, they bring the smiles even when the kitchen’s a little chaotic and the kids are begging for just one more bite.”
Why You’ll Love This Recipe
After countless test runs—both on busy weeknights and during chaotic holiday prep—these desserts have proven their worth. Here’s why they’re such a hit:
- Quick & Easy: You can have these ready in under 30 minutes, perfect when you’re juggling grilling, decorating, and entertaining.
- Simple Ingredients: No need for specialty stores or complicated shopping lists. Most of these goodies use pantry staples you likely already own.
- Perfect for Family Gatherings: Whether it’s a backyard BBQ or a picnic at the park, these desserts travel well and please crowds of all ages.
- Crowd-Pleaser: From my nephew’s sugar-smeared grin to my mother-in-law’s nod of approval, these treats win over kids and adults alike.
- Unbelievably Delicious: The balance of sweet, fresh, and festive flavors makes these desserts comfort food with a celebratory twist.
What sets these July 4th desserts apart? Honestly, it’s the little touches—like using fresh berries for natural color bursts or mixing in a sprinkle of cinnamon for depth. They’re not just red, white, and blue for show; the flavors work together beautifully. Plus, the recipes are forgiving—if you forget an ingredient or want to swap something, it usually still turns out great. That’s the kind of recipe you want when you’ve got a million things going on!
What Ingredients You Will Need
These Easy Affordable July 4th Desserts rely on straightforward, wholesome components that come together to create festive and flavorful treats. Whether you’re baking, assembling, or whipping up no-bake delights, the ingredients keep things simple without sacrificing taste.
- For the Base and Batter:
- All-purpose flour (about 2 cups / 240g) – the backbone for any baked treat
- Granulated sugar (1 cup / 200g) – classic sweetness
- Baking powder (1 tsp) – for a nice rise
- Salt (½ tsp) – balances flavor
- Unsalted butter, softened (½ cup / 115g) – adds richness and moisture (I prefer Land O’Lakes for consistent quality)
- Large eggs (2, room temperature) – for binding and structure
- Vanilla extract (1 tsp) – simple flavor enhancer
- Milk (¾ cup / 180ml), whole or 2% – keeps things tender (use almond milk for a dairy-free twist)
- For the Festive Touches:
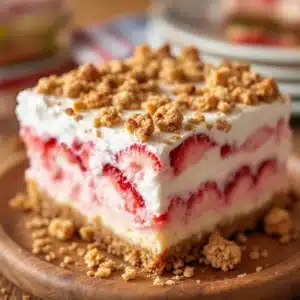
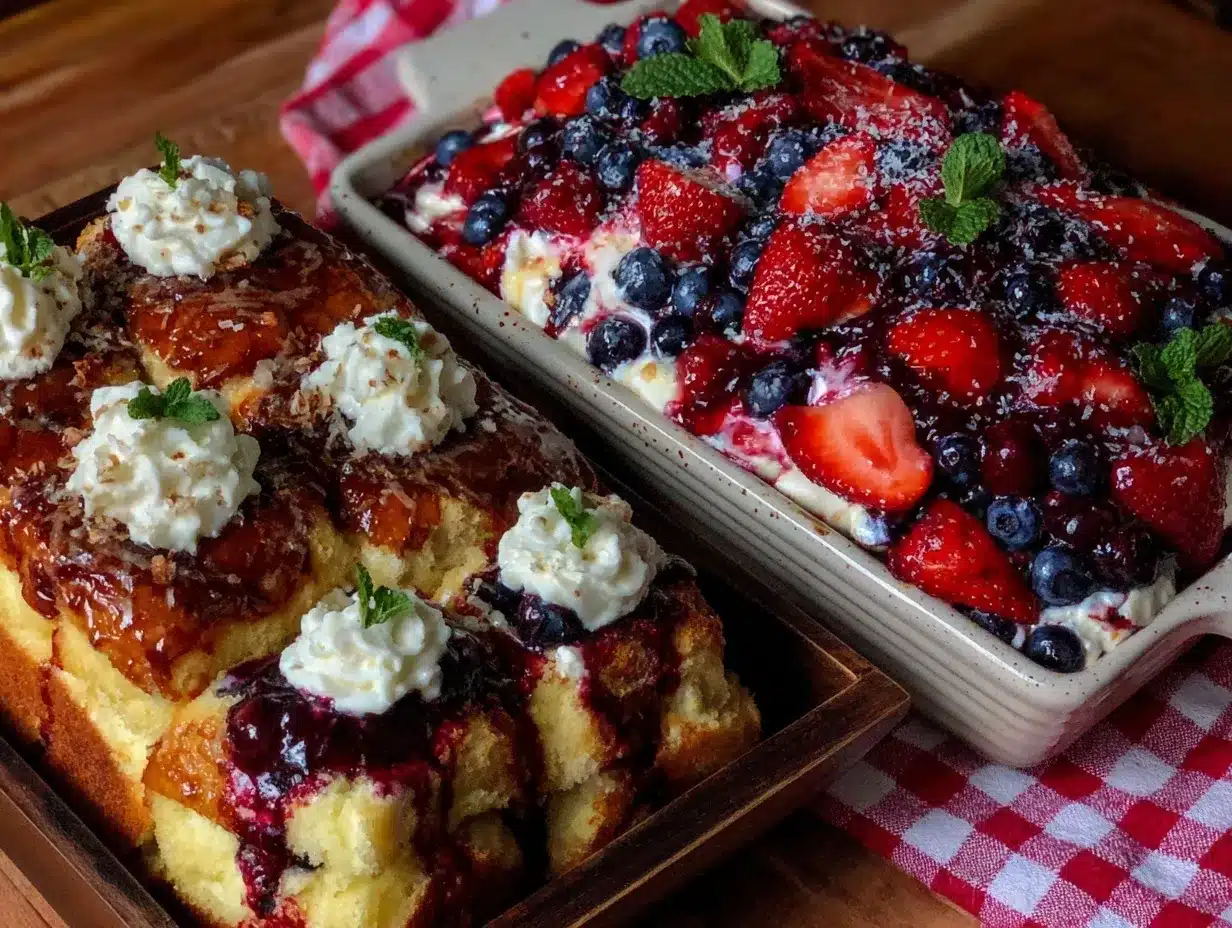
- Fresh strawberries and blueberries (about 1 cup each) – natural red and blue colors
- Whipped cream or whipped topping (1 cup) – light and fluffy finishing touch
- Red, white, and blue sprinkles (¼ cup) – optional, but fun for kids and festive presentation
- Powdered sugar (optional, for dusting)
- For No-Bake Options or Quick Assembly:
- Graham crackers or vanilla wafer cookies (1 sleeve) – easy base for layered desserts
- Cream cheese (8 oz / 225g), softened – adds tang and creaminess
- Sweetened condensed milk (14 oz / 400g can) – for a rich, sweet filling
- Lemon juice (1 tbsp) – adds brightness and balances sweetness
Keep in mind, fresh berries are best when in season—summer is perfect for strawberries and blueberries, but if you’re making this off-season, frozen berries work fine too. Just thaw and drain excess liquid before using. Also, if you’re aiming for gluten-free options, substituting all-purpose flour with a gluten-free blend like Bob’s Red Mill works well in these recipes.
Equipment Needed
You won’t need a ton of fancy kitchen gadgets to make these easy affordable July 4th desserts, which is a relief when your counter space is already packed! Here’s what I find most helpful:
- Mixing Bowls: A set of medium and large bowls, preferably glass or stainless steel. I like using glass because it’s easy to see what’s going on.
- Electric Hand Mixer or Stand Mixer: While you can mix by hand, these make whipping cream and batter a breeze and save your arm some trouble.
- Measuring Cups and Spoons: Essential for precise baking, especially when working with flour and sugar.
- Spatula and Whisk: For folding in berries gently and mixing ingredients evenly.
- Baking Pans: A 9×9 inch square pan or 8-inch round pans work well. If you don’t have these, disposable foil pans are affordable and easy to clean.
- Serving Dishes or Trifle Bowls: For layered desserts or no-bake parfaits, clear bowls showcase the festive layers beautifully.
For those on a budget, a simple whisk and sturdy bowl can replace some gadgets, and disposable pans mean you don’t have to worry about cleanup after a lively family day. I’ve even made these desserts using a handheld mixer borrowed from a neighbor when mine was being repaired—it’s all about making it work!
Preparation Method
- Preheat the Oven: Set your oven to 350°F (175°C). While it warms up, grease your baking pan with butter or non-stick spray.
- Mix Dry Ingredients: In a large bowl, whisk together 2 cups (240g) all-purpose flour, 1 cup (200g) granulated sugar, 1 teaspoon baking powder, and ½ teaspoon salt until combined.
- Cream Butter and Eggs: In another bowl, use your electric mixer to cream ½ cup (115g) softened unsalted butter until smooth and fluffy, about 2 minutes. Add 2 large eggs one at a time, beating well after each addition. Stir in 1 teaspoon vanilla extract.
- Combine Wet and Dry: Gradually add the flour mixture to the butter mixture, alternating with ¾ cup (180ml) milk, beginning and ending with the flour. Mix until just combined; don’t overmix or the cake may get tough.
- Bake: Pour batter into the prepared pan, spreading evenly. Bake for 25-30 minutes, or until a toothpick inserted in the center comes out clean. You’ll notice a golden crust and a subtle vanilla aroma filling your kitchen.
- Cool Down: Let the cake cool completely in the pan on a wire rack. If you’re impatient like me, cooling it in the fridge helps speed things up but wrap it well to avoid drying out.
- Prepare the Berry Topping: While the cake cools, wash and hull about 1 cup each of strawberries and blueberries. Slice strawberries thinly for even layering.
- Assemble the Dessert: Spread a layer of whipped cream (about 1 cup) over the cooled cake. Arrange the sliced strawberries and blueberries on top in fun patterns—think stripes or stars for a festive look. Sprinkle with red, white, and blue sprinkles if you’re feeling playful!
- Chill Before Serving: Pop the dessert into the fridge for at least 30 minutes to let the flavors meld, but don’t wait too long or the berries might release too much juice.
Pro tip: If your whipped cream starts to weep, a quick whisk brings it back to life. Also, when slicing the cake, use a serrated knife with a gentle sawing motion to keep the layers intact.
Cooking Tips & Techniques
Making these Easy Affordable July 4th Desserts is pretty straightforward, but a few tricks can really make your results shine. Here’s what I’ve learned after many summers of baking and tweaking:
- Don’t Overmix the Batter: This is a classic baking tip but worth repeating. Overmixing develops gluten, making your cake dense rather than tender and fluffy.
- Room Temperature Ingredients: Let your eggs and butter sit out for about 30 minutes before mixing. It helps everything blend more smoothly, giving you a better texture.
- Whip Cream Just Right: Stop whipping as soon as stiff peaks form. Overwhipping turns it grainy and buttery—no one wants that! If you’re rushed, chilled bowls and beaters speed the process.
- Berry Prep: Gently pat berries dry after washing to avoid soggy topping. Also, slice strawberries evenly to keep the layers looking neat.
- Multitasking: While the cake bakes, prep your berries and whip the cream. It saves time and keeps your kitchen workflow smooth.
- Storage Tip: Assemble the dessert just before serving if possible. If you must prepare ahead, keep the whipped cream and berries separate until last minute to avoid sogginess.
Honestly, these tips come from a few kitchen mishaps—like once I left the batter mixing too long and ended up with a brick of a cake. Learn from my mistakes! Also, if you want more ideas, I recall how a friend’s crispy garlic chicken meal inspired me to keep things simple but flavorful for the whole family.
Variations & Adaptations
One of the reasons this recipe stays in my rotation is how easily it adapts to different tastes, dietary needs, and occasions. Here are some ways you can tweak these desserts:
- Gluten-Free Option: Swap all-purpose flour with a gluten-free blend like Bob’s Red Mill 1-to-1. The texture stays soft and the flavor just as delightful.
- Vegan-Friendly: Use dairy-free butter and milk alternatives like coconut or almond milk. Replace eggs with flax eggs (1 tbsp ground flaxseed mixed with 3 tbsp water per egg) for binding.
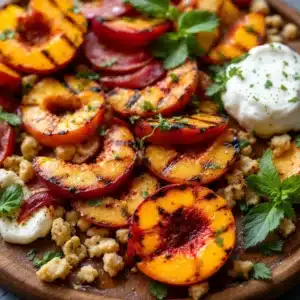
- Seasonal Fruit Swap: Instead of berries, try peaches, mangoes, or cherries in summer. It keeps the dessert fresh and exciting.
- No-Bake Parfait: Layer crushed graham crackers, sweetened cream cheese filling, and berries in glasses for a quick, no-bake treat.
- Spice It Up: Add a pinch of cinnamon or nutmeg to the batter for a cozy depth of flavor.
Personally, I once added a layer of lemon curd between the cake and whipped cream—unexpected but it gave the dessert a tangy surprise that was a hit at a picnic. Feel free to play around until you find your family’s favorite twist.
Serving & Storage Suggestions
These desserts are best served chilled or at room temperature, depending on the occasion. Here’s how to make the most of them:
- Serving: Use a sharp serrated knife for clean slices. Serve on colorful plates to complement the red, white, and blue theme. Pair with a cold glass of lemonade or iced tea for a refreshing combo.
- Storage: Keep leftovers covered in the refrigerator for up to 3 days. If you made a no-bake parfait, individual servings should be eaten within 24 hours for best texture.
- Freezing: You can freeze the cake base (without whipped cream and berries) wrapped tightly for up to 2 months. Thaw in the fridge overnight before assembling.
- Reheating: Warm cake slices in the microwave for 10-15 seconds before adding toppings to bring back that fresh-baked feel.
- Flavor Development: The flavors meld beautifully after a few hours in the fridge, especially when the berries release their natural juices and mingle with whipped cream.
Nutritional Information & Benefits
While these desserts are a treat, they also offer some nutritional perks thanks to fresh fruit and simple ingredients:
- Each serving (about 1/8 of the dessert) contains roughly 250-300 calories—balanced enough for occasional indulgence.
- Fresh strawberries and blueberries provide antioxidants, vitamin C, and fiber, supporting heart health and digestion.
- Using unsalted butter and controlling sugar amounts keeps the recipe within reasonable limits for a family-friendly dessert.
- Dairy-free and gluten-free substitutions make this dessert accessible for those with common allergies or dietary restrictions.
Personally, I find making desserts like this helps me enjoy celebrations without feeling guilty or overwhelmed by complicated recipes. It’s the kind of comfort food that feels good both in taste and in balance.
Conclusion
These Easy Affordable July 4th Desserts are perfect for anyone who wants to celebrate with their whole family without fuss or expense. They bring together simple ingredients, easy preparation, and festive flavor in a way that’s just right for summer gatherings. Whether you’re a seasoned baker or a kitchen newbie, these recipes invite you to add your own spin and enjoy the process as much as the result.
Honestly, I keep coming back to these desserts year after year because they remind me that great food doesn’t have to be complicated to be memorable. I’d love to hear how you make them your own—drop a comment or share your version! Let’s make every 4th of July a little sweeter and a lot more fun.
FAQs
Can I make these desserts ahead of time?
Yes! You can bake the cake base a day or two before and store it wrapped tightly. Assemble the toppings just before serving for the freshest taste.
What’s the best way to keep berries fresh in the dessert?
Wash and dry berries thoroughly, then add them right before serving or chilling. This helps prevent sogginess and maintains their bright color.
Can I use frozen berries instead of fresh?
Absolutely! Just thaw them, drain excess liquid, and pat dry before using to avoid watery desserts.
Are there any dairy-free options?
Yes, substitute butter with vegan margarine and use plant-based milk like almond or coconut milk. Whipped coconut cream works well instead of traditional whipped cream.
How do I store leftover dessert without it getting soggy?
Keep the whipped cream and fruit separate if possible, storing the cake base wrapped tightly. Add toppings only when ready to serve.
Pin This Recipe!
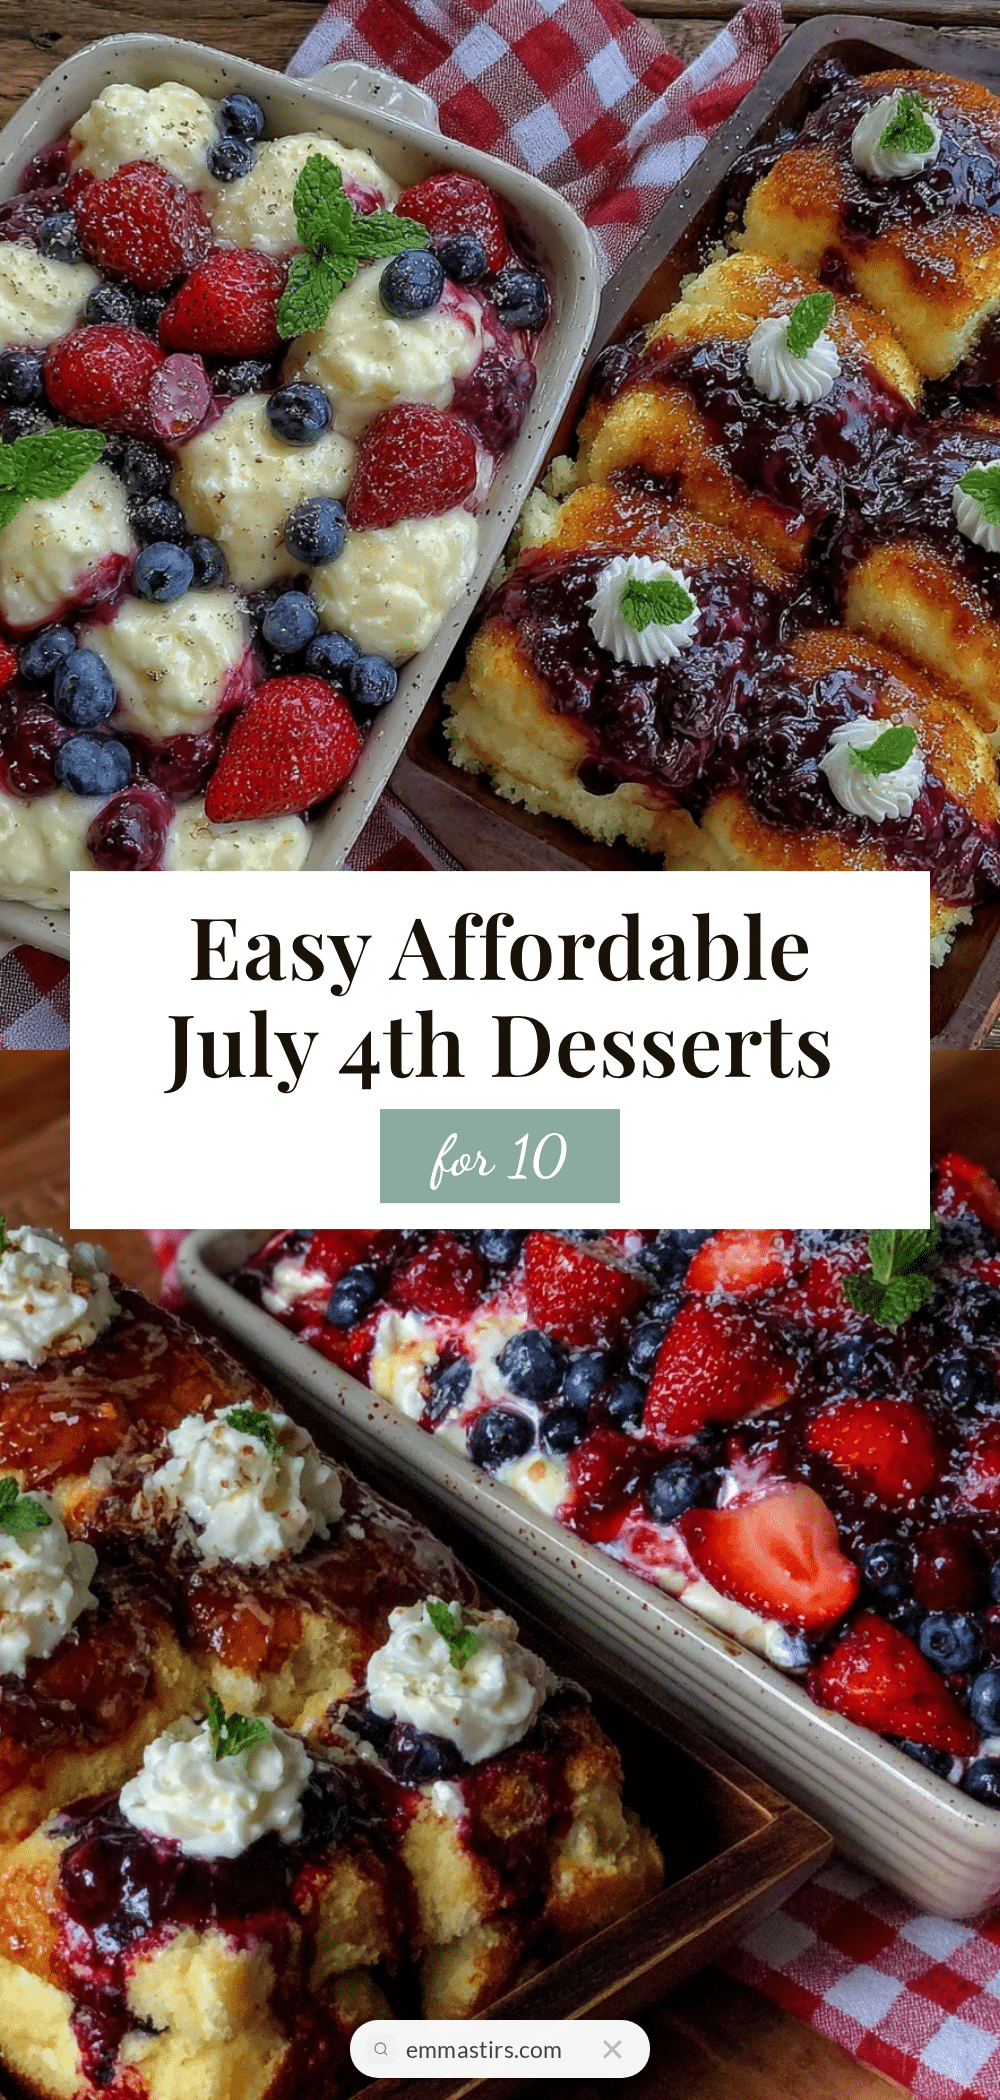
Easy Affordable July 4th Desserts Perfect for the Whole Family Celebration

These easy and affordable July 4th desserts are perfect for family gatherings, featuring simple ingredients and festive red, white, and blue colors. They are quick to prepare, budget-friendly, and crowd-pleasers for all ages.
- Prep Time: 15 minutes
- Cook Time: 25-30 minutes
- Total Time: 40-45 minutes
- Yield: 8 servings 1x
- Category: Dessert
- Cuisine: American
Ingredients
- 2 cups (240g) all-purpose flour
- 1 cup (200g) granulated sugar
- 1 teaspoon baking powder
- ½ teaspoon salt
- ½ cup (115g) unsalted butter, softened
- 2 large eggs, room temperature
- 1 teaspoon vanilla extract
- ¾ cup (180ml) milk, whole or 2% (or almond milk for dairy-free)
- 1 cup fresh strawberries
- 1 cup fresh blueberries
- 1 cup whipped cream or whipped topping
- ¼ cup red, white, and blue sprinkles (optional)
- Powdered sugar (optional, for dusting)
- 1 sleeve graham crackers or vanilla wafer cookies (for no-bake options)
- 8 oz (225g) cream cheese, softened (for no-bake options)
- 14 oz (400g) can sweetened condensed milk (for no-bake options)
- 1 tablespoon lemon juice (for no-bake options)
Instructions
- Preheat the oven to 350°F (175°C). Grease your baking pan with butter or non-stick spray.
- In a large bowl, whisk together the flour, granulated sugar, baking powder, and salt until combined.
- In another bowl, use an electric mixer to cream the softened butter until smooth and fluffy, about 2 minutes. Add eggs one at a time, beating well after each addition. Stir in vanilla extract.
- Gradually add the flour mixture to the butter mixture, alternating with milk, beginning and ending with the flour. Mix until just combined; do not overmix.
- Pour batter into the prepared pan and spread evenly. Bake for 25-30 minutes or until a toothpick inserted in the center comes out clean.
- Let the cake cool completely in the pan on a wire rack. Cooling in the fridge can speed this up but wrap well to avoid drying out.
- Wash and hull the strawberries and blueberries. Slice strawberries thinly for even layering.
- Spread a layer of whipped cream over the cooled cake. Arrange the sliced strawberries and blueberries on top in festive patterns. Sprinkle with red, white, and blue sprinkles if desired.
- Chill the dessert in the fridge for at least 30 minutes before serving to let flavors meld.
Notes
Do not overmix the batter to keep the cake tender and fluffy. Use room temperature eggs and butter for better texture. Whip cream until stiff peaks form but avoid overwhipping. Gently pat berries dry to avoid soggy topping. Assemble dessert just before serving if possible to maintain freshness. Frozen berries can be used if thawed and drained well. Gluten-free and vegan substitutions are possible.
Nutrition
- Serving Size: 1/8 of the dessert
- Calories: 275
- Sugar: 25
- Sodium: 180
- Fat: 12
- Saturated Fat: 7
- Carbohydrates: 38
- Fiber: 2
- Protein: 4
Keywords: July 4th desserts, easy desserts, affordable desserts, family desserts, patriotic desserts, red white and blue desserts, no-bake desserts, berry desserts