Love this? Save it for later!
Share the inspiration with your friends
Alright, I need something sweet, crunchy, and a little bit salty right now. Not a full dessert, not a handful of chips, but that specific in-between snack that feels like a treat without being a whole production. I have pumpkin seeds leftover from carving, a cinnamon shaker staring at me from the spice rack, and a hunch that roasting them with sugar instead of salt is the move today. No, not the savory garlic version I usually make, but something that tastes like a warm bakery counter and a fall festival rolled into one crispy little seed.
Honestly, I have been making savory roasted pumpkin seeds for years. You know the ones, heavy on the salt, a little cayenne if I am feeling wild. But last October, I had a bag of seeds sitting on the counter and a serious craving for something sweet. I thought, why not? So I tossed them with butter, cinnamon, and a generous shower of brown sugar. The result was so good I actually ate the entire batch standing over the stove before they even cooled down. That is the kind of snack you need in your life.
These Crispy Cinnamon Sugar Roasted Pumpkin Seeds are not just a leftover pumpkin byproduct. They are a standalone snack that deserves its own spotlight. The sugar caramelizes into a delicate shell, the cinnamon warms everything up, and that little hit of salt keeps you coming back for just one more. This is the recipe that turns pumpkin carving day into something you actually look forward to for the snack alone.
Why You Will Love This Recipe
Let me tell you why this version is different from every other roasted seed you have tried. I tested this recipe seven times to get the texture exactly right. Not too sticky, not burnt, just perfectly crispy with a sugary crunch that shatters when you bite down. That is the sweet spot, pun intended.
- Quick & Easy : From seed to snack in under 30 minutes. That is faster than a trip to the store for a bag of chips.
- Simple Ingredients : You probably have everything in your pantry right now. Pumpkin seeds, butter, sugar, cinnamon, and salt. That is it.
- Perfect for Fall Gatherings : Halloween parties, Thanksgiving appetizers, or just a cozy night in with a movie. These seeds fit everywhere.
- Crowd-Pleaser : Kids devour them, adults sneak handfuls, and everyone asks for the recipe. I have seen it happen at three different parties now.
- Unbelievably Delicious : The combination of crunchy, sweet, salty, and buttery is next-level comfort food. You will not believe something so simple can taste this good.
What makes this recipe stand out is the technique. Instead of just tossing seeds with sugar and hoping for the best, I use a stovetop pre-toast before the oven. This ensures every seed gets evenly coated and the sugar caramelizes without burning. It is a small extra step that makes a massive difference in texture. Trust me, I learned this after my first batch came out chewy and sad.
This is not just another version of roasted pumpkin seeds. This is the one that makes you close your eyes after the first bite. It is comfort food reimagined, faster, sweeter, and with the same soul-soothing satisfaction as your favorite fall treat.
What Ingredients You Will Need
This recipe uses simple, wholesome ingredients to deliver that perfect sweet crunch. Most of these are pantry staples, which makes this an easy last-minute snack whenever the craving hits.
- Pumpkin Seeds (1 cup, raw, cleaned) – Fresh from a pumpkin or store-bought pepitas both work great. If using fresh, make sure they are thoroughly washed and dried. Wet seeds will steam instead of roast, and nobody wants soggy seeds.
- Unsalted Butter (2 tablespoons, melted) – Butter gives that rich, toasty flavor that oil just cannot replicate. I use unsalted so I can control the salt level myself. If you only have salted butter, just skip the added salt later.
- Brown Sugar (2 tablespoons, packed) – Light or dark brown sugar works here. Dark brown sugar gives a deeper, almost molasses-like flavor that pairs beautifully with cinnamon. I prefer dark brown for fall recipes.
- Granulated Sugar (1 tablespoon) – The granulated sugar helps create that extra-crispy coating. It caramelizes differently than brown sugar, giving you a shatter texture instead of a sticky one.
- Ground Cinnamon (1 teaspoon) – Use a good quality cinnamon here. I really like Saigon cinnamon for its bold, slightly spicy kick. It makes a noticeable difference in flavor.
- Salt (¼ teaspoon, plus more for sprinkling) – Fine sea salt works best for mixing in, and a pinch of flaky sea salt at the end really takes it over the top. The salt balances the sweetness perfectly.
Ingredient Tips from My Kitchen: If you are using fresh pumpkin seeds, do not skip the drying step. Spread them on a paper towel and pat them dry, then let them sit on the counter for 10 minutes. Any moisture left on the seeds will stop them from getting crispy. I learned this the hard way after my first batch turned out chewy and disappointing.
Substitution Guidance: For a dairy-free version, swap the butter with coconut oil or a vegan butter stick. The flavor will change slightly, but the crispy texture stays intact. You can also use maple sugar instead of brown sugar for a less processed option, though the caramelization will be slightly different.
Equipment Needed
You do not need fancy equipment for this recipe, which is part of the beauty. Here is what you will need:
- Baking Sheet – A standard half-sheet pan works perfectly. Line it with parchment paper for easier cleanup, though it is not strictly necessary.
- Mixing Bowl – Any medium-sized bowl will do for tossing the seeds with butter and sugar.
- Spatula or Wooden Spoon – For stirring and spreading the seeds on the baking sheet.
- Small Skillet – Optional, but highly recommended for the stovetop pre-toast step. A non-stick skillet works best here.
- Measuring Spoons – Precision matters with sugar and cinnamon, so use actual measuring spoons instead of guessing.
- Cooling Rack – Not essential, but it helps the seeds cool evenly and stay crispy. If you do not have one, just let them cool directly on the baking sheet.
I have made these seeds with just a baking sheet and a bowl before, and they turned out great. The pre-toast step in a skillet is not mandatory, but it gives you that extra insurance policy against soggy seeds. If you are short on time or dishes, you can skip it and just roast a few minutes longer.
Preparation Method
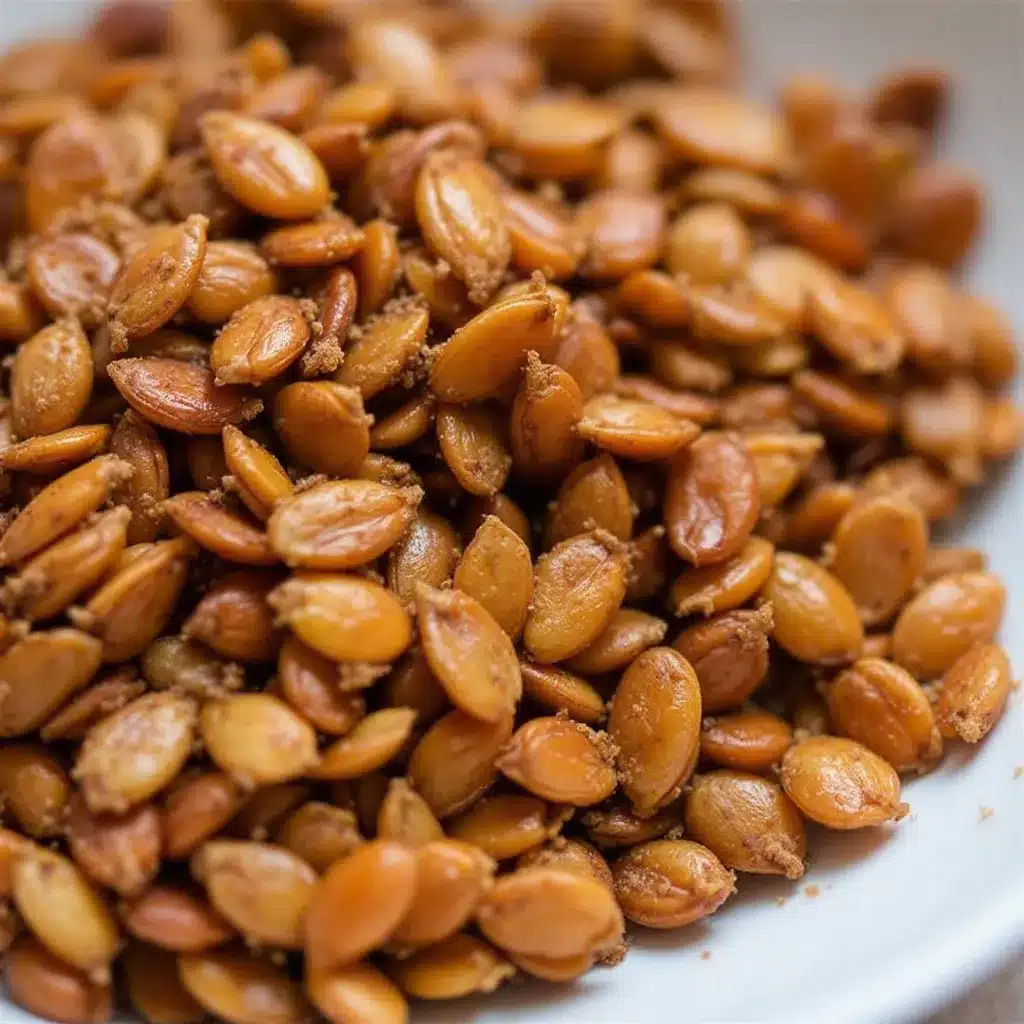
Follow these steps carefully, and you will have the crispiest, most addictive cinnamon sugar pumpkin seeds of your life.
- Preheat your oven to 325°F (163°C). Line a baking sheet with parchment paper if you want easy cleanup. Position the rack in the center of the oven.
- Clean and dry your pumpkin seeds thoroughly. If using fresh seeds, rinse them in a colander under cold water to remove the pumpkin pulp. Pick out any large pieces of stringy flesh. Spread the seeds on a clean kitchen towel or paper towels and pat them completely dry. Let them air dry for 10 minutes while you prepare the other ingredients. This step is non-negotiable for crispy results.
- Melt the butter in a small skillet over medium heat. Swirl it around until it is fully melted and just starting to bubble. Remove from heat immediately. You want melted butter, not browned butter, for this recipe.
- In a medium mixing bowl, combine the melted butter, brown sugar, granulated sugar, ground cinnamon, and salt. Whisk together until the sugars are mostly dissolved and the mixture looks like a thick, grainy paste. It will not be perfectly smooth, and that is fine.
- Add the dried pumpkin seeds to the bowl. Use a spatula to toss them until every seed is evenly coated in the cinnamon sugar mixture. Make sure there are no dry spots. The mixture will look clumpy and that is exactly what you want.
- Optional stovetop pre-toast: Heat the same small skillet over medium heat. Add the coated seeds and stir constantly for 2 to 3 minutes. You will smell the sugar starting to caramelize and the seeds will become fragrant. Do not walk away during this step. Sugar burns fast. Remove from heat as soon as the seeds look glossy and smell toasty.
- Spread the seeds in a single layer on the prepared baking sheet. Use your spatula to break up any clumps. Try to get them in an even layer so they roast uniformly. Some clusters are okay, they turn into crunchy little candy bits.
- Roast for 12 to 15 minutes, stirring halfway through. At the 7-minute mark, pull the pan out and give the seeds a good stir with your spatula. This ensures even browning and prevents the sugar from burning on the edges. The seeds are done when they are golden brown and the sugar coating looks bubbly and caramelized.
- Remove from the oven and let cool completely on the baking sheet. Do not skip this step. The seeds will continue to crisp up as they cool. If you try to eat them too early, they will seem soft and you might panic. Just wait. Patience pays off here.
- Once completely cool, sprinkle with a tiny pinch of flaky sea salt. This final touch balances the sweetness and makes the flavors pop. Break up any large clusters with your hands and transfer to a serving bowl.
Sensory Cues: At step 6, you should smell warm cinnamon and toasting seeds, not burnt sugar. If it smells acrid, your heat is too high. At step 8, the seeds should look glossy and golden, with the sugar bubbling gently around the edges. The kitchen will smell like a cinnamon roll bakery, which is a dangerous but wonderful thing.
Cooking Tips & Techniques
Here is where I share the hard-earned wisdom from my many, many batches of these seeds. Some were triumphs, some were tragic, and all taught me something.
The Biggest Mistake: Not drying the seeds properly. I cannot stress this enough. Wet seeds steam instead of roast, and steam makes sugar sticky instead of crispy. My first batch was a chewy, clumpy mess because I was impatient. Now I pat them dry, let them sit, and pat them dry again. It takes five extra minutes and saves the whole recipe.
Temperature Control: Oven temperatures vary wildly. If your oven runs hot, check the seeds at the 10-minute mark. Burnt sugar is bitter and ruins the whole batch. If your oven runs cool, you might need an extra 3 to 5 minutes. Trust your nose more than the timer. The moment you smell caramel, start watching closely.
Multitasking Strategy: While the seeds are roasting, clean up your workspace. The butter-sugar mixture is sticky when it cools, so wash your bowl and spatula immediately. By the time the seeds are done, your kitchen will be clean and ready for snacking.
My Personal Failure: I once tried to double the batch and crammed all the seeds onto one baking sheet. They were overcrowded, steamed instead of roasted, and turned out soggy and sad. Lesson learned. Always spread the seeds in a single layer with space between them. If you need to double the recipe, use two baking sheets.
Consistency Tip: For the most even coating, toss the seeds with the sugar mixture while the butter is still warm. Cold butter will clump up and leave you with uneven coverage. Work quickly once the butter is melted.
Variations & Adaptations
This base recipe is fantastic on its own, but here are some ways to switch it up depending on your mood or what you have in the pantry.
Pumpkin Pie Spice Version: Replace the cinnamon with 1 teaspoon of pumpkin pie spice mix. Add a pinch of nutmeg and a tiny pinch of ground cloves for that classic holiday flavor. This version is perfect for Thanksgiving snacking or gifting in little jars.
Maple Pecan Variation: Swap the brown sugar for 2 tablespoons of pure maple syrup. Toss in ¼ cup of chopped pecans along with the seeds before roasting. The maple syrup creates a slightly different texture, more candied than crispy, but absolutely delicious. Just watch the oven closely because maple syrup burns faster than granulated sugar.
Spicy-Sweet Twist: Add ¼ teaspoon of cayenne pepper along with the cinnamon. The heat sneaks up on you after the sweetness fades, and it is surprisingly addictive. My husband thought I was crazy until he ate half the batch in one sitting.
Dietary Adaptations: For a vegan version, use coconut oil instead of butter. The coconut flavor pairs beautifully with the cinnamon. For a lower-sugar option, use monk fruit sweetener or coconut sugar. The texture will be slightly less crispy, but still delicious.
My Personal Favorite Variation: I once added a tablespoon of cocoa powder to the sugar mixture and it turned into cinnamon chocolate pumpkin seeds. They tasted like a healthier version of those chocolate-covered pretzels. Highly recommend if you have a sweet tooth that needs serious satisfying.
Serving & Storage Suggestions
These seeds are best served at room temperature, straight from the cooling rack if you can resist. The contrast between the crunchy seed and the caramelized sugar coating is at its peak right after they cool down.
Presentation Ideas: Pile them into a wooden bowl for a rustic fall tablescape. Serve them in small paper cones for a Halloween party favor. Layer them in a mason jar with a ribbon for a homemade gift that looks as good as it tastes.
Complementary Dishes: These seeds pair beautifully with a warm mug of apple cider or a pumpkin spice latte. They also make a great crunchy topping for yogurt parfaits, oatmeal, or even a simple fresh low-calorie fruit salad with mint. The sweet crunch adds texture to creamy dishes.
Storage Instructions: Store completely cooled seeds in an airtight container at room temperature. They will stay crispy for up to 5 days. Do not refrigerate them, the moisture in the fridge will soften the sugar coating. If they lose their crunch, spread them on a baking sheet and reheat at 300°F (150°C) for 5 minutes. Let them cool again and they will crisp right back up.
Freezer Option: You can freeze these seeds in a freezer-safe bag for up to 3 months. Thaw them at room temperature, then re-crisp in the oven as described above. The flavor holds up surprisingly well.
Flavor Development Note: These seeds are actually best the day they are made. The sugar coating is at its crispiest and the cinnamon is most aromatic. After a day or two, the flavors mellow and the crunch softens slightly. That is why I usually make a half batch unless I am serving a crowd.
Nutritional Information & Benefits
Here is the honest truth, these are a treat, not a health food. But they are made with real ingredients and offer some surprising nutritional benefits that make them a smarter choice than most packaged snacks.
| Nutrient | Amount Per Serving (¼ cup) |
|---|---|
| Calories | 180 |
| Total Fat | 12g |
| Saturated Fat | 4g |
| Carbohydrates | 16g |
| Sugar | 12g |
| Protein | 7g |
| Fiber | 2g |
| Sodium | 150mg |
Health Benefits: Pumpkin seeds are a solid source of magnesium, zinc, and healthy fats. Magnesium supports muscle function and sleep quality, while zinc is great for immune health. The protein and fiber help keep you full, which means a small handful can actually satisfy a snack craving instead of sending you on a sugar rollercoaster.
Dietary Considerations: This recipe is naturally gluten-free and can be made dairy-free by swapping the butter for coconut oil. It is not low-carb due to the sugar, but you can reduce the sugar by half if you prefer a less sweet version. The seeds themselves are a great addition to a balanced diet when enjoyed in moderation.
Potential Allergens: Contains dairy (butter). Pumpkin seeds are tree nut free and peanut free, making them a safe option for many nut allergy households. Always check your ingredient labels if you have specific allergies.
Conclusion
These Crispy Cinnamon Sugar Roasted Pumpkin Seeds are the snack you did not know you needed. They turn a leftover pumpkin carving byproduct into the most addictive treat on your counter. The combination of warm cinnamon, buttery crunch, and that perfect hit of salt is honestly hard to beat.
I love this recipe because it feels like a little win every time I make it. It is simple enough for a weekday afternoon, but special enough to serve at a party. You can customize it a hundred ways, and every version is delicious in its own right. That is the kind of recipe that earns a permanent spot in your rotation.
Now I want to hear from you. Have you tried making sweet roasted pumpkin seeds before? Did you add your own twist? Drop a comment below and tell me about your version. And if you make these, tag me in your photos, I genuinely love seeing your kitchen creations. Happy roasting, and try not to eat the entire batch before they cool down. I dare you.
Frequently Asked Questions
Can I use store-bought pepitas instead of fresh pumpkin seeds?
Absolutely. Store-bought pepitas work perfectly and save you the cleaning step. Just make sure they are raw and unsalted. The roasting time may be slightly shorter since pepitas are smaller, so check them at the 10-minute mark.
Why are my roasted pumpkin seeds chewy instead of crispy?
Chewy seeds usually mean they were not dried thoroughly before roasting, or they were overcrowded on the baking sheet. Make sure your seeds are completely dry before coating them, and spread them in a single layer with space between each seed. Also, let them cool completely before eating, they crisp up as they cool.
Can I make this recipe without butter?
Yes. Coconut oil is the best substitute for butter in this recipe. It adds a subtle coconut flavor that pairs nicely with the cinnamon. Vegan butter sticks also work well. Avoid olive oil, the flavor is too strong and does not complement the sweet cinnamon sugar.
How do I prevent the sugar from burning?
Watch your oven temperature carefully. If your oven runs hot, reduce the temperature to 300°F (150°C) and extend the roasting time by a few minutes. Stir the seeds halfway through roasting to ensure even cooking. If you see the sugar turning dark brown before the seeds are done, pull them out immediately.
Can I double this recipe for a crowd?
Yes, but use two baking sheets instead of one. Overcrowding the pan will cause the seeds to steam instead of roast, resulting in a softer texture. Rotate the pans halfway through baking for even results. You might need to add 2 to 3 minutes to the total roasting time when using two pans.
Pin This Recipe!
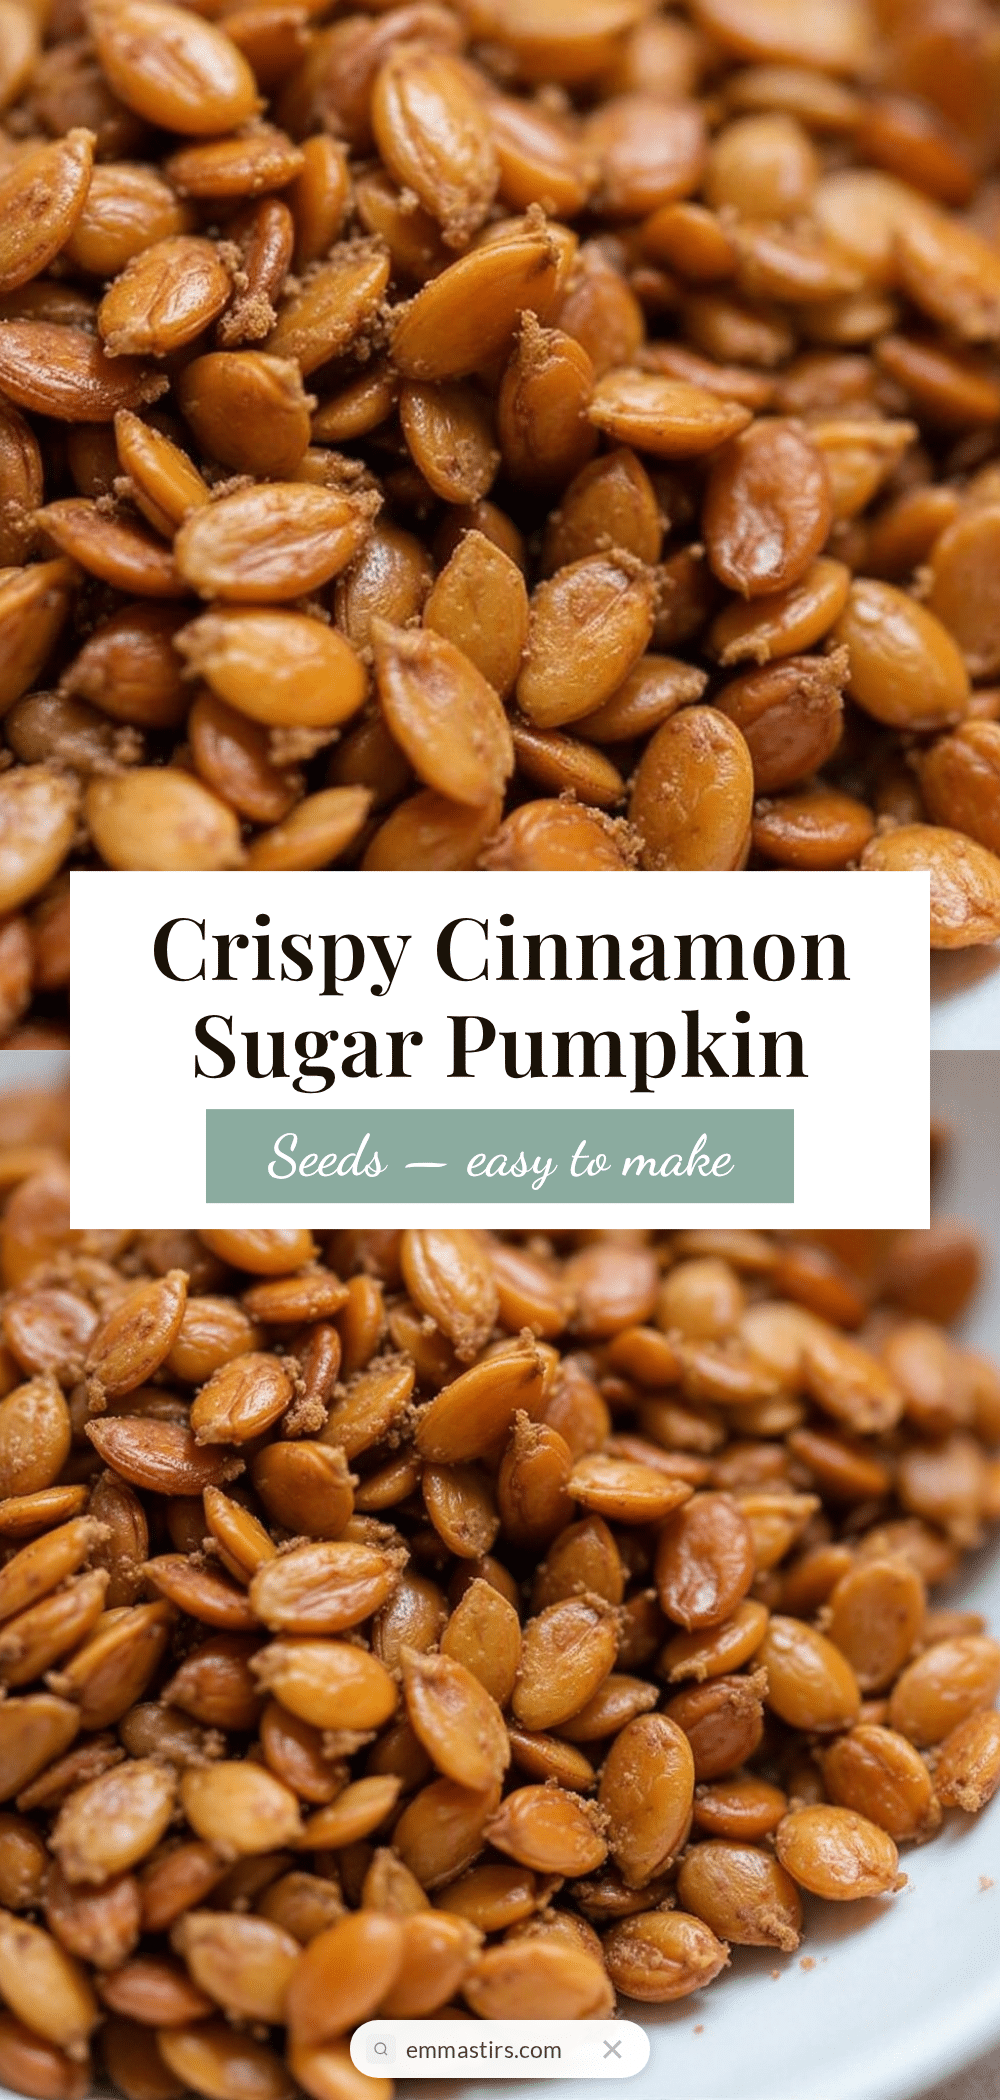
Easy Crispy Cinnamon Sugar Roasted Pumpkin Seeds Recipe
These Crispy Cinnamon Sugar Roasted Pumpkin Seeds are a sweet, crunchy, and slightly salty snack that turns leftover pumpkin seeds into an addictive treat. With a caramelized sugar coating and warm cinnamon flavor, they are perfect for fall gatherings or a cozy night in.
- Prep Time: 15 minutes
- Cook Time: 15 minutes
- Total Time: 30 minutes
- Yield: 4 servings 1x
- Category: Snack
- Cuisine: American
Ingredients
- 1 cup raw pumpkin seeds, cleaned
- 2 tablespoons unsalted butter, melted
- 2 tablespoons packed brown sugar
- 1 tablespoon granulated sugar
- 1 teaspoon ground cinnamon
- ¼ teaspoon fine sea salt, plus more for sprinkling
- Pinch of flaky sea salt (for finishing)
Instructions
- Preheat your oven to 325°F (163°C). Line a baking sheet with parchment paper if desired. Position the rack in the center of the oven.
- Clean and dry your pumpkin seeds thoroughly. Rinse fresh seeds in a colander under cold water to remove pulp. Spread on a clean towel or paper towels and pat completely dry. Let air dry for 10 minutes.
- Melt the butter in a small skillet over medium heat. Swirl until fully melted and just starting to bubble. Remove from heat immediately.
- In a medium mixing bowl, combine the melted butter, brown sugar, granulated sugar, ground cinnamon, and salt. Whisk until the sugars are mostly dissolved and the mixture forms a thick, grainy paste.
- Add the dried pumpkin seeds to the bowl. Use a spatula to toss until every seed is evenly coated in the cinnamon sugar mixture. The mixture will look clumpy.
- Optional stovetop pre-toast: Heat the same small skillet over medium heat. Add the coated seeds and stir constantly for 2 to 3 minutes until the sugar starts to caramelize and the seeds become fragrant. Remove from heat immediately.
- Spread the seeds in a single layer on the prepared baking sheet. Use a spatula to break up any clumps. Some clusters are okay.
- Roast for 12 to 15 minutes, stirring halfway through at the 7-minute mark. The seeds are done when golden brown and the sugar coating looks bubbly and caramelized.
- Remove from the oven and let cool completely on the baking sheet. The seeds will continue to crisp up as they cool.
- Once completely cool, sprinkle with a tiny pinch of flaky sea salt. Break up any large clusters with your hands and transfer to a serving bowl.
Notes
Ensure seeds are thoroughly dried before roasting to avoid chewiness. For dairy-free, substitute butter with coconut oil or vegan butter. Store in an airtight container at room temperature for up to 5 days. To re-crisp, reheat at 300°F (150°C) for 5 minutes and cool.
Nutrition
- Serving Size: ¼ cup
- Calories: 180
- Sugar: 12
- Sodium: 150
- Fat: 12
- Saturated Fat: 4
- Carbohydrates: 16
- Fiber: 2
- Protein: 7
Keywords: cinnamon sugar pumpkin seeds, roasted pumpkin seeds, sweet pumpkin seeds, fall snack, Halloween snack, Thanksgiving snack, crispy pumpkin seeds


