Love this? Save it for later!
Share the inspiration with your friends
My neighbor handed me a bag of chocolate chips and said, “Make something that doesn’t feel like a project.” That’s how these fluffy pumpkin chocolate chip muffins came to be—not out of a deep craving for fall baking, but out of a Tuesday afternoon where I needed something small and satisfying without turning my kitchen into a war zone. She’d just had a baby, and I wanted to bring her something that felt like a treat but didn’t require her to commit to a dozen muffins she’d have to freeze.
The funny thing is, I almost didn’t use the pumpkin. It was sitting in my pantry, half-forgotten from a can I’d opened for a soup that never happened. But there it was—orange, unassuming, and begging to be used before it turned into science experiment material. I threw it into my standard muffin batter, crossed my fingers, and hoped for the best. What came out of the oven was anything but an afterthought.
The muffins rose beautifully—tall, domed, and speckled with melted chocolate. My neighbor texted me later that night: “My husband ate three before I could have one. Send help.” Honestly, that’s the kind of feedback that makes all the sticky countertops worth it. These fluffy pumpkin chocolate chip muffins aren’t trying to be complicated. They’re just trying to be good—and they absolutely are.
Why You’ll Love This Recipe
Let me tell you why this recipe has become my go-to for fall baking that doesn’t feel like a chore. I’ve tested this batter at least seven times to get the texture just right—fluffy without being dry, sweet without being cloying, and packed with enough pumpkin flavor to feel seasonal without overwhelming everything else.
- Small Batch Perfection: This recipe makes exactly six muffins. No more, no less. Perfect for when you want a treat without committing to a bakery-sized batch that goes stale before you finish it.
- Simple Pantry Ingredients: You probably have most of these items already. Pumpkin puree, flour, sugar, eggs, butter, and chocolate chips. No weird extracts or specialty flours required.
- Ready in Under 30 Minutes: From mixing bowl to cooling rack in about 25 minutes. That’s faster than ordering delivery and way more satisfying.
- Kid-Approved and Adult-Friendly: My neighbor’s toddler ate one and signed “more” with his sticky little hands. Meanwhile, I’ve served these at book club and watched grown adults fight over the last one.
- Freezer-Friendly: Made the full batch and couldn’t finish? Pop the extras in a zip-top bag and pull them out when you need a quick breakfast or afternoon pick-me-up.
What sets these apart from every other pumpkin muffin recipe out there is the technique. I blend the pumpkin puree with melted butter instead of oil, which gives the muffins a tender crumb that stays moist for days. Plus, I fold the chocolate chips in at the very end to keep them suspended throughout the batter instead of sinking to the bottom. It’s a small thing, but it makes every bite feel intentional.
These muffins are the kind of recipe you’ll memorize after making them twice. They’re forgiving enough for beginner bakers but satisfying enough for experienced cooks who just want something that works without fuss.
What Ingredients You Will Need
This recipe keeps things simple with ingredients that work together to create that perfect fluffy texture. Here’s what you’ll need and why each one matters:
- All-purpose flour (1 cup / 120g): The backbone of our muffins. Spoon and level your flour—don’t scoop directly from the bag, or you’ll end up with dense, dry muffins. I use King Arthur Flour because it’s consistently reliable, but any brand works fine.
- Granulated sugar (⅓ cup / 65g): Just enough sweetness to balance the pumpkin and chocolate. If you prefer less sweet muffins, you can reduce this to ¼ cup without major issues.
- Light brown sugar (2 tablespoons / 25g): Adds moisture and a subtle molasses flavor that complements the pumpkin beautifully. Pack it firmly when measuring.
- Baking powder (1 teaspoon): The leavening agent that gives these muffins their lift. Make sure it’s fresh—test it by dropping a bit in hot water; if it fizzes, you’re good.
- Baking soda (½ teaspoon): Helps the muffins rise and contributes to browning. Don’t skip it even though the amount seems small.
- Ground cinnamon (1 teaspoon): The star spice. I prefer Saigon cinnamon for its bold, warm flavor, but regular cinnamon works perfectly.
- Ground nutmeg (¼ teaspoon): Adds that classic pumpkin pie warmth. Freshly grated nutmeg takes it to another level if you have it.
- Ground ginger (¼ teaspoon): A little kick that brightens the whole flavor profile. You can skip it if you’re not a fan, but I think it makes a difference.
- Salt (¼ teaspoon): Don’t skip this—it balances the sweetness and enhances all the other flavors.
- Unsalted butter (4 tablespoons / 57g), melted and slightly cooled: Melted butter gives these muffins a tender, rich crumb that oil just can’t replicate. I’ve tested both, and butter wins every time.
- Large egg (1): Room temperature is best. If you forgot to take it out ahead of time, place it in a bowl of warm water for 5 minutes.
- Pumpkin puree (½ cup / 120g): Not pumpkin pie filling—make sure you grab the 100% pure pumpkin puree. Libby’s is my go-to brand for consistent texture and flavor.
- Milk (2 tablespoons / 30ml): Whole milk gives the richest result, but 2% or even oat milk work fine. Adds just enough liquid to bring the batter together.
- Vanilla extract (½ teaspoon): Enhances the chocolate and pumpkin flavors. Real vanilla is worth the investment here.
- Semi-sweet chocolate chips (⅓ cup / 60g): I prefer Ghirardelli for their size and melt quality. You can use dark chocolate, milk chocolate, or even white chocolate chips depending on your preference.
Ingredient Swap Notes: For a dairy-free version, use vegan butter and your favorite plant-based milk. For a gluten-free option, substitute with a 1:1 gluten-free flour blend—just add an extra tablespoon of milk since gluten-free flours tend to absorb more liquid.
Equipment Needed
You don’t need a fancy kitchen to make these muffins. Here’s what I use:
- Standard 6-cup muffin tin: The star of the show. I bought mine for $8 at Target years ago, and it still works perfectly. If you only have a 12-cup tin, just fill the empty cups halfway with water to prevent uneven baking.
- Muffin liners (paper or silicone): Paper liners make cleanup a breeze. I like the unbleached brown ones for a rustic look. Silicone liners work great too and are reusable.
- Mixing bowls (medium and small): One for dry ingredients, one for wet. Nothing fancy needed—I use the same set I’ve had since college.
- Whisk: For combining dry ingredients evenly. A fork works in a pinch, but a whisk does a better job distributing the baking powder and soda.
- Rubber spatula: For folding the batter together without overmixing. This is your best friend for tender muffins.
- Measuring cups and spoons: Accurate measurements matter here. I use stainless steel ones that I’ve had for a decade.
- Cooling rack: Lets air circulate around the muffins so they don’t get soggy on the bottom. If you don’t have one, you can use a clean dish towel laid flat.
- Cookie scoop (optional but helpful): A #20 scoop (about 3 tablespoons) gives you even, perfectly portioned muffins every time. Not necessary, but it makes the process smoother.
Budget-Friendly Tip: You can make these muffins without a mixer—everything comes together by hand. No stand mixer or hand mixer required. Just a little elbow grease and a good whisk.
Preparation Method
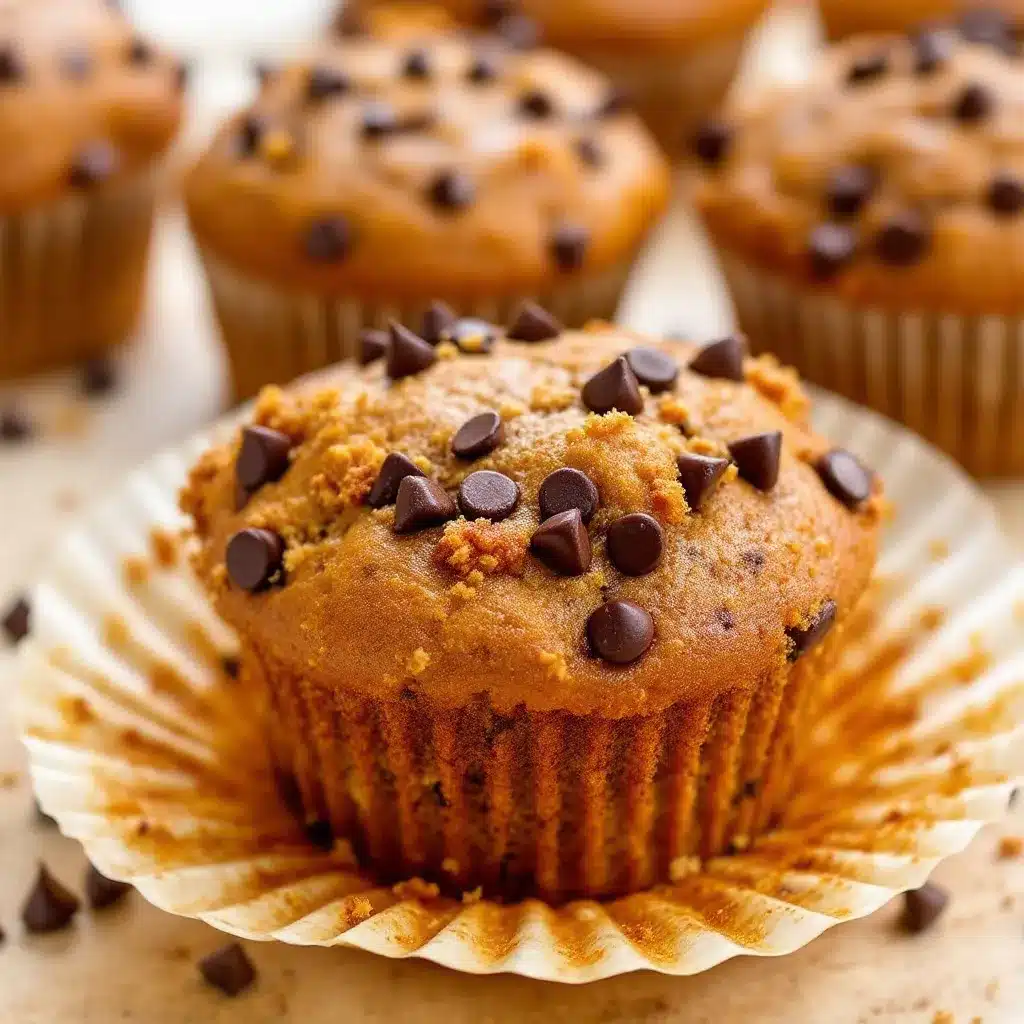
Alright, let’s get baking. Preheat your oven to 375°F (190°C) and line your muffin tin with paper liners. This is one of those recipes where the order of operations actually matters, so follow along and you’ll get perfect results every time.
- Melt the butter and let it cool slightly. Pop 4 tablespoons of unsalted butter in a microwave-safe bowl and heat in 20-second bursts until just melted. Set it aside to cool while you prep the other ingredients. You want it warm, not hot—if it’s too hot, it’ll cook the egg when you mix them together.
- Whisk the dry ingredients together. In a medium bowl, combine 1 cup all-purpose flour, ⅓ cup granulated sugar, 2 tablespoons packed light brown sugar, 1 teaspoon baking powder, ½ teaspoon baking soda, 1 teaspoon cinnamon, ¼ teaspoon nutmeg, ¼ teaspoon ginger, and ¼ teaspoon salt. Whisk until everything is evenly distributed—about 15 seconds. This step ensures you don’t bite into a pocket of baking soda later.
- Mix the wet ingredients in a separate bowl. In a small bowl, whisk together the melted butter, 1 large egg (room temperature), ½ cup pumpkin puree, 2 tablespoons milk, and ½ teaspoon vanilla extract. Whisk until the mixture is smooth and uniform. It should look like a thick, orange-hued liquid with no streaks of egg white visible.
- Combine wet and dry ingredients. Pour the wet mixture into the dry mixture. Here’s where the magic happens—use a rubber spatula to fold everything together gently. Stir just until you no longer see streaks of flour. A few lumps are totally fine. Overmixing at this stage will develop gluten and make your muffins tough and dense instead of light and fluffy.
- Fold in the chocolate chips. Add ⅓ cup semi-sweet chocolate chips to the batter. Fold them in with 3-4 gentle strokes. Don’t go crazy here—you want the chips evenly distributed, not smashed into the batter. The batter will be thick and slightly sticky, which is exactly what you want.
- Portion the batter into the muffin tin. Divide the batter evenly among the 6 muffin cups. Each cup should be about ¾ full. I use a cookie scoop for this, but two spoons work just fine. If you want those bakery-style domed tops, fill the cups a little fuller—just be careful they don’t overflow.
- Bake for 15-18 minutes. Place the muffin tin on the middle rack of your preheated oven. Bake for 15 minutes, then check for doneness. The muffins should be golden brown on top, and a toothpick inserted into the center of a muffin should come out clean or with just a few moist crumbs attached. If the toothpick has wet batter on it, give them another 2-3 minutes.
- Cool in the pan for 5 minutes. This step is crucial—it lets the muffins set so they don’t fall apart when you try to remove them. After 5 minutes, transfer the muffins to a cooling rack to cool completely. If you leave them in the pan too long, the bottoms will get soggy from trapped steam.
Sensory Cue: Your kitchen should smell like fall by the time these come out of the oven—warm cinnamon, nutty pumpkin, and rich chocolate. The tops should be slightly domed and golden, with little chocolate chips peeking through like buried treasure.
Cooking Tips & Techniques
I’ve made these muffins enough times to know exactly where things can go wrong. Here are the lessons I learned the hard way so you don’t have to:
Don’t overmix the batter. This is the number one mistake I see with muffin recipes. I did it myself the first time—I kept stirring until the batter was perfectly smooth, thinking I was being thorough. Instead, I ended up with tough, rubbery muffins that barely rose. Mix until the flour just disappears, then stop. Lumps are your friends here.
Room temperature ingredients matter. I know, I know—nobody remembers to take the egg out ahead of time. But cold ingredients don’t emulsify as well, which means your muffins won’t rise as high or have that tender crumb. If you’re in a rush, place the egg in a bowl of warm water for 5 minutes. For the milk, 10 seconds in the microwave on low power does the trick.
Use a light hand with the pumpkin puree. Pumpkin contains a lot of water, which can make muffins gummy if you add too much. Measure your ½ cup carefully—don’t heap it. If your pumpkin puree looks watery (some brands are thinner than others), blot it with a paper towel before adding it to the batter.
Let the butter cool before mixing. I learned this one after scrambling an egg into hot butter and ending up with a curdled mess. Let your melted butter sit for 5 minutes before adding the egg. It should be warm to the touch but not hot.
Bake on the middle rack. The middle rack provides the most even heat distribution. If you bake too close to the top, the muffin tops will brown too quickly while the centers stay undercooked. Too close to the bottom, and you’ll get burnt bottoms with pale tops.
Rotate the pan halfway through. Ovens have hot spots. Halfway through baking (around the 8-minute mark), quickly rotate the muffin tin 180 degrees. This ensures even browning and consistent doneness across all six muffins.
Test with a toothpick, not your eyes. Muffins can look done on the outside but still be raw in the center. Always use the toothpick test. And remember—a few moist crumbs are fine. Wet batter means they need more time.
Variations & Adaptations
One of the best things about this recipe is how flexible it is. Here are some variations I’ve tried and loved:
Pumpkin Cream Cheese Muffins: Before baking, drop a small spoonful of cream cheese mixture (2 oz cream cheese softened + 1 tablespoon sugar + ½ teaspoon vanilla) into the center of each muffin. Push it down slightly so it’s surrounded by batter. The result is a gooey, tangy surprise in the middle of every bite.
Gluten-Free Version: Substitute the all-purpose flour with a 1:1 gluten-free baking flour blend. I’ve tested this with Bob’s Red Mill 1:1 Baking Flour, and the texture is remarkably similar. Add an extra tablespoon of milk since gluten-free flours tend to absorb more liquid.
Vegan Adaptation: Replace the egg with a flax egg (1 tablespoon ground flaxseed + 3 tablespoons water, let sit for 5 minutes). Use melted coconut oil or vegan butter instead of dairy butter, and swap the milk for oat milk or almond milk. The muffins will be slightly denser but still delicious.
Double Chocolate Pumpkin Muffins: Replace 2 tablespoons of the flour with 2 tablespoons of unsweetened cocoa powder. Use dark chocolate chips instead of semi-sweet. The chocolate-pumpkin combo is incredible—like a brownie and a pumpkin pie had a beautiful baby.
Spice It Up: If you love a stronger spice profile, add ¼ teaspoon of cloves and ¼ teaspoon of allspice along with the other spices. This gives the muffins a chai-like warmth that’s perfect for cozy fall mornings.
Nutty Crunch: Fold in ¼ cup of toasted pecans or walnuts along with the chocolate chips. The crunch adds a lovely textural contrast to the soft, fluffy muffin.
My personal favorite variation? I once made these with white chocolate chips and dried cranberries instead of semi-sweet chocolate. It felt like a completely different muffin—lighter, brighter, and perfect for Thanksgiving morning. The tartness of the cranberries cuts through the sweetness beautifully.
Serving & Storage Suggestions
These muffins are best served warm, when the chocolate chips are still slightly melty and the pumpkin flavor is at its peak. Here’s how to make the most of them:
Serving Temperature: Warm them in the microwave for 10-15 seconds before serving. If you’re serving a crowd, pop them in a 300°F oven for 5 minutes to bring back that fresh-from-the-oven warmth.
Presentation Ideas: Arrange the muffins on a rustic wooden board or a simple white plate. Dust them with a light sprinkle of powdered sugar for a bakery-style finish. For a fall-themed brunch, serve them alongside a warm pumpkin spice latte or a cup of chai tea.
Perfect Pairings: These muffins are fantastic with a pat of salted butter spread on top. They also pair beautifully with:
- A hot cup of coffee or cold brew
- Chai tea latte (the spices complement each other perfectly)
- A glass of cold milk (classic for a reason)
- Vanilla Greek yogurt for a protein-packed breakfast
- A dollop of whipped cream and a drizzle of caramel sauce for dessert
Storage Instructions: Store leftover muffins in an airtight container at room temperature for up to 3 days. Place a paper towel at the bottom of the container to absorb excess moisture, and another paper towel on top to catch any condensation from the lid. Change the paper towels if they get damp.
Freezer Instructions: These muffins freeze beautifully. Let them cool completely, then wrap each muffin individually in plastic wrap. Place the wrapped muffins in a freezer-safe zip-top bag, squeeze out as much air as possible, and freeze for up to 3 months. To thaw, leave them at room temperature for about an hour, or microwave for 20-30 seconds.
Flavor Development: Here’s something interesting—these muffins actually taste better the next day. The pumpkin and spice flavors have time to meld together, creating a deeper, more complex flavor profile. If you can resist eating them all on day one, you’re in for a real treat on day two.
Nutritional Information & Benefits
Here’s the approximate nutritional breakdown for one muffin (based on the recipe as written):
| Nutrient | Amount Per Muffin |
|---|---|
| Calories | 245 |
| Total Fat | 11g |
| Saturated Fat | 6g |
| Cholesterol | 45mg |
| Sodium | 210mg |
| Total Carbohydrates | 34g |
| Dietary Fiber | 2g |
| Sugars | 18g |
| Protein | 4g |
| Vitamin A | 35% DV |
| Iron | 8% DV |
Health Benefits: Pumpkin is packed with vitamin A (in the form of beta-carotene), which supports eye health and immune function. It’s also a good source of fiber, which helps with digestion and keeps you feeling full longer. The chocolate chips provide antioxidants (flavonoids) that support heart health—in moderation, of course.
Dietary Considerations: These muffins are vegetarian. They can be made vegan and gluten-free with the substitutions mentioned earlier. They contain dairy (butter, milk) and gluten (flour), so they’re not suitable for those with allergies to those ingredients without modifications.
My Wellness Take: I don’t believe in labeling foods as “good” or “bad.” These muffins are a treat—something to enjoy without guilt. They have some nutritional value thanks to the pumpkin and whole ingredients, but they’re primarily about pleasure. And honestly? That’s okay. A balanced life includes room for chocolate chip muffins.
Frequently Asked Questions
Can I use pumpkin pie filling instead of pumpkin puree?
No, don’t do that. Pumpkin pie filling is pre-sweetened and spiced, which will throw off the sugar and spice balance in this recipe. Stick with 100% pure pumpkin puree for the best results. Your muffins will thank you.
Why did my muffins turn out dense and flat?
This usually happens for one of three reasons: overmixing the batter (which develops too much gluten), using expired baking powder or baking soda, or not measuring your flour correctly. Make sure you’re spooning and leveling your flour, not scooping it directly from the bag.
Can I double this recipe?
Absolutely! This recipe doubles beautifully. Just use a 12-cup muffin tin instead of a 6-cup one. The baking time might increase by 1-2 minutes since the oven has more batter to heat through. Check for doneness with a toothpick starting at the 16-minute mark.
How do I keep the chocolate chips from sinking to the bottom?
Toss the chocolate chips in a tablespoon of flour before folding them into the batter. The flour coating helps suspend the chips throughout the muffin instead of letting them sink. Also, make sure your batter is thick enough—if it’s too thin, the chips will drop like stones.
Can I use fresh pumpkin instead of canned?
Yes, but you’ll need to cook and puree it first. Roast a small sugar pumpkin at 400°F for about 45 minutes, scoop out the flesh, and blend until smooth. The main difference is that fresh pumpkin puree tends to be more watery than canned, so you might need to drain it through a cheesecloth or paper towel before using it in this recipe.
Conclusion
These fluffy pumpkin chocolate chip muffins have become my secret weapon for fall baking that doesn’t feel like a production. They’re small enough to make on a whim, delicious enough to impress, and simple enough that you won’t dread the cleanup. The pumpkin keeps them moist, the chocolate chips add little pockets of sweetness, and the whole thing comes together in about half an hour.
What I love most about this recipe is how forgiving it is. You can swap ingredients, adjust the spices, or change up the mix-ins, and it still works. It’s the kind of recipe that becomes a habit—the one you turn to when you need something warm and comforting without a lot of fuss.
I’d love to hear how yours turn out. Did you try a variation? Did your family devour them in record time? Drop a comment below and let me know. And if you’re looking for more small-batch baking inspiration, you might also enjoy my small batch banana muffins or these pumpkin spice scones for another quick fall treat. Happy baking, friends!
Pin This Recipe!
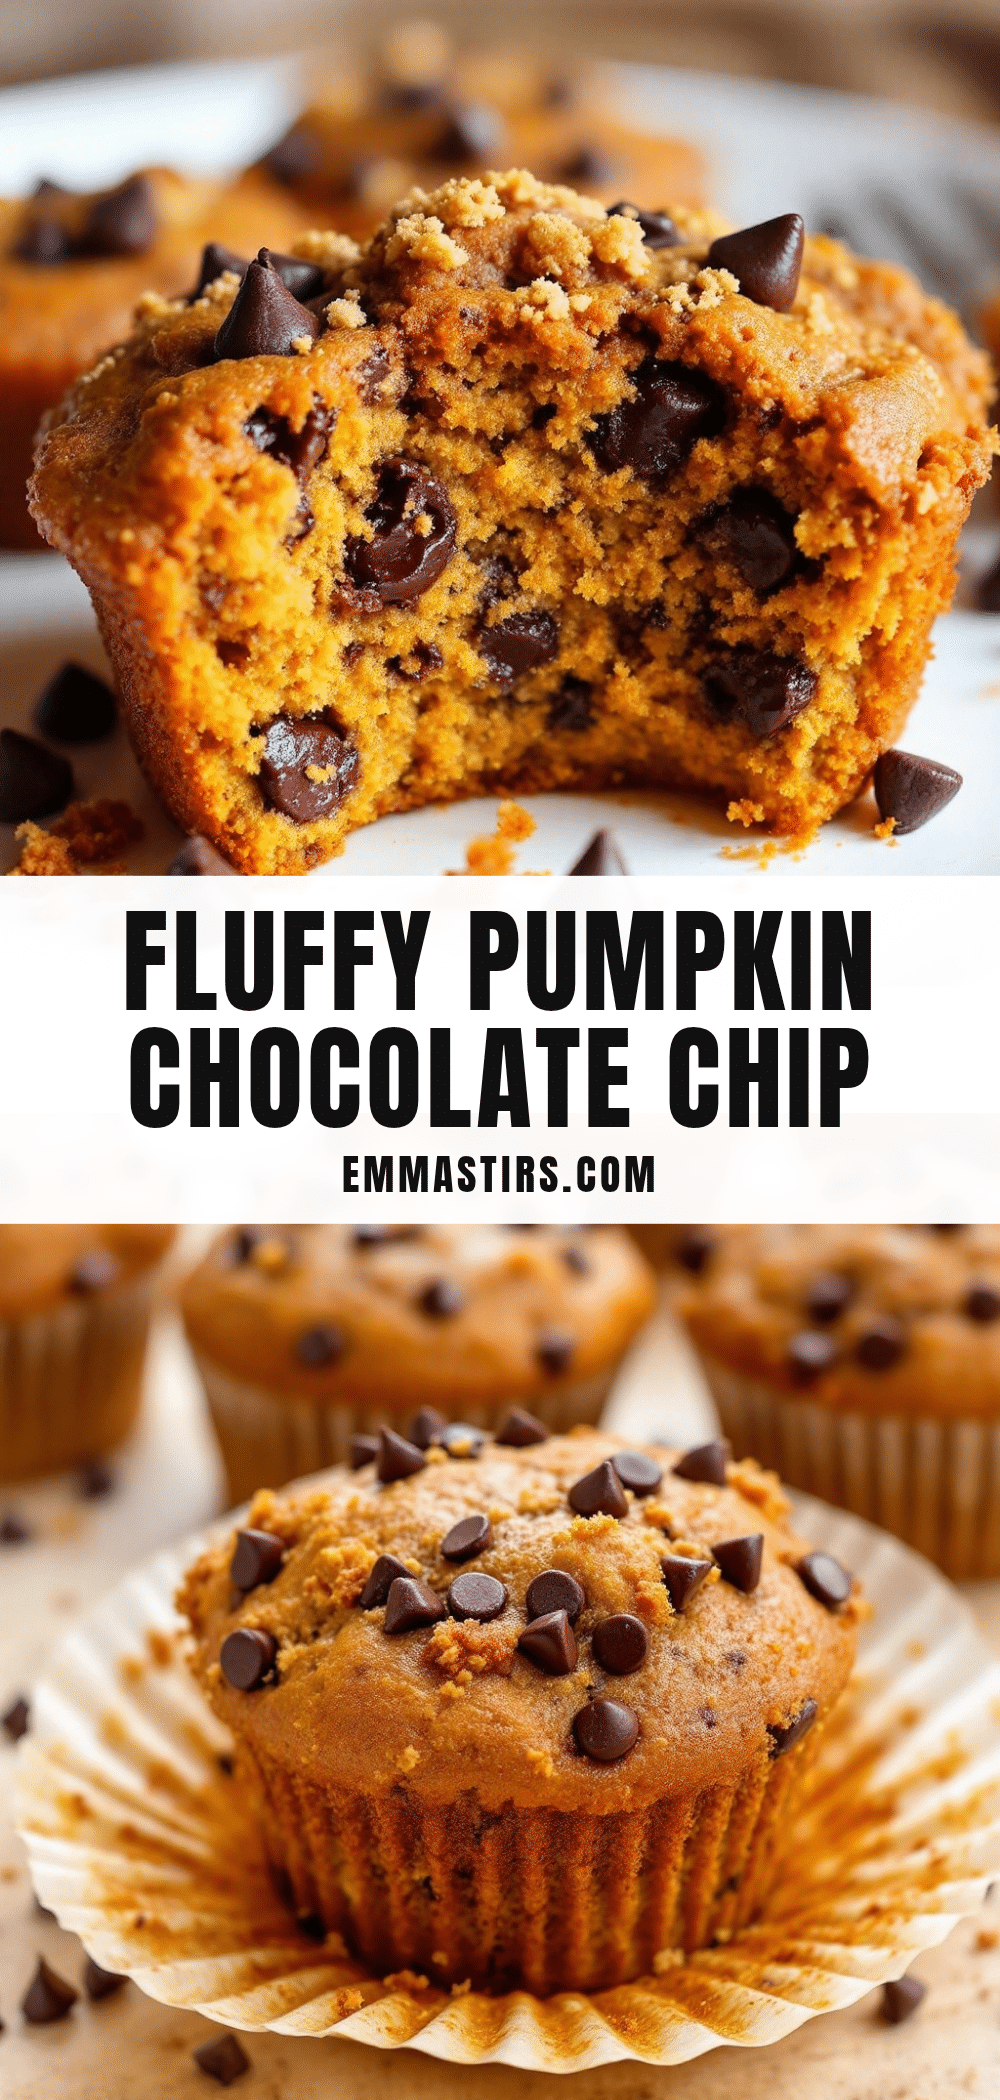
Easy Fluffy Pumpkin Chocolate Chip Muffins (Small Batch)

These fluffy pumpkin chocolate chip muffins are a small-batch treat that comes together in under 30 minutes. Made with simple pantry ingredients, they’re perfect for fall baking without the fuss.
- Prep Time: 10 minutes
- Cook Time: 18 minutes
- Total Time: 28 minutes
- Yield: 6 muffins 1x
- Category: Dessert
- Cuisine: American
Ingredients
- 1 cup all-purpose flour (120g)
- ⅓ cup granulated sugar (65g)
- 2 tablespoons light brown sugar (25g), packed
- 1 teaspoon baking powder
- ½ teaspoon baking soda
- 1 teaspoon ground cinnamon
- ¼ teaspoon ground nutmeg
- ¼ teaspoon ground ginger
- ¼ teaspoon salt
- 4 tablespoons unsalted butter (57g), melted and slightly cooled
- 1 large egg, room temperature
- ½ cup pumpkin puree (120g)
- 2 tablespoons milk (30ml)
- ½ teaspoon vanilla extract
- ⅓ cup semi-sweet chocolate chips (60g)
Instructions
- Preheat oven to 375°F (190°C). Line a 6-cup muffin tin with paper liners.
- Melt 4 tablespoons unsalted butter in a microwave-safe bowl in 20-second bursts. Set aside to cool slightly.
- In a medium bowl, whisk together 1 cup all-purpose flour, ⅓ cup granulated sugar, 2 tablespoons packed light brown sugar, 1 teaspoon baking powder, ½ teaspoon baking soda, 1 teaspoon cinnamon, ¼ teaspoon nutmeg, ¼ teaspoon ginger, and ¼ teaspoon salt until evenly distributed.
- In a small bowl, whisk together the melted butter, 1 large egg, ½ cup pumpkin puree, 2 tablespoons milk, and ½ teaspoon vanilla extract until smooth.
- Pour the wet mixture into the dry mixture. Fold gently with a rubber spatula until just combined—a few lumps are fine. Do not overmix.
- Add ⅓ cup semi-sweet chocolate chips and fold in with 3-4 gentle strokes.
- Divide the batter evenly among the 6 muffin cups, filling each about ¾ full.
- Bake on the middle rack for 15-18 minutes, until golden brown and a toothpick inserted into the center comes out clean or with a few moist crumbs.
- Cool in the pan for 5 minutes, then transfer to a cooling rack to cool completely.
Notes
For dairy-free, use vegan butter and plant-based milk. For gluten-free, substitute with a 1:1 gluten-free flour blend and add an extra tablespoon of milk. Do not overmix the batter to avoid dense muffins. Let butter cool before adding egg to prevent scrambling. For bakery-style domed tops, fill cups slightly fuller. Muffins taste even better the next day as flavors meld.
Nutrition
- Serving Size: 1 muffin
- Calories: 245
- Sugar: 18
- Sodium: 210
- Fat: 11
- Saturated Fat: 6
- Carbohydrates: 34
- Fiber: 2
- Protein: 4
Keywords: pumpkin chocolate chip muffins, small batch muffins, fall baking, easy muffin recipe, fluffy muffins


