Love this? Save it for later!
Share the inspiration with your friends
The way the marshmallow stretches between your fingers as you shape it—that’s the real magic. Not the ghost shape itself, though those little white blobs are pretty cute. It’s that moment when the warm, sticky mixture is still too hot to handle but you can’t stop touching it anyway, feeling it transform from a goopy mess into something that will soon hold its shape. That’s what I made these for. The crunch that follows is just a bonus.
I wasn’t planning on making Halloween treats last year. Honestly, I was just trying to use up a box of cereal that had been sitting in my pantry since August. But my niece walked in, took one look at the bag of marshmallows on my counter, and said, “Can we make ghosts?” And well—how do you say no to that? So we did. We made the ugliest, lopsided, butter-fingered little ghosts you’ve ever seen. And they were perfect.
These Easy Halloween Rice Krispie Ghosts Treats are exactly that—easy. No fancy molds, no special tools, no stress. Just a simple recipe that somehow makes everyone feel like a kid again. And honestly? That’s the whole point of Halloween anyway.
Why You’ll Love This Recipe
I’ve tested a lot of Halloween treats over the years. Some were complicated. Some were messy. Some required me to buy things I’ll never use again (looking at you, skeleton-shaped cookie cutter). These ghosts are none of those things. They’re the kind of recipe you can make with kids, on a weeknight, without losing your mind.
- Quick & Easy: From start to finish, you’re looking at about 20 minutes. That includes cooling time. Seriously.
- Simple Ingredients: Butter, marshmallows, Rice Krispies cereal, and a few candy eyes. That’s it. You probably already have everything.
- Perfect for Halloween Parties: School events, office potlucks, or just a fun afternoon activity—these fit everywhere.
- No Baking Required: No oven needed. No complicated steps. Just a stovetop and a little patience.
- Crowd-Pleaser: I’ve yet to meet a kid (or adult) who doesn’t smile when they see these little guys. They’re just… happy.
What makes these different from other Halloween treats? It’s the texture. The way the outside gets just slightly crisp while the inside stays soft and chewy. That contrast is everything. And because you shape them by hand, each ghost has its own personality. Some are tall. Some are squat. Some look like they’ve had a rough day. It’s charming, not imperfect.
This is the kind of recipe that makes you feel like you’ve actually accomplished something fun. Not stressful. Not Pinterest-perfect. Just good, messy, delicious fun.
What Ingredients You Will Need
This recipe uses simple pantry staples to create something that feels special. No weird ingredients, no hunting down specialty items. Just good old-fashioned marshmallow treats dressed up for Halloween.
For the Rice Krispie Treat Base:
- 3 tablespoons unsalted butter (plus extra for greasing your hands and the pan)
- 1 package (10 oz) regular marshmallows (about 40 large marshmallows or 4 cups mini marshmallows—I prefer mini because they melt faster and more evenly)
- 6 cups Rice Krispies cereal (or any crispy rice cereal—just make sure it’s fresh and not stale for the best crunch)
- ¼ teaspoon vanilla extract (optional, but I love the subtle warmth it adds)
- Pinch of salt (balances the sweetness—don’t skip it)
For Decorating:
- Candy eyes (the little white and black ones you find in the baking aisle—about 24-30 per batch)
- Black icing tube (for drawing mouths, or you can use melted chocolate chips in a piping bag—I’ve done both and honestly, the tube is easier)
- Parchment paper (for cooling and setting)
Ingredient Tips:
I recommend using name-brand marshmallows for this recipe. Store-brand marshmallows sometimes don’t melt as smoothly and can leave you with a grainy texture. If you’re using mini marshmallows, measure by weight if you can—it’s more accurate. For the cereal, make sure your box is fresh. Stale cereal won’t give you that satisfying crunch, and that’s really the whole point of a Rice Krispie treat.
If you need a dairy-free option, use vegan butter and vegan marshmallows. Dandies brand makes excellent vegan marshmallows that melt beautifully. Just note that the texture might be slightly different—a little chewier, but still delicious.
Equipment Needed
You don’t need much for this recipe. That’s kind of the beauty of it. But having the right tools makes everything easier.
- Large pot or Dutch oven: You need something big enough to hold all the cereal plus the marshmallow mixture. A 5-quart pot works perfectly.
- Rubber spatula or wooden spoon: Something sturdy for stirring. The mixture gets thick, so don’t use a flimsy spoon.
- 9×13-inch baking dish: For pressing the mixture if you want to cut them into squares instead of shaping by hand. But honestly, you might not even need this.
- Parchment paper: Essential for cooling and preventing sticking. Wax paper works too, but parchment is sturdier.
- Small bowl of water: For wetting your hands so the mixture doesn’t stick to you. This is a game-changer.
- Butter knife or offset spatula: For spreading if you’re doing the pan method.
Budget-Friendly Tip: Don’t have a Dutch oven? Any large, heavy-bottomed pot will work. Just make sure it’s non-stick or well-seasoned, because the marshmallow mixture can be stubborn to clean off. A little warm water and patience does the trick.
Preparation Method
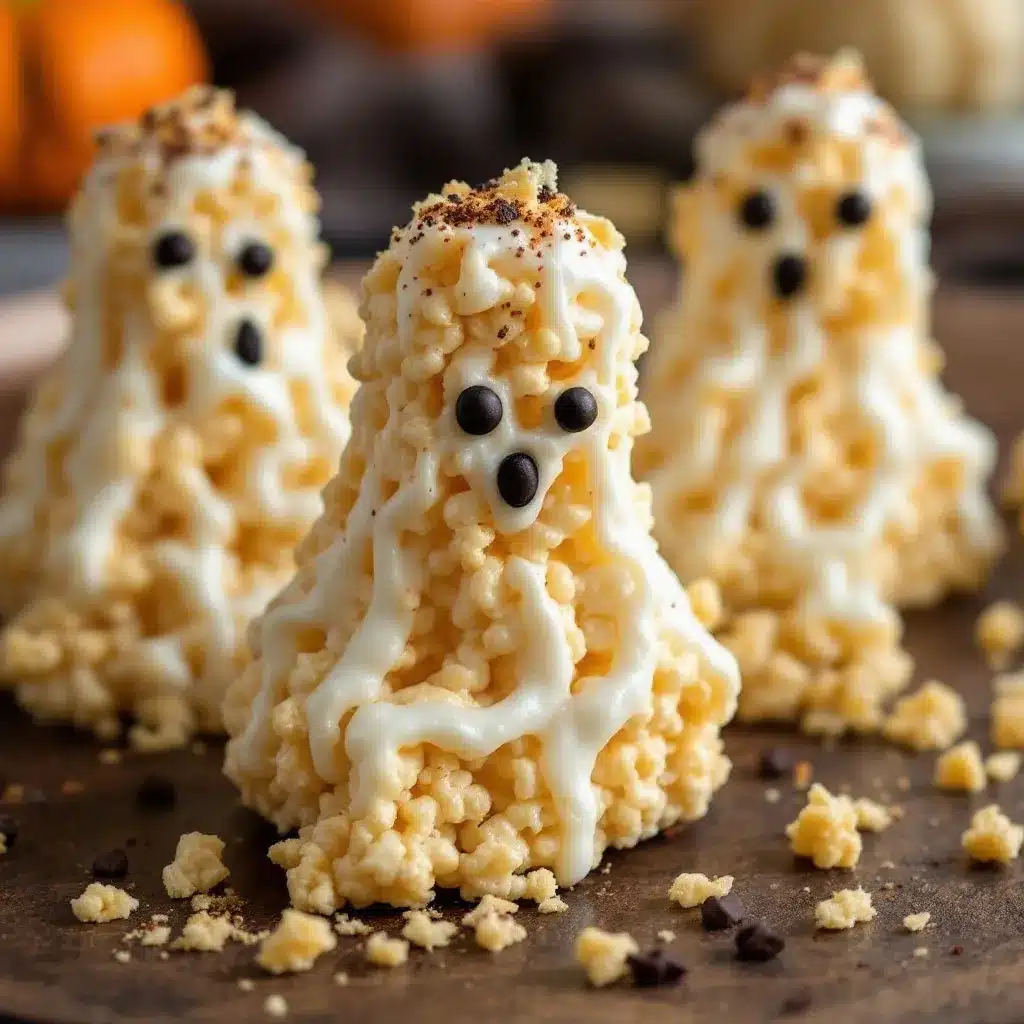
This is where the fun begins. The process is simple, but there are a few tricks that make the difference between good ghosts and great ghosts. Pay attention to the little details—they matter.
- Prepare your workspace. Line a large baking sheet or cutting board with parchment paper. Lightly butter the parchment. This prevents sticking and makes cleanup a breeze. Set aside a small bowl of cool water nearby.
- Melt the butter. In your large pot, melt the 3 tablespoons of butter over medium-low heat. Don’t rush this—if the butter burns, you’ll taste it in the final treats. Swirl the pot occasionally so it melts evenly. Once it’s fully melted and just starting to bubble, you’re ready for the next step.
- Add the marshmallows. Pour in the entire bag of marshmallows. Stir constantly with your rubber spatula, scraping the bottom and sides of the pot. The marshmallows will start to puff up and then collapse into a smooth, gooey puddle. This takes about 3-4 minutes. If you’re using the vanilla extract and salt, stir them in now. The mixture should be smooth and glossy—no lumps.
- Remove from heat. Take the pot off the burner immediately. You don’t want the marshmallow mixture to overcook or it’ll become tough. Pour in the 6 cups of Rice Krispies cereal all at once. Stir gently but thoroughly, folding the cereal into the marshmallow until every piece is coated. Don’t overmix or you’ll crush the cereal and lose that signature crunch.
- Let it cool slightly. This is the hardest part. The mixture will be extremely hot. Let it sit in the pot for 2-3 minutes. You want it warm enough to shape but cool enough to handle. If you try to shape it immediately, you’ll burn your fingers. Trust me on this—I’ve done it.
- Butter your hands. Rub a little butter on your palms. Then dip them in the bowl of cool water. This creates a barrier that prevents the sticky mixture from clinging to your skin. You’ll need to re-wet your hands between each ghost.
- Shape the ghosts. Grab a handful of the mixture—about the size of a golf ball for small ghosts or a tangerine for larger ones. Roll it into a ball first, then gently pinch and pull one side to form a teardrop shape. The round end is the head, the pointed end is the tail. Place it on the prepared parchment paper. Don’t worry if they’re not perfect—ghosts are supposed to be a little wonky.
- Add the eyes immediately. While the mixture is still warm and soft, press two candy eyes into the round end of each ghost. If the mixture has cooled too much, the eyes won’t stick. Work quickly but gently. If the eyes fall off later, you can always attach them with a dab of black icing.
- Let them set completely. Leave the ghosts on the parchment paper for at least 30 minutes. They need time to firm up and hold their shape. If you try to move them too soon, they’ll squish and lose their form. Patience, my friend.
- Draw the mouths. Once the ghosts are fully set, use your black icing tube to draw little mouths. Go for classic “O” shapes, crooked smiles, or even scared expressions. This is where you can really have fun. Let the icing dry for 10-15 minutes before serving or storing.
Troubleshooting Tip: If your mixture is too sticky to shape, your marshmallows might have overcooked. Next time, remove them from the heat as soon as they’re melted. If the mixture is too dry and crumbly, you might have added too much cereal or not enough marshmallow. Gently press the mixture together—it should hold. If it doesn’t, melt a little extra marshmallow and stir it in.
Cooking Tips & Techniques
I’ve made these ghosts more times than I can count. And I’ve learned a few things along the way—mostly through trial and error. Here’s what I wish someone had told me.
Don’t overheat the marshmallows. This is the number one mistake people make. The marshmallows should just barely melt—you want them smooth and glossy, not bubbling and brown. Overcooked marshmallows turn into hard, brittle candy that’s impossible to shape. Low and slow is the way to go.
Wet hands are your best friend. I cannot stress this enough. The mixture will stick to dry hands like glue. Butter plus water creates a non-stick barrier that makes shaping almost effortless. Re-wet your hands between each ghost. It takes two seconds and saves you a world of frustration.
Work in small batches. If you’re making a double batch, don’t try to shape all the ghosts at once. The mixture cools quickly, and once it’s cold, it’s too firm to shape. Make one batch, shape it, then start the next. Your hands will thank you.
Use a light touch. When you’re shaping the ghosts, don’t squeeze too hard. You want them to be firm enough to hold their shape but light enough to stay tender. Think of it like handling a baby bird—gentle but confident.
Let them rest. The ghosts need at least 30 minutes to set. I know it’s tempting to eat them right away, but they’ll be much better if you wait. The texture firms up, the flavors settle, and the eyes stay put. Trust the process.
Storage matters. These treats are best within 24 hours. After that, they start to get stale. Store them in an airtight container at room temperature. Don’t refrigerate them—the cold makes them hard and chewy in a bad way.
Variations & Adaptations
One of the best things about this recipe is how easy it is to adapt. Once you’ve got the basic technique down, you can make all kinds of fun variations.
Chocolate Ghosts: Melt ½ cup of chocolate chips with the butter before adding the marshmallows. This gives you a chocolate-flavored base that’s delicious and spooky. Use white candy eyes for contrast.
Gluten-Free Option: This recipe is naturally gluten-free if you use certified gluten-free crispy rice cereal. Most major brands are gluten-free, but double-check the label if you’re serving someone with celiac disease.
Pumpkin Spice Ghosts: Add 1 teaspoon of pumpkin pie spice to the marshmallow mixture along with the vanilla. The warm spices make these feel extra cozy for fall. Top with a tiny orange candy pumpkin for a fun twist.
Vegan Ghosts: Use vegan butter and vegan marshmallows. The texture will be slightly different—a little denser—but they’re still delicious. Dandies brand works beautifully.
Funfetti Ghosts: Stir in ¼ cup of rainbow sprinkles right after the cereal. They add a pop of color and make the ghosts look like they’re celebrating. Perfect for a Halloween party that’s more fun than scary.
I once tried making these with Fruity Pebbles instead of Rice Krispies. The color was… interesting. Bright pink ghosts aren’t exactly traditional, but my niece loved them. So there’s that.
Serving & Storage Suggestions
These ghosts are best served at room temperature. The texture is soft and chewy with just a hint of crunch from the cereal. If you’ve made them ahead of time, let them sit out for 10-15 minutes before serving to take the chill off.
Presentation Ideas: Arrange the ghosts on a platter lined with black or orange parchment paper. Add a few candy pumpkins or candy corn around the edges for color. You can also stick them on lollipop sticks for a fun treat-on-a-stick option—just insert the stick before the mixture sets.
Storage: Store any leftover ghosts in an airtight container at room temperature. They’ll stay fresh for up to 3 days, but they’re best within the first 24 hours. After that, the cereal starts to soften and lose its crunch. Don’t refrigerate them—the cold makes them tough.
Freezing: You can freeze these for up to a month. Wrap each ghost individually in plastic wrap, then place them in a freezer-safe bag. Thaw at room temperature for about 30 minutes before serving. They won’t be quite as fresh as the day you made them, but they’re still pretty good.
Flavor Development: These treats are actually best the day you make them. The marshmallow is soft and the cereal is perfectly crunchy. After a day, the texture starts to change. So if you’re making them for a party, make them the morning of or the night before.
Nutritional Information & Benefits
Let’s be real—these are a treat. They’re not health food, and that’s okay. But here’s what you should know if you’re keeping track.
Per serving (1 ghost, based on 24 servings):
- Calories: 120
- Fat: 3g
- Carbohydrates: 24g
- Sugar: 12g
- Protein: 1g
- Sodium: 100mg
Dietary Considerations: This recipe is naturally nut-free and egg-free. It can be made gluten-free with the right cereal and vegan with appropriate substitutions. The main allergens are dairy (butter) and potentially gluten (depending on your cereal choice).
Health Benefits: Look, I’m not going to pretend these are good for you. But they do provide quick energy from the carbohydrates, and the small portion size makes them easy to enjoy in moderation. Plus, the act of making them with kids is a wonderful way to create memories. That counts for something, right?
If you’re looking for a healthier alternative, try these no-bake peanut butter chocolate protein energy balls for a treat that’s still satisfying but packed with protein.
Conclusion
These Easy Halloween Rice Krispie Ghosts Treats are exactly what a Halloween recipe should be—fun, simple, and absolutely delicious. They don’t require fancy skills or expensive ingredients. They just need a little butter, a little patience, and a willingness to get your hands sticky.
I love that each ghost has its own personality. Some look surprised. Some look grumpy. Some look like they’re telling a secret. And that’s what makes them special—they’re not perfect, but they’re perfect for Halloween.
So grab a bag of marshmallows, call the kids (or your inner child), and make some ghosts. Trust me, you’ll smile when you see them. And you’ll definitely smile when you eat them.
Have you made these? I’d love to hear how they turned out. Leave a comment below and tell me about your ghost-making adventures. And if you came up with a fun variation, share that too—I’m always looking for new ideas!
Frequently Asked Questions
Can I use a different cereal instead of Rice Krispies?
Absolutely! Cocoa Pebbles, Fruity Pebbles, or even plain cornflakes work well. Just keep in mind that different cereals have different textures and sweetness levels. If you’re using something sweeter, you might want to reduce the marshmallows slightly.
How do I keep the mixture from sticking to my hands?
Butter your hands first, then dip them in cool water. The butter creates a barrier, and the water prevents the butter from melting too quickly. Re-wet your hands between each ghost. This is the trick that makes shaping possible.
Can I make these ahead of time?
Yes! You can make them up to 2 days ahead. Store them in an airtight container at room temperature. If you’re making them more than a day ahead, wait to add the eyes and mouths until the day you’re serving them—they stay fresher that way.
Why did my ghosts turn out hard?
You likely overcooked the marshmallows. They should just barely melt—remove them from the heat as soon as they’re smooth and glossy. If they start to brown or bubble, you’ve gone too far. Next time, use lower heat and stir constantly.
Can I freeze these treats?
Yes, you can freeze them for up to a month. Wrap each ghost individually in plastic wrap, then place them in a freezer-safe bag. Thaw at room temperature for about 30 minutes before serving. They won’t be quite as fresh, but they’re still tasty.
Pin This Recipe!
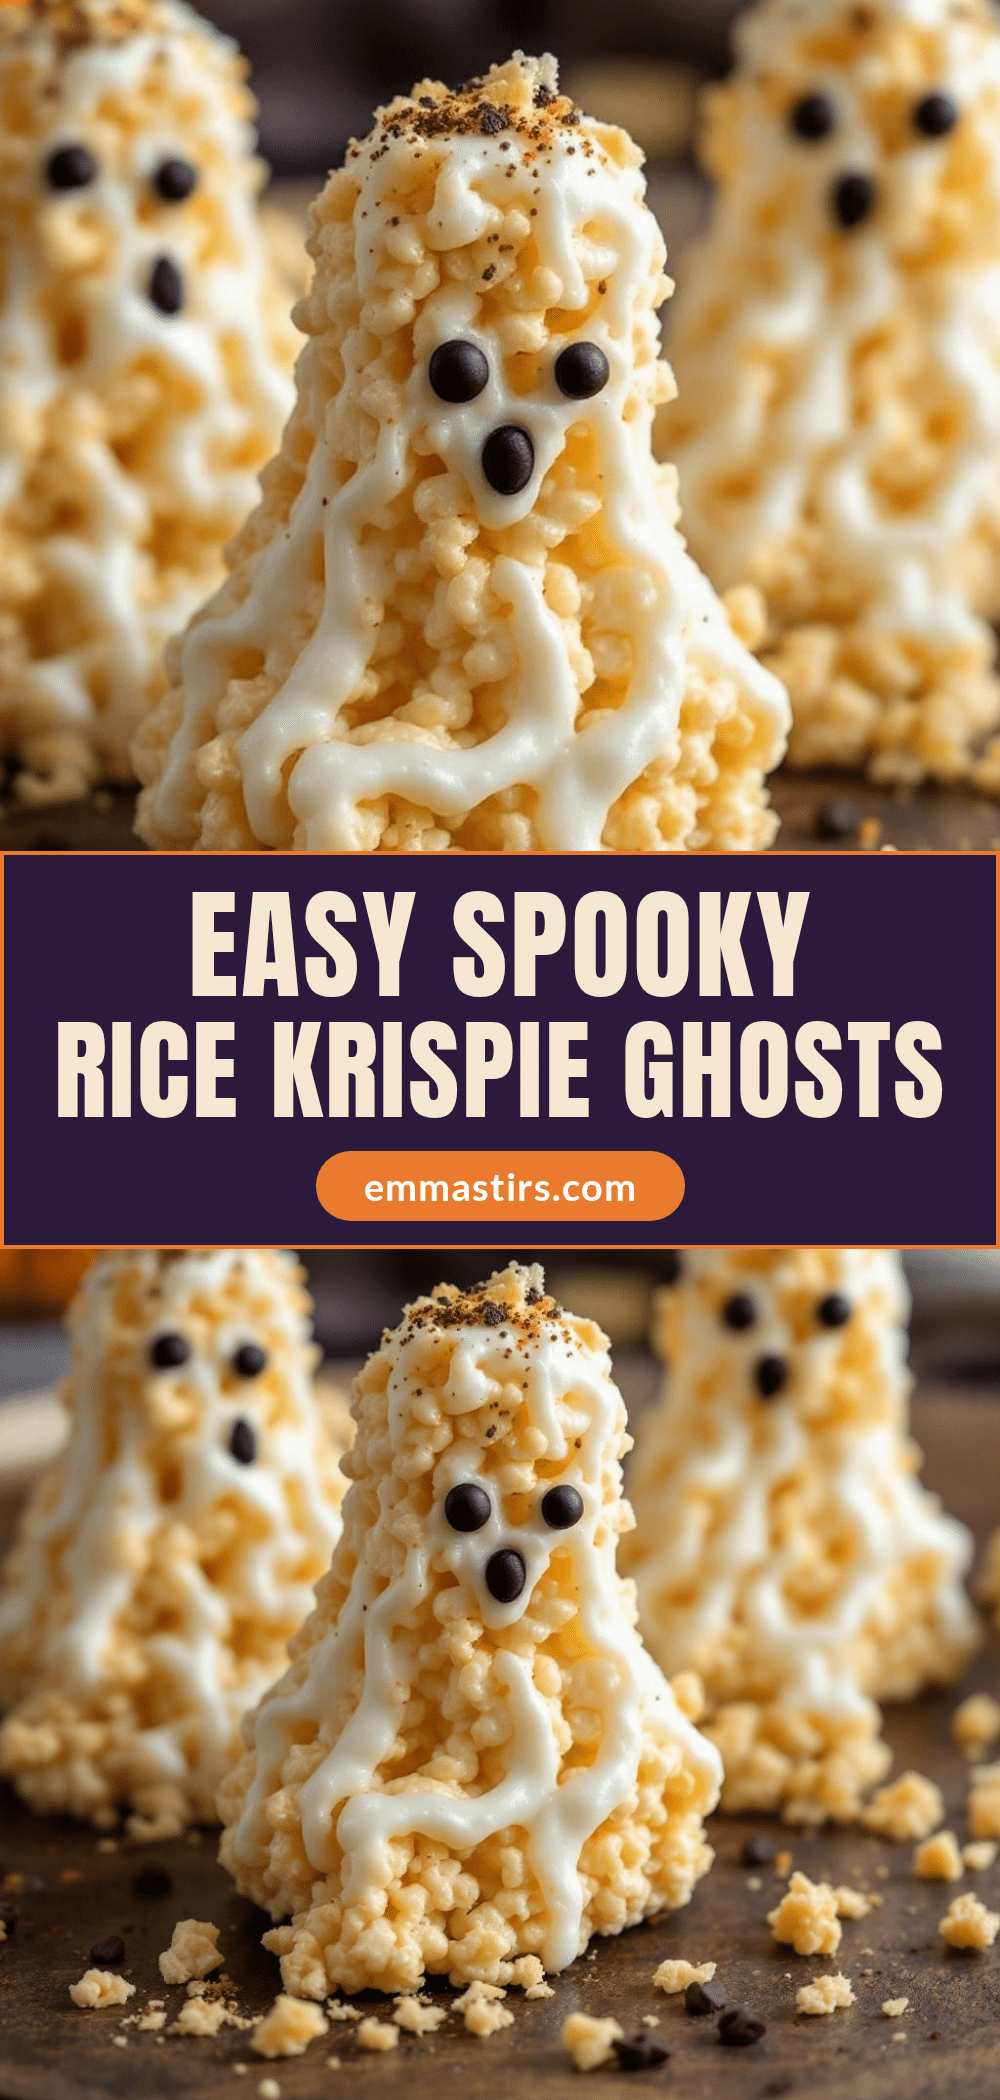
Easy Halloween Rice Krispie Ghosts Treats
These Easy Halloween Rice Krispie Ghosts Treats are fun, simple, and absolutely delicious. No fancy molds or special tools needed—just a stovetop and a little patience to create adorable, lopsided ghosts that everyone will love.
- Prep Time: 10 minutes
- Cook Time: 10 minutes
- Total Time: 20 minutes
- Yield: 24 servings 1x
- Category: Dessert
- Cuisine: American
Ingredients
- 3 tablespoons unsalted butter (plus extra for greasing hands and pan)
- 1 package (10 oz) regular marshmallows (about 40 large or 4 cups mini)
- 6 cups Rice Krispies cereal
- ¼ teaspoon vanilla extract (optional)
- Pinch of salt
- Candy eyes (about 24-30 per batch)
- Black icing tube (or melted chocolate chips)
- Parchment paper
Instructions
- Prepare your workspace. Line a large baking sheet or cutting board with parchment paper. Lightly butter the parchment. Set aside a small bowl of cool water nearby.
- Melt the butter. In a large pot, melt 3 tablespoons of butter over medium-low heat until just starting to bubble.
- Add the marshmallows. Pour in the entire bag of marshmallows and stir constantly until smooth and glossy, about 3-4 minutes. Stir in vanilla extract and salt if using.
- Remove from heat. Immediately pour in 6 cups of Rice Krispies cereal and stir gently until every piece is coated.
- Let it cool slightly. Let the mixture sit in the pot for 2-3 minutes until warm but handleable.
- Butter your hands. Rub a little butter on your palms, then dip them in cool water.
- Shape the ghosts. Grab a handful of mixture (golf ball to tangerine size), roll into a ball, then pinch and pull one side to form a teardrop shape. Place on prepared parchment.
- Add the eyes immediately. Press two candy eyes into the round end of each ghost while still warm.
- Let them set completely. Leave ghosts on parchment for at least 30 minutes to firm up.
- Draw the mouths. Use black icing tube to draw mouths on the ghosts. Let icing dry for 10-15 minutes before serving or storing.
Notes
Don’t overheat the marshmallows—remove from heat as soon as melted. Wet hands are essential for shaping. Work in small batches if doubling. Ghosts are best within 24 hours. Store in airtight container at room temperature; do not refrigerate.
Nutrition
- Serving Size: 1 ghost
- Calories: 120
- Sugar: 12
- Sodium: 100
- Fat: 3
- Saturated Fat: 2
- Carbohydrates: 24
- Protein: 1
Keywords: Halloween treats, Rice Krispie treats, ghost treats, no-bake dessert, easy Halloween recipe, kid-friendly, marshmallow treats


