Love this? Save it for later!
Share the inspiration with your friends
I want something fun for dinner tonight, but I also need it to be fast and not require a trip to the store for weird ingredients. That’s the exact thought that hit me last October when I was staring at a bag of orange bell peppers and a pound of ground beef in my fridge. I had this sudden, stubborn image in my head—little pepper faces grinning up from a baking dish, all cheesy and savory. It felt ridiculous and perfect all at once. Honestly, the hardest part was carving the tiny faces, and even that took maybe two minutes per pepper. These Easy Jack-O-Lantern Stuffed Bell Peppers turned out exactly like I hoped they would—cute enough to make the kids laugh and hearty enough to count as a real dinner. They’re basically a complete meal in a vegetable bowl, and the little faces make everyone at the table smile. That’s a win in my book any night of the week.
These little guys have become my go-to for Halloween week when we want something festive but don’t want to eat candy for dinner. They are savory, cheesy, and packed with all the cozy flavors you crave when the weather turns cool. Plus, you can prep the filling ahead of time and just stuff and bake when you’re ready. It’s the kind of recipe that feels special without any stress.
Why You’ll Love This Recipe
I’ve made stuffed peppers a hundred different ways over the years, and this version is hands-down the most fun. But don’t let the cute face fool you—it’s also one of the most reliable recipes in my rotation. I tested it with different fillings, different pepper sizes, and even different carving techniques to make sure it works every single time.
- Fun for All Ages : Kids love helping carve the faces, and adults love that it feels festive without being over-the-top. It’s a Halloween dinner that actually gets eaten.
- Simple Ingredients : You probably have most of these in your pantry right now. Ground beef, rice, cheese, tomato sauce—no fancy stuff required.
- Perfect for a Busy Weeknight : From start to finish, these come together in about 45 minutes. You can even assemble them the night before and just bake them when you get home.
- Naturally Gluten-Free : If you use gluten-free breadcrumbs or skip them, this recipe is totally friendly for gluten-free eaters. No special flours needed.
- Customizable Filling : Swap the beef for turkey, chicken, or even a hearty plant-based crumble. The peppers are just a vessel for whatever filling you love.
What really sets these apart from other stuffed pepper recipes is the carving. It’s not just for show—cutting the faces actually lets steam escape during baking, which keeps the peppers tender without getting mushy. And the little cheese smiles that peek through the holes? That’s just pure joy on a plate. If you’re looking for more cozy fall dinners, you might also love this cheesy ground beef stuffed bell peppers recipe for a no-carve version that’s just as satisfying.
What Ingredients You Will Need
This recipe uses simple, wholesome ingredients that come together to create something truly satisfying. You don’t need a specialty grocery store for any of these—just a quick trip to your regular market will do.
- 4 large orange bell peppers (look for ones that sit flat and have a wide base—they’re easier to carve and won’t tip over in the dish)
- 1 pound ground beef (85/15 is my sweet spot—lean enough to not be greasy, but fatty enough to stay juicy)
- 1 cup cooked white rice (leftover rice works great here; you can also use brown rice or cauliflower rice for a lower-carb option)
- 1 small yellow onion, finely diced (about 1/2 cup—adds sweetness and depth)
- 2 cloves garlic, minced (fresh is best, but jarred minced garlic works in a pinch)
- 1 can (15 ounces) tomato sauce (I prefer Hunt’s or Muir Glen for clean flavor—no added sugar)
- 1 teaspoon dried oregano (adds that classic Italian-ish vibe that pairs perfectly with the beef and peppers)
- 1/2 teaspoon smoked paprika (optional, but it adds a subtle smokiness that makes the filling taste like it cooked all day)
- 1/2 teaspoon salt (plus more to taste)
- 1/4 teaspoon black pepper
- 1 cup shredded mozzarella cheese (divided—use part for the filling and part for topping the faces)
- 1/4 cup grated Parmesan cheese (adds a salty, nutty kick to the filling)
- 2 tablespoons olive oil (for sautéing the onion and garlic)
- Optional: fresh parsley or basil for garnish
For the filling, I recommend using a high-quality ground beef from a trusted source if you can. I’ve noticed that grass-fed beef tends to be a bit leaner, so you might need to add an extra tablespoon of olive oil to keep the filling moist. If you’re looking for a lighter option, ground turkey works beautifully—just be sure to add a little extra moisture with an additional 1/4 cup of tomato sauce.
The cheese is where you can really have fun. Mozzarella gives that classic stretchy pull, but you can swap in cheddar for a sharper flavor or pepper jack for a little heat. I’ve even used a dairy-free shredded cheese blend for a lactose-free version, and it melted surprisingly well.
Equipment Needed
You don’t need a ton of fancy tools for this recipe, which is exactly how I like it. Here’s what you’ll need:
- Large skillet or frying pan (for cooking the filling—any non-stick or cast iron works great)
- Sharp paring knife (this is crucial for carving the faces—a dull knife will just squash the pepper)
- Small spoon or melon baller (for scooping out the seeds and membranes)
- Baking dish (a 9×13-inch dish works perfectly for 4 large peppers)
- Aluminum foil (for covering the dish during the first part of baking)
- Cutting board (preferably one that’s stable and won’t slip around)
- Measuring cups and spoons (for accuracy, though I often eyebit the spices)
If you don’t have a paring knife, a small serrated knife works too—just be gentle so you don’t tear the pepper skin. I’ve also used a tiny pumpkin carving tool from a Halloween kit, and honestly, it works perfectly for this. The key is to have something small and sharp so you can make clean cuts.
For the baking dish, any oven-safe dish that fits the peppers snugly will work. You want them to be close together so they support each other and don’t tip over during baking. If your dish is too big, you can crumple a piece of foil and tuck it between the peppers to hold them upright.
Preparation Method
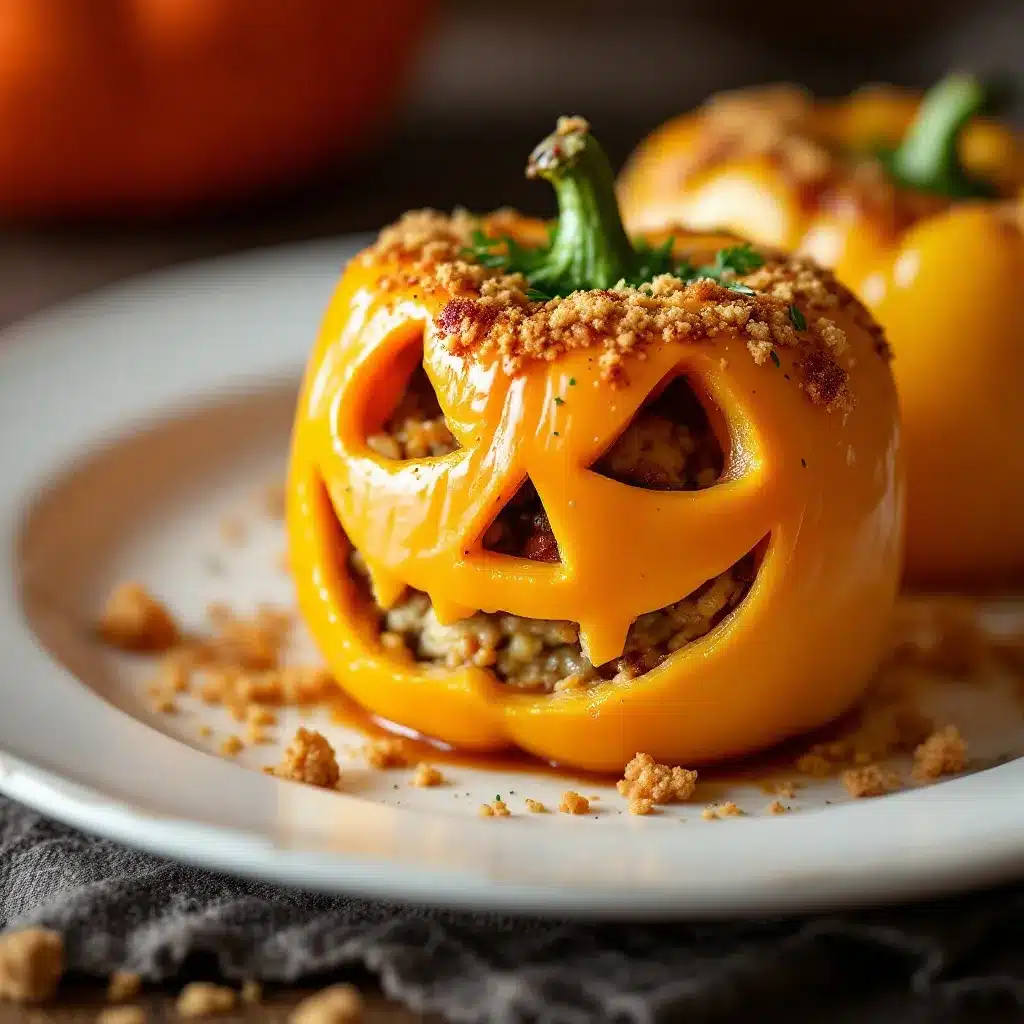
Let’s walk through this step by step. I promise it’s easier than it looks, and the faces make it so much fun.
- Preheat your oven to 375°F (190°C). While it’s heating up, bring a large pot of water to a boil. You’ll blanch the peppers briefly to soften them just enough for easy carving.
- Prep the peppers. Wash the orange bell peppers and pat them dry. Using a sharp knife, cut the tops off each pepper—about 1/2 inch from the top. Set the tops aside (you can use the little stem pieces as hats if you want, but I usually just toss them). Scoop out the seeds and white membranes from inside each pepper. Rinse them out and pat dry again.
- Blanch the peppers. Drop the hollowed peppers into the boiling water for 3 minutes. This softens them just enough that carving is easy, but they won’t fall apart. Remove them with tongs and let them drain upside down on a paper towel. This is a trick I learned after my first batch of rock-hard peppers—trust me, it makes a difference.
- Carve the faces. Once the peppers are cool enough to handle, use your paring knife to cut small jack-o-lantern faces into one side of each pepper. Triangles for eyes, a little zigzag or crescent for a mouth—keep it simple. Don’t cut too close to the top or bottom, or the pepper might split during baking. I’ve found that making the mouth slightly larger than the eyes gives the best “grinning” effect.
- Cook the filling. Heat the olive oil in a large skillet over medium heat. Add the diced onion and cook for 3-4 minutes until it’s soft and translucent. Add the minced garlic and cook for another 30 seconds until fragrant. Add the ground beef and break it apart with a wooden spoon. Cook until browned, about 6-8 minutes. Drain off any excess fat if needed.
- Season the filling. Stir in the cooked rice, tomato sauce (reserve about 1/4 cup for later), oregano, smoked paprika, salt, and pepper. Let it simmer for 2-3 minutes so the flavors meld together. Taste and adjust seasoning—I usually add a pinch more salt here. Remove from heat and stir in 1/2 cup of the mozzarella cheese and all of the Parmesan.
- Stuff the peppers. Place the carved peppers upright in your baking dish. Spoon the filling into each pepper, pressing gently to pack it in. Don’t overstuff—you want the filling to be level with the top of the pepper, not mounded over. If you have extra filling, you can spoon it around the peppers in the dish.
- Add the topping. Spoon the reserved tomato sauce over the tops of the stuffed peppers. Sprinkle the remaining 1/2 cup of mozzarella cheese over each pepper, letting some fall into the carved mouth and eyes. This is what creates the “cheesy grin” effect, so don’t skip it.
- Bake. Cover the dish with aluminum foil and bake for 25 minutes. Remove the foil and bake for another 10-15 minutes until the cheese is bubbly and lightly golden. The peppers should be tender but still hold their shape.
- Rest and serve. Let the peppers sit for 5 minutes before serving. This helps the filling set and makes them easier to handle. Garnish with fresh parsley or basil if you like, and serve warm.
The first time I made these, I forgot to blanch the peppers and ended up with faces that looked more like angry scribbles than cute jack-o-lanterns. The peppers were so firm that my knife kept slipping, and I nearly cut myself. So please, learn from my mistake and take those extra three minutes to blanch them. Your fingers—and your dinner—will thank you.
Cooking Tips & Techniques
Over the years, I’ve made these peppers more times than I can count, and I’ve picked up a few tricks that make the process smoother and the results more consistent.
Choose the right peppers. Not all orange bell peppers are created equal. Look for ones that are squat and wide rather than tall and narrow. They sit better in the dish and give you a bigger surface area for carving. Also, make sure the bottom is flat—if it wobbles, the pepper will tip over during baking and all your careful carving will be sideways.
Don’t over-blanch. Three minutes is the sweet spot. Any longer, and the peppers get too soft and might tear when you’re stuffing them. Any shorter, and they’re still too firm to carve easily. I set a timer every single time because I have a tendency to get distracted and let things boil too long.
Make the faces simple. You don’t need to be an artist here. Two triangle eyes and a crescent mouth are plenty. I once tried to carve a detailed pumpkin face with a nose and eyebrows, and it took forever. Plus, the cheese melted and filled in all the details anyway. Simple is better.
Use leftover rice. If you have leftover rice from takeout or a previous meal, this is the perfect place to use it. Day-old rice is actually better because it’s slightly drier and won’t make the filling mushy. If you’re cooking rice fresh, let it cool completely before mixing it into the filling.
Prep ahead for busy nights. You can blanch and carve the peppers, cook the filling, and stuff everything a day in advance. Just cover the dish and refrigerate. When you’re ready to bake, add about 10 minutes to the covered baking time since you’re starting from cold. This is a lifesaver on Halloween when you’re busy with costumes and candy.
One thing I’ve learned the hard way: don’t skip the foil cover for the first part of baking. The steam helps cook the peppers through without drying out the filling. If you bake them uncovered the whole time, the peppers can get a little leathery on the outside while the inside is still firm.
Variations & Adaptations
This recipe is incredibly forgiving, and I’ve tried quite a few variations over the years. Here are some of my favorites:
Turkey and Quinoa Filling : Swap the ground beef for ground turkey and use cooked quinoa instead of rice. This lightens things up significantly while still keeping the filling hearty. I made this version for a friend who was doing a Whole30, and she asked for the recipe twice.
Vegetarian Black Bean and Corn Filling : Skip the meat entirely and use a can of drained black beans and a cup of frozen corn (thawed). Add an extra 1/2 cup of tomato sauce to keep things moist. This version is surprisingly filling and has a nice texture contrast from the corn.
Spicy Chorizo Version : Use Mexican chorizo instead of ground beef for a spicy, smoky twist. Be sure to drain the fat well after cooking, as chorizo releases a lot of oil. This pairs beautifully with pepper jack cheese on top.
Keto-Friendly Adaptation : Replace the rice with riced cauliflower (fresh or frozen, sautéed until dry) and use full-fat cheese. This version is low-carb and keto-friendly without sacrificing flavor. I’ve made it for myself on low-carb weeks, and it hits the spot.
Cheesy Broccoli and Chicken Filling : Use shredded rotisserie chicken and add 1 cup of finely chopped steamed broccoli to the filling. The broccoli adds color and nutrients, and the chicken keeps it light. This is a great way to use up leftover chicken from a tender slow cooker chicken breast recipe.
My personal favorite variation is the chorizo one. I made it for a Halloween party a few years ago, and people were fighting over the last pepper. The smokiness from the chorizo combined with the sweet orange pepper is just incredible.
Serving & Storage Suggestions
These peppers are best served warm, right out of the oven. Let them rest for 5 minutes so the filling sets and the cheese stops being lava-hot. I like to serve them on a plate with a simple side salad or some crusty bread to soak up any extra sauce in the dish.
For a complete fall dinner, pair them with roasted vegetables like Brussels sprouts or sweet potatoes. The sweetness of the roasted veggies complements the savory filling perfectly. You could also serve them alongside a fresh low-calorie fruit salad with mint for a lighter counterpoint.
Storage : Leftover stuffed peppers keep well in the refrigerator for up to 4 days. Store them in an airtight container, and they’ll actually taste better the next day as the flavors continue to meld. The peppers will soften a bit, but the flavor is still fantastic.
Freezing : You can freeze these for up to 3 months. The best way is to assemble the peppers completely (including the cheese topping) but don’t bake them. Wrap each pepper individually in plastic wrap, then place them in a freezer bag. When you’re ready to eat, thaw them in the refrigerator overnight and bake as directed, adding about 10 minutes to the covered baking time.
Reheating : To reheat individual servings, microwave on high for 1-2 minutes, or until heated through. For better texture, reheat in a 350°F oven for about 15 minutes. The oven method keeps the peppers from getting too soft.
One thing I’ve noticed is that the flavors actually deepen overnight. The tomato sauce and spices have time to really soak into the rice and meat, making leftovers taste even better than the first serving. So don’t be sad if you have extras—you’re in for a treat.
Nutritional Information & Benefits
Here’s an approximate nutritional breakdown per serving (one stuffed pepper):
| Nutrient | Amount |
|---|---|
| Calories | 410 |
| Protein | 28g |
| Carbohydrates | 28g |
| Fiber | 4g |
| Sugar | 8g |
| Fat | 20g |
| Saturated Fat | 8g |
| Sodium | 680mg |
Bell peppers are an excellent source of vitamin C—in fact, one orange bell pepper contains more vitamin C than an orange. They’re also rich in vitamin A, which is great for eye health and immune function. The orange color comes from beta-carotene, an antioxidant that your body converts into vitamin A.
The ground beef provides high-quality protein and important minerals like iron and zinc. If you use lean ground beef, you can reduce the fat content significantly. For a lighter option, ground turkey or chicken works well and cuts the calories and fat by about 30%.
This recipe is naturally gluten-free (just check your tomato sauce label to be sure) and can be made dairy-free by using vegan cheese or skipping the cheese altogether. It’s also low-carb friendly if you swap the rice for cauliflower rice.
Potential allergens include dairy (cheese) and gluten (if using certain brands of tomato sauce or rice that may have cross-contamination). Always check labels if you’re cooking for someone with allergies.
Conclusion
These Easy Jack-O-Lantern Stuffed Bell Peppers are proof that you can have fun with your food without sacrificing flavor or nutrition. They’re the kind of recipe that makes everyone at the table smile, whether you’re serving them on Halloween night or just a random Tuesday when you need a little whimsy.
I love that this recipe is so adaptable—you can make it as simple or as fancy as you want, and it always turns out delicious. The filling is forgiving, the peppers are forgiving, and even if your carving skills are questionable (mine definitely are), the cheese covers up a multitude of sins.
I’d love to hear how yours turn out! Leave a comment below and let me know what faces you carved, what variations you tried, and whether your kids helped in the kitchen. And if you come up with a new filling combination, please share it—I’m always looking for new ideas to try.
Happy Halloween cooking, friends. May your peppers be orange, your cheese be melty, and your dinner be full of joy.
Frequently Asked Questions
Can I use other colors of bell peppers?
Absolutely! While orange peppers look the most like jack-o-lanterns, you can use red, yellow, or even green peppers. Red peppers are the sweetest, while green peppers have a slightly more bitter, grassy flavor. Just keep in mind that the “jack-o-lantern” effect won’t be as pronounced with non-orange peppers.
How do I keep the peppers from tipping over in the dish?
Choose peppers with flat bottoms, and place them close together in the dish so they support each other. If your dish is too big, you can crumple a piece of aluminum foil and tuck it between the peppers to hold them upright. Another trick is to slice a thin sliver off the bottom of each pepper to create a flat surface.
Can I make these in an air fryer?
Yes! Preheat your air fryer to 350°F (175°C). Place the stuffed peppers in the air fryer basket, making sure they’re not touching. Cook for 15-18 minutes, checking at the 12-minute mark. The air fryer gives a slightly crisper texture to the peppers, which I actually really like. Just be careful not to overcrowd the basket.
What can I use instead of rice?
You have plenty of options! Cooked quinoa, riced cauliflower, cooked lentils, or even cooked orzo pasta all work well. If you’re going low-carb, cauliflower rice is your best bet. Just make sure whatever you use is fully cooked before mixing it into the filling, as it won’t cook much more during baking.
How do I prevent the cheese from burning?
If you notice the cheese is getting too brown during the uncovered baking time, tent a piece of foil loosely over the dish. This will protect the cheese while still allowing the peppers to finish cooking. Also, make sure you’re not using a broiler setting by accident—bake at 375°F, not higher.
Pin This Recipe!
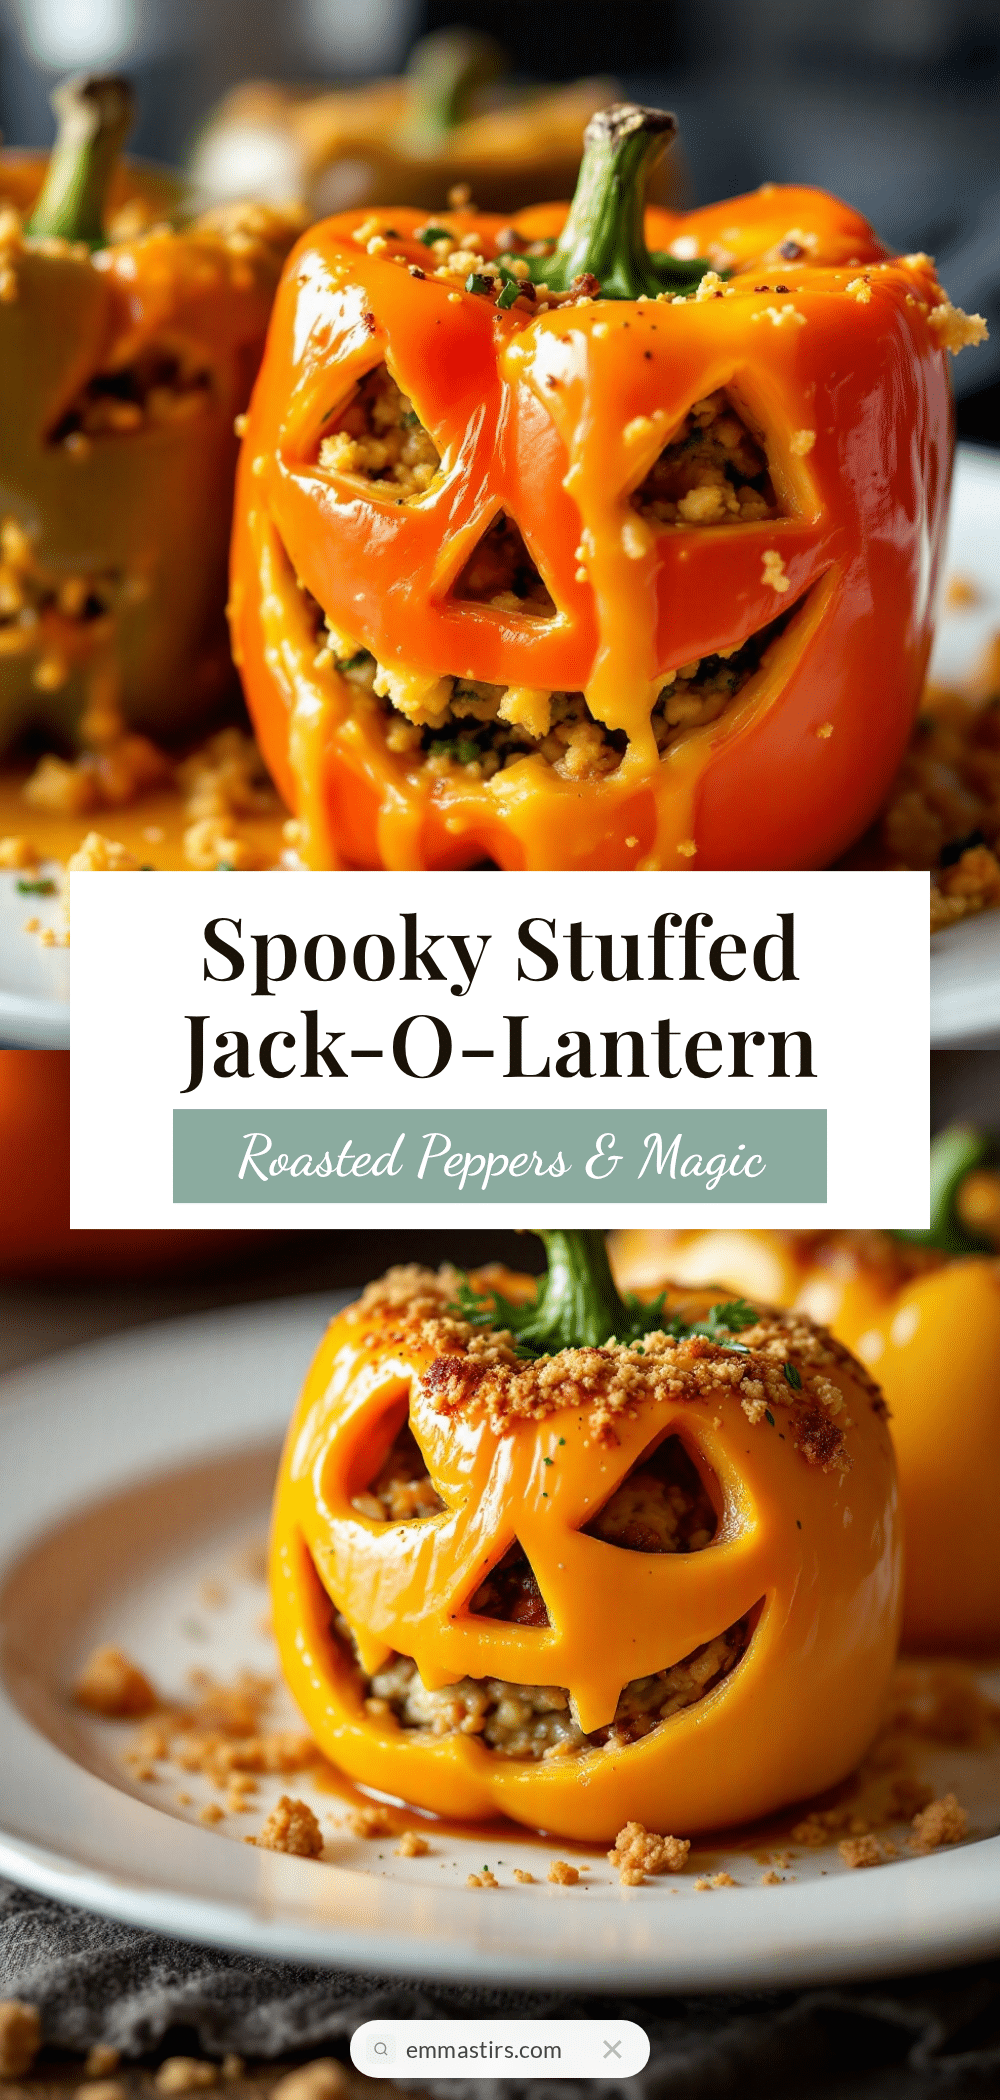
Easy Jack-O-Lantern Stuffed Bell Peppers: Best Fall Dinner
These Easy Jack-O-Lantern Stuffed Bell Peppers are a fun and hearty fall dinner. Carved orange bell peppers are filled with a savory mixture of ground beef, rice, and cheese, then baked until tender and bubbly.
- Prep Time: 15 minutes
- Cook Time: 40 minutes
- Total Time: 55 minutes
- Yield: 4 servings 1x
- Category: Main Course
- Cuisine: American
Ingredients
- 4 large orange bell peppers
- 1 pound ground beef (85/15)
- 1 cup cooked white rice
- 1 small yellow onion, finely diced (about 1/2 cup)
- 2 cloves garlic, minced
- 1 can (15 ounces) tomato sauce
- 1 teaspoon dried oregano
- 1/2 teaspoon smoked paprika (optional)
- 1/2 teaspoon salt
- 1/4 teaspoon black pepper
- 1 cup shredded mozzarella cheese, divided
- 1/4 cup grated Parmesan cheese
- 2 tablespoons olive oil
- Optional: fresh parsley or basil for garnish
Instructions
- Preheat your oven to 375°F (190°C). Bring a large pot of water to a boil.
- Wash the orange bell peppers and pat them dry. Cut the tops off each pepper—about 1/2 inch from the top. Scoop out the seeds and white membranes. Rinse and pat dry.
- Drop the hollowed peppers into the boiling water for 3 minutes. Remove with tongs and let them drain upside down on a paper towel.
- Once the peppers are cool enough to handle, use a paring knife to cut small jack-o-lantern faces into one side of each pepper (triangles for eyes, a zigzag or crescent for a mouth).
- Heat the olive oil in a large skillet over medium heat. Add the diced onion and cook for 3-4 minutes until soft and translucent. Add the minced garlic and cook for another 30 seconds until fragrant.
- Add the ground beef and break it apart with a wooden spoon. Cook until browned, about 6-8 minutes. Drain off any excess fat if needed.
- Stir in the cooked rice, tomato sauce (reserve about 1/4 cup for later), oregano, smoked paprika, salt, and pepper. Let it simmer for 2-3 minutes. Remove from heat and stir in 1/2 cup of the mozzarella cheese and all of the Parmesan.
- Place the carved peppers upright in a 9×13-inch baking dish. Spoon the filling into each pepper, pressing gently to pack it in. Spoon the reserved tomato sauce over the tops of the stuffed peppers.
- Sprinkle the remaining 1/2 cup of mozzarella cheese over each pepper, letting some fall into the carved mouth and eyes.
- Cover the dish with aluminum foil and bake for 25 minutes. Remove the foil and bake for another 10-15 minutes until the cheese is bubbly and lightly golden.
- Let the peppers sit for 5 minutes before serving. Garnish with fresh parsley or basil if desired.
Notes
Blanching the peppers for 3 minutes makes carving easier and prevents them from being too firm. Choose squat, wide peppers with flat bottoms for stability. The filling can be prepped a day in advance; add 10 minutes to covered baking time if starting from cold. For a gluten-free version, ensure tomato sauce is gluten-free.
Nutrition
- Serving Size: 1 stuffed pepper
- Calories: 410
- Sugar: 8
- Sodium: 680
- Fat: 20
- Saturated Fat: 8
- Carbohydrates: 28
- Fiber: 4
- Protein: 28
Keywords: stuffed bell peppers, jack-o-lantern peppers, Halloween dinner, fall dinner, ground beef stuffed peppers, easy dinner


