Love this? Save it for later!
Share the inspiration with your friends
Jaw literally dropped when I realized I had zero heavy cream in the fridge. Three layers of chocolate ganache were supposed to happen, and instead I was staring at a half-empty jar of peanut butter and a box of graham crackers like they held the answers to the universe. My mom always said I was dramatic. But honestly, that moment of panic turned into something better than the original plan ever could have been. This Easy No-Bake Reeses Peanut Butter Icebox Cake was born out of pure desperation and a serious craving for something cold, creamy, and ridiculously chocolatey.
The kitchen was a disaster—dirty spatulas everywhere, peanut butter smeared on the counter, and I was licking the last bits of cream cheese off my finger when it hit me. This was it. This was the dessert I’d been chasing. No oven required, no fussing with melted chocolate over a double boiler, just layer after layer of pure, unapologetic indulgence. And the best part? It actually set up perfectly in the fridge while I cleaned up the mess. There is something deeply satisfying about a dessert that does the hard work for you.
I’ve made this Easy No-Bake Reeses Peanut Butter Icebox Cake for every potluck, birthday, and random Tuesday since that night. It never lasts long. People hover around the pan, pretending to have conversations, but really they’re just waiting for another slice. And I get it. The combination of creamy peanut butter filling, crunchy chocolate wafers, and that thick layer of melted peanut butter and chocolate on top is basically irresistible. It’s the kind of dessert that feels fancy but is secretly the easiest thing you’ll make all week. Trust me on this one.
Why You’ll Love This Recipe
Let me tell you why this Easy No-Bake Reeses Peanut Butter Icebox Cake has earned a permanent spot in my dessert rotation. First off, it requires zero baking skills. If you can stir and spread, you can make this cake. I tested this recipe with my sister who once burned water, and even she nailed it on the first try.
- Quick & Easy : Comes together in about 20 minutes of active prep time. The fridge does the rest of the work while you binge your favorite show or, you know, actually socialize with your guests.
- Simple Ingredients : Cream cheese, peanut butter, powdered sugar, Cool Whip, chocolate wafers, and a few extra Reeses cups for good measure. No fancy grocery store trips needed.
- Perfect for Any Occasion : This cake works for birthday parties, summer cookouts, holiday gatherings, or just a Tuesday night when you need something sweet. It travels well too, which is a huge bonus.
- Crowd-Pleaser : I’ve served this to kids, picky eaters, and adults who claim they don’t like sweets. Every single person has asked for the recipe. It’s that good.
- Unbelievably Delicious : The texture is what gets me every time. The wafers soften into a cake-like consistency while the filling stays light and fluffy. It’s like a peanut butter cheesecake and a chocolate cake had a beautiful baby.
What makes this version different from other icebox cakes is the layering technique. Most recipes have you just stack wafers and filling, but I take it a step further by pressing the wafers into the filling slightly so they absorb just enough moisture without turning into complete mush. It took me three tries to get that perfect balance, and now I’m sharing it with you. This isnt just another dessert—it’s the one that will make people think you spent hours in the kitchen when you really didn’t.
What Ingredients You Will Need
This recipe uses simple, mostly pantry-friendly ingredients to create something truly special. The magic happens when the peanut butter filling meets the chocolate wafers and everything melds together in the fridge overnight. Here is what you will need:
- Graham Crackers or Chocolate Wafers: I prefer using chocolate wafer cookies like Nabisco Famous Wafers because they add an extra layer of chocolatey goodness. But regular graham crackers work perfectly too. If you go with graham crackers, try the chocolate variety for a deeper flavor.
- Peanut Butter: Use creamy peanut butter for the smoothest filling. I recommend Skippy or Jif for the best texture. Natural peanut butter that separates can make the filling grainy, so stick with the processed stuff here—it really does make a difference.
- Cream Cheese: Full-fat cream cheese gives the filling that rich, tangy flavor that balances the sweetness. Make sure it’s softened to room temperature before you start, or you will end up with lumpy filling. Nobody wants lumpy filling.
- Powdered Sugar: This sweetens the filling without adding grittiness. Sift it if you’re feeling fancy, but honestly, I rarely do and it turns out fine.
- Cool Whip: Thawed Cool Whip keeps the filling light and airy. You can use homemade whipped cream if you prefer, but Cool Whip stabilizes better and makes the cake easier to slice cleanly. I’ve tested both, and Cool Whip wins for texture.
- Reeses Peanut Butter Cups: Chopped or whole, these go on top for that iconic look and extra peanut butter-chocolate hit. I like to use the miniatures because they’re easier to chop evenly.
- Chocolate Syrup or Melted Chocolate: A drizzle over the top adds visual appeal and a little extra chocolate. I use Hershey’s syrup most of the time, but melted semi-sweet chocolate chips work beautifully too.
- Butter: A small amount of melted butter mixed with crushed graham crackers or wafers for the base layer. This step is optional but gives the cake a firmer bottom that holds up better when slicing.
For substitutions, you can use dairy-free cream cheese and coconut whipped topping to make this dessert dairy-friendly. Almond butter works instead of peanut butter if you have allergies, though the flavor will be different. And if you’re gluten-free, look for gluten-free chocolate wafers or graham crackers—they exist and work perfectly.
Equipment Needed
You don’t need a fancy kitchen to pull off this Easy No-Bake Reeses Peanut Butter Icebox Cake. Here is what you will need:
- 9×13 Baking Dish or 8×8 Square Pan: The size determines how many layers you get. A 9×13 dish gives you more surface area and thinner layers, while an 8×8 pan creates taller, more dramatic slices. I prefer the 9×13 for parties because it feeds more people.
- Electric Mixer or Stand Mixer: Handheld works great. You need something to beat the cream cheese and peanut butter together until smooth. A whisk and some elbow grease will work too, but your arm will definitely feel it.
- Spatula: For spreading the filling evenly. A rubber spatula is your best friend here.
- Large Mixing Bowl: Big enough to hold all the filling ingredients without splattering everywhere.
- Plastic Wrap or Foil: To cover the cake while it chills. You don’t want it absorbing fridge odors overnight.
- Sharp Knife: For clean slices. Chill the cake completely before cutting, and wipe the knife between cuts for the best presentation.
If you don’t have an electric mixer, you can use a food processor to blend the cream cheese and peanut butter, then fold in the Cool Whip by hand. It’s a little more work but totally doable. And if you’re using a glass baking dish, just make sure it’s oven-safe if you decide to try a different recipe later. For this one, no heat required.
Preparation Method
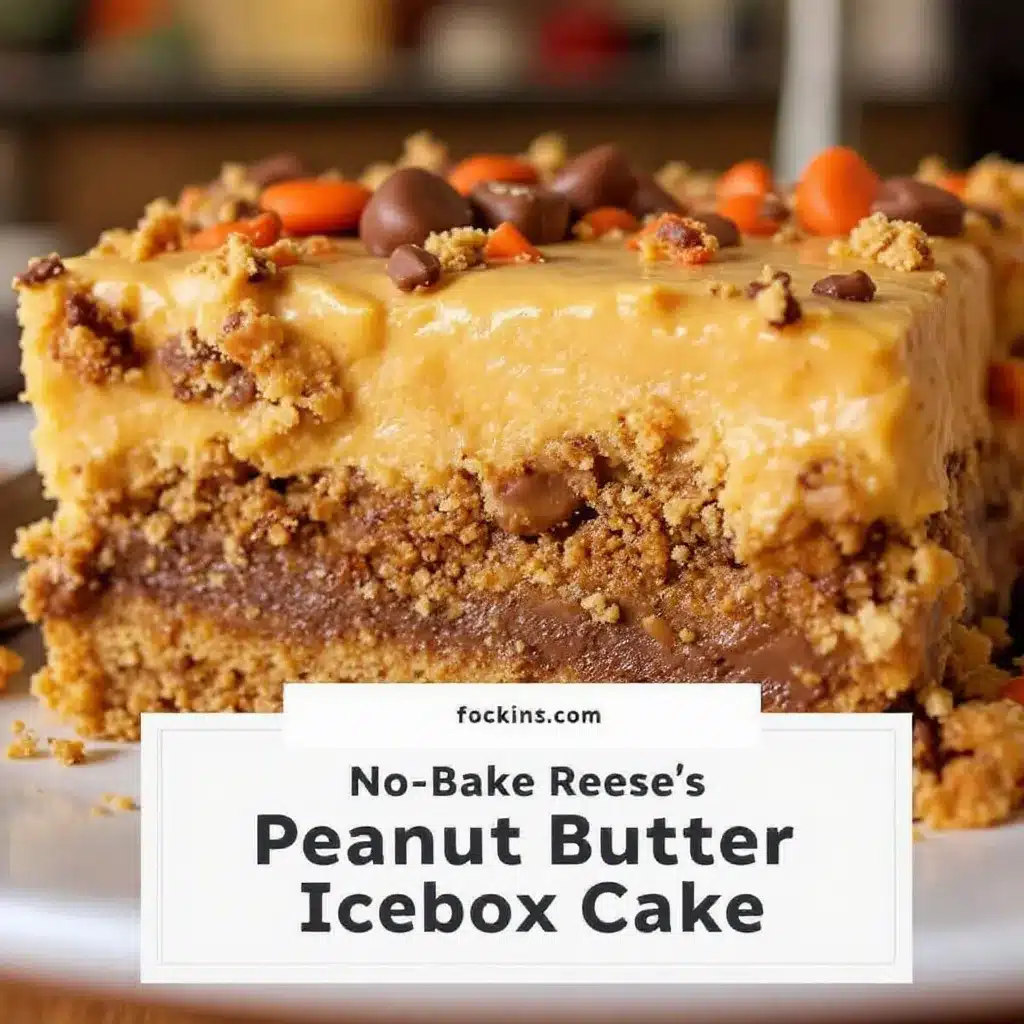
Alright, let’s get to the good part. Here is how to make this Easy No-Bake Reeses Peanut Butter Icebox Cake step by step. Take your time with each layer, and don’t rush the chilling process—that’s where the magic happens.
- Prepare the Base (Optional but Recommended): Crush about 1 cup of chocolate wafers or graham crackers into fine crumbs. Mix with 2 tablespoons of melted butter. Press this mixture firmly into the bottom of your 9×13 baking dish. Pop it in the fridge while you make the filling. This step gives your cake a sturdy foundation that won’t slide around when you slice it.
- Make the Peanut Butter Filling: In a large mixing bowl, beat 8 ounces of softened cream cheese with 1 cup of creamy peanut butter until smooth and fluffy. This takes about 2-3 minutes with an electric mixer on medium speed. Scrape down the sides of the bowl halfway through. Add 1 cup of powdered sugar and beat again until fully incorporated. The mixture will be thick and sticky at this point—that’s normal.
- Fold in the Cool Whip: Gently fold in 8 ounces of thawed Cool Whip using a rubber spatula. Start with about half, then add the rest. Fold until no white streaks remain. The filling should be light, fluffy, and easy to spread. If it seems too stiff, let it sit at room temperature for a few minutes and try again.
- Layer the Wafers: Spread a thin layer of the peanut butter filling (about 1 cup) evenly over the prepared base. Place a single layer of chocolate wafers on top, covering the surface completely. Break some wafers in half to fill in gaps. Press them gently into the filling so they start absorbing moisture.
- Repeat the Layers: Spread another layer of filling over the wafers, then add another layer of wafers. Repeat until you run out of filling, ending with a layer of filling on top. I usually get about 4 layers of wafers and 5 layers of filling in a 9×13 dish. The final layer should be smooth and even.
- Top with Reeses Cups: Chop about 1 cup of Reeses peanut butter cups into small pieces. Sprinkle them generously over the top layer of filling. Press them in slightly so they stick. Drizzle chocolate syrup or melted chocolate over everything for that picture-perfect finish.
- Chill Overnight: Cover the dish tightly with plastic wrap or foil. Refrigerate for at least 6 hours, but overnight is best. The wafers need time to soften completely, and the filling needs to set up firm enough to slice cleanly. Trust me, the wait is worth it.
- Slice and Serve: When you’re ready to serve, use a sharp knife to cut clean slices. Wipe the knife between cuts for the best presentation. Serve cold straight from the fridge. The cake will be creamy, slightly firm, and absolutely decadent.
A quick note: if you’re in a hurry, you can chill the cake for 4 hours, but the texture won’t be as perfect. The wafers will still be a bit crunchy in the center, which some people actually prefer. I like them fully softened, so I always go overnight.
Cooking Tips & Techniques
After making this Easy No-Bake Reeses Peanut Butter Icebox Cake more times than I can count, I’ve picked up a few tricks that make a real difference. Here are my best tips:
Soften your cream cheese properly. This is non-negotiable. Cold cream cheese will leave you with lumpy filling no matter how long you beat it. Take it out of the fridge 30 minutes before you start, or microwave it in 10-second bursts until it’s soft to the touch. I learned this the hard way after making a lumpy mess my first time.
Don’t overmix the Cool Whip. Once you fold it in, stop. Overmixing deflates the air and makes the filling dense instead of light and fluffy. You want gentle, sweeping motions until everything just comes together. It’s okay if there are a few tiny streaks—they’ll disappear as the cake chills.
Press the wafers gently. When you add each layer of wafers, press them into the filling just enough so they stick. If you press too hard, the filling squishes out the sides and makes a mess. Too light, and the wafers won’t soften evenly. It’s a gentle touch thing, but you’ll get the hang of it after one layer.
Use a serrated knife for slicing. A bread knife works wonders on this cake. The wafers can be a little stubborn, and a serrated blade cuts through them cleanly without dragging the filling. I ruined my first few slices with a dull chef’s knife and ended up with a plate of mush.
Let the cake sit at room temperature for 5 minutes before serving. This takes the chill off just enough so the flavors really shine. Cold temperatures can mute sweetness, so a few minutes on the counter makes a noticeable difference. Don’t leave it out longer than 15 minutes though, or it will start to get too soft.
Make it ahead of time. This cake actually gets better after a day or two in the fridge. The flavors meld together, and the texture becomes perfectly uniform. I often make it two days before I plan to serve it, and nobody has ever complained.
Variations & Adaptations
One of the best things about this Easy No-Bake Reeses Peanut Butter Icebox Cake is how easy it is to switch up. Here are some variations I’ve tried and loved:
Chocolate Peanut Butter Dream: Swap half the peanut butter for Nutella or chocolate hazelnut spread. The filling becomes even richer, and the chocolate flavor deepens. I did this for a friend’s birthday, and she said it was the best cake she’d ever had. High praise.
Cookies and Cream Twist: Replace the chocolate wafers with Oreo cookies (cream filling and all). Crush a few extra Oreos and sprinkle them between layers for added crunch. This version is a hit with kids and anyone who loves cookies and cream ice cream.
Gluten-Free Option: Use gluten-free chocolate wafer cookies or gluten-free graham crackers. Most brands work well, just make sure they’re sturdy enough to hold up to the filling. I’ve tested this with Schar brand wafers, and the texture was spot on.
Dairy-Free Adaptation: Use dairy-free cream cheese (like Kite Hill or Tofutti) and coconut whipped topping. The filling will be slightly less tangy, but still delicious. I served this at a dairy-free potluck and got rave reviews from people who didn’t even know it was dairy-free.
Peanut Butter Lover’s Version: Add a layer of melted peanut butter chips between the wafers for an extra punch of peanut butter flavor. You can also drizzle warm peanut butter over the top before adding the Reeses cups. This one is for the true peanut butter fanatics out there.
Fruity Summer Version: Add a layer of sliced strawberries or bananas between the wafers. The fruit adds freshness that cuts through the richness. I made this for a Fourth of July barbecue, and it was gone in 20 minutes. Just make sure to pat the fruit dry so it doesn’t make the filling watery.
If you’re looking for other no-bake treats, you might also enjoy my Easy No-Bake Peanut Butter Chocolate Protein Energy Balls for a healthier snack option that still satisfies that peanut butter craving. And for a savory twist, these Flavorful Grilled Chicken Skewers make a great main dish to serve before this indulgent dessert.
Serving & Storage Suggestions
This Easy No-Bake Reeses Peanut Butter Icebox Cake is best served cold, straight from the fridge. The texture is perfect when it’s firm but still creamy, like a frozen cheesecake that’s been allowed to soften just slightly. I like to slice it into neat squares and serve each piece with a dollop of whipped cream and an extra drizzle of chocolate syrup. It looks impressive without much effort.
For presentation, wipe the edges of the dish clean before serving. The filling can smear against the sides, and a clean dish makes the cake look professional. If you’re bringing this to a party, assemble it directly in a disposable aluminum pan for easy transport. Just cover it with foil and you’re good to go.
Storage: Keep the cake covered in the refrigerator for up to 5 days. The flavors actually improve after a day or two as the wafers fully soften and the filling sets completely. I’ve never had leftovers last longer than 3 days in my house, but theoretically it will keep just fine.
Freezing: This cake freezes beautifully. Wrap the entire dish tightly in plastic wrap, then a layer of foil. Freeze for up to 3 months. To serve, thaw in the refrigerator overnight. The texture stays creamy and the wafers don’t get mushy. I often make two cakes at once—one for now and one for later.
Reheating: You don’t really reheat this cake, but if you prefer a softer texture, let it sit at room temperature for 10-15 minutes before serving. Some people like the wafers a little firmer, so adjust based on your preference. I like mine fully softened, so overnight chilling is my go-to.
This cake pairs beautifully with a cup of coffee or a cold glass of milk. For a more elaborate dessert spread, serve it alongside Cozy One-Bowl Banana Bread with Brown Butter and Walnuts for a double dose of comfort food.
Nutritional Information & Benefits
Let’s be real—this Easy No-Bake Reeses Peanut Butter Icebox Cake is an indulgence. But that doesn’t mean it can’t fit into a balanced lifestyle. Here’s a rough estimate of what you’re looking at per serving (based on 12 servings):
- Calories: Approximately 380-420 per slice
- Protein: 8-10 grams (thanks to the peanut butter and cream cheese)
- Fat: 24-28 grams
- Carbohydrates: 38-42 grams
- Sugar: 28-32 grams
- Fiber: 2-3 grams
The peanut butter provides a decent amount of protein and healthy fats, which helps keep you fuller longer. Cream cheese adds calcium and a little protein too. And while this isn’t a health food by any stretch, it’s made with real ingredients you can recognize—no weird preservatives or artificial flavors.
If you’re watching your sugar intake, you can reduce the powdered sugar by a quarter cup without affecting the texture too much. The Cool Whip already has some sweetness, and the Reeses cups add plenty. I’ve made a lower-sugar version before, and it was still delicious.
This dessert is vegetarian-friendly but contains dairy and gluten. For allergen-friendly options, check out the variations section above. And if you’re looking for a high-protein breakfast to balance out this indulgent dessert, try my Fluffy Cottage Cheese Pancakes with 20g Protein for a satisfying start to your day.
Conclusion
This Easy No-Bake Reeses Peanut Butter Icebox Cake is the dessert that keeps on giving. It’s simple enough for a beginner baker, impressive enough for a dinner party, and delicious enough to make you forget about any fancy bakery cake. The layers of creamy peanut butter filling and soft chocolate wafers create something truly special—a dessert that feels like a hug in cake form.
I love this recipe because it reminds me that you don’t need complicated techniques or expensive ingredients to make something memorable. Sometimes the best things come from a moment of panic and a half-empty jar of peanut butter. It’s forgiving, adaptable, and always, always a hit.
Now I want to hear from you. Have you tried making this cake? Did you add your own twist? Drop a comment below and let me know how it turned out. And if you loved it, share this recipe with a friend who needs a little dessert magic in their life. Happy no-baking, friends!
Frequently Asked Questions
Can I use natural peanut butter for this recipe?
You can, but I don’t recommend it. Natural peanut butter that separates can make the filling grainy and oily. Stick with processed creamy peanut butter like Jif or Skippy for the smoothest, most consistent results. If you must use natural, stir it really well and expect a slightly different texture.
How long does this cake need to chill?
At least 6 hours, but overnight is best. The wafers need time to soften fully, and the filling needs to set up firm enough to slice cleanly. If you’re in a hurry, 4 hours will work, but the texture won’t be as perfect. Trust me, the wait is worth it.
Can I make this cake ahead of time?
Absolutely! This cake actually gets better after a day or two in the fridge. The flavors meld together, and the texture becomes perfectly uniform. I often make it two days before I plan to serve it. Just keep it covered tightly with plastic wrap or foil.
Can I freeze this cake?
Yes, it freezes beautifully. Wrap the entire dish tightly in plastic wrap, then a layer of foil. Freeze for up to 3 months. To serve, thaw in the refrigerator overnight. The texture stays creamy and the wafers don’t get mushy. I often make two cakes at once—one for now and one for later.
How do I get clean slices?
Use a sharp serrated knife and wipe it clean between each cut. Let the cake chill for the full recommended time before slicing. If the knife drags or the filling sticks, run it under hot water and dry it off before making the next cut. Patience is key here!
Pin This Recipe!
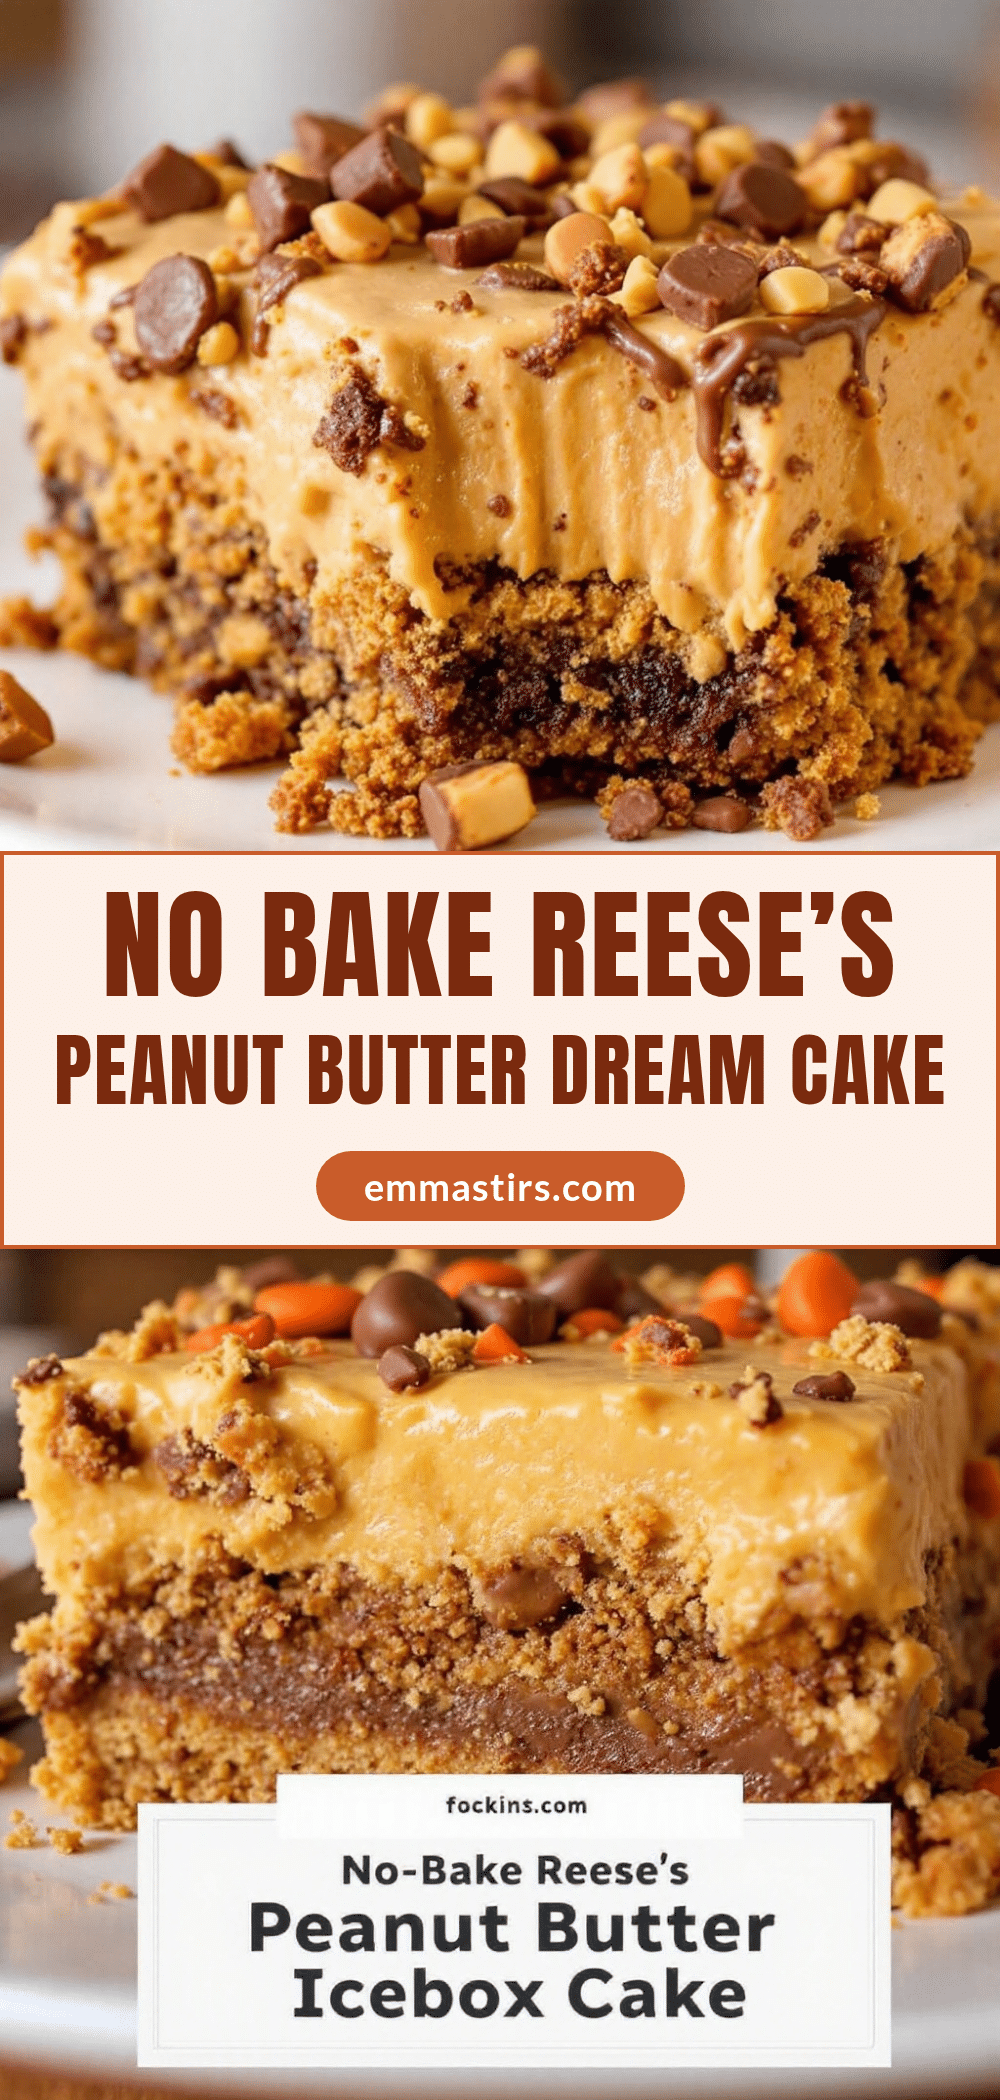
Easy No-Bake Reeses Peanut Butter Icebox Cake

A decadent no-bake dessert featuring layers of creamy peanut butter filling, chocolate wafers, and Reeses peanut butter cups. Perfect for any occasion, this easy icebox cake requires minimal effort and delivers maximum flavor.
- Prep Time: 20 minutes
- Cook Time: 0 minutes
- Total Time: 6 hours 20 minutes (including chilling)
- Yield: 12 servings 1x
- Category: Dessert
- Cuisine: American
Ingredients
- 1 cup chocolate wafer crumbs or graham cracker crumbs
- 2 tablespoons melted butter
- 8 ounces cream cheese, softened
- 1 cup creamy peanut butter (e.g., Skippy or Jif)
- 1 cup powdered sugar
- 8 ounces Cool Whip, thawed
- 1 box chocolate wafer cookies (e.g., Nabisco Famous Wafers) or graham crackers
- 1 cup Reeses peanut butter cups, chopped
- Chocolate syrup or melted chocolate for drizzling
Instructions
- Prepare the base (optional but recommended): Crush about 1 cup of chocolate wafers or graham crackers into fine crumbs. Mix with 2 tablespoons of melted butter. Press this mixture firmly into the bottom of a 9×13 baking dish. Pop it in the fridge while you make the filling.
- Make the peanut butter filling: In a large mixing bowl, beat 8 ounces of softened cream cheese with 1 cup of creamy peanut butter until smooth and fluffy, about 2-3 minutes with an electric mixer on medium speed. Scrape down the sides of the bowl halfway through. Add 1 cup of powdered sugar and beat again until fully incorporated.
- Fold in the Cool Whip: Gently fold in 8 ounces of thawed Cool Whip using a rubber spatula. Start with about half, then add the rest. Fold until no white streaks remain. The filling should be light, fluffy, and easy to spread.
- Layer the wafers: Spread a thin layer of the peanut butter filling (about 1 cup) evenly over the prepared base. Place a single layer of chocolate wafers on top, covering the surface completely. Break some wafers in half to fill in gaps. Press them gently into the filling so they start absorbing moisture.
- Repeat the layers: Spread another layer of filling over the wafers, then add another layer of wafers. Repeat until you run out of filling, ending with a layer of filling on top. I usually get about 4 layers of wafers and 5 layers of filling in a 9×13 dish. The final layer should be smooth and even.
- Top with Reeses cups: Chop about 1 cup of Reeses peanut butter cups into small pieces. Sprinkle them generously over the top layer of filling. Press them in slightly so they stick. Drizzle chocolate syrup or melted chocolate over everything.
- Chill overnight: Cover the dish tightly with plastic wrap or foil. Refrigerate for at least 6 hours, but overnight is best. The wafers need time to soften completely, and the filling needs to set up firm enough to slice cleanly.
- Slice and serve: When you’re ready to serve, use a sharp knife to cut clean slices. Wipe the knife between cuts for the best presentation. Serve cold straight from the fridge.
Notes
For best results, chill overnight. The cake actually gets better after a day or two in the fridge. For dairy-free, use dairy-free cream cheese and coconut whipped topping. For gluten-free, use gluten-free chocolate wafers or graham crackers. Let the cake sit at room temperature for 5 minutes before serving for optimal flavor.
Nutrition
- Serving Size: 1 slice (1/12 of cak
- Calories: 400
- Sugar: 30
- Sodium: 320
- Fat: 26
- Saturated Fat: 10
- Carbohydrates: 40
- Fiber: 2.5
- Protein: 9
Keywords: no-bake dessert, icebox cake, peanut butter, Reeses, chocolate, easy dessert, summer dessert, potluck dessert


