Love this? Save it for later!
Share the inspiration with your friends
I was standing in the grocery store parking lot last Tuesday when the smell of garlic butter drifted out from the deli section—and suddenly I was twenty-two, standing in my first tiny apartment with a broken oven and a whole lot of determination. That apartment had exactly two burners that worked and a toaster oven that was more decorative than functional. I had no idea what I was doing in the kitchen, honestly. But I had just gotten my first set of cookware from my aunt, and I was determined to make something that didn’t come from a box.
The garlic butter chicken thighs I made that night were a disaster in the best possible way. I burned the butter, the garlic turned bitter, and I somehow managed to splatter grease across the entire stovetop. But that first bite—even imperfect—was a revelation. There was something about the richness of the butter mingling with the crispy skin that felt like a secret I’d just discovered. I made those chicken thighs every week for months, getting better each time, until I finally figured out the exact method that makes them perfect every single time.
Maybe you’ve been there too—staring at a pack of chicken thighs wondering how to turn them into something special without a lot of fuss. That’s exactly what this recipe is for. These easy one-pan garlic butter chicken thighs come together in about thirty minutes with ingredients you probably already have. They’re the kind of meal that makes you feel like you’ve got it all together, even on a Tuesday night when you’re running on empty. And honestly? That’s the best kind of dinner there is.
Why You’ll Love This Recipe
Let me tell you why these garlic butter chicken thighs have earned a permanent spot in my weekly rotation. I’ve tested this recipe more times than I can count, tweaking the heat levels, the butter-to-garlic ratio, and the cooking times until everything clicked. Here’s what makes it stand out:
- Quick & Easy: From start to finish, you’re looking at about 30 minutes. No marinating overnight, no complicated techniques—just simple cooking that works.
- Simple Ingredients: You probably have garlic, butter, and chicken thighs in your kitchen right now. No fancy grocery trips required for this one.
- Perfect for Busy Weeknights: This is the dinner you make when you’re tired, hungry, and need something satisfying without spending an hour in the kitchen.
- Crowd-Pleaser: I’ve served these to picky eaters, dinner guests, and my own skeptical self—everyone goes back for seconds.
- Unbelievably Delicious: The skin gets perfectly crispy, the meat stays juicy, and that garlic butter sauce is so good you’ll want to drink it straight from the pan.
What makes this recipe different from every other garlic butter chicken out there is the technique. Instead of just pan-frying the thighs, you’ll start them skin-side down in a cold pan—trust me on this. That little trick gives you the crispiest skin without any extra oil. Plus, you only use one pan, which means less cleanup and more time doing literally anything else.
This isn’t just another chicken recipe. It’s the kind that makes you close your eyes after the first bite, the kind that turns a regular Tuesday into something worth remembering. It’s comfort food that comes together fast, with the same soul-soothing satisfaction as something you’d simmer all day.
What Ingredients You Will Need
This recipe uses simple, wholesome ingredients to deliver bold flavor and satisfying texture without any fuss. Most of these are pantry staples, which is exactly what you want on a busy weeknight.
- Chicken thighs, bone-in and skin-on (about 4-6 thighs, roughly 2 pounds total) — The bone keeps the meat moist, and the skin crisps up beautifully. I prefer thighs from a trusted brand like Bell & Evans or Springer Mountain Farms for consistent quality.
- Unsalted butter, 4 tablespoons, divided — Using unsalted butter lets you control the salt level. Look for European-style butter like Kerrygold for extra richness if you want to splurge.
- Garlic, 6 cloves, minced — Fresh garlic makes all the difference here. Don’t use the pre-minced stuff from a jar—it just doesn’t have the same punch. I like to mince mine by hand for the best texture.
- Olive oil, 1 tablespoon — Just a little to help the butter from burning and to get that initial sear going.
- Salt, 1 teaspoon — I use kosher salt, preferably Diamond Crystal. If you’re using table salt, cut back to about ¾ teaspoon.
- Black pepper, ½ teaspoon, freshly ground — Freshly ground pepper has so much more flavor than the pre-ground stuff. It’s worth the extra few seconds.
- Paprika, 1 teaspoon — This adds a beautiful color and a subtle smokiness. Smoked paprika works great here too if you have it.
- Dried thyme, ½ teaspoon — Thyme and chicken are a classic combo. You can use fresh thyme if you have it—just use about 1 teaspoon of fresh leaves.
- Chicken broth, ¼ cup — This deglazes the pan and creates the base for your sauce. Low-sodium broth is best so you can control the salt.
- Fresh parsley, 2 tablespoons, chopped — For garnish and a fresh finish. Totally optional but highly recommended.
- Lemon juice, 1 tablespoon, fresh — A squeeze of lemon at the end brightens everything up and cuts through the richness of the butter.
For the best results, take your chicken thighs out of the fridge about 20 minutes before you start cooking. Room temperature chicken cooks more evenly. And if you’re watching your salt intake, feel free to use low-sodium broth and adjust the salt at the table instead.
Equipment Needed
The beauty of this recipe is that you really don’t need much. Here’s what you’ll need:
- Large skillet or frying pan — A 12-inch skillet is ideal. Cast iron works beautifully because it holds heat so well, but a good stainless steel or nonstick pan will work just fine. I’ve made these in my trusty Lodge cast iron and my Calphalon nonstick—both turned out great.
- Tongs — For flipping the chicken without piercing the skin. Trust me, you don’t want to lose those crispy bits.
- Cutting board — For mincing garlic and chopping parsley. Keep one separate for raw chicken to avoid cross-contamination.
- Chef’s knife — A sharp knife makes mincing garlic a breeze. Dull knives are actually more dangerous—they slip more easily.
- Measuring spoons — For the spices and liquids. Eyeballing works for some things, but for this recipe, the measurements matter.
- Paper towels — For patting the chicken dry. This step is non-negotiable for crispy skin.
If you don’t have a cast iron skillet, don’t worry. Any heavy-bottomed pan will work. The key is to use something that heats evenly and holds onto that heat when you add the chicken. Budget-friendly options from Tramontina or Cuisinart work great—no need to spend a fortune.
One tip: if you’re using a nonstick pan, be careful not to use metal tongs that could scratch the surface. Silicone-tipped tongs are your friend here.
Preparation Method
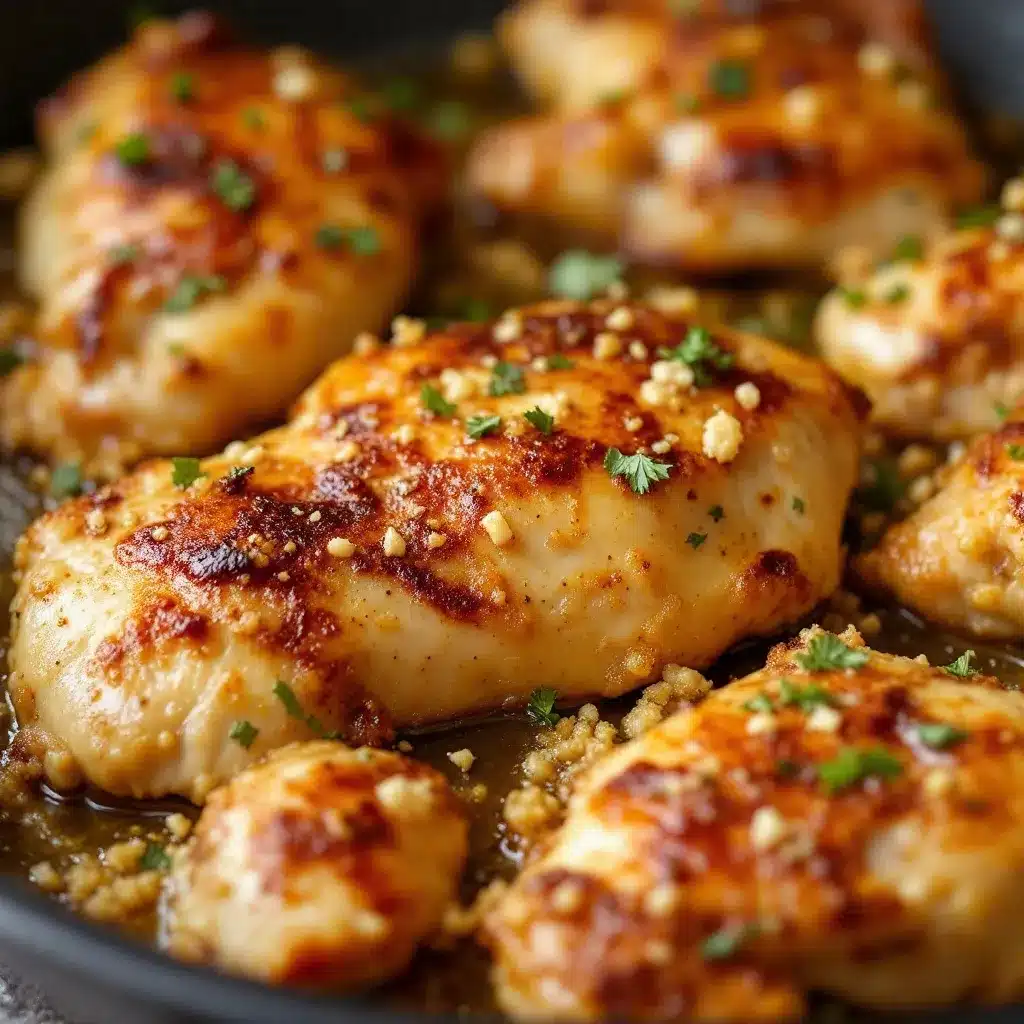
Let me walk you through this step by step. I’ve made these chicken thighs so many times that I could do it in my sleep, but I’ll break it down so you get perfect results on your first try.
- Prep the chicken (5 minutes): Pat your chicken thighs dry with paper towels. This is the most important step for crispy skin—wet chicken steams instead of sears. Season both sides generously with salt, pepper, and paprika. Don’t be shy with the seasoning. Let the chicken sit at room temperature while you get everything else ready.
- Start with a cold pan (2 minutes): Place your skillet on the stovetop and add 1 tablespoon of butter and the olive oil. Here’s the trick—put the chicken thighs in the pan skin-side down before you turn on the heat. I know this sounds weird, but starting with a cold pan renders the fat slowly, giving you the crispiest skin you’ve ever had. Trust me on this one.
- Cook skin-side down (10-12 minutes): Turn the heat to medium-high and let the chicken cook undisturbed. You’ll hear a gentle sizzle—that’s the sound of magic happening. Don’t touch the chicken for at least 10 minutes. I know it’s tempting, but let it be. The skin should be deep golden brown and crispy when you flip it. If it sticks to the pan, it’s not ready yet.
- Flip and finish cooking (8-10 minutes): Use your tongs to flip each thigh over. The skin side should be beautifully golden. Add the remaining 3 tablespoons of butter and the minced garlic to the pan, spooning the melting butter over the chicken as it cooks. Cook for another 8-10 minutes, until the internal temperature reaches 165°F (74°C) when checked with a meat thermometer. The garlic will become fragrant and start to brown—but watch it carefully so it doesn’t burn.
- Make the pan sauce (3 minutes): Remove the chicken to a plate and tent loosely with foil. Pour off most of the fat from the pan, leaving about a tablespoon along with the garlic bits. Add the chicken broth and scrape up all those browned bits from the bottom of the pan—that’s where all the flavor lives. Let it simmer for about 2 minutes until it reduces slightly. Stir in the lemon juice and any juices that have accumulated on the plate with the chicken.
- Finish and serve (2 minutes): Return the chicken to the pan, spoon the sauce over the top, and sprinkle with fresh parsley. Serve immediately while everything is hot and the skin is still crispy.
A few things to watch for: if the garlic starts to look too dark before the chicken is done, just scoop it out and set it aside. Burnt garlic is bitter and will ruin the whole dish. And if your pan seems dry at any point, add a splash more butter or broth—you want enough fat to keep everything happy.
Cooking Tips & Techniques
I’ve made every mistake in the book with this recipe, so let me save you some trouble. Here’s what I’ve learned the hard way:
The cold pan trick is non-negotiable. I know it feels wrong to put chicken in a cold pan, but this is the secret to the crispiest skin. When you start cold, the fat renders slowly and evenly, giving you that crackling-crisp texture. I tried it the traditional way once—hot pan, chicken in—and the skin was tough and chewy. Never again.
Don’t crowd the pan. If you’re making a big batch, cook the chicken in batches. When the pan is too full, the temperature drops and the chicken steams instead of sears. You want each thigh to have some breathing room. I learned this the hard way when I tried to cram eight thighs into my pan and ended up with pale, sad chicken.
Use a meat thermometer. Chicken thighs are forgiving, but you still want to hit that 165°F (74°C) mark. The thickest part of the thigh should register this temperature. I used to guess by cutting into the meat, but that lets all the juices run out. A simple instant-read thermometer changed my chicken game completely.
Let the chicken rest. Those five minutes under foil aren’t just for show. Resting allows the juices to redistribute throughout the meat. If you cut into it right away, all those delicious juices will end up on your cutting board instead of in your mouth.
Watch your heat. Medium-high is the sweet spot for this recipe. Too high and the butter burns before the chicken is done. Too low and you’ll never get that crispy skin. If you see the butter starting to brown too quickly, just lower the heat a notch. You can always turn it up at the end to crisp things up.
Variations & Adaptations
One of the best things about this recipe is how adaptable it is. Here are some of my favorite variations:
Herb Butter Chicken: Add a tablespoon of fresh rosemary or sage along with the garlic. The herbs infuse the butter as it melts, giving the chicken a whole new dimension of flavor. I tried this last Thanksgiving when I needed a quick alternative to turkey, and it was a hit.
Spicy Garlic Butter Chicken: Add ½ teaspoon of red pepper flakes along with the garlic, or stir in a teaspoon of harissa paste into the butter. The heat cuts through the richness beautifully. My husband loves this version—he says it wakes up his taste buds.
Lemon Garlic Butter Chicken: Double the lemon juice and add some lemon zest to the butter. The brightness is perfect for spring and summer dinners. Serve it with a side of roasted asparagus and you’ve got a meal that feels fancy but takes almost no effort.
Dairy-Free Version: Substitute the butter with a good quality vegan butter or use all olive oil. I’ve used Miyoko’s cultured vegan butter with great results—it even browns nicely. Just note that the sauce won’t be as rich, but it’s still delicious.
Boneless Thighs: If you only have boneless, skinless thighs, this recipe still works. Reduce the cooking time to about 5-6 minutes per side, and skip the cold pan trick since there’s no skin to crisp. The garlic butter sauce will still be amazing.
Oven Finish: For extra-crispy skin without any fuss, sear the chicken on the stovetop for 5 minutes skin-side down, then transfer the whole pan to a 400°F (200°C) oven for 15-20 minutes. This is my go-to method when I’m cooking for company because it frees up my stovetop for side dishes.
Serving & Storage Suggestions
These garlic butter chicken thighs are incredibly versatile when it comes to serving. Here’s how I like to enjoy them:
Serving Temperature: Serve these hot, straight from the pan. The skin is at its crispiest right after cooking, and the butter sauce is perfectly warm and silky. If you need to hold them for a bit, keep them in a warm oven (200°F/95°C) for up to 20 minutes, but don’t cover them or the skin will soften.
What to Serve With Them: These chicken thighs pair beautifully with so many sides. Try them with creamy mashed potatoes to soak up all that garlic butter sauce. Or go with something lighter like a crisp green salad with lemon vinaigrette. Roasted vegetables—especially broccoli, asparagus, or green beans—are a natural fit. For a low-carb option, serve them over cauliflower rice or zucchini noodles. And honestly, a crusty piece of bread to mop up the sauce is never a bad idea.
Storage: Leftover chicken thighs keep well in the refrigerator for up to 4 days. Store them in an airtight container with the sauce. The flavors actually deepen overnight, so leftovers might be even better the next day.
Reheating: The best way to reheat these is in a skillet over medium heat with a splash of chicken broth or water. This helps the skin crisp back up without drying out the meat. Microwave works in a pinch, but the skin will be soft. If you’re reheating in the microwave, cover the chicken with a damp paper towel to keep it moist.
Freezing: You can freeze cooked chicken thighs for up to 3 months. Let them cool completely, then store in a freezer-safe container with the sauce. Thaw overnight in the refrigerator before reheating. I like to freeze individual portions for quick lunches—just grab one, reheat, and you’re good to go.
Nutritional Information & Benefits
Here’s the nutritional breakdown for one serving (based on 4 servings, using bone-in, skin-on chicken thighs):
| Nutrient | Amount per Serving |
|---|---|
| Calories | 385 |
| Total Fat | 28g |
| Saturated Fat | 12g |
| Cholesterol | 145mg |
| Sodium | 680mg |
| Total Carbohydrates | 3g |
| Dietary Fiber | 0g |
| Sugars | 1g |
| Protein | 32g |
| Vitamin A | 15% DV |
| Vitamin C | 6% DV |
| Calcium | 4% DV |
| Iron | 10% DV |
Beyond the numbers, chicken thighs are a great source of high-quality protein, which helps keep you full and supports muscle health. The garlic in this recipe isn’t just for flavor—it’s known for its anti-inflammatory properties and immune-boosting benefits. And while butter gets a bad rap sometimes, it’s a good source of fat-soluble vitamins like A, D, and E, especially if you use grass-fed butter.
This recipe fits nicely into a low-carb or keto lifestyle, with only 3g of carbs per serving. If you’re watching your sodium, use low-sodium broth and go easy on the added salt. And if you have dietary concerns, the dairy-free variation I mentioned earlier works great.
Conclusion
These easy one-pan garlic butter chicken thighs have become my go-to dinner for so many reasons. They’re quick enough for a busy weeknight but impressive enough for company. The ingredients are simple, the technique is foolproof once you know the cold pan trick, and the results are consistently delicious.
What I love most about this recipe is how it makes me feel—like I’ve got dinner handled without any stress or fuss. That’s a rare thing in the kitchen, honestly. Whether you’re a seasoned cook or someone who’s just starting to find your way around a skillet, this recipe will work for you. It’s forgiving, adaptable, and always satisfying.
I’d love to hear how these turn out for you. Did you try any of the variations? Did you discover a new favorite side dish to serve with them? Drop a comment below and let me know—I read every single one. And if you loved this recipe, share it with a friend who needs a simple, delicious dinner in their life. Happy cooking!
Frequently Asked Questions
Can I use chicken breasts instead of thighs?
You can, but you’ll need to adjust the cooking time. Boneless, skinless chicken breasts cook faster—about 5-6 minutes per side. The cold pan trick works best with skin-on pieces, so if you’re using skinless breasts, just sear them in a hot pan with butter and oil. Watch the internal temperature carefully, as breasts dry out quickly.
How do I know when the chicken is fully cooked?
The most reliable way is to use an instant-read meat thermometer. Insert it into the thickest part of the thigh without touching the bone. You’re looking for 165°F (74°C). If you don’t have a thermometer, pierce the thickest part with a knife—the juices should run clear, not pink.
Can I make this recipe ahead of time?
Absolutely. You can cook the chicken completely, then reheat it when you’re ready to serve. The flavors actually get better overnight. Just store the chicken and sauce together in the fridge, then reheat in a skillet with a splash of broth to keep everything moist. The skin won’t be quite as crispy, but it’ll still be delicious.
What if I don’t have a cast iron skillet?
No problem at all. Any heavy-bottomed skillet will work—stainless steel, nonstick, or even a well-seasoned carbon steel pan. The key is to use something that heats evenly and holds onto that heat. Avoid thin pans that might cause hot spots or uneven cooking.
Can I double this recipe?
You can, but don’t crowd the pan. Cook the chicken in batches if you’re making a lot. Each thigh needs some space to get that beautiful crispy skin. If you try to cram too many into one pan, they’ll steam instead of sear, and you’ll end up with sad, pale chicken. Better to take the extra few minutes and do it in batches.
Pin This Recipe!

Easy One-Pan Garlic Butter Chicken Thighs: Best 30-Min Dinner

These easy one-pan garlic butter chicken thighs come together in about thirty minutes with simple ingredients. The skin gets perfectly crispy, the meat stays juicy, and the garlic butter sauce is so good you’ll want to drink it straight from the pan.
- Prep Time: 5 minutes
- Cook Time: 25 minutes
- Total Time: 30 minutes
- Yield: 4 servings 1x
- Category: Main Course
- Cuisine: American
Ingredients
- 4–6 bone-in, skin-on chicken thighs (about 2 pounds)
- 4 tablespoons unsalted butter, divided
- 6 cloves garlic, minced
- 1 tablespoon olive oil
- 1 teaspoon kosher salt
- ½ teaspoon freshly ground black pepper
- 1 teaspoon paprika
- ½ teaspoon dried thyme
- ¼ cup low-sodium chicken broth
- 2 tablespoons fresh parsley, chopped
- 1 tablespoon fresh lemon juice
Instructions
- Pat chicken thighs dry with paper towels. Season both sides generously with salt, pepper, and paprika. Let sit at room temperature while preparing other ingredients.
- Place a large skillet on the stovetop and add 1 tablespoon butter and olive oil. Place chicken thighs skin-side down in the pan before turning on the heat.
- Turn heat to medium-high and cook chicken undisturbed for 10-12 minutes until skin is deep golden brown and crispy.
- Flip chicken using tongs. Add remaining 3 tablespoons butter and minced garlic to the pan, spooning melting butter over chicken. Cook for 8-10 minutes until internal temperature reaches 165°F (74°C).
- Remove chicken to a plate and tent loosely with foil. Pour off most of the fat from the pan, leaving about 1 tablespoon with garlic bits. Add chicken broth and scrape up browned bits from the bottom. Simmer for about 2 minutes until slightly reduced. Stir in lemon juice and any accumulated juices from the plate.
- Return chicken to the pan, spoon sauce over the top, and sprinkle with fresh parsley. Serve immediately.
Notes
Start chicken in a cold pan for crispiest skin. Don’t crowd the pan; cook in batches if needed. Let chicken rest 5 minutes before serving. If garlic starts to brown too quickly, remove it from the pan to prevent bitterness.
Nutrition
- Serving Size: 1 chicken thigh with
- Calories: 385
- Sugar: 1
- Sodium: 680
- Fat: 28
- Saturated Fat: 12
- Carbohydrates: 3
- Protein: 32
Keywords: garlic butter chicken, one-pan chicken, easy chicken dinner, 30-minute meal, chicken thighs, crispy chicken skin


