Love this? Save it for later!
Share the inspiration with your friends
That first whiff of melted butter and marshmallow — the kind that sticks to your hair and your sweater for the rest of the afternoon — still takes me straight to the kindergarten classroom. I can see the paper plates covered in wax paper, the tubs of sprinkles passed around like precious cargo, and the way every single kid sat a little straighter when those Rice Krispie treats appeared on the snack table. For me, that smell is the smell of belonging. It is the smell of a celebration that didn’t need fancy decorations or expensive favors — just a warm, sticky square of happiness made by someone’s mom.
Years later, when my own kids started bringing home classroom birthday invitations, I realized that the tradition had faded a bit. Cupcakes with swirls of frosting were the new normal, and honestly, I was a little sad about it. Not because I don’t love a good cupcake (I do, let’s be real), but because there’s something about a Rice Krispie treat that feels like a shared secret. It’s simple. It’s nostalgic. And for a classroom full of kids with varying allergies, picky palates, and excitement levels, it’s the great equalizer.
That’s when I started making these Easy School Birthday Rice Krispie Cupcakes. They are the best of both worlds — the beloved crispy, marshmallow-y texture of a classic treat, shaped into a cute, portable cupcake form that feels just a little more special. No crumbly mess, no frosting that gets everywhere, just a perfectly portioned little cake that every kid (and honestly, every adult) can grab and go. And the best part? You can make a whole batch in under 20 minutes. That is a win for the classroom mom who is already juggling a dozen other things.
This recipe isn’t about reinventing the wheel. It’s about honoring a tradition that deserves to stick around. It’s the kind of treat that makes you feel like a rockstar parent without the stress, and honestly, that is a feeling worth holding onto.
Why You’ll Love This Easy School Birthday Rice Krispie Cupcakes Recipe
Let’s be honest — the classroom birthday scene can be a little chaotic. You have kids with nut allergies, kids who don’t like chocolate, and kids who will eat anything as long as it’s sweet. These Easy School Birthday Rice Krispie Cupcakes solve all of those problems in one fell swoop.
- No Baking Required: This is a no-bake recipe, which means you don’t have to worry about your oven temperature, burnt edges, or a cake that sinks in the middle. It is practically foolproof.
- Comes Together in Under 20 Minutes: From start to finish — including the time it takes to butter your pan — you can have a batch of these ready to go. That leaves you more time to actually enjoy the party.
- Simple Ingredients: You only need three main ingredients: butter, marshmallows, and Rice Krispies cereal. Chances are, you already have them in your pantry.
- Perfect for Allergies: This recipe is naturally nut-free (just double-check your marshmallow brand) and can easily be made gluten-free with a simple cereal swap. It is the ultimate crowd-pleaser.
- Portable and Mess-Free: Each “cupcake” is individually wrapped in a cupcake liner, making it easy for little hands to grab without a sticky mess. No plates needed.
- Kid-Approved and Adult-Loved: There is a reason these have been a staple at birthday parties for decades. They are sweet, crunchy, and utterly satisfying.
I have made these for my son’s class three years running, and I always get the same response — the teacher says they are the only treat that doesn’t end up half-eaten in the trash. That is a pretty solid endorsement if you ask me.
Ingredients You Will Need
This recipe uses simple, pantry-friendly ingredients to create something that feels genuinely special. Each component plays a key role in getting that perfect balance of chewy, crispy, and sweet.
- 3 tablespoons unsalted butter — Plus a little extra for greasing your pan and spatula. I always use unsalted butter so I can control the salt level. If you only have salted butter on hand, just skip adding any extra salt to the mixture. The butter adds richness and helps the marshmallows melt into a silky, smooth sauce.
- 1 package (10 ounces) regular marshmallows — This is about 40 large marshmallows or 4 cups of mini marshmallows. I personally prefer using regular-sized marshmallows because they melt more evenly, but mini ones work just fine too. Do not use marshmallow creme for this recipe; the texture will be too gooey and the treats won’t hold their shape.
- 6 cups Rice Krispies cereal — The classic puffed rice cereal is what gives these treats their signature crunch. I recommend using a fresh box for the best texture. Stale cereal will result in a less crispy treat.
- 1/4 teaspoon vanilla extract (optional) — This is my little secret. A tiny splash of vanilla adds a warm, round flavor that makes the treats taste homemade rather than just sweet. It is completely optional but highly recommended.
- Pinch of salt (optional) — If you are using unsalted butter, a tiny pinch of salt helps balance the sweetness and enhances the marshmallow flavor. Trust me on this one.
For the “Cupcake” Presentation:
- 24 standard-sized cupcake liners — Go for the fun, colorful ones! This is a birthday treat, after all. I like to use foil-lined paper liners because they hold their shape better and look a little more festive.
- Non-stick cooking spray or butter — For greasing your hands and the spatula. This is non-negotiable if you want to avoid a sticky mess.
Optional Toppings:
- Sprinkles, festive jimmies, or colored sugar — Because what is a birthday treat without sprinkles? Add them right after pressing the mixture into the liners while the tops are still slightly tacky.
- Melted white or milk chocolate for drizzling — For an extra-special touch, you can drizzle a little melted chocolate over the top. My kids go crazy for this.
Equipment Needed
You don’t need any fancy kitchen gadgets for this recipe, which is part of its charm. Here is what you will need:
- Large pot or Dutch oven — You need a pot big enough to hold all six cups of cereal with room to stir. I use a 5-quart Dutch oven, and it works perfectly. A non-stick pot is ideal, but any heavy-bottomed pot will work.
- Rubber spatula or wooden spoon — A silicone spatula is my go-to because it is heat-resistant and makes scraping the pot easy. A wooden spoon works in a pinch, but the mixture tends to stick to it more.
- Measuring cups and spoons — For measuring the cereal, butter, and vanilla.
- 24-count muffin tin — This helps the cupcake liners hold their shape while the mixture sets. If you don’t have a muffin tin, you can place the filled liners on a baking sheet and just let them set in the fridge for a bit longer.
- Small bowl of water or cooking spray — For greasing your hands. This is the most important trick for pressing the mixture into the liners without it sticking to your fingers.
- Parchment paper (optional) — If you want to make traditional bars instead of cupcakes, line a 9×13-inch baking dish with parchment paper for easy removal.
Honestly, the first time I made these, I used a cheap non-stick pot and a plastic spatula that I still have. It all worked out fine. Don’t overthink the equipment — just use what you have.
How to Make Easy School Birthday Rice Krispie Cupcakes
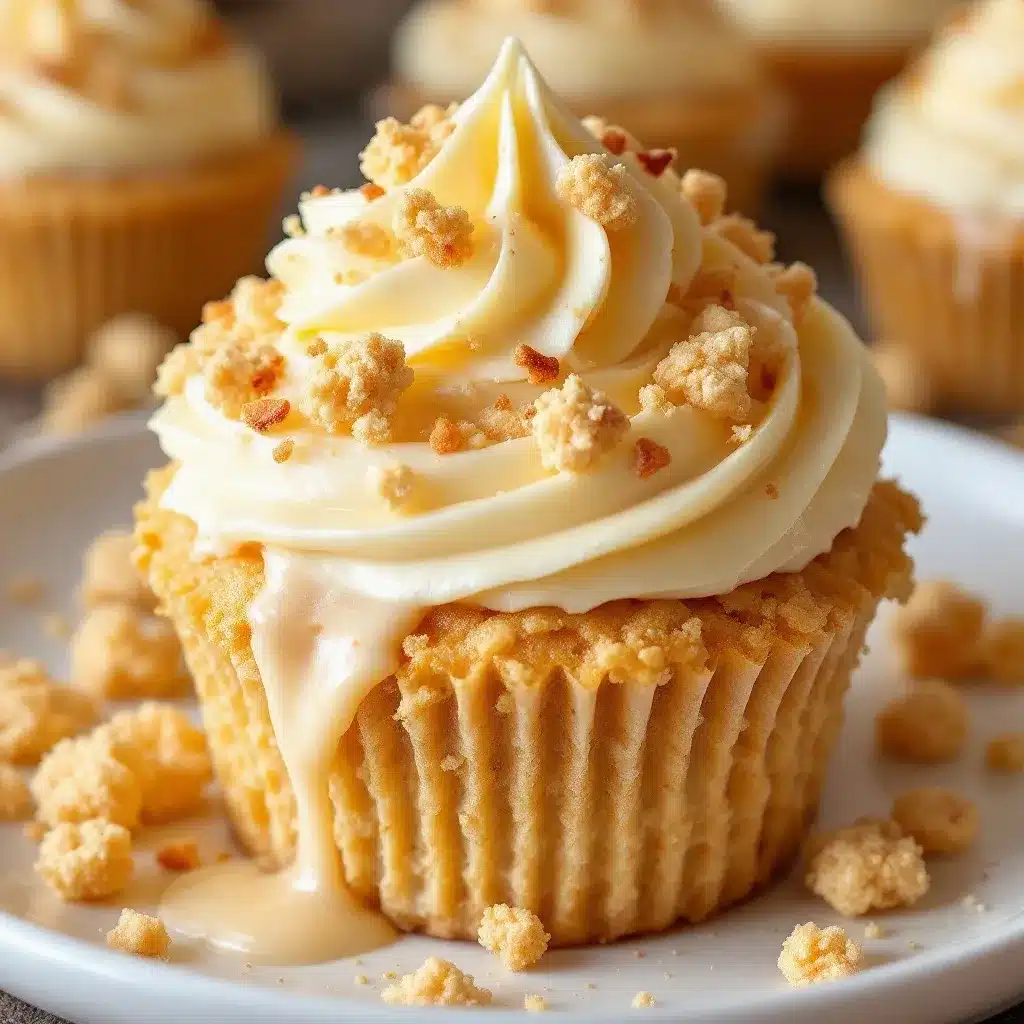
This method is straightforward, but there are a few small tricks that make the difference between a perfect, chewy cupcake and a rock-hard one. Pay attention to the heat and the timing, and you will nail it every time.
- Prepare your muffin tin and liners. Place a cupcake liner into each well of a 24-count muffin tin. Lightly spray the inside of each liner with non-stick cooking spray. This step is optional but highly recommended — it makes peeling the paper off the treats so much easier later. Set the tin aside.
- Melt the butter. Place your large pot over low heat and add the 3 tablespoons of butter. Let it melt slowly, stirring occasionally. Do not rush this step — if the butter gets too hot, it can brown, which will change the flavor of your treats. You want it just melted and barely bubbling.
- Add the marshmallows. Pour the entire package of marshmallows into the pot with the melted butter. Stir constantly with your rubber spatula until the marshmallows are completely melted and the mixture is smooth and glossy. This should take about 3-4 minutes. Keep the heat on low the entire time. If you see any steam or wisps of smoke, pull the pot off the heat immediately — you have gone too far.
- Add the vanilla and salt (if using). Stir in the vanilla extract and the pinch of salt. Mix until everything is combined. The mixture will look like a thick, sticky sauce.
- Remove from heat and add the cereal. Take the pot off the burner completely. Pour in the 6 cups of Rice Krispies cereal all at once. Gently fold the cereal into the marshmallow mixture using a folding motion — scrape from the bottom and fold over the top. Continue until the cereal is evenly coated. Do not overmix, or the cereal can get crushed and lose its crunch.
- Work quickly. The mixture will start to set as it cools, so you need to move fast. If it becomes too stiff to work with, you can place the pot back over very low heat for 10-15 seconds to soften it slightly.
- Grease your hands and a spatula. Spray your hands generously with non-stick cooking spray or rub them with a little butter. Spray the back of a small spoon or a small spatula as well. This is the most important step for avoiding a sticky disaster.
- Fill the cupcake liners. Using your greased hands, scoop up a small handful of the mixture — about the size of a golf ball — and place it into a prepared cupcake liner. Gently press the mixture down into the liner using your fingers or the greased spatula. Do not press too hard, or the treats will be dense and hard. You want them to be compact but still airy. Repeat with the remaining mixture. You should get about 22-24 cupcakes depending on how full you fill them.
- Add sprinkles immediately. If you are using sprinkles, add them now while the tops are still sticky. Press them in very gently so they stick.
- Let them set. Allow the cupcakes to cool and set at room temperature for about 30 minutes. If you are in a hurry, you can pop the muffin tin into the refrigerator for 15 minutes. Once set, they should peel away from the liners easily.
Cooking Tips & Techniques
I have made this recipe more times than I can count, and I have definitely learned a few things the hard way. Here are my best tips for perfect Rice Krispie Cupcakes every time.
Use Low Heat. This is the number one rule. High heat will cause the marshmallows to seize up or scorch, resulting in a hard, brittle texture. Keep the heat on low and be patient. Your treats will thank you.
Don’t Overmix the Cereal. When you add the cereal, fold it gently. Overmixing crushes the puffs and turns the treats into a dense, tough block. You want to see some air pockets in the finished product.
Grease Everything. Grease your hands, your spatula, your pot, and even the inside of the cupcake liners. This is not optional — it is the difference between a fun baking project and a sticky nightmare. I learned this the hard way when I had to peel marshmallow off my kitchen counter for an hour.
Work in Batches. If you are making a double batch, do not try to mix everything at once. Make one batch, fill the liners, and then start the second batch. The mixture sets quickly, and you will end up with uneven treats if you try to do too much at once.
Add a Little Extra Butter. If your treats come out too hard, you probably didn’t use enough butter or you overheated the marshmallows. For a softer, more tender treat, add an extra tablespoon of butter next time.
Use a Wet Spatula. If the mixture starts sticking to your spatula while you are pressing it into the liners, dip the spatula in a small bowl of water and shake off the excess. The water creates a thin barrier that prevents sticking.
Variations & Adaptations
This recipe is incredibly versatile, and I love playing around with different flavor combinations. Here are a few of my favorites:
Chocolate Lover’s Version: Stir 1/2 cup of mini chocolate chips into the mixture right after you add the cereal. The residual heat will melt them slightly, creating little pockets of chocolate throughout the treat. You can also use cocoa-flavored Rice Krispies if you can find them.
Peppermint Holiday Treats: For a festive winter version, add 1/2 teaspoon of peppermint extract along with the vanilla. Crush a few candy canes and sprinkle them on top along with some red and green sprinkles. These are always a hit at holiday parties.
Gluten-Free Option: Rice Krispies are naturally gluten-free, but some brands can be processed in facilities that also process wheat. If you need certified gluten-free treats, look for a brand like One Degree Organic or use a gluten-free puffed rice cereal. The recipe works exactly the same way.
Peanut Butter Twist: Stir 1/4 cup of creamy peanut butter into the marshmallow mixture right after it melts. This adds a rich, savory note that pairs beautifully with the sweet marshmallow. Just be sure to check for peanut allergies if you are making these for a school event.
Fruity Fun: Add 1/2 cup of freeze-dried strawberries or raspberries along with the cereal. The freeze-dried fruit adds a pop of color and a tangy flavor that cuts through the sweetness. My kids love the pink specks throughout the treat.
Serving & Storage Suggestions
These Easy School Birthday Rice Krispie Cupcakes are best served at room temperature. They have the perfect texture — chewy but not sticky, crispy but not hard — when they are not too cold.
For a Classroom Party: Arrange the cupcakes in a large, shallow box or on a sturdy platter. I like to use a disposable aluminum baking tray lined with a festive napkin. It makes transport easy and cleanup even easier.
Pairing Suggestions: These treats pair beautifully with a cold glass of milk (obviously) or a warm cup of hot chocolate. For a more grown-up gathering, they are surprisingly good with a cup of black coffee — the bitterness balances the sweetness nicely.
Storage: Store leftover cupcakes in an airtight container at room temperature for up to 3 days. Do not refrigerate them — the cold temperature will dry them out and make them hard. If you need to store them longer, you can freeze them.
Freezing Instructions: Place the fully set cupcakes in a single layer in a freezer-safe bag or container. Separate layers with parchment paper. They will keep in the freezer for up to 3 months. To thaw, simply leave them at room temperature for about 30 minutes. The texture will be just as good as fresh.
Flavor Development: These treats are actually at their best the day after they are made. The marshmallow has time to soften slightly, and the flavors meld together beautifully. If you can resist eating them all on day one, you are in for a treat on day two.
Nutritional Information & Benefits
Let’s be real — these are a treat, not a health food. But that doesn’t mean they don’t have their place in a balanced diet. A single Rice Krispie Cupcake made with this recipe contains approximately:
- Calories: 110-130
- Fat: 3-4g
- Carbohydrates: 22-25g
- Sugar: 12-15g
- Protein: 1g
These numbers will vary slightly depending on the specific brands of butter and marshmallows you use, but they give you a general idea. The treats are relatively low in fat because the main ingredient is marshmallow, which is fat-free. The butter adds a small amount of fat, but it is minimal per serving.
Dietary Considerations: This recipe is naturally nut-free and can be made gluten-free with a simple cereal swap. It is also vegetarian (just check your marshmallow brand — some use gelatin, which is not suitable for vegans). If you need a vegan version, you can use vegan butter and vegan marshmallows, which are available at most health food stores.
Allergen Notes: The main allergens in this recipe are dairy (from the butter) and gluten (from the cereal, if not certified gluten-free). Always check labels if you are serving a crowd with known allergies.
I personally believe that treats like these have a place in a healthy lifestyle. They are about joy, celebration, and connection — and those things are just as important as the nutrients on your plate.
Frequently Asked Questions
Can I use margarine instead of butter?
You can, but I don’t recommend it. Butter gives the treats a richer flavor and a better texture. Margarine has a higher water content, which can make the treats greasy or cause them to separate. Stick with butter for the best results.
Why did my Rice Krispie treats turn out hard?
This usually happens when the marshmallows are overheated or when the mixture is pressed too firmly into the liners. Keep the heat on low and stir gently. When pressing the mixture into the liners, use a light hand — you want them compact but not compressed.
Can I double this recipe?
You can, but I recommend making two separate batches rather than doubling everything in one pot. A larger volume of marshmallow mixture is harder to stir evenly, and it can cool too quickly, leading to uneven treats. Two batches take just a few extra minutes and give you much better results.
How far in advance can I make these for a school party?
You can make them up to 3 days in advance. Store them in an airtight container at room temperature. If you make them more than 3 days ahead, I recommend freezing them and then thawing them the morning of the party. They will taste just as fresh.
Can I use mini marshmallows instead of regular ones?
Yes, you can. Mini marshmallows melt slightly faster than regular ones, so keep an eye on them. Use 4 cups of mini marshmallows to replace one 10-ounce bag of regular marshmallows. The end result will be the same.
Conclusion
These Easy School Birthday Rice Krispie Cupcakes are more than just a recipe — they are a way to bring a little bit of joy into a busy classroom. They are simple enough to make on a school night, special enough to feel like a celebration, and forgiving enough that even a tired parent can pull them off without stress. That is a rare combination.
I love that this recipe lets me participate in my kids’ school traditions in a meaningful way. It is not about being the Pinterest-perfect parent; it is about showing up with something made with love, even if my kitchen looks like a marshmallow bomb went off. And honestly, the sticky fingers and the messy counter are totally worth it when I see the smiles on those little faces.
I would love to hear how these turn out for you. Did you add sprinkles? Did you try the chocolate version? Drop a comment below and let me know — your feedback helps other readers too. And if you are looking for another easy, crowd-pleasing treat for your next gathering, you might enjoy these cozy one-bowl banana bread with brown butter and walnuts or these savory brown butter salted chocolate chip cookies. Both are made with the same kind of simple, heartfelt approach.
Happy baking — and happy celebrating!
Pin This Recipe!
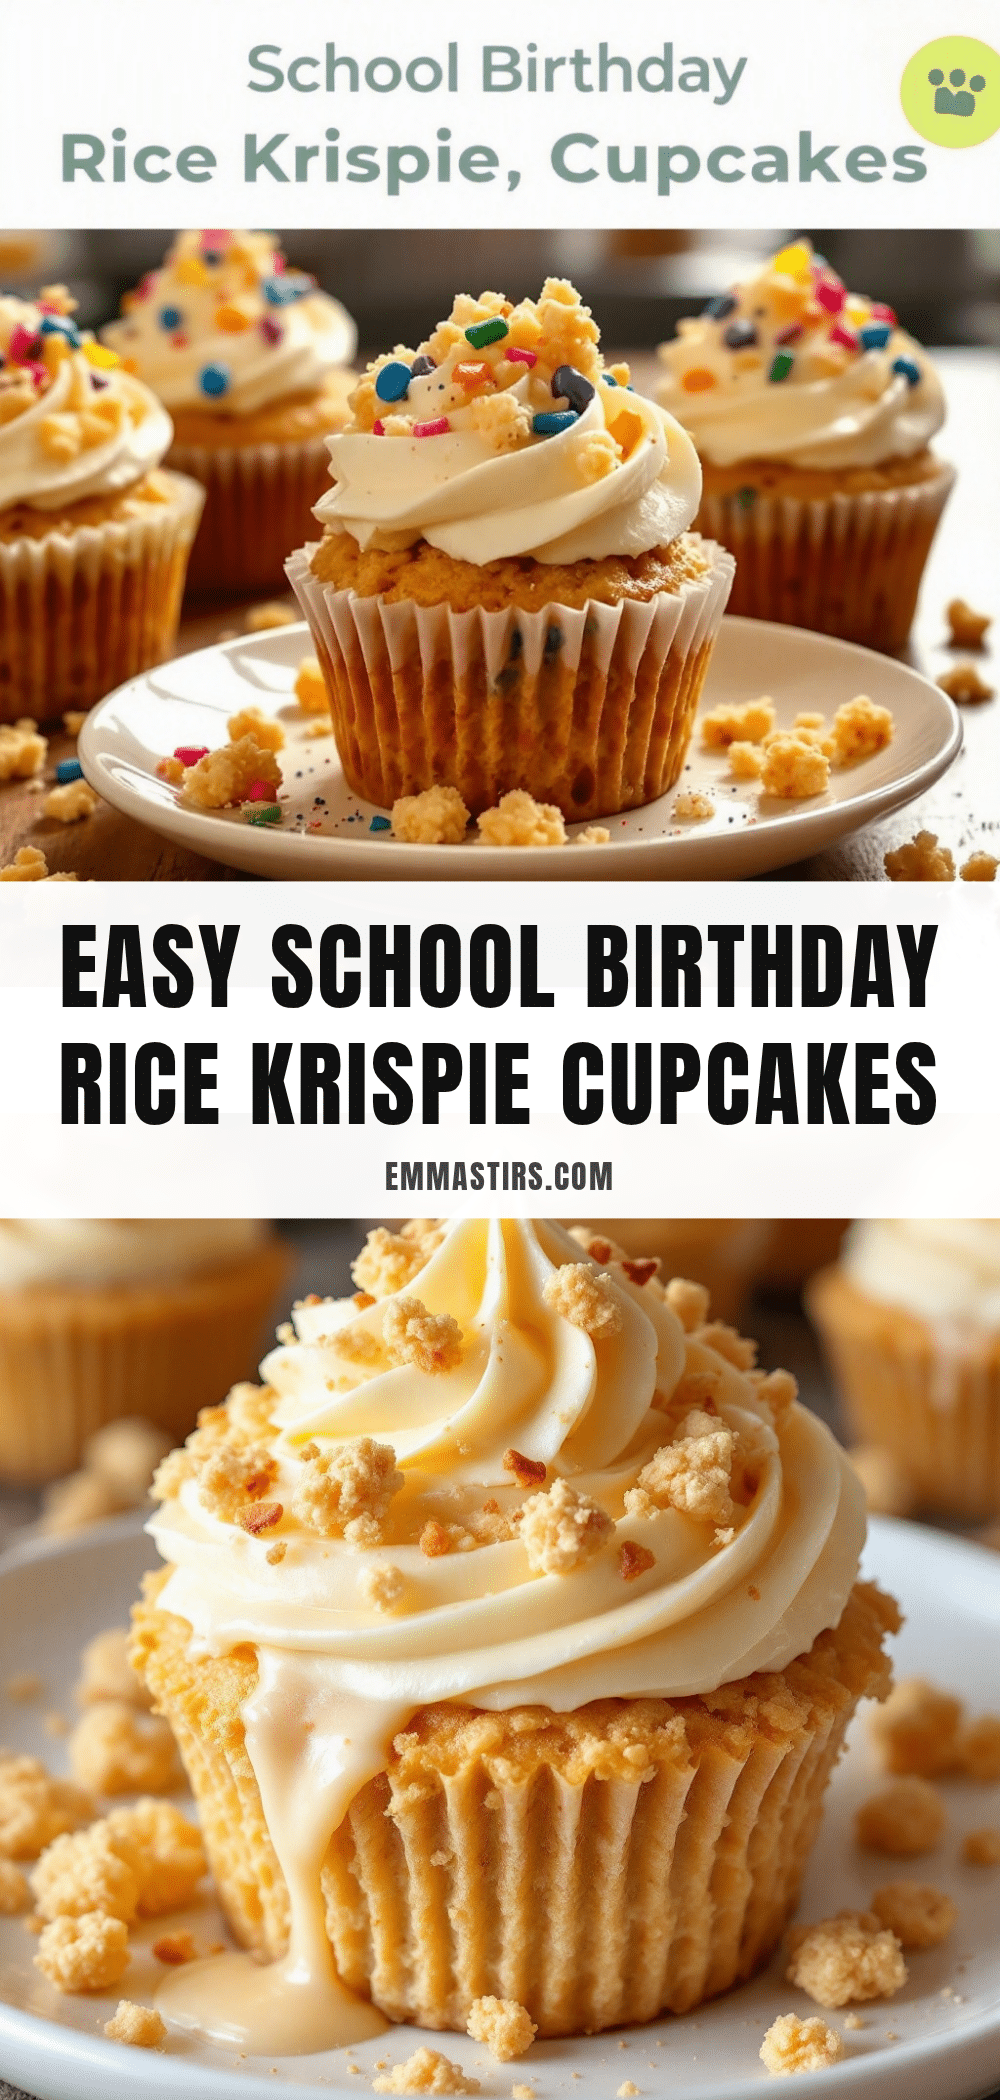
Easy School Birthday Rice Krispie Cupcakes
These Easy School Birthday Rice Krispie Cupcakes combine the beloved crispy, marshmallow-y texture of a classic treat with a cute, portable cupcake form. Perfect for classroom parties, they are no-bake, nut-free, and come together in under 20 minutes.
- Prep Time: 10 minutes
- Cook Time: 5 minutes
- Total Time: 15 minutes (plus 30 minutes setting time)
- Yield: 22-24 cupcakes 1x
- Category: Dessert
- Cuisine: American
Ingredients
- 3 tablespoons unsalted butter, plus extra for greasing
- 1 package (10 ounces) regular marshmallows (about 40 large or 4 cups mini)
- 6 cups Rice Krispies cereal
- 1/4 teaspoon vanilla extract (optional)
- Pinch of salt (optional)
- 24 standard-sized cupcake liners
- Non-stick cooking spray or butter for greasing hands and spatula
- Sprinkles, festive jimmies, or colored sugar (optional)
- Melted white or milk chocolate for drizzling (optional)
Instructions
- Prepare your muffin tin and liners: Place a cupcake liner into each well of a 24-count muffin tin. Lightly spray the inside of each liner with non-stick cooking spray. Set aside.
- Melt the butter: Place a large pot over low heat and add 3 tablespoons of butter. Let it melt slowly, stirring occasionally, until just melted and barely bubbling.
- Add the marshmallows: Pour the entire package of marshmallows into the pot with the melted butter. Stir constantly with a rubber spatula until completely melted and smooth, about 3-4 minutes. Keep heat on low.
- Add vanilla and salt (if using): Stir in the vanilla extract and pinch of salt until combined.
- Remove from heat and add cereal: Take the pot off the burner. Pour in 6 cups of Rice Krispies cereal all at once. Gently fold the cereal into the marshmallow mixture using a folding motion until evenly coated. Do not overmix.
- Work quickly: The mixture will start to set as it cools. If it becomes too stiff, place the pot back over very low heat for 10-15 seconds to soften.
- Grease your hands and a spatula: Spray your hands generously with non-stick cooking spray or rub with butter. Spray the back of a small spoon or spatula as well.
- Fill the cupcake liners: Using greased hands, scoop up a small handful of mixture (about golf ball size) and place into a prepared liner. Gently press down using fingers or greased spatula. Repeat with remaining mixture to make 22-24 cupcakes.
- Add sprinkles immediately: If using sprinkles, add them now while tops are still sticky. Press in gently.
- Let them set: Allow cupcakes to cool and set at room temperature for about 30 minutes, or in the refrigerator for 15 minutes. Once set, they should peel away from liners easily.
Notes
Use low heat to prevent marshmallows from scorching. Grease everything to avoid sticky mess. Do not overmix cereal to maintain crunch. For softer treats, add an extra tablespoon of butter. Treats are best the day after making. Store in airtight container at room temperature for up to 3 days, or freeze for up to 3 months.
Nutrition
- Serving Size: 1 cupcake
- Calories: 120
- Sugar: 13
- Sodium: 115
- Fat: 3.5
- Saturated Fat: 2
- Carbohydrates: 23
- Protein: 1
Keywords: Rice Krispie treats, cupcakes, school birthday, no-bake, nut-free, easy dessert, classroom treat, marshmallow treats