Love this? Save it for later!
Share the inspiration with your friends
My neighbor, Mrs. Harper, insisted for years that shaped cookies were a waste of time—too much fuss for a treat that tastes like any other sugar cookie. Ten school seasons passed with her rolling her eyes whenever I mentioned decorating cookies for back-to-school. Then last fall, I baked these Perfect Back to School Pencil Sugar Cookies with Royal Icing “just to try something new.” I caught her sneaking a second one, pencil tip and all, while pretending to read the morning paper on my porch. Honestly, it was a moment that felt like a quiet victory. You know that feeling when someone you respect surprises you? Yeah, that.
The thing is, these cookies aren’t just sugar and icing; they’re a little celebration of starting fresh, a sweet nudge to get excited about the school year ahead. I remember the messy countertop, a cracked bowl of royal icing, and the way the afternoon sun caught the yellow icing just right. Maybe you’ve been there—trying to make something simple feel special, and suddenly it’s a tradition. That’s how these pencil cookies stayed with me, quietly proving Mrs. Harper wrong and winning over more skeptics one bite at a time.
Why You’ll Love This Recipe
Let me tell you, after testing more sugar cookie and icing combos than I’d care to admit, this recipe stands out for all the right reasons. It’s been tried and tested by my circle of teachers, parents, and a few very honest kids. Here’s why this one keeps coming back:
- Quick & Easy: Comes together in under an hour, perfect for busy weeknights or last-minute classroom treats.
- Simple Ingredients: No need for specialty stores; pantry staples like butter, sugar, and eggs get the job done beautifully.
- Perfect for Back to School: Those pencil shapes? Spot on for a themed party or just making lunchboxes a little brighter.
- Crowd-Pleaser: Kids and adults alike can’t resist the crisp edges and subtle vanilla flavor paired with smooth royal icing.
- Unbelievably Delicious: The secret? The royal icing is just thick enough for neat designs but melts in your mouth—trust me, that makes all the difference.
This isn’t your run-of-the-mill sugar cookie. The balance between a tender crumb and that little snap at the edge makes you want to savor every bite. Plus, the icing technique? I’ll share my little trick for keeping it workable without the usual cracking or sugary grit. Honestly, these cookies have become my go-to when I want something that says “special” without turning the kitchen upside down.
What Ingredients You Will Need
This recipe uses straightforward, wholesome ingredients to bring out classic sugar cookie flavor with that perfect pencil shape and royal icing that dries just right. Most of these are kitchen staples, so you likely already have them on hand.
- For the Sugar Cookies:
- 2 ¾ cups (345 g) all-purpose flour – I recommend King Arthur for consistent texture
- 1 teaspoon baking powder
- ½ teaspoon salt
- 1 cup (227 g) unsalted butter, softened (adds richness and tenderness)
- 1 ½ cups (300 g) granulated sugar
- 1 large egg, room temperature
- 2 teaspoons pure vanilla extract
- 2 tablespoons whole milk (or almond milk for dairy-free)
- For the Royal Icing:
- 3 cups (360 g) powdered sugar, sifted
- 2 large egg whites, room temperature (or 4 tablespoons aquafaba for egg-free)
- 1 teaspoon lemon juice (for a slight tang and better drying)
- Gel food coloring: yellow, pink, green, and black (I like AmeriColor for vibrant colors)
- Optional: a pinch of cream of tartar to stabilize the icing
Feel free to swap in gluten-free flour blends if needed, though the texture will be a bit different (still delicious, though). In the summer, I sometimes add a drop of almond extract for a subtle twist. The key with the royal icing is to keep it smooth and not too runny—this recipe’s ratios have been tested for that perfect balance.
Equipment Needed
- Mixing bowls (at least two, one for dough and one for icing)
- Electric hand mixer or stand mixer (makes creaming butter and beating egg whites much easier)
- Rolling pin – I’ve used plastic and wood; both work fine but a non-stick rolling pin cuts down on flour mess
- Pencil-shaped cookie cutter (available online or in baking supply stores; alternatively, a small rectangular cutter and a paring knife work)
- Baking sheets lined with parchment paper or silicone baking mats (I swear by Silpat mats for even baking)
- Fine-tipped piping bags or squeeze bottles for decorating (I keep a few reusable bags handy for quick cleanup)
- Toothpicks or small decorating brushes for details
If you don’t have a stand mixer, a sturdy hand whisk and some elbow grease will do. Just take your time creaming the butter well. Also, keeping your icing tools clean and dry is key to smooth piping—this is a lesson learned after several clumpy batches!
Preparation Method
- Prep the Dough (15 minutes): In a medium bowl, whisk together the flour, baking powder, and salt. In a large bowl, cream the softened butter and sugar using an electric mixer on medium speed until light and fluffy—about 3 to 5 minutes. Add the egg, vanilla extract, and milk, mixing until combined.
- Combine Dry and Wet (3-5 minutes): Gradually add the flour mixture to the wet ingredients, mixing on low speed just until incorporated. Avoid overmixing or the cookies will get tough. The dough should be soft but not sticky.
- Chill the Dough (at least 1 hour): Wrap the dough in plastic wrap and refrigerate for at least 60 minutes. This helps the dough firm up so it’s easier to roll and cuts cleanly. If you’re pressed for time, 30 minutes can work but the cookies might spread more during baking.
- Roll and Cut (15 minutes): Preheat your oven to 350°F (175°C). Lightly flour your work surface and roll the dough to about ¼ inch (6 mm) thickness. Use your pencil-shaped cookie cutter to cut shapes and place them about 1 inch (2.5 cm) apart on the lined baking sheets.
- Bake (10-12 minutes): Bake for 10 to 12 minutes or until the edges just begin to turn golden. The centers may still look soft but will firm up as they cool. Remove from the oven and let cool completely on a wire rack.
- Make the Royal Icing (10 minutes): While cookies bake, whisk egg whites and lemon juice until frothy. Gradually beat in sifted powdered sugar until the icing holds stiff peaks (about 7-10 minutes). Divide the icing into bowls and tint with your gel colors.
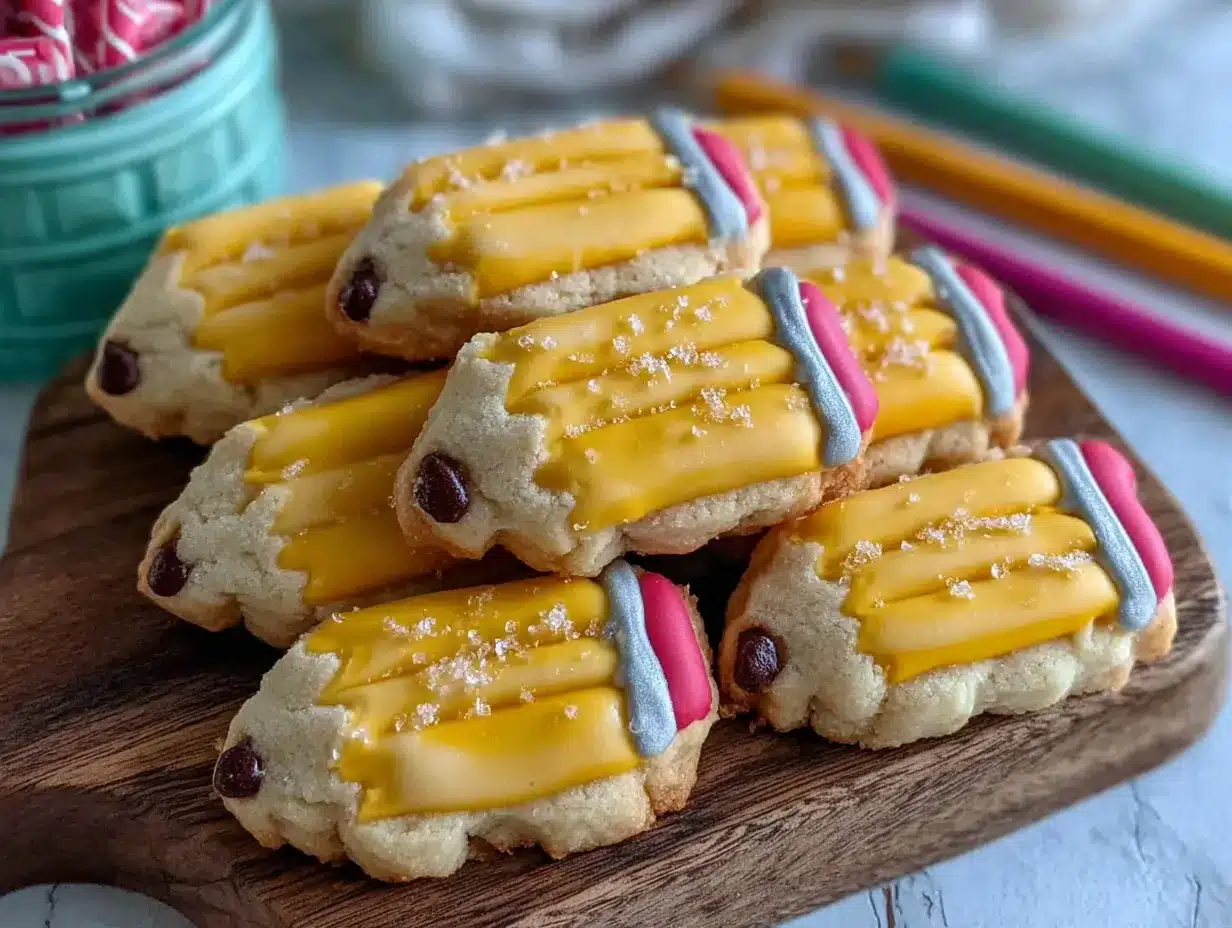
- Decorate (30-45 minutes): Using piping bags, outline the pencil shapes first with yellow icing for the body, pink for the eraser, green for the metal band, and black for the tip. Let each color dry slightly (5-10 minutes) before flooding the inside with a thinner consistency of the same color. Use toothpicks to smooth out any bubbles. Let dry fully, preferably overnight.
Pro tip: If your icing feels too stiff, add a few drops of water at a time. Too runny? Add more powdered sugar. And don’t rush the drying time—patience is the secret to those clean, crisp lines you see in professional cookies.
Cooking Tips & Techniques
Getting sugar cookies and royal icing just right is a bit of an art, but here’s what I’ve learned from a dozen batches and many “oops” moments:
- Don’t overwork the dough: Overmixing activates gluten, leading to tougher cookies. Mix just until combined for a tender crumb.
- Chilling is your friend: It helps cookies keep their shape and makes rolling easier. If the dough softens too much while cutting, pop it back in the fridge for a few minutes.
- Use room temperature ingredients: This ensures even mixing and smooth dough texture.
- Test your oven’s temperature: Ovens can vary, so watch the first batch closely to avoid overbaking.
- Royal icing consistency matters: Too thick and it’s hard to pipe; too thin and it runs off the cookie. Start stiff for outlines, then thin it slightly for flooding.
- Layer colors carefully: Let outlines crust before flooding to prevent colors from bleeding.
- Practice patience: Rushing the drying process leads to smudges and cracks. I usually let my decorated cookies dry uncovered overnight.
- Storage tip: Store decorated cookies in a single layer in an airtight container to avoid sticking and smudging.
Honestly, my first few attempts looked more like abstract art than pencils. But with these tips, you’ll get there faster than you think, and the compliments will roll in.
Variations & Adaptations
If you want to switch things up or cater to dietary needs, here are a few ideas I’ve tried or recommend:
- Gluten-Free Version: Use a 1-to-1 gluten-free baking flour blend. The texture is slightly less crisp but still delicious.
- Vegan Adaptation: Swap butter for vegan margarine and replace egg with flax egg (1 tablespoon ground flaxseed + 3 tablespoons water). Use aquafaba for royal icing instead of egg whites.
- Flavor Twists: Add a teaspoon of lemon zest to the dough for a fresh note or swap vanilla for almond extract for a nutty twist.
- Alternative Shapes: If you don’t have a pencil cutter, use a small rectangle for the body and a triangle for the tip, then decorate accordingly.
- Decorating Style: Try hand-painting details with food coloring thinned with a little vodka or lemon juice for a watercolor effect.
One time, I replaced the royal icing with a simple cream cheese frosting piped on after baking—delicious but less neat for school treats. It’s fun to experiment, but for that classic look and durability, royal icing is still my top pick.
Serving & Storage Suggestions
These pencil sugar cookies shine when served at room temperature, allowing the flavors and textures to come through just right. I like to arrange them on a colorful platter alongside a pitcher of cold milk or a bright batch of iced tea for a back-to-school party or afternoon snack.
They also make a charming addition to lunchboxes, especially if you pack them carefully in a sturdy container to avoid smushing. If you’re preparing ahead, store the cookies in an airtight container layered with parchment paper to keep the icing intact.
For longer storage, these cookies freeze well. Just wrap them individually in plastic wrap and place in a freezer-safe container. Thaw at room temperature before serving. The icing may soften slightly but the flavors hold up beautifully.
Interestingly, the cookies develop a slightly richer flavor after a day or two as the sugars marry in the dough, so if you can wait, that’s a bonus. Just keep them well sealed to avoid drying out.
Nutritional Information & Benefits
Each pencil sugar cookie (about 2.5 inches long) contains approximately:
| Calories | 110 kcal |
|---|---|
| Carbohydrates | 18 g |
| Fat | 4.5 g |
| Protein | 1 g |
| Sugar | 10 g |
While sugar cookies are an indulgence, the recipe uses real butter and fresh eggs, which provide some nutrients and a satisfying texture. The lemon juice in the royal icing adds a touch of vitamin C, and opting for natural gel colors avoids artificial dyes.
For those with dietary restrictions, swapping in gluten-free flour or vegan ingredients can make these treats more inclusive without sacrificing much flavor. Just a heads-up: the royal icing contains egg whites unless substituted.
From a wellness perspective, I see these cookies as a cheerful occasional treat—a little joy to brighten the back-to-school rush.
Conclusion
So, why should you make these Perfect Back to School Pencil Sugar Cookies with Royal Icing? Because they’re more than just cookies—they’re a small celebration you can hold in your hands. They bring a bit of fun, a pop of color, and a touch of sweetness to a busy time of year. Plus, they’re customizable to fit your kitchen style and dietary needs.
I keep making them because they remind me that even the simplest ingredients can create moments of delight, and honestly, who doesn’t want a little more of that during hectic school mornings? Give the recipe a try, tweak it your way, and tell me how it goes—I love hearing about your decorating adventures and flavor twists.
Here’s to a school year that’s as sweet as these cookies. Happy baking!
FAQs
Can I make the sugar cookie dough ahead of time?
Yes! You can prepare the dough and refrigerate it for up to 3 days before rolling and cutting. Just wrap it tightly in plastic wrap to prevent drying out.
How long does royal icing take to dry completely?
Royal icing usually takes 6-8 hours to dry fully at room temperature, but overnight is best for sturdy decorations, especially if you’re stacking or packaging cookies.
What can I use instead of egg whites in royal icing?
Aquafaba (the liquid from canned chickpeas) is a great egg white substitute. Use about 4 tablespoons aquafaba to replace 2 egg whites for a vegan-friendly option.
Can I freeze decorated sugar cookies?
Yes, freeze them individually wrapped in plastic wrap inside an airtight container. Thaw at room temperature before serving. The icing might soften but will still taste great.
My cookies spread too much during baking—what went wrong?
This usually happens if the dough is too warm or overworked. Make sure to chill your dough well before baking and avoid adding too much flour when rolling out.
Pin This Recipe!

Perfect Back to School Pencil Sugar Cookies Easy Royal Icing Recipe

These pencil-shaped sugar cookies with smooth royal icing are a delightful back-to-school treat, combining a tender crumb with crisp edges and vibrant, neat decorations.
- Prep Time: 20 minutes
- Cook Time: 12 minutes
- Total Time: 1 hour 45 minutes
- Yield: 24 cookies 1x
- Category: Dessert
- Cuisine: American
Ingredients
- 2 ¾ cups (345 g) all-purpose flour
- 1 teaspoon baking powder
- ½ teaspoon salt
- 1 cup (227 g) unsalted butter, softened
- 1 ½ cups (300 g) granulated sugar
- 1 large egg, room temperature
- 2 teaspoons pure vanilla extract
- 2 tablespoons whole milk or almond milk
- 3 cups (360 g) powdered sugar, sifted
- 2 large egg whites, room temperature (or 4 tablespoons aquafaba for egg-free)
- 1 teaspoon lemon juice
- Gel food coloring: yellow, pink, green, and black
- Optional: a pinch of cream of tartar
Instructions
- Prep the Dough (15 minutes): In a medium bowl, whisk together the flour, baking powder, and salt. In a large bowl, cream the softened butter and sugar using an electric mixer on medium speed until light and fluffy—about 3 to 5 minutes. Add the egg, vanilla extract, and milk, mixing until combined.
- Combine Dry and Wet (3-5 minutes): Gradually add the flour mixture to the wet ingredients, mixing on low speed just until incorporated. Avoid overmixing or the cookies will get tough. The dough should be soft but not sticky.
- Chill the Dough (at least 1 hour): Wrap the dough in plastic wrap and refrigerate for at least 60 minutes. This helps the dough firm up so it’s easier to roll and cuts cleanly. If you’re pressed for time, 30 minutes can work but the cookies might spread more during baking.
- Roll and Cut (15 minutes): Preheat your oven to 350°F (175°C). Lightly flour your work surface and roll the dough to about ¼ inch (6 mm) thickness. Use your pencil-shaped cookie cutter to cut shapes and place them about 1 inch (2.5 cm) apart on the lined baking sheets.
- Bake (10-12 minutes): Bake for 10 to 12 minutes or until the edges just begin to turn golden. The centers may still look soft but will firm up as they cool. Remove from the oven and let cool completely on a wire rack.
- Make the Royal Icing (10 minutes): While cookies bake, whisk egg whites and lemon juice until frothy. Gradually beat in sifted powdered sugar until the icing holds stiff peaks (about 7-10 minutes). Divide the icing into bowls and tint with your gel colors.
- Decorate (30-45 minutes): Using piping bags, outline the pencil shapes first with yellow icing for the body, pink for the eraser, green for the metal band, and black for the tip. Let each color dry slightly (5-10 minutes) before flooding the inside with a thinner consistency of the same color. Use toothpicks to smooth out any bubbles. Let dry fully, preferably overnight.
Notes
Do not overmix the dough to avoid tough cookies. Chill dough for at least 1 hour for best shape retention. Adjust royal icing consistency by adding water or powdered sugar as needed. Let decorated cookies dry overnight for best results. Store in airtight container layered with parchment paper. Cookies freeze well when wrapped individually.
Nutrition
- Serving Size: 1 cookie (about 2.5
- Calories: 110
- Sugar: 10
- Fat: 4.5
- Carbohydrates: 18
- Protein: 1
Keywords: sugar cookies, royal icing, back to school, pencil cookies, decorated cookies, easy sugar cookies, cookie decorating


