Love this? Save it for later!
Share the inspiration with your friends
The Sunday before Thanksgiving, three years ago, I was sitting on my kitchen floor surrounded by four loaf pans, a mountain of stale bread, and the sinking feeling that I had made a terrible mistake. The turkey was brining in the fridge, the pies were chilling on the back porch, and I still had to figure out how to get the stuffing to the table without it turning into a soggy, lukewarm mess halfway through the meal. That was the year I swore off traditional stuffing casseroles for good.
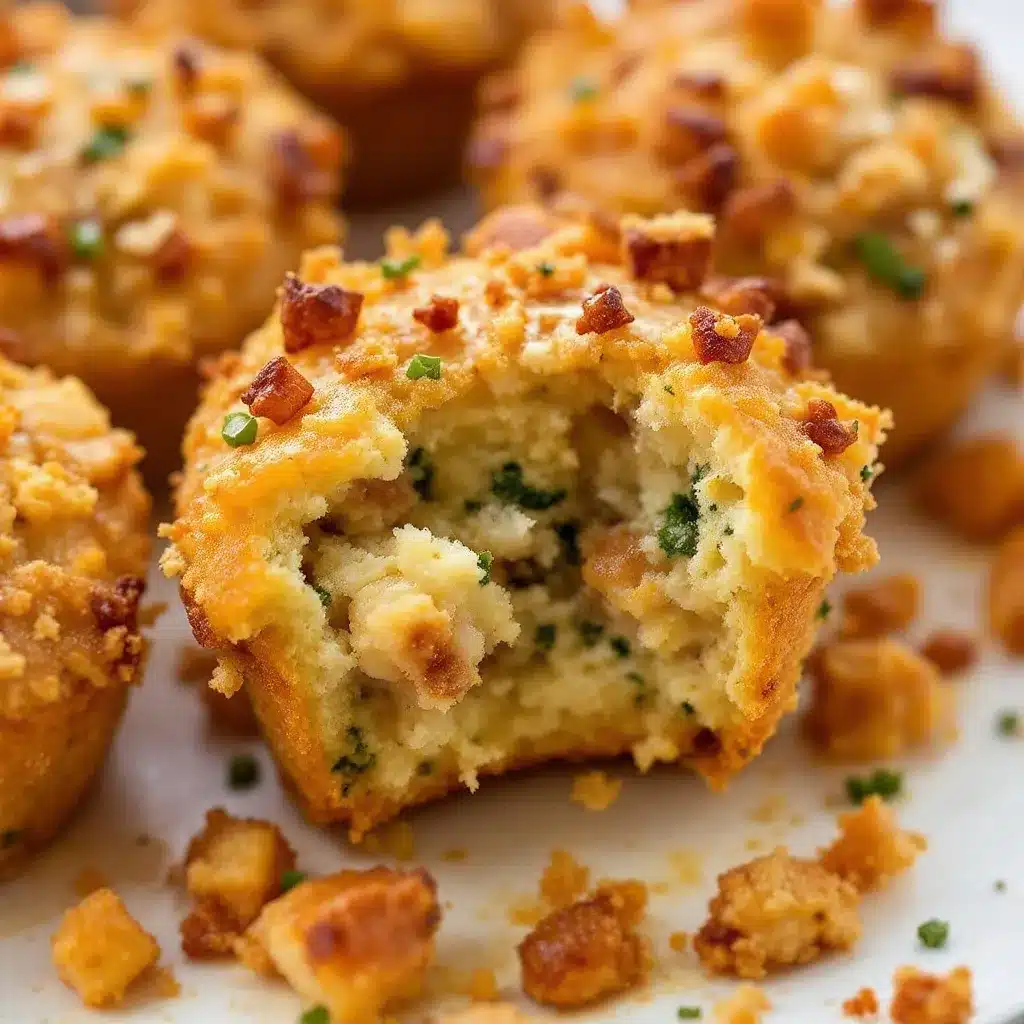
I had this idea — what if I baked the stuffing in muffin tins instead? Individual portions that could be made ahead, reheated in minutes, and served with that perfect crispy edge on every single bite. The first batch came out a little dry, honestly. The second batch fell apart. But the third batch? That was the one. Those little golden domes of herby, buttery bread came out of the oven with the most incredible texture — crisp on the outside, impossibly tender on the inside. My family devoured them before the turkey even made it to the table.
That moment changed how I approach Thanksgiving entirely. These stuffing muffins aren’t just a shortcut; they are the solution to the great stuffing dilemma. They free up oven space, eliminate last-minute scrambling, and give everyone their own personal portion of the best part of the meal. No more fighting over the corner pieces. Every muffin gets that coveted crispy edge.
So if you have ever stood over a steaming casserole dish at 2 PM on Thanksgiving, frantically stirring and wondering why you didn’t start earlier, this recipe is for you. It is the kind of practical, reliable dish that makes hosting feel less like a performance and more like what it should be — sharing a meal with the people you love.
Why You Will Love This Recipe
I have tested this recipe more times than I care to admit. I have made it with fresh bread, stale bread, gluten-free bread, and even leftover cornbread. I have baked it in mini muffin tins, jumbo muffin tins, and once, in a moment of desperation, a silicone cupcake pan. Through all those trials, I landed on a method that works every single time without fail.
- Make-Ahead Magic: Assemble and bake these up to three days in advance. Reheat them in a hot oven for 10 minutes, and they taste like you just pulled them out.
- Perfectly Portioned: No more scooping from a communal dish. Each person gets their own crispy, golden muffin that holds together beautifully.
- Crispy Edges Everywhere: The muffin tin creates maximum surface area for browning. That means more of the good stuff — the crunchy, buttery bits that everyone fights over.
- Oven Space Saver: Pop these in while the turkey rests. They take up barely any room and reheat in a fraction of the time a traditional casserole needs.
- Foolproof for Beginners: Even if you have never made stuffing from scratch, this recipe walks you through every step. The muffin format is actually more forgiving than a big casserole.
This isn’t just another stuffing recipe. It is the one that saves your sanity on the busiest cooking day of the year. It is the one your guests will ask about for years to come. And honestly? It is the one that made me actually look forward to making stuffing again.
What Ingredients You Will Need
This recipe uses straightforward, pantry-friendly ingredients, but each one plays a specific role in creating that perfect texture and flavor. Let me walk you through what you need and why it matters.
For the Bread Base
- 1 loaf (about 16 ounces) day-old French bread or sourdough, cut into ½-inch cubes — Stale bread is non-negotiable here. Fresh bread turns to mush. I prefer a rustic sourdough because it holds its shape and adds a subtle tang that balances the richness. If you only have fresh bread, spread the cubes on a baking sheet and toast them at 300°F for 10-15 minutes to dry them out.
- 4 tablespoons unsalted butter, melted — This gets drizzled over the bread cubes before baking. It adds richness and helps the edges crisp up beautifully.
For the Aromatics
- 1 large yellow onion, finely diced (about 1½ cups) — Yellow onion has the perfect balance of sweetness and bite. It melts into the stuffing as it bakes, adding moisture without making it soggy.
- 3 celery stalks, finely diced (about 1 cup) — Celery is the backbone of classic stuffing. It adds a subtle bitterness and that signature crunch that softens just enough during baking.
- 4 cloves garlic, minced — Fresh garlic only here. The jarred stuff won’t give you the same aromatic depth.
- ½ cup fresh parsley, finely chopped — Parsley brightens everything up. It is the ingredient that keeps the stuffing from tasting too heavy.
- 2 tablespoons fresh sage, finely chopped — Sage is non-negotiable for Thanksgiving stuffing. It has that earthy, slightly peppery flavor that defines the dish.
- 1 tablespoon fresh thyme leaves — Thyme adds a subtle floral note that rounds out the sage beautifully.
- 1 tablespoon fresh rosemary, finely chopped — Rosemary is potent, so don’t go overboard. It adds a piney, aromatic quality that pairs perfectly with the butter.
For the Custard Base
- 2 cups low-sodium chicken or vegetable broth — Low-sodium is important here because the bread absorbs the liquid and concentrates the salt. You can always add more salt later, but you can’t take it out. I prefer Swanson chicken broth for its clean flavor.
- 2 large eggs — Eggs are the binder that holds the muffins together. They create a custard-like texture that sets as the muffins bake.
- ½ cup heavy cream or whole milk — Heavy cream makes the stuffing extra rich and tender. Whole milk works if you want something lighter, but the texture won’t be quite as luxurious.
- 1 teaspoon kosher salt — I use Diamond Crystal kosher salt. If you use table salt, reduce to ½ teaspoon.
- ½ teaspoon black pepper, freshly ground — Freshly ground pepper makes a noticeable difference here. The pre-ground stuff just doesn’t have the same punch.
Optional Add-Ins
- ½ cup dried cranberries — Adds a pop of sweetness that contrasts beautifully with the savory herbs.
- ½ cup cooked and crumbled breakfast sausage — For a heartier, more substantial stuffing. I recommend Jimmy Dean or Applegate for clean ingredients.
- ¼ cup toasted pecans or walnuts, chopped — Adds crunch and a nutty depth that works especially well with sage.
Equipment Needed
You don’t need any fancy gadgets for this recipe, but having the right tools makes the process smoother and the results more consistent.
- 12-cup standard muffin tin — A non-stick muffin tin works best. If you only have a dark-colored tin, reduce the baking temperature by 25°F to prevent over-browning. I have used Wilton and USA Pan brands with great results.
- Large mixing bowl — You need room to toss the bread cubes with the aromatics and custard without spilling everything onto the counter.
- Large skillet — For sautéing the onions, celery, and garlic. A 12-inch skillet gives you plenty of surface area for even cooking.
- Whisk — For beating the eggs and broth together until smooth.
- Sharp chef’s knife and cutting board — You will be doing a lot of chopping. A sharp knife makes it quick and safe.
- Measuring cups and spoons — Accuracy matters in baking, even for stuffing.
- Pastry brush or paper towel — For greasing the muffin tin. Butter works best for flavor, but cooking spray is fine in a pinch.
- Cooling rack — Letting the muffins cool in the tin for 5 minutes, then transferring them to a rack prevents the bottoms from getting soggy.
If you don’t have a muffin tin, you can bake this stuffing in a standard 9×13-inch casserole dish. Just spread it evenly and bake for 35-40 minutes. You won’t get the crispy edges on every bite, but it will still taste amazing.
Preparation Method
This recipe comes together in about 45 minutes of active time, plus 25 minutes of baking. The key is to work efficiently and trust the process.
Step 1: Prepare the Bread
Preheat your oven to 350°F. Spread the bread cubes on a large baking sheet in a single layer. Toast them for 10-12 minutes, stirring halfway through, until they are dry and lightly golden. Remove from the oven and let them cool completely. This step is crucial — the drier the bread, the better it absorbs the custard without turning mushy. I have forgotten to toast the bread before, and the result was a dense, wet stuffing that nobody finished.
Step 2: Sauté the Aromatics
While the bread toasts, melt 2 tablespoons of butter in a large skillet over medium heat. Add the diced onion and celery. Cook, stirring occasionally, for 6-8 minutes until the vegetables are soft and translucent but not browned. Add the minced garlic and cook for 1 more minute until fragrant. Remove from heat and stir in the fresh parsley, sage, thyme, and rosemary. Set aside to cool slightly.
Step 3: Make the Custard
In a medium bowl, whisk together the chicken broth, eggs, heavy cream, kosher salt, and black pepper. Whisk until the eggs are fully incorporated and the mixture is smooth. Don’t skip the whisking — if the eggs aren’t fully beaten, you will end up with streaks of cooked egg white in your stuffing.
Step 4: Combine Everything
In a large mixing bowl, combine the toasted bread cubes and the sautéed vegetable-herb mixture. Pour the custard over the top and gently fold everything together with a rubber spatula. Make sure every bread cube gets coated. Let the mixture sit for 10 minutes. This resting time allows the bread to absorb the liquid evenly. If the mixture looks dry after resting, add an extra ¼ cup of broth.
Step 5: Fill the Muffin Tin
Grease a 12-cup muffin tin generously with butter or cooking spray. Using a ¼-cup measuring scoop or a large spoon, divide the stuffing mixture evenly among the cups. Press down gently with the back of the spoon to compact each muffin slightly. This helps them hold their shape as they bake. Don’t overfill — leave about ¼ inch of space at the top so the muffins can puff up.
Step 6: Bake
Bake the stuffing muffins at 375°F for 22-25 minutes, until the tops are golden brown and crispy. A toothpick inserted into the center should come out clean. If the tops are browning too quickly, tent the pan loosely with foil for the last 5 minutes of baking.
Step 7: Cool and Serve
Let the muffins cool in the pan for 5 minutes. Run a butter knife around the edges to loosen them, then transfer to a cooling rack. Serve warm. If making ahead, let them cool completely before storing.
Cooking Tips & Techniques
After making these stuffing muffins more times than I can count, I have picked up a few tricks that make a real difference. Here are the ones I wish I had known from the start.
The Bread Matters More Than You Think. I have tried this recipe with everything from brioche to whole wheat sandwich bread. The best results come from a sturdy, crusty loaf like sourdough or French bread. Soft breads absorb too much liquid and collapse. If you only have soft bread, toast it until it is very dry — almost crunchy — before using it.
Don’t Skip the Resting Time. I know it is tempting to rush, but letting the stuffing mixture sit for 10 minutes before scooping it into the muffin tin is non-negotiable. This resting period allows the bread to absorb the custard evenly. If you skip it, you will end up with dry spots and soggy spots in the same muffin.
Pack the Muffins Firmly. When you fill the muffin cups, press the mixture down gently with the back of a spoon or your fingers. This compaction helps the muffins hold their shape and creates that dense, satisfying texture. Loose packing leads to crumbly muffins that fall apart when you try to remove them.
Watch the Oven Temperature. Every oven runs a little differently. If your muffins are browning too quickly on top but are still wet in the center, lower the temperature to 350°F and bake for an additional 5-7 minutes. If they are pale after 25 minutes, crank the heat to 400°F for the last 3 minutes.
Make Extra for the Freezer. These muffins freeze beautifully. Bake them, cool them completely, then wrap each muffin individually in plastic wrap and place them in a freezer bag. To reheat, unwrap and bake at 350°F for 12-15 minutes directly from frozen. They taste just as good as fresh.
Variations & Adaptations
One of the best things about this recipe is how adaptable it is. Here are some of my favorite variations that I have tested over the years.
Classic Sausage Stuffing Muffins
Brown ½ pound of breakfast sausage in the skillet before cooking the onions and celery. Remove the sausage with a slotted spoon and set it aside. Proceed with the recipe as written, folding the cooked sausage into the bread mixture along with the vegetables. The rendered fat from the sausage adds incredible flavor and richness.
Vegetarian Mushroom & Leek Stuffing Muffins
Sauté 8 ounces of sliced cremini mushrooms with the onions and celery. Replace the chicken broth with vegetable broth. Add 1 cup of finely chopped leeks (white and light green parts only) along with the onions. The mushrooms add an earthy, umami depth that even meat-eaters love.
Gluten-Free Stuffing Muffins
Use a good-quality gluten-free bread. I have had the best results with Canyon Bakehouse or Udi’s gluten-free sourdough. The bread needs to be toasted until very dry — gluten-free bread absorbs liquid differently and can turn gummy if it isn’t dried out enough. Add an extra egg to help with binding.
Cornbread Stuffing Muffins
Substitute half of the bread cubes with crumbled cornbread. Use Marie Callender’s cornbread mix or your favorite homemade recipe. Reduce the broth to 1½ cups, as cornbread is more absorbent than regular bread. These are especially good with dried cranberries and pecans folded in.
Dairy-Free Stuffing Muffins
Replace the butter with olive oil or a plant-based butter. Use unsweetened oat milk or almond milk instead of heavy cream. The texture will be slightly less rich, but the flavor from the herbs and aromatics still shines through beautifully.
Serving & Storage Suggestions
These stuffing muffins are incredibly versatile when it comes to serving. Here is everything you need to know about getting them to the table and keeping them fresh.
Serving Temperature: Serve the muffins warm, straight from the oven or reheated. The contrast between the crispy exterior and the tender interior is at its peak when they are hot. If you are serving them alongside a full Thanksgiving spread, reheat them during the last 10 minutes of the turkey’s resting time.
Presentation: Arrange the muffins on a large platter lined with fresh sage leaves or rosemary sprigs. The green herbs contrast beautifully with the golden-brown muffins. For an extra touch, drizzle a little melted butter over the tops just before serving.
What to Serve With Them: These muffins pair perfectly with roast turkey, creamy Tuscan chicken, or even a simple honey garlic baked chicken breast. They also make an excellent side for a cozy cheeseburger soup on a cold winter night. For a lighter meal, serve them alongside a shrimp and avocado salad for a surprising but delicious combination.
Refrigerator Storage: Store leftover muffins in an airtight container in the refrigerator for up to 4 days. Place a paper towel at the bottom of the container to absorb excess moisture, and change it daily for best results.
Freezer Storage: These muffins freeze exceptionally well. Cool them completely, then wrap each muffin individually in plastic wrap. Place the wrapped muffins in a freezer-safe bag or container. They will keep for up to 3 months. To thaw, transfer them to the refrigerator overnight, then reheat in a 350°F oven for 10 minutes.
Reheating: The oven is your best friend for reheating. Microwave reheating makes the muffins soggy. Preheat your oven to 350°F, place the muffins on a baking sheet, and heat for 8-10 minutes (12-15 minutes if frozen). The tops will crisp back up beautifully.
Nutritional Information & Benefits
While stuffing is traditionally seen as an indulgence, these muffins offer some surprising nutritional benefits, especially when you make a few smart swaps.
| Nutrient | Per Muffin (standard recipe) |
|---|---|
| Calories | 195 |
| Total Fat | 8g |
| Saturated Fat | 4g |
| Cholesterol | 45mg |
| Sodium | 380mg |
| Total Carbohydrates | 24g |
| Dietary Fiber | 2g |
| Sugars | 3g |
| Protein | 6g |
The fresh herbs in this recipe — sage, thyme, and rosemary — are rich in antioxidants and have anti-inflammatory properties. Celery provides vitamin K and potassium, while the eggs offer high-quality protein and choline, which supports brain health. If you use whole wheat bread, the fiber content increases to about 4g per muffin.
For a lighter version, replace the heavy cream with unsweetened almond milk and reduce the butter to 2 tablespoons. This cuts the calories to about 155 per muffin and reduces the saturated fat by half.
If you are looking for other high-protein side dishes to round out your meal, try a savory cottage cheese bowl or a Greek yogurt chicken salad for a lighter alternative.
Conclusion
These make-ahead stuffing muffins have genuinely changed how I approach Thanksgiving. They took something that used to stress me out — the timing, the texture, the fighting over the crispy bits — and turned it into the easiest, most reliable part of the meal. I love that I can make them days in advance, pop them in the oven while the turkey rests, and watch my family grab them off the platter before I even get the gravy on the table.
But more than that, I love that they make everyone feel special. There is something about having your own personal muffin, perfectly crispy on all sides, that makes the meal feel more intentional. It is a small detail, but it is the kind of detail that turns a good dinner into a memorable one.
I would love to hear how these turn out for you. Did you add sausage or keep it classic? Did you go with sourdough or cornbread? Drop a comment below and let me know. And if you try a variation I haven’t thought of, please share it — I am always looking for new ways to make these even better.
Until next time, happy cooking, and may your stuffing always be crispy on the outside and tender on the inside.
Frequently Asked Questions
Can I use store-bought stuffing mix for this recipe?
You can, but the texture won’t be quite the same. Store-bought stuffing mix is much finer and more processed than fresh bread cubes. If you use it, reduce the broth to 1¼ cups and skip the toasting step. The muffins will be denser and less fluffy, but they will still taste good.
Why did my stuffing muffins fall apart when I took them out of the pan?
This usually happens for one of two reasons: the muffins weren’t packed firmly enough into the muffin cups, or they didn’t cool long enough in the pan. Make sure you press the mixture down firmly before baking, and let them rest in the pan for at least 5 minutes after baking. Running a butter knife around the edges before lifting them out also helps.
Can I make these stuffing muffins in a mini muffin tin?
Absolutely. Use a mini muffin tin and reduce the baking time to 12-15 minutes. These are perfect for appetizers or for holiday parties. You will get about 36 mini muffins from this recipe. Just keep an eye on them toward the end — mini muffins brown quickly.
How far ahead can I assemble the stuffing mixture before baking?
You can assemble the mixture up to 24 hours in advance. Cover the bowl tightly with plastic wrap and refrigerate. When you are ready to bake, let the mixture sit at room temperature for 20 minutes, then scoop it into the muffin tin and bake as directed. If the mixture seems dry after refrigeration, stir in an extra ¼ cup of broth before baking.
Can I add cooked turkey to the stuffing muffins for a leftover meal?
Yes, and it is a fantastic way to use up leftover turkey. Fold 1½ cups of finely chopped cooked turkey into the bread mixture along with the vegetables. Reduce the broth to 1¾ cups since the turkey adds moisture. These make an excellent post-Thanksgiving breakfast or lunch.
Pin This Recipe!
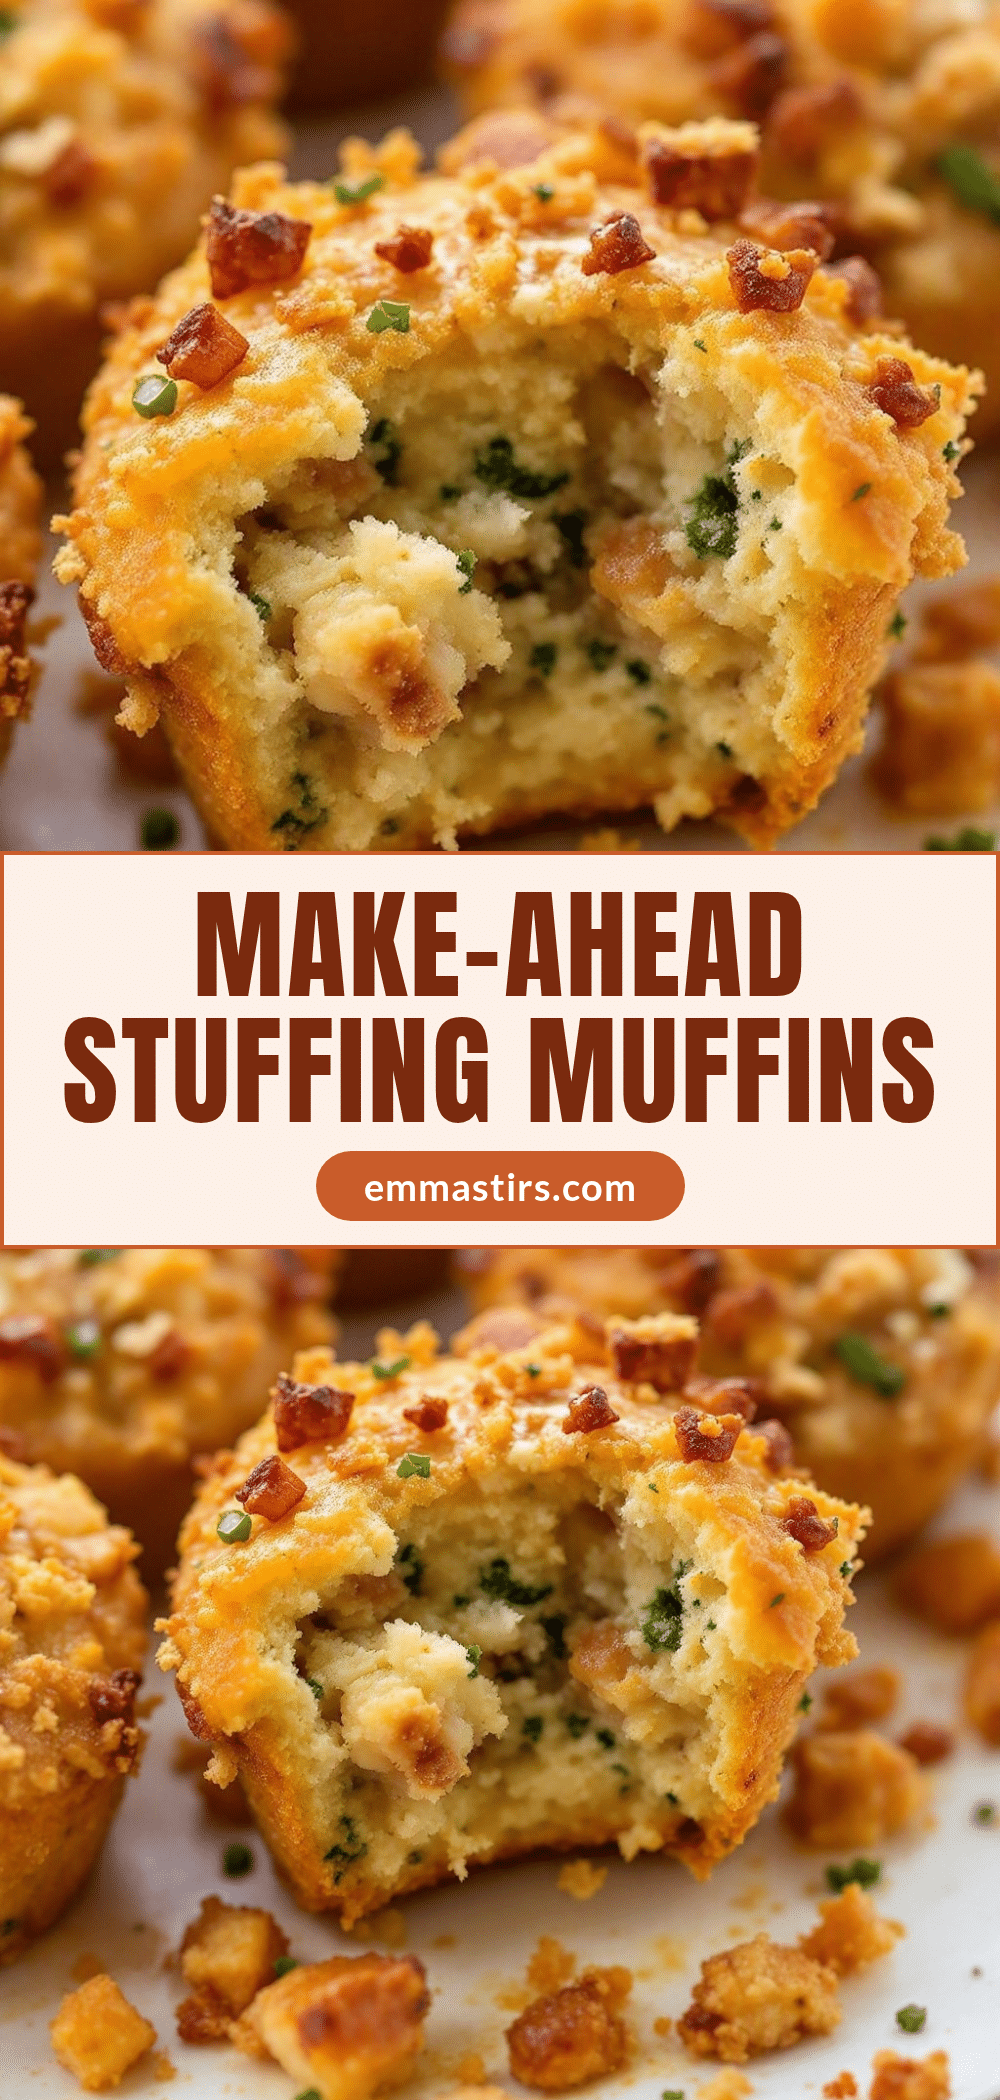
Perfect Make-Ahead Stuffing Muffins: Easy Thanksgiving Side

Individual stuffing muffins with crispy edges and tender centers, made ahead and reheated in minutes. A foolproof, oven-space-saving Thanksgiving side that everyone loves.
- Prep Time: 45 minutes
- Cook Time: 25 minutes
- Total Time: 1 hour 10 minutes
- Yield: 12 servings 1x
- Category: Side Dish
- Cuisine: American
Ingredients
- 1 loaf (about 16 ounces) day-old French bread or sourdough, cut into ½-inch cubes
- 4 tablespoons unsalted butter, melted
- 1 large yellow onion, finely diced (about 1½ cups)
- 3 celery stalks, finely diced (about 1 cup)
- 4 cloves garlic, minced
- ½ cup fresh parsley, finely chopped
- 2 tablespoons fresh sage, finely chopped
- 1 tablespoon fresh thyme leaves
- 1 tablespoon fresh rosemary, finely chopped
- 2 cups low-sodium chicken or vegetable broth
- 2 large eggs
- ½ cup heavy cream or whole milk
- 1 teaspoon kosher salt
- ½ teaspoon black pepper, freshly ground
- ½ cup dried cranberries (optional)
- ½ cup cooked and crumbled breakfast sausage (optional)
- ¼ cup toasted pecans or walnuts, chopped (optional)
Instructions
- Preheat oven to 350°F. Spread bread cubes on a large baking sheet in a single layer. Toast for 10-12 minutes, stirring halfway, until dry and lightly golden. Let cool completely.
- While bread toasts, melt 2 tablespoons butter in a large skillet over medium heat. Add onion and celery. Cook 6-8 minutes until soft and translucent. Add garlic and cook 1 minute more. Remove from heat and stir in parsley, sage, thyme, and rosemary. Set aside to cool slightly.
- In a medium bowl, whisk together broth, eggs, heavy cream, salt, and pepper until smooth.
- In a large bowl, combine toasted bread cubes and sautéed vegetable-herb mixture. Pour custard over and fold gently until all bread is coated. Let rest 10 minutes. If dry, add ¼ cup extra broth.
- Grease a 12-cup muffin tin with butter or cooking spray. Divide stuffing mixture evenly among cups, pressing down gently. Leave about ¼ inch space at top.
- Bake at 375°F for 22-25 minutes until tops are golden brown and crispy. A toothpick inserted in center should come out clean. Tent with foil if browning too quickly.
- Cool in pan for 5 minutes. Run a knife around edges to loosen, then transfer to a cooling rack. Serve warm.
Notes
Stale bread is crucial; if using fresh bread, toast cubes at 300°F for 10-15 minutes to dry out. Let stuffing mixture rest 10 minutes before baking for even absorption. Pack muffins firmly to prevent crumbling. For make-ahead, bake up to 3 days in advance and reheat at 350°F for 10 minutes. Freeze individually wrapped for up to 3 months.
Nutrition
- Serving Size: 1 muffin
- Calories: 195
- Sugar: 3
- Sodium: 380
- Fat: 8
- Saturated Fat: 4
- Carbohydrates: 24
- Fiber: 2
- Protein: 6
Keywords: stuffing muffins, make-ahead stuffing, Thanksgiving side, individual stuffing, crispy stuffing, holiday side dish


