Love this? Save it for later!
Share the inspiration with your friends
Introduction
“I wasn’t even planning to bake that afternoon,” I remember saying to myself as I pulled into the parking lot of my local community center last April. It was the annual spring fundraiser, and honestly, I had forgotten until my phone buzzed with a last-minute plea for dessert contributions. I dashed inside with nothing but a vague idea and a cracked bowl I’d somehow managed to drop earlier (classic me). That’s when my neighbor, Joan, leaned over and whispered about her secret weapon: robin egg nest cake pops. I thought, why not? A colorful little nest of cake and candy seemed perfect for spring celebrations. What started as a rushed experiment quickly became the star of the event.
Maybe you’ve been there—scrambling to whip up something festive, fresh, and fun. These cake pops aren’t just cute; they’re a joyful nod to the season, combining light sponge cake, creamy frosting, and pastel candy-coated eggs that look like tiny treasures nestled in a springtime nest. I mean, who can resist a treat that looks as good as it tastes, especially when it brings smiles all around?
Since that day, I’ve refined the recipe to balance sweetness and texture just right, and honestly, these Perfect Robin Egg Nest Cake Pops have become my go-to for Easter brunches, school parties, and even casual weekend gatherings where a little spring magic is needed. So, let me tell you why these cake pops are worth every crumb of your attention this season!
Why You’ll Love This Recipe
After countless tests, tweaks, and a few too many frosting-covered fingers, I’m confident these robin egg nest cake pops will win you over. They combine the charm of spring with an easy-to-follow process that anyone can master.
- Quick & Easy: Ready in under 45 minutes (including chilling time), making them perfect for last-minute celebrations or spontaneous baking sessions.
- Simple Ingredients: No need for fancy or hard-to-find items. You probably have most of these in your pantry already, saving you unnecessary grocery trips.
- Perfect for Spring Celebrations: Whether it’s Easter, a garden party, or a baby shower, these cake pops add a playful, seasonal touch that’s sure to impress.
- Crowd-Pleaser: Kids adore the colorful candy eggs, and adults appreciate the moist cake and creamy frosting combo—everyone gets a little nostalgic with each bite.
- Unbelievably Delicious: The combination of soft cake, rich frosting, and the slight crunch of candy-coated eggs makes for a texture and flavor mix that’s truly delightful.
This isn’t just another cake pop recipe. The secret lies in the frosting-to-cake ratio, which I’ve perfected to deliver moist, flavorful pops that don’t crumble or get dry. Plus, the way the candy eggs nestle on top adds that whimsical, springtime vibe you won’t find in ordinary treats. Honestly, once you make these, you might find yourself sneaking an extra one or two before guests arrive!
What Ingredients You Will Need
This Perfect Robin Egg Nest Cake Pops recipe relies on straightforward, wholesome ingredients that come together to create something truly special. The components are pantry-friendly, seasonal, and easy to swap if needed.
- For the Cake:
- 1 box of yellow cake mix (or homemade equivalent) – I prefer Betty Crocker for consistent results
- 3 large eggs, room temperature
- 1/2 cup vegetable oil
- 1 cup water
- For the Frosting:
- 1/2 cup unsalted butter, softened (adds richness and creaminess)
- 2 cups powdered sugar, sifted
- 2 tablespoons whole milk or cream (use dairy-free milk if preferred)
- 1 teaspoon vanilla extract
- For the Decoration:
- 1 package of pastel Robin Egg candy-coated chocolate eggs (look for Wilton or Chocorua brands for best color variety)
- 2 cups white candy melts or white chocolate chips
- 12 cake pop sticks
- Optional: edible grass or shredded coconut dyed green for extra nest effect
If you’re aiming for a gluten-free version, try using a gluten-free cake mix—just keep an eye on moisture levels when mixing. For a vegan twist, almond milk and plant-based butter work nicely. And if fresh eggs aren’t on hand, liquid egg replacer can do the trick.
Equipment Needed
- Standard 9×13-inch baking pan for the cake
- Mixing bowls (one large for batter, one medium for frosting)
- Electric hand mixer or stand mixer (helps get the frosting super smooth)
- Baking sheet lined with parchment paper (for chilling cake pops)
- Microwave-safe bowl for melting candy melts
- Cake pop sticks (available at craft stores or online)
- Optional: Styrofoam block or cake pop stand for drying
If you don’t have a cake pop stand, a simple Styrofoam block works wonders to keep your pops upright while the candy coating sets. For melting candy melts, a double boiler is nice, but the microwave method with 20-second bursts works just as well (just don’t overheat!). I often use a silicone spatula — it’s gentle and perfect for scraping every last bit of frosting or melted candy.
Preparation Method
- Prepare the Cake Batter (10 minutes): Preheat your oven to 350°F (175°C). In a large bowl, combine the cake mix, eggs, vegetable oil, and water. Beat with an electric mixer on medium speed until smooth and well blended. Scrape down the sides occasionally.
- Bake the Cake (30 minutes): Pour the batter evenly into the greased 9×13-inch pan. Bake for 28-32 minutes or until a toothpick inserted into the center comes out clean. Let the cake cool completely on a wire rack (about 30 minutes).
- Crumble the Cake (5 minutes): Once cooled, crumble the cake into a large mixing bowl using your hands or a fork. You want fine crumbs but not powder.
- Make the Frosting (5 minutes): In a separate bowl, beat softened butter until creamy. Gradually add powdered sugar, then milk and vanilla extract. Beat until smooth and fluffy.
- Combine Cake and Frosting (5 minutes): Add frosting to the cake crumbs a little at a time, mixing gently with your hands or a spoon until the mixture holds together but isn’t too sticky. This is your cake pop dough.
- Shape the Cake Pops (15 minutes): Scoop about 2 tablespoons (30g) of the mixture and roll into balls (approximately 1.25 inches or 3 cm diameter). Place them on a parchment-lined baking sheet.
- Chill the Cake Pops (at least 1 hour): Refrigerate the cake balls to firm up—this step is crucial for easy dipping.
- Prepare Candy Melts for Dipping: Melt candy melts in a microwave-safe bowl in 20-second intervals, stirring between each until smooth.
- Attach Sticks and Dip: Dip one end of a cake pop stick into the melted candy, then insert it about halfway into a chilled cake ball (this helps secure the stick). Dip the entire cake pop into the candy coating, tapping off excess. Let the coating set slightly.
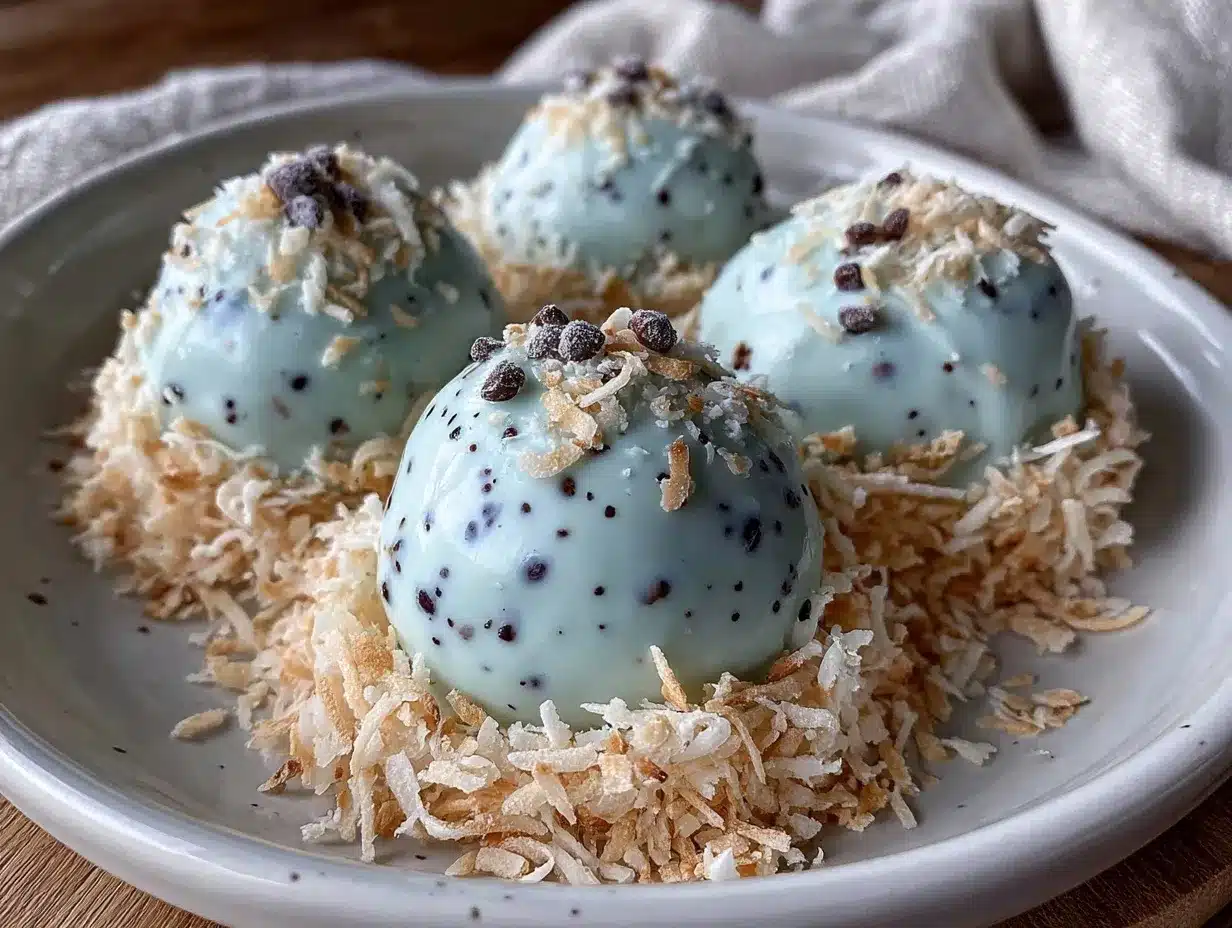
- Create the Nest: Before the coating fully hardens, gently press 3-4 robin egg candies on top of each cake pop to resemble a nest. Optionally, add a small amount of edible grass or dyed coconut around the eggs for texture.
- Set and Serve (15 minutes): Place the finished cake pops upright in a Styrofoam block or on parchment to dry completely. Chill again if needed before serving.
Pro tip: If your cake pops are falling off the sticks, the cake mixture is likely too crumbly or the candy coating too warm. Chill both a bit more before dipping. Also, avoid overmixing cake and frosting to keep pops tender and moist.
Cooking Tips & Techniques
Making perfect cake pops can feel tricky, but I’ve learned a few tricks along the way that make the process smoother and the results consistently delightful.
- Don’t Skip the Chilling: Chilling the cake balls is non-negotiable. It prevents crumbling and helps the coating adhere nicely.
- Use Room Temperature Ingredients: Eggs and butter at room temp mix more evenly, giving you a smoother batter and frosting.
- Handle Candy Melts with Care: Melt candy slowly and stir often. Overheating makes them grainy or stiff.
- Stick Placement: Dip the stick in candy first to “glue” it to the cake ball. This simple step keeps your pops together during dipping.
- Work in Batches: Don’t try to dip all at once. Melts can harden quickly, so work with small batches to keep the coating smooth.
- Keep It Cool: If your kitchen is warm, pop the coated cake pops in the fridge for a few minutes to set faster.
- Avoid Overmixing: Too much mixing when combining cake and frosting creates dense pops—gentle folding is best.
Honestly, the first time I made these, I tried to rush through and ended up with crumbly messes and uneven coating. Patience and these little techniques changed everything. You’ll get there too!
Variations & Adaptations
This recipe is a fun canvas for creativity and can be adapted to fit different diets, flavors, and occasions.
- Flavor Variations: Add a teaspoon of almond or lemon extract to the frosting for a subtle twist. Mixing in mini chocolate chips or sprinkles into the cake batter also adds texture and surprise.
- Seasonal Adaptations: For spring beyond Easter, swap robin eggs for pastel jelly beans or small fruit candies. In fall, try candy corn or pumpkin-shaped chocolates for a cozy vibe.
- Dietary Substitutions: Use gluten-free cake mix and vegan butter/milk alternatives to make these allergy-friendly. For a low-sugar version, opt for sugar substitutes in frosting and sugar-free candy melts.
- Cooking Method: Instead of cake pops, press the cake-frosting mixture into mini muffin tins for bite-sized “nests.” Top with the same candy eggs for a no-stick alternative.
- Personal Favorite: I once added a teaspoon of finely grated orange zest into the frosting. It gave a bright, fresh note that paired wonderfully with the candy eggs and made the pops feel extra spring-y!
Serving & Storage Suggestions
These cake pops are best served slightly chilled or at room temperature. The candy coating has a perfect snap when cool but softens pleasantly as they warm.
For presentation, arrange them upright in a decorative Styrofoam block or a colorful basket with shredded green paper “grass” for that true nest effect. Pair them with light beverages like iced tea or lemonade to complement the sweet, creamy flavors.
Store cake pops in an airtight container in the refrigerator for up to 5 days. Avoid stacking them to prevent smushing. They also freeze well wrapped individually in plastic wrap—just thaw in the fridge overnight before serving.
Reheat gently at room temperature; avoid microwaving as it can melt the candy coating unevenly. Flavors tend to deepen and meld after a day, so these actually taste better if you make them a day ahead.
Nutritional Information & Benefits
Each robin egg nest cake pop (serving size: 1 pop) contains approximately:
| Calories | 180 |
|---|---|
| Fat | 8g |
| Carbohydrates | 25g |
| Protein | 2g |
| Sugar | 18g |
While these cake pops are definitely a treat, they offer some calcium from the dairy butter and milk, and the candy eggs provide small amounts of iron and vitamin A. Using real vanilla extract adds antioxidants, and swapping in whole-grain cake mixes can bump fiber content slightly.
Keep in mind allergens like gluten, dairy, and eggs are present—substitutions can help if needed. I like to think of these pops as a joyful indulgence for spring gatherings that brings people together and brightens spirits.
Conclusion
If you’re looking for a festive, fun, and downright adorable treat to celebrate spring, these Perfect Robin Egg Nest Cake Pops are a winner. They’re approachable for bakers of all levels, quick enough for last-minute plans, and charming enough to impress any crowd.
Feel free to tweak the flavors and decorations to fit your taste—maybe you’ll add edible flowers or switch up the candy eggs for something unexpected. The best part is how these cake pops bring a little sunshine to your table, no matter the occasion.
I love making these every year because they remind me of that chaotic spring day when a quick idea turned into a beloved tradition. Now, I’d love to hear your twists or memories if you give them a try—drop a comment below and share your story!
Happy baking and joyful spring celebrations!
FAQs
Can I make these cake pops ahead of time?
Yes! You can prepare the cake pops up to 2 days in advance and keep them refrigerated. Just make sure to store them in an airtight container to keep the coating crisp.
What if I don’t have candy melts—can I use chocolate instead?
Absolutely. White chocolate chips or bars work well. Melt them gently and stir frequently to avoid burning. Candy melts are easier to use but chocolate tastes great too!
How do I keep cake pops from falling off the sticks?
Dipping the stick tip into melted candy before inserting it into the cake ball helps secure it. Also, chilling the cake balls thoroughly before dipping prevents crumbling and falling off.
Can I use homemade cake instead of boxed mix?
Definitely. Use your favorite yellow or vanilla cake recipe. Just ensure the cake is fully cooled and crumbled finely before mixing with frosting.
What’s the best way to store leftover cake pops?
Store them in a sealed container in the fridge for up to 5 days. For longer storage, wrap individually and freeze, then thaw overnight in the fridge before eating.
Pin This Recipe!
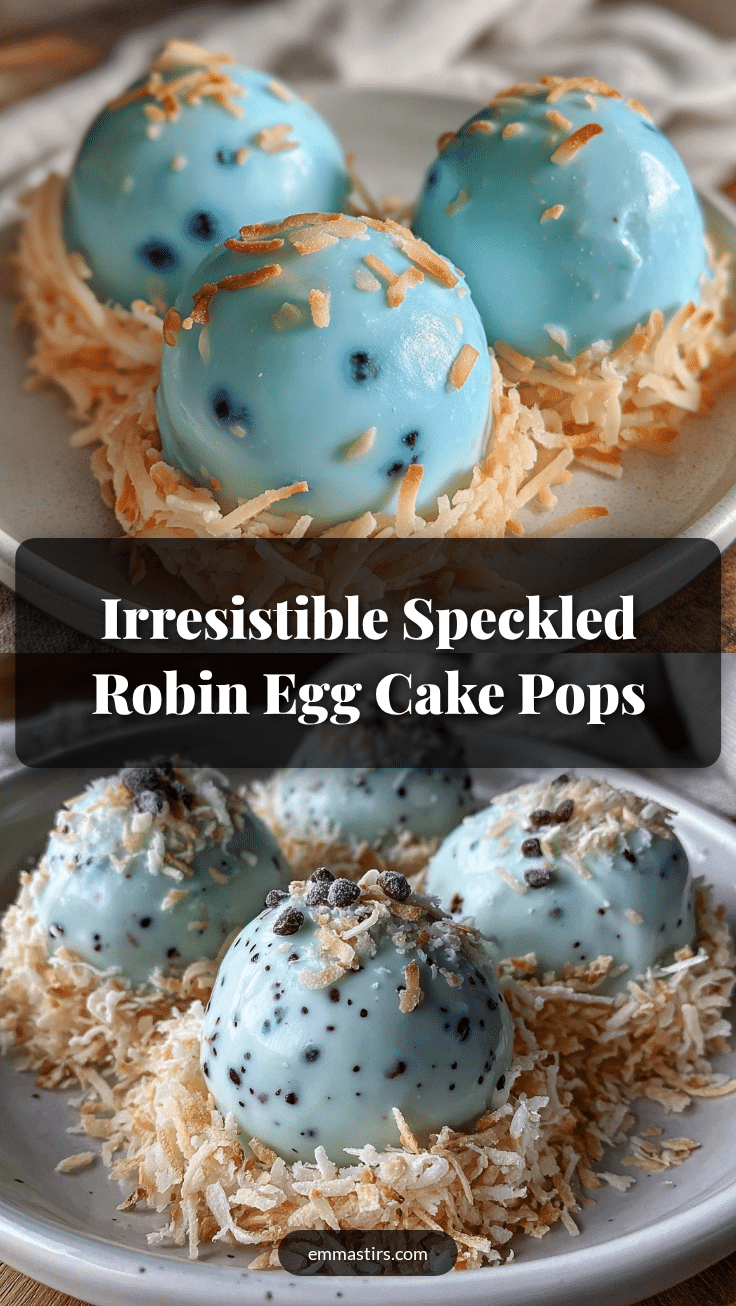
Perfect Robin Egg Nest Cake Pops

These colorful and festive cake pops combine moist yellow cake, creamy frosting, and pastel candy-coated eggs to create a delightful springtime treat perfect for celebrations like Easter and garden parties.
- Prep Time: 20 minutes
- Cook Time: 30 minutes
- Total Time: 1 hour 50 minutes
- Yield: 12 servings 1x
- Category: Dessert
- Cuisine: American
Ingredients
- 1 box yellow cake mix (or homemade equivalent)
- 3 large eggs, room temperature
- 1/2 cup vegetable oil
- 1 cup water
- 1/2 cup unsalted butter, softened
- 2 cups powdered sugar, sifted
- 2 tablespoons whole milk or cream (or dairy-free milk)
- 1 teaspoon vanilla extract
- 1 package pastel Robin Egg candy-coated chocolate eggs
- 2 cups white candy melts or white chocolate chips
- 12 cake pop sticks
- Optional: edible grass or shredded coconut dyed green for extra nest effect
Instructions
- Preheat oven to 350°F (175°C). In a large bowl, combine cake mix, eggs, vegetable oil, and water. Beat with electric mixer on medium speed until smooth and well blended, scraping sides occasionally.
- Pour batter evenly into greased 9×13-inch baking pan. Bake for 28-32 minutes or until toothpick inserted in center comes out clean. Cool completely on wire rack (about 30 minutes).
- Crumble cooled cake into a large mixing bowl using hands or fork until fine crumbs form but not powder.
- In a separate bowl, beat softened butter until creamy. Gradually add powdered sugar, then milk and vanilla extract. Beat until smooth and fluffy.
- Add frosting to cake crumbs a little at a time, mixing gently until mixture holds together but isn’t too sticky to form cake pop dough.
- Scoop about 2 tablespoons (30g) of mixture and roll into balls approximately 1.25 inches (3 cm) diameter. Place on parchment-lined baking sheet.
- Refrigerate cake balls for at least 1 hour to firm up.
- Melt candy melts in microwave-safe bowl in 20-second intervals, stirring between each until smooth.
- Dip one end of a cake pop stick into melted candy, then insert halfway into chilled cake ball to secure stick.
- Dip entire cake pop into candy coating, tapping off excess. Let coating set slightly.
- Before coating fully hardens, gently press 3-4 robin egg candies on top of each cake pop to resemble a nest. Optionally add edible grass or dyed coconut around eggs for texture.
- Place finished cake pops upright in Styrofoam block or on parchment to dry completely. Chill again if needed before serving.
Notes
Chilling the cake balls is essential to prevent crumbling and to help the candy coating adhere. Dip the stick tip in melted candy before inserting into the cake ball to secure it. Avoid overmixing cake and frosting to keep pops tender and moist. Work in small batches when dipping to keep candy melts smooth. Store cake pops in airtight container in refrigerator up to 5 days or freeze individually wrapped.
Nutrition
- Serving Size: 1 cake pop
- Calories: 180
- Sugar: 18
- Fat: 8
- Carbohydrates: 25
- Protein: 2
Keywords: cake pops, robin egg cake pops, spring dessert, Easter treats, candy-coated eggs, cake pop recipe, easy cake pops, festive desserts