Love this? Save it for later!
Share the inspiration with your friends
My brother-in-law, Dave, did not trust chicken wings at a tailgate. He said they were either soggy from a sauce that slid right off, or they were so sticky you needed a wet nap and a prayer. Honestly, I thought he had a point. I had been burned by too many sad, lukewarm wings myself. So when I volunteered to bring the main dish for the big game, I knew I had to crack the code. I wanted something that packed a punch, stayed crispy under all that glaze, and didn’t require a fork. After a few messy experiments in my own kitchen (and one that ended with a baking sheet in the trash), I landed on these sticky honey garlic chicken wings. They were the first thing to go at the next tailgate. Dave ate twelve of them without a single complaint about sogginess.
The trick, I learned, is all in the technique. It is not just about the sauce, though that sticky honey garlic coating is dangerously good. It is about getting the skin shatteringly crisp first so it can hold up to the glaze. These wings come out of the oven (or air fryer) with a crackly skin that stays crunchy even after you toss them in that sweet, savory, garlicky magic. The honey caramelizes just enough to create a glossy, finger-licking finish that is pure tailgate perfection. They have that perfect balance of sticky and spicy, with a little kick from the garlic and a touch of heat. It is the kind of recipe that makes you forget about the score of the game.
Why You’ll Love This Recipe
I have made these wings for every game day, backyard BBQ, and casual get-together for the last two years. They are my go-to for a reason. Here is why they will become yours too.
- Perfect for a Crowd: This recipe scales up beautifully. You can easily double or triple it for a big tailgate party without any extra fuss.
- Crispy Without Frying: We get that ultra-crispy skin using a simple baking powder trick in the oven. No deep fryer needed, just a hot oven and a little patience.
- Simple Pantry Ingredients: You likely have almost everything you need right now. Honey, soy sauce, garlic, and a few other staples create a complex, restaurant-quality sauce.
- Make-Ahead Friendly: You can par-bake the wings and finish them in the sauce right before serving. This makes game day prep a breeze.
- Unbelievably Delicious: The combination of salty, sweet, sticky, and savory is absolutely addictive. People will be asking for the recipe before the first commercial break.
What makes these wings different is the double-bake method. Most recipes just toss raw wings in sauce, which leads to a sad, steamed texture. I bake them first until the skin is dry and crispy, then toss them in the glaze and bake again. This locks in the crunch and creates a thick, caramelized coating that sticks to every nook and cranny. It is a little extra effort, but the payoff is huge. These are not just wings; they are the wings you will be known for.
What Ingredients You Will Need
This recipe relies on a handful of everyday ingredients to create something truly special. Here is everything you will need to make these sticky honey garlic chicken wings.
- Chicken Wings (3 lbs): I use a mix of flats and drumettes. You can buy them pre-cut or cut whole wings yourself. Pat them very dry with paper towels before you start. This is the most important step for crispy skin.
- Baking Powder (1 ½ teaspoons): This is the secret to crispy oven-baked wings. It helps dry out the skin and create tiny bubbles that get golden and crunchy. Make sure it is baking powder, not baking soda. I prefer aluminum-free like Rumford.
- Salt (1 teaspoon): Use a fine sea salt or kosher salt. It seasons the skin from the inside out.
- Garlic Powder (½ teaspoon): Adds a subtle savory depth to the wings before they even hit the sauce.
- Black Pepper (¼ teaspoon): A little fresh crack for balance.
- Honey (⅓ cup): The star of the glaze. Use a good quality, runny honey for the best texture and flavor. Local honey is always a nice touch if you have it.
- Soy Sauce (¼ cup): Provides the salty, umami backbone. I use low-sodium soy sauce to control the salt level. You can use tamari for a gluten-free option.
- Garlic (4 cloves, minced): Fresh garlic is non-negotiable here. It adds a pungent, aromatic kick that powdered garlic just cannot match. Mince it very fine so it melts into the sauce.
- Rice Vinegar (2 tablespoons): A splash of acidity cuts through the sweetness and balances the glaze. Apple cider vinegar or white wine vinegar will work in a pinch.
- Sesame Oil (1 tablespoon): Adds a nutty, toasty flavor that makes the sauce taste incredibly complex. A little goes a long way.
- Red Pepper Flakes (½ teaspoon, or to taste): For a gentle heat that builds. Leave it out if you prefer a milder wing, or add more for a spicy kick.
- Cornstarch (1 tablespoon, mixed with 2 tablespoons water): This slurry thickens the glaze so it clings perfectly to each wing. Do not skip it.
- Optional Garnishes: Sliced green onions, toasted sesame seeds, and a pinch of flaky sea salt right before serving.
Ingredient Selection Tips
For the best texture, look for wings that are not too fatty. If you have time, leave the wings uncovered in the fridge for a few hours after seasoning. This dries the skin out even more, leading to an even crispier result. If you are short on time, just pat them very dry with paper towels. For the honey, a darker, more robust honey like buckwheat honey can add a deeper flavor, but a standard clover honey works perfectly.
Substitution Guidance
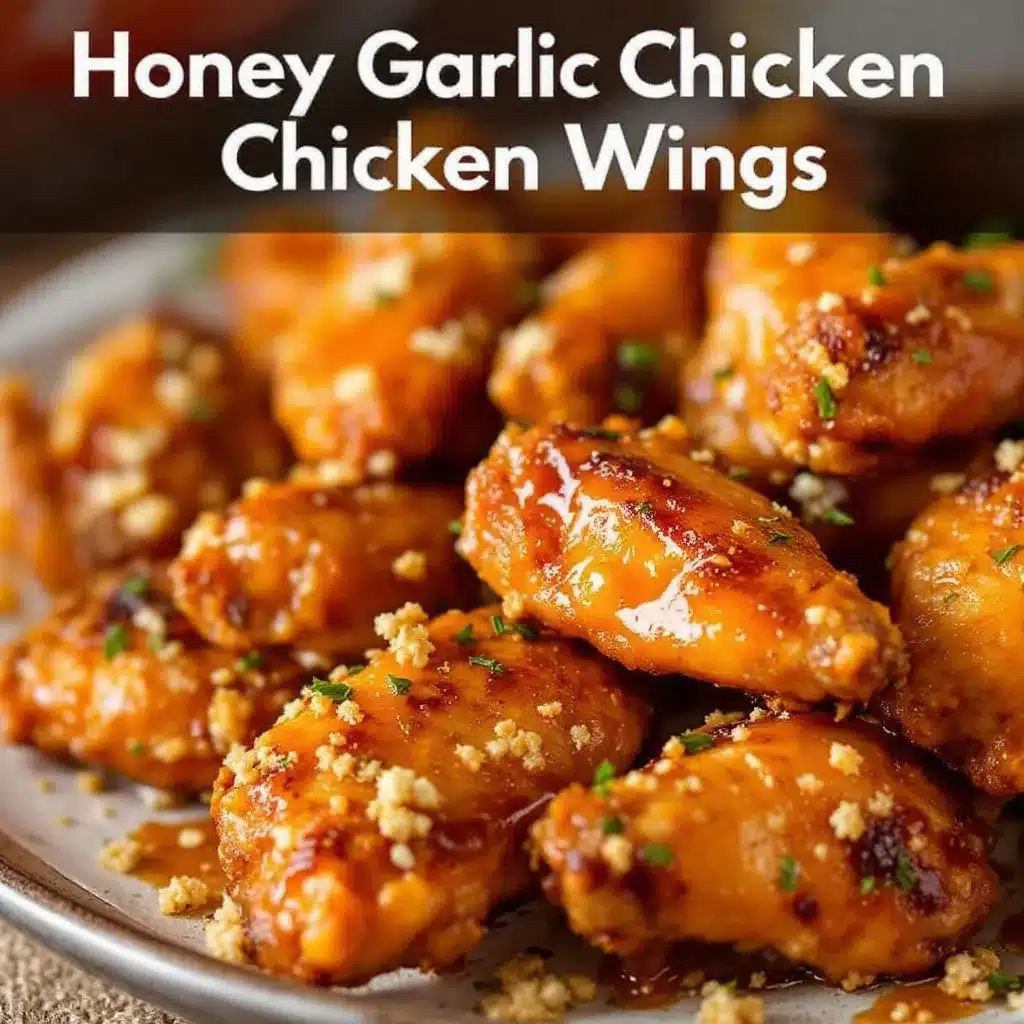
To make this honey garlic baked chicken recipe gluten-free, simply use tamari or coconut aminos instead of soy sauce. For a lower-sugar option, you can substitute half the honey with a sugar-free honey alternative, though the texture of the glaze will be slightly different. If you do not have rice vinegar, a squeeze of fresh lime juice works wonderfully.
Equipment Needed
You do not need a lot of fancy gear for these wings, which is part of their charm. Here is what you will need.
- Large Baking Sheet: A rimmed baking sheet is essential to catch any drips. Line it with parchment paper or aluminum foil for easy cleanup.
- Wire Rack: This is a game-changer. Placing a wire rack on top of the baking sheet allows hot air to circulate all around the wings, making them crispy on all sides without having to flip them.
- Large Mixing Bowls: You will need one for seasoning the wings and another for making the glaze.
- Small Saucepan: For simmering and thickening the honey garlic glaze.
- Whisk: To combine the glaze ingredients smoothly.
- Tongs: For tossing the hot wings in the glaze without burning your fingers.
If you do not have a wire rack, you can bake the wings directly on the parchment paper. Just flip them halfway through cooking to ensure they get crispy on both sides. A silicone baking mat also works well. For the glaze, a non-stick saucepan is ideal, but any small pot will do.
Preparation Method
Let us get to the fun part. Follow these steps carefully, and you will have the best wings of your life.
- Prep the Wings: Start by patting the 3 lbs of chicken wings very dry with paper towels. This is the most important step. The drier the skin, the crispier the result. Place the wings in a large bowl.
- Season the Wings: In a small bowl, whisk together 1 ½ teaspoons baking powder, 1 teaspoon salt, ½ teaspoon garlic powder, and ¼ teaspoon black pepper. Sprinkle this mixture over the wings and toss with your hands until each wing is evenly coated. Make sure the baking powder is fully distributed.
- First Bake: Preheat your oven to 425°F (220°C). Arrange the seasoned wings in a single layer on a wire rack set over a lined baking sheet. Make sure they are not touching. Bake for 30 minutes. The wings will look dry and pale, but do not worry. This is the drying phase.
- Second Bake for Crispiness: After 30 minutes, flip each wing over using tongs. Return the baking sheet to the oven and bake for another 20-25 minutes, until the skin is deep golden brown and very crispy. The wings should look almost like they have been fried. The sound of the skin cracking when you touch it is a good sign.
- Make the Glaze: While the wings are baking, make the sauce. In a small saucepan over medium heat, combine ⅓ cup honey, ¼ cup low-sodium soy sauce, 4 minced garlic cloves, 2 tablespoons rice vinegar, 1 tablespoon sesame oil, and ½ teaspoon red pepper flakes. Whisk to combine and bring to a gentle simmer. Let it cook for 2-3 minutes, stirring occasionally.
- Thicken the Glaze: In a tiny bowl, stir together 1 tablespoon cornstarch and 2 tablespoons cold water to create a slurry. Pour this into the simmering sauce while whisking constantly. The sauce will immediately start to thicken. Let it cook for another minute until it is glossy and coats the back of a spoon. Remove from heat.
- Toss and Glaze: Once the wings are out of the oven, transfer them to a large, clean bowl. Pour about half of the warm glaze over the wings and toss gently with tongs until every wing is coated. You can add more glaze if you like them extra sticky.
- Final Bake: Return the glazed wings to the wire rack in a single layer. Bake for another 5-7 minutes. This final blast of heat caramelizes the glaze and sets it, creating that perfect sticky-yet-crispy exterior. Keep a close eye on them so the honey does not burn.
- Garnish and Serve: Remove the wings from the oven. Sprinkle with sliced green onions and toasted sesame seeds. Let them rest for 2 minutes before serving. The glaze will be very hot.
Preparation Notes
If you are making a large batch, work in batches to avoid overcrowding the baking sheet. Overcrowding traps steam and prevents the wings from getting crispy. If you want to make these in an air fryer, cook the seasoned wings at 400°F (200°C) for 20-25 minutes, shaking the basket halfway through, then toss with glaze and cook for another 3-4 minutes.
Cooking Tips & Techniques
Here are some hard-earned lessons from my own wing-making journey. These tips will help you avoid my mistakes and nail it on the first try.
Do not skip the drying step. I know it seems tedious, but moisture is the enemy of crispy skin. Pat those wings down with paper towels until they feel dry to the touch. For extra credit, leave them uncovered in the fridge on a wire rack overnight. This dries the skin out even more for an almost supernatural crunch.
Use a wire rack. This is non-negotiable for me now. It allows hot air to circulate under the wings, so the bottoms get just as crispy as the tops. No flipping required mid-bake (well, except for the one flip). If you bake them directly on the pan, the bottoms will steam and get soggy.
Watch the glaze carefully. Honey can burn quickly under high heat. When you do the final bake with the glaze, keep a close eye on it. You want the glaze to caramelize, not turn into a sticky, black mess. If your oven runs hot, reduce the final bake time to 4-5 minutes.
Double the glaze. Honestly, I always make a double batch of the honey garlic sauce. Half goes on the wings for the final bake, and the other half I keep warm on the stove for people to drizzle on extra. It is that good, and you will not want to run out.
I once forgot to add the cornstarch slurry to my glaze, and it was a thin, watery mess that just slid right off the wings. It was still tasty, but it lacked that signature sticky cling. The cornstarch is what gives the sauce its body and makes it coat the wings like a dream. Do not skip it.
Variations & Adaptations
This recipe is a fantastic base, but do not be afraid to make it your own. Here are a few ways I have adapted it over the years.
- Spicy Honey Garlic: Add 1-2 tablespoons of sriracha or gochujang (Korean chili paste) to the glaze for a fiery kick. The sweetness of the honey balances the heat beautifully.
- Lemon Garlic Herb: Swap the rice vinegar for fresh lemon juice and add a teaspoon of dried oregano and thyme to the glaze. Finish with a sprinkle of fresh parsley. This gives the wings a brighter, more Mediterranean flavor profile.
- Air Fryer Method: This is my go-to for smaller batches. Season the wings as directed and cook them in the air fryer at 400°F (200°C) for 20-25 minutes, shaking the basket halfway. Toss with the glaze and cook for another 3-4 minutes. They come out incredibly crispy in half the time.
- Grilled Version: For a smoky tailgate flavor, grill the seasoned wings over medium-high heat for about 15-20 minutes, turning frequently, until the skin is charred and crispy. Toss with the glaze in a bowl and serve immediately.
If you are feeding a crowd that loves variety, consider making a batch of these alongside some crispy air fryer chicken thighs for a complete protein spread. The different textures and flavors will make everyone happy.
Serving & Storage Suggestions
These wings are best served hot and fresh from the oven, but they are still incredibly delicious at room temperature, which makes them perfect for a tailgate spread.
Serving: Pile the wings on a large platter. Sprinkle generously with sliced green onions, toasted sesame seeds, and a pinch of flaky sea salt. Serve with plenty of napkins and a side of celery and carrot sticks with ranch or blue cheese dressing for dipping. They pair perfectly with a cold beer or a crisp soda.
Storage: Leftover wings can be stored in an airtight container in the refrigerator for up to 3 days. The glaze will soften the skin over time, so they will not be as crispy as they were fresh.
Reheating: To bring back some of the crunch, reheat the wings in a 400°F (200°C) oven or air fryer for 5-7 minutes. Do not microwave them, as the skin will become rubbery and the glaze will turn into a sticky puddle. The oven or air fryer is your best friend for leftover wings.
Make-Ahead Tip: You can fully cook the wings and make the glaze up to a day in advance. Keep them separate in the fridge. On game day, toss the wings with the glaze and do the final 5-7 minute bake right before serving. This makes hosting incredibly easy.
Nutritional Information & Benefits
While these wings are a treat, they do offer some nutritional benefits. Here is a rough estimate per serving (about 5-6 wings).
| Nutrient | Amount per Serving |
|---|---|
| Calories | 380-420 |
| Protein | 28g |
| Fat | 22g |
| Carbohydrates | 18g |
| Sugar | 15g |
| Sodium | 680mg |
Chicken wings are a good source of high-quality protein, which is essential for muscle repair and keeping you full. The skin does contain fat, but it also provides that unbeatable texture. If you are watching your sodium, be sure to use low-sodium soy sauce. For a healthier side, consider serving these wings with a fresh watermelon cucumber feta salad to balance out the richness. This recipe is naturally gluten-free when using tamari and can be made keto-friendly by using a sugar-free honey substitute.
Conclusion
These sticky honey garlic chicken wings are more than just a recipe; they are the centerpiece of a great tailgate. They have that perfect balance of sweet, savory, and sticky that makes you want to lick your fingers (and you will). The double-bake method ensures they stay crispy even after being tossed in that incredible glaze, so you never have to worry about soggy wings again. I have made these for every big game, and they never last long.
I encourage you to play around with the spice level or try the air fryer method for an even quicker version. This recipe is forgiving and adaptable, so make it your own. I would love to hear how they turn out for you. Did you add extra garlic? Did you double the red pepper flakes? Drop a comment below and let me know your favorite twist. Now go make some wings and enjoy the game!
Frequently Asked Questions
Can I use frozen chicken wings for this recipe?
Yes, you can use frozen wings, but you must thaw them completely in the refrigerator first. Pat them very dry before seasoning, as frozen wings release a lot of moisture as they thaw. The drying step is even more critical here.
Why are my wings not crispy?
The most common culprit is moisture. Either the wings were not dried thoroughly before seasoning, or the baking sheet was overcrowded. Make sure your wings are in a single layer with space between them. Also, check that your baking powder is not expired, as old baking powder loses its leavening power.
Can I make the glaze ahead of time?
Absolutely. You can make the honey garlic glaze up to a week in advance. Store it in an airtight container in the refrigerator. When you are ready to use it, gently reheat it on the stove or in the microwave, whisking until smooth. You may need to add a splash of water to thin it out.
How do I cut whole chicken wings?
If you bought whole wings, you can easily cut them yourself. Using a sharp knife or kitchen shears, locate the joint between the drumette and the flat. Cut through the skin and joint. Then, find the joint between the flat and the tip and cut through that as well. Discard the wing tips or save them for making chicken stock.
Can I use this sauce for other dishes?
Yes! This honey garlic sauce is incredibly versatile. It is fantastic on grilled chicken skewers, salmon, meatballs, or even as a stir-fry sauce for vegetables and tofu. Just double or triple the recipe as needed.
Pin This Recipe!
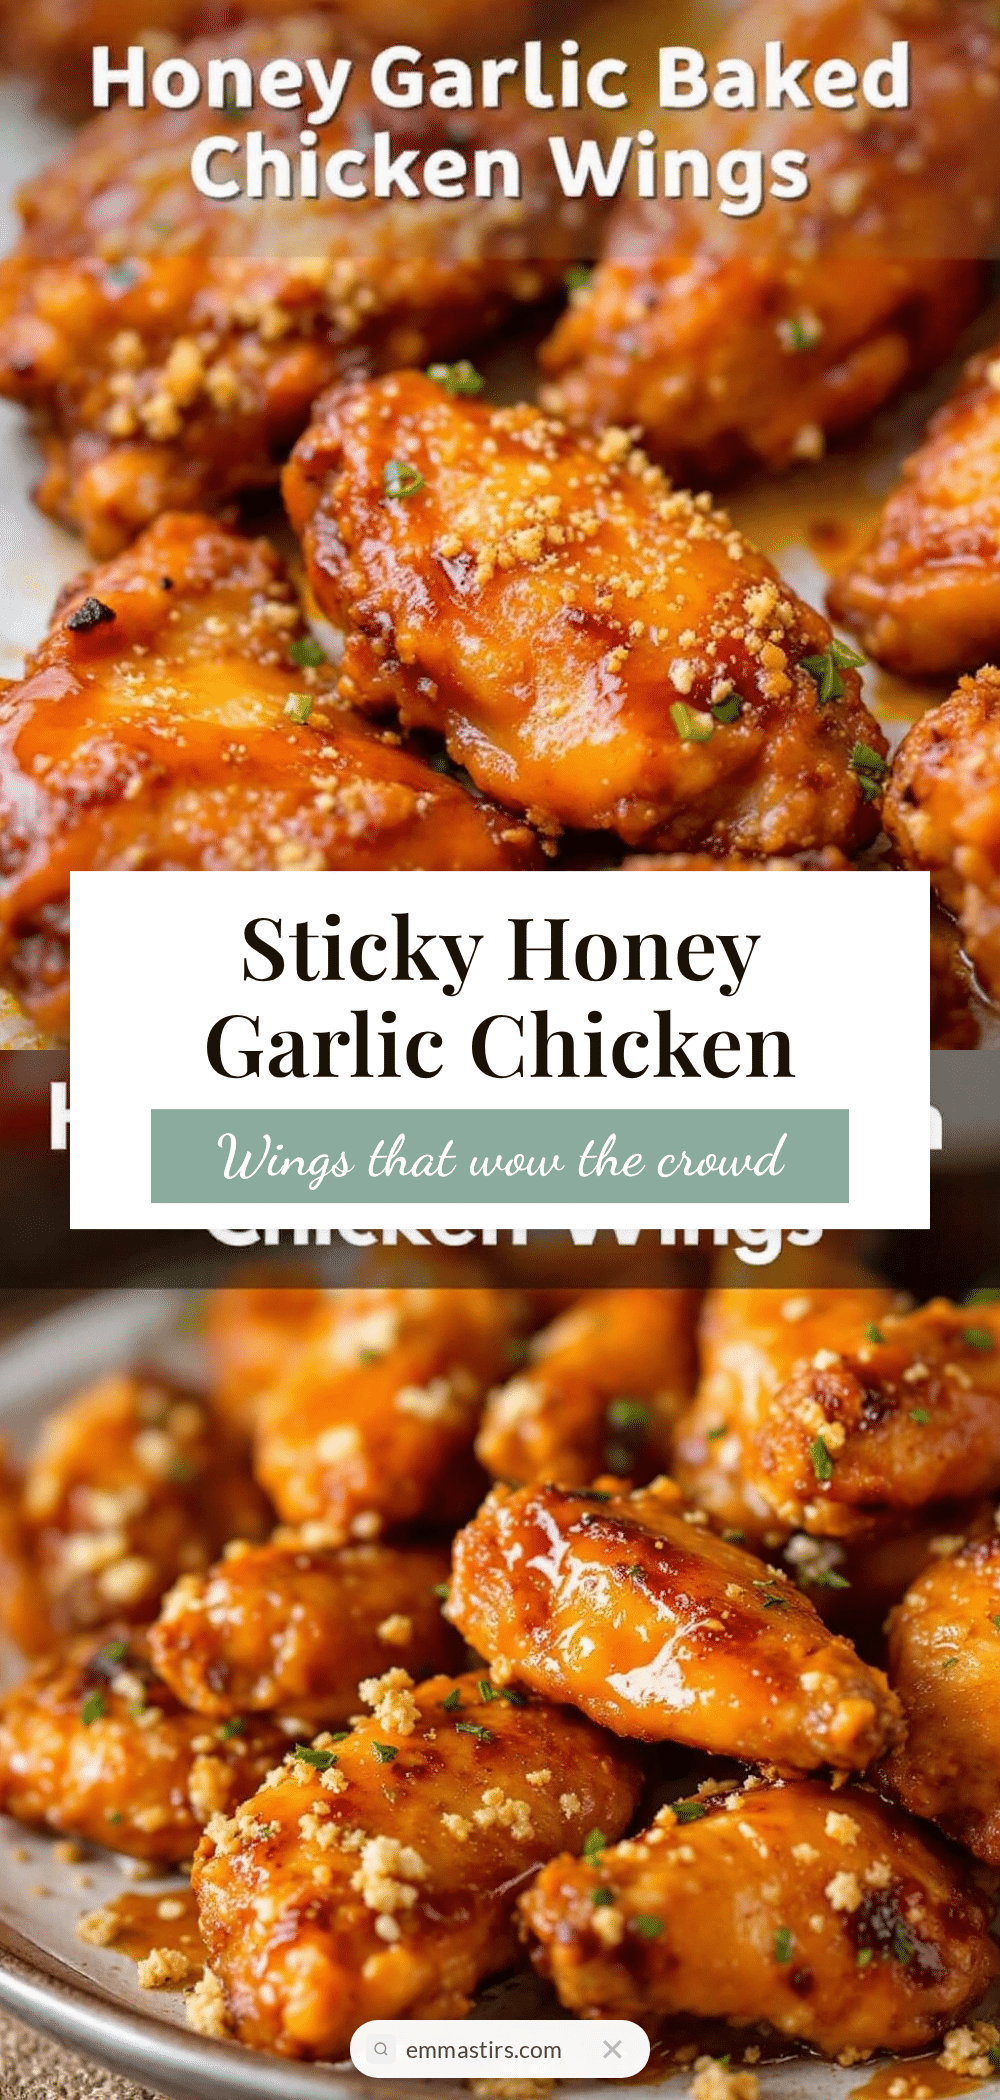
Best Sticky Honey Garlic Chicken Wings for Tailgating

These sticky honey garlic chicken wings are perfectly crispy, coated in a sweet and savory glaze, and ideal for game day. The double-bake method ensures a shatteringly crisp skin that stays crunchy even after tossing in the glossy, finger-licking sauce.
- Prep Time: 15 minutes
- Cook Time: 55 minutes
- Total Time: 1 hour 10 minutes
- Yield: 4 servings 1x
- Category: Appetizer
- Cuisine: American
Ingredients
- 3 lbs chicken wings (flats and drumettes)
- 1 ½ teaspoons baking powder
- 1 teaspoon salt
- ½ teaspoon garlic powder
- ¼ teaspoon black pepper
- ⅓ cup honey
- ¼ cup low-sodium soy sauce
- 4 cloves garlic, minced
- 2 tablespoons rice vinegar
- 1 tablespoon sesame oil
- ½ teaspoon red pepper flakes (or to taste)
- 1 tablespoon cornstarch
- 2 tablespoons cold water
- Optional: sliced green onions, toasted sesame seeds, flaky sea salt for garnish
Instructions
- Pat the chicken wings very dry with paper towels. Place in a large bowl.
- In a small bowl, whisk together baking powder, salt, garlic powder, and black pepper. Sprinkle over wings and toss to coat evenly.
- Preheat oven to 425°F (220°C). Arrange wings in a single layer on a wire rack set over a lined baking sheet. Bake for 30 minutes.
- Flip wings and bake for another 20-25 minutes until deep golden brown and crispy.
- While wings bake, make the glaze: In a small saucepan over medium heat, combine honey, soy sauce, minced garlic, rice vinegar, sesame oil, and red pepper flakes. Whisk and bring to a gentle simmer. Cook for 2-3 minutes.
- In a tiny bowl, mix cornstarch with cold water to form a slurry. Pour into simmering sauce while whisking constantly. Cook for 1 minute until thickened and glossy. Remove from heat.
- Transfer baked wings to a large bowl. Pour about half the glaze over wings and toss gently with tongs to coat.
- Return glazed wings to the wire rack in a single layer. Bake for another 5-7 minutes until caramelized.
- Remove from oven. Garnish with green onions and sesame seeds. Let rest 2 minutes before serving.
Notes
For extra crispy skin, pat wings very dry and use a wire rack. Do not skip the cornstarch slurry; it thickens the glaze so it clings to the wings. Watch the final bake carefully to prevent burning. Double the glaze if desired for extra dipping.
Nutrition
- Serving Size: 5-6 wings
- Calories: 400
- Sugar: 15
- Sodium: 680
- Fat: 22
- Saturated Fat: 6
- Carbohydrates: 18
- Protein: 28
Keywords: sticky honey garlic chicken wings, tailgate wings, crispy baked wings, game day appetizer, honey garlic wings


