Love this? Save it for later!
Share the inspiration with your friends
I burned my first batch of pan de muerto so badly the kitchen smelled like scorched orange rind for three days. Not my finest moment, honestly. I was so focused on getting the shape right—those little bone-shaped decorations, the crossed “bones” on top—that I forgot ovens actually get hot. The dough was raw in the middle and black on the bottom. My abuela would have laughed, then handed me her rolling pin and made me start over. That was seven years ago, and I’ve made this bread every November since. It took me four tries before I understood that this recipe isn’t about perfection. It’s about patience, and honestly, about trusting your hands more than a timer.
The first time I got it right, I was alone in my kitchen at midnight. The dough felt alive under my palms, soft and slightly tacky, and when I pulled the golden loaf from the oven, the orange blossom scent wrapped around me like a hug I didn’t know I needed. I tore off a piece while it was still warm, and that moment—the slight crunch of the crust giving way to pillowy, citrus-kissed bread—made every burnt batch worth it.
This classic pan de muerto with orange blossom glaze isn’t just a holiday bread. It’s the kind of recipe that teaches you something about yourself. Maybe you’ll burn your first batch too. That’s okay. Keep going.
Why You’ll Love This Recipe
This pan de muerto recipe earned its spot in my permanent rotation because it actually works for home bakers. I’m not a professional pastry chef—I’m someone who has ruined plenty of dough and learned from every mistake. Here’s what makes this version different:
- Foolproof Dough: This dough is forgiving. It’s enriched with butter and eggs, which means it stays soft even if you overwork it slightly. I’ve tested it with both active dry and instant yeast, and both work beautifully.
- Real Orange Blossom Flavor: The glaze isn’t just for looks. Orange blossom water infuses both the dough and the topping, giving that authentic floral aroma that makes this bread unmistakable. No artificial extracts here.
- Perfect for Día de Muertos or Any Day: Traditionally made for November 1st and 2nd, this bread is wonderful for fall gatherings, Thanksgiving morning, or just a cozy weekend baking project. It’s a showstopper on any table.
- Simple Ingredients: You likely have most of these in your pantry already. Flour, sugar, butter, eggs, yeast. The only specialty item is orange blossom water, which is easy to find online or at Middle Eastern grocery stores.
- Deeply Satisfying: There’s something almost meditative about shaping this bread. The bone-shaped decorations, the domed top, the final dusting of sugar—it’s edible art that tastes even better than it looks.
This isn’t just another sweet bread recipe. It’s the one I make when I want to feel connected to tradition, even if I’m miles away from family. The orange blossom glaze takes it from good to unforgettable—bright, fragrant, and just sweet enough.
What Ingredients You Will Need
This recipe uses simple, wholesome ingredients that come together to create something truly special. The magic is in the technique, not the grocery list. Here’s everything you need:
For the Dough
- All-purpose flour (4 cups, or 500g) – I use Gold Medal or King Arthur. Bread flour also works for a chewier texture.
- Active dry yeast (2 ¼ teaspoons, or one packet) – Make sure it’s fresh. Instant yeast works too; just skip the proofing step.
- Warm milk (½ cup, or 120ml) – Whole milk gives the richest flavor, but 2% works fine. Heat to about 110°F—warm but not hot.
- Granulated sugar (½ cup, or 100g) – Regular white sugar. Don’t substitute brown sugar here; it changes the texture.
- Unsalted butter (½ cup, or 113g, softened) – Let it sit out for an hour before starting. Cold butter won’t incorporate properly.
- Large eggs (3, room temperature) – Cold eggs can seize the dough. Place them in warm water for 5 minutes if you forgot to set them out.
- Orange zest (from 2 oranges) – Use a microplane. Avoid the white pith—it’s bitter.
- Orange blossom water (2 tablespoons) – This is the star. I like Cortas brand. Don’t skip it; there’s no good substitute.
- Salt (1 teaspoon) – Fine sea salt, not kosher flakes.
- Vanilla extract (1 teaspoon) – Pure, not imitation.
For the Glaze & Topping
- Powdered sugar (1 ½ cups, or 180g) – Sift it to avoid lumps.
- Orange blossom water (2 tablespoons) – Same brand as above.
- Milk (2-3 tablespoons) – Adjust for consistency. You want a thick but pourable glaze.
- Orange zest (from 1 orange) – For garnish and extra fragrance.
- Granulated sugar (¼ cup, for dusting) – Optional, but traditional.
A quick note on orange blossom water: it’s not the same as orange extract. Orange blossom water is floral and delicate; extract is concentrated and can be overpowering. If you can’t find it, the bread will still be good, but it won’t taste like the real thing. I order mine online in bulk because I use it in everything from cookies to cocktails.
Equipment Needed
You don’t need a professional bakery setup for this recipe. Here’s what I use:
- Stand mixer with dough hook – A KitchenAid or similar makes kneading effortless. You can knead by hand, but expect 12-15 minutes of arm work.
- Large mixing bowl – Glass or stainless steel. Plastic can hold onto grease.
- Baking sheets (2) – Rimmed sheets work best. Line with parchment paper.
- Microplane or fine grater – For zesting oranges without the bitter pith.
- Pastry brush – For applying the glaze evenly. Silicone or natural bristle both work.
- Cooling rack – Essential for airflow so the glaze sets properly.
- Plastic wrap or clean kitchen towel – For covering the dough while it rises.
- Kitchen scale – I highly recommend weighing your flour. Cup measurements vary wildly, and this dough is sensitive to ratios.
I’ve made this bread in a tiny apartment kitchen with a hand mixer and a lot of patience. It worked. But a stand mixer truly saves time and frustration. If you’re kneading by hand, use a bench scraper to help lift and fold the sticky dough—it’s a game-changer.
Preparation Method
Let’s get into the actual process. Take your time with this one. Rushing leads to dense bread, and we want it light and fluffy.
- Proof the yeast. In a small bowl, combine the warm milk (110°F), 1 tablespoon of sugar, and the yeast. Stir gently and let it sit for 5-10 minutes until frothy. If it doesn’t bubble, your yeast is dead. Start over with fresh yeast.
- Mix the dry ingredients. In the bowl of your stand mixer, whisk together the flour, remaining sugar, orange zest, and salt. Make a well in the center.
- Add the wet ingredients. Pour in the proofed yeast mixture, beaten eggs, softened butter, orange blossom water, and vanilla extract. Mix on low speed with the dough hook until a shaggy dough forms, about 2 minutes.
- Knead the dough. Increase speed to medium-low and knead for 8-10 minutes. The dough should pull away from the sides of the bowl and feel smooth and elastic. It will be slightly sticky—that’s okay. If it’s too wet to handle, add flour 1 tablespoon at a time. If it’s too dry, add milk 1 teaspoon at a time.
- First rise. Shape the dough into a ball and place it in a lightly greased bowl. Cover tightly with plastic wrap and let it rise in a warm, draft-free spot for 1½ to 2 hours, until doubled in size. I put mine in the oven with the light on—it stays perfectly warm.
- Punch down and divide. Gently deflate the dough. Divide it into two equal pieces for two loaves, or keep it whole for one large loaf. Reserve about ¼ of the dough to make the bone-shaped decorations.
- Shape the base. Form the main dough into a smooth ball. Place it on a parchment-lined baking sheet and gently flatten it slightly. It should look like a domed bun about 6 inches wide.
- Make the decorations. Take the reserved dough and roll it into ropes about ½ inch thick. Cut into 4-inch lengths. For each “bone,” roll a rope, then pinch the ends and press them flat. Cross two pieces on top of the loaf to form an X shape. Roll a small ball of dough and place it in the center where the bones cross. This represents the skull.
- Second rise. Cover the shaped loaves loosely with plastic wrap and let them rise for 45 minutes to 1 hour. They should look puffy and almost doubled.
- Preheat and bake. Preheat your oven to 350°F (175°C). Bake the loaves for 20-25 minutes, rotating the pan halfway through. The bread should be golden brown and sound hollow when tapped on the bottom. Internal temperature should reach 190°F.
- Cool completely. Transfer the loaves to a cooling rack. Let them cool for at least 30 minutes before glazing. Warm bread will absorb the glaze and become soggy, so be patient.
- Make the glaze. In a small bowl, whisk together the powdered sugar, orange blossom water, and milk until smooth. It should be thick but pourable. Add more milk if needed, 1 teaspoon at a time.
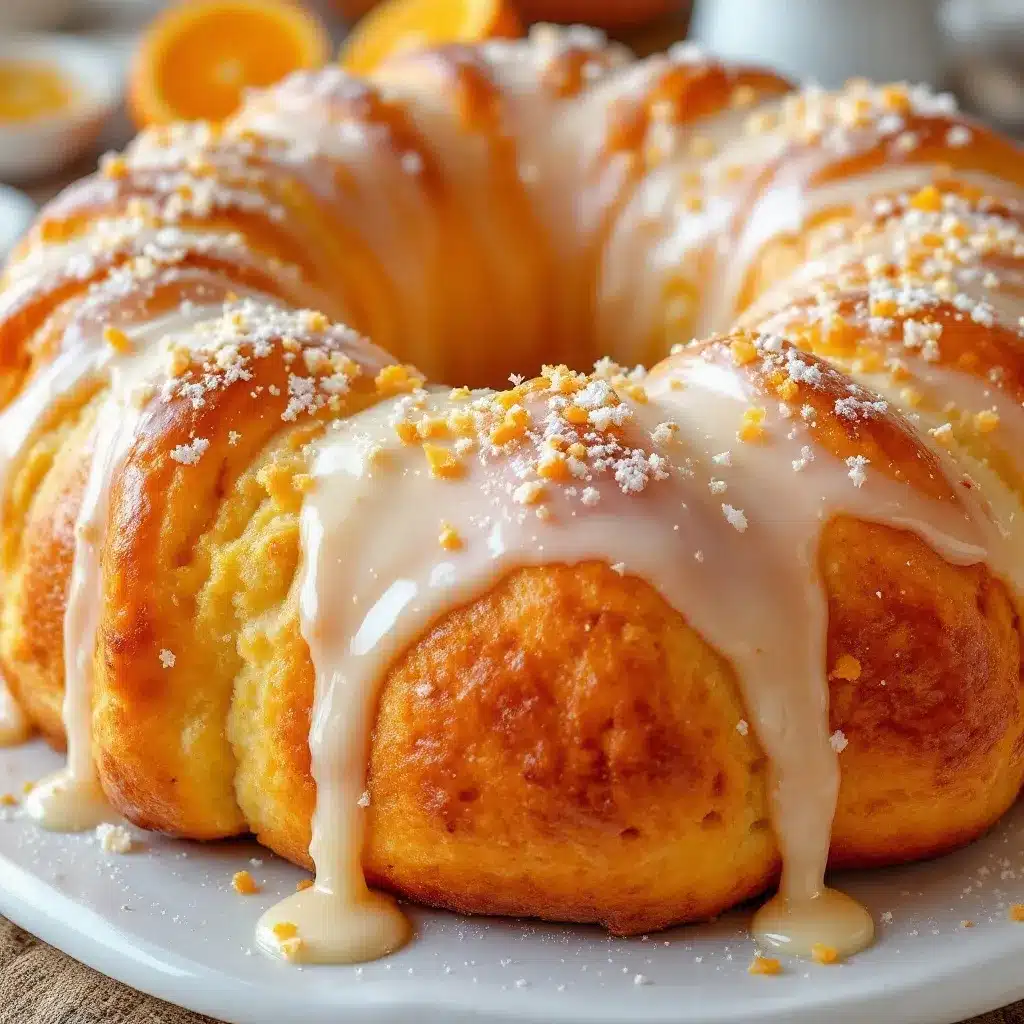
- Glaze and garnish. Brush the glaze generously over the cooled loaves. Sprinkle with orange zest and granulated sugar immediately, while the glaze is still wet. Let the glaze set for 15-20 minutes before serving.
A sensory cue for you: when the dough is properly kneaded, it should feel like your earlobe—soft, smooth, and slightly springy. If it tears easily, keep kneading. If it feels like bubblegum, you’ve added too much flour. Adjust as you go.
Cooking Tips & Techniques
I’ve learned these lessons the hard way so you don’t have to. Here are the things I wish someone had told me before my first attempt:
Temperature matters more than you think. Cold ingredients make dense bread. Your eggs, butter, and milk should all be at room temperature. If your kitchen is cold, the dough will take longer to rise. I once left a batch to rise in a drafty kitchen and came back four hours later to minimal progress. Now I use the oven-with-the-light-on method every time.
Don’t over-flour your work surface. This dough is meant to be slightly sticky. If you add too much flour while shaping, you’ll end up with dry, crumbly bread. Instead, lightly oil your hands and the counter. It works better than flour and keeps the dough tender.
The bone decorations aren’t just for looks. They actually serve a structural purpose. The crossed bones help support the domed top during baking, preventing it from collapsing. Make sure they’re firmly attached to the base dough—press them in gently but securely.
Watch the bake time closely. Ovens vary wildly. My old oven would burn the bottom of every loaf. Now I place my baking sheet on the middle rack and check at 18 minutes. If the top is browning too fast, tent it loosely with foil.
Glaze when completely cool. I know it’s tempting to rush, but warm bread soaks up the glaze and turns into a sticky mess. Let it cool fully—at least 30 minutes on a wire rack. The glaze should sit on top like a shiny coat, not disappear into the bread.
One more thing: if your dough tears while shaping, just patch it. This bread is forgiving. I once dropped a shaped loaf on the floor (true story), picked it up, reshaped it, and it baked perfectly. Don’t stress the small stuff.
Variations & Adaptations
This recipe is wonderful as written, but it’s also a great base for experimentation. Here are some variations I’ve tried and loved:
Chocolate Orange Pan de Muerto: Add ¼ cup of cocoa powder to the flour mixture and reduce the flour by 2 tablespoons. The chocolate pairs beautifully with the orange blossom. I made this for a friend who claimed she didn’t like pan de muerto—she ate half the loaf in one sitting.
Vegan Version: Substitute the butter with vegan butter (I like Miyoko’s), use flax eggs (1 tablespoon ground flax + 3 tablespoons water per egg), and swap the milk for oat milk. The texture is slightly denser but still delicious. The glaze can be made with plant milk and vegan sugar.
Gluten-Free Adaptation: Use a 1:1 gluten-free flour blend that contains xanthan gum. Cup4Cup works well. The dough will be stickier and harder to shape, so wet your hands frequently. The bone decorations may spread more during baking, but the flavor is still there.
Spiced Version: Add 1 teaspoon of cinnamon, ½ teaspoon of nutmeg, and ¼ teaspoon of cloves to the flour. This gives the bread a warm, cozy flavor that’s perfect for fall. I make this version for Thanksgiving morning breakfast.
Individual Buns: Instead of one large loaf, divide the dough into 12 equal pieces and shape into small rounds. Skip the bone decorations and just glaze them. Bake for 15-18 minutes. These are perfect for sharing or freezing.
My personal favorite variation is the chocolate orange version. There’s something about the bitterness of cocoa against the floral sweetness of orange blossom that feels sophisticated but still comforting. I serve it with a cup of strong coffee and pretend I’m at a fancy bakery.
Serving & Storage Suggestions
Pan de muerto is best served the day it’s made, when the crust is still slightly crisp and the inside is pillowy soft. Here’s how to make the most of it:
Serving Temperature: Serve at room temperature or slightly warm. If you want to reheat it, pop slices in a 300°F oven for 5 minutes. The microwave will make it rubbery—avoid it if you can.
Presentation: Place the whole loaf on a wooden board or a colorful platter. The bone decorations and glossy glaze make it a centerpiece. Sprinkle extra orange zest and a dusting of powdered sugar on the board for a beautiful finish.
Pairings: This bread is wonderful with a cup of Mexican hot chocolate, café de olla, or a simple black coffee. For a more indulgent treat, serve it with a side of warm dulce de leche for dipping. It also pairs surprisingly well with a fresh watermelon cucumber feta salad if you’re serving it as part of a larger meal—the sweetness of the bread contrasts beautifully with the salty feta and crisp cucumber.
Storage: Store leftover pan de muerto in an airtight container at room temperature for up to 3 days. The glaze may soften slightly, but the flavor will still be wonderful. Do not refrigerate—it will dry out the bread.
Freezing: You can freeze the unglazed loaf for up to 2 months. Wrap it tightly in plastic wrap, then foil. When you’re ready to serve, thaw at room temperature, then warm in a 300°F oven for 10 minutes. Glaze after warming. I always freeze one loaf during October so I can enjoy it in December.
The flavors actually deepen after a day or two. The orange blossom becomes more pronounced, and the bread takes on a slightly denser, more cake-like texture. I honestly prefer it on day two, when the glaze has set into a thin, crackly shell.
Nutritional Information & Benefits
Let’s be real—pan de muerto is a treat, not a health food. But it does have some redeeming qualities:
- Estimated per serving (1/8 of a loaf): 320 calories, 8g fat, 55g carbohydrates, 7g protein, 2g fiber, 22g sugar.
- Orange zest provides vitamin C and antioxidants. The orange blossom water is mostly aromatic, but it adds a lovely floral note without extra sugar.
- Eggs and butter provide some protein and fat, which helps keep you full. The bread is also relatively low in sodium compared to store-bought sweet breads.
- Dietary considerations: This recipe contains gluten, dairy, and eggs. It is not suitable for vegans (without modifications) or those with celiac disease (without gluten-free adaptation).
I don’t make this bread for its nutritional profile. I make it because it connects me to tradition, to family, and to the simple joy of creating something beautiful with my hands. That has its own kind of nourishment.
Conclusion
This classic pan de muerto with orange blossom glaze is more than a recipe—it’s an experience. It’s the smell of orange and yeast filling your kitchen, the feel of soft dough under your palms, and the pride of pulling a golden, glossy loaf from the oven. It’s forgiving enough for beginners and satisfying enough for experienced bakers.
I hope you give it a try, even if you’re nervous. Burn your first batch if you have to. Learn from it. The second one will be better, and the third one will be the one you remember forever. That’s how it works with bread, and honestly, with most things worth doing.
If you make this recipe, I’d love to hear about it. Leave a comment below with your experience, your variations, or even your mishaps—we all start somewhere. And if you’re looking for more cozy baking projects, check out this cozy one-bowl banana bread with brown butter and walnuts for another weekend baking adventure.
Happy baking, and remember—the best bread is the one made with patience and a little bit of love.
Frequently Asked Questions
Can I make pan de muerto without a stand mixer?
Absolutely. You can knead this dough by hand—it just takes longer. Expect 12-15 minutes of steady kneading. Use a bench scraper to help lift and fold the dough. It’s a great arm workout, honestly.
Where can I buy orange blossom water?
Most Middle Eastern grocery stores carry it. You can also find it online—I buy Cortas brand from Amazon. It’s inexpensive and lasts forever. A little goes a long way.
My dough isn’t rising. What went wrong?
Most likely, your yeast is dead or your kitchen is too cold. Check that your milk was warm (110°F) but not hot. If your yeast didn’t foam during proofing, it’s expired. Try placing the dough in a warm oven (with just the light on) for the next rise.
Can I skip the bone decorations?
You can, but they’re part of what makes pan de muerto special. The bones represent the deceased, and the circle of dough on top represents the skull. If you’re short on time, shape the dough into a simple round loaf and just glaze it. It’ll still taste wonderful.
How do I store leftover pan de muerto?
Store it in an airtight container at room temperature for up to 3 days. Do not refrigerate—it dries out the bread. You can also freeze the unglazed loaf for up to 2 months. Thaw, warm, and glaze when ready to serve.
Pin This Recipe!
Classic Pan de Muerto with Easy Orange Blossom Glaze
This classic pan de muerto with orange blossom glaze is a forgiving, foolproof recipe that yields a golden, citrus-kissed bread perfect for Día de Muertos or any fall gathering. The dough is enriched with butter and eggs, and the floral glaze adds an authentic, aromatic finish.
- Prep Time: 30 minutes
- Cook Time: 25 minutes
- Total Time: 3 hours 25 minutes (including rising time)
- Yield: 8 servings 1x
- Category: Bread
- Cuisine: Mexican
Ingredients
- 4 cups all-purpose flour (500g)
- 2 ¼ teaspoons active dry yeast (one packet)
- ½ cup warm milk (120ml, about 110°F)
- ½ cup granulated sugar (100g)
- ½ cup unsalted butter, softened (113g)
- 3 large eggs, room temperature
- Zest of 2 oranges
- 2 tablespoons orange blossom water
- 1 teaspoon fine sea salt
- 1 teaspoon pure vanilla extract
- 1 ½ cups powdered sugar (180g), sifted
- 2 tablespoons orange blossom water (for glaze)
- 2–3 tablespoons milk (for glaze)
- Zest of 1 orange (for garnish)
- ¼ cup granulated sugar (for dusting, optional)
Instructions
- Proof the yeast: In a small bowl, combine warm milk (110°F), 1 tablespoon of sugar, and yeast. Stir gently and let sit for 5-10 minutes until frothy. If it doesn’t bubble, start over with fresh yeast.
- Mix dry ingredients: In the bowl of a stand mixer, whisk together flour, remaining sugar, orange zest, and salt. Make a well in the center.
- Add wet ingredients: Pour in proofed yeast mixture, beaten eggs, softened butter, orange blossom water, and vanilla extract. Mix on low speed with dough hook until a shaggy dough forms, about 2 minutes.
- Knead dough: Increase speed to medium-low and knead for 8-10 minutes until dough is smooth, elastic, and pulls away from the sides. It should be slightly sticky. Add flour 1 tablespoon at a time if too wet, or milk 1 teaspoon at a time if too dry.
- First rise: Shape dough into a ball and place in a lightly greased bowl. Cover tightly with plastic wrap and let rise in a warm, draft-free spot for 1½ to 2 hours until doubled in size.
- Punch down and divide: Gently deflate dough. Divide into two equal pieces for two loaves, or keep whole for one large loaf. Reserve about ¼ of the dough for bone-shaped decorations.
- Shape base: Form main dough into a smooth ball. Place on a parchment-lined baking sheet and gently flatten slightly into a domed bun about 6 inches wide.
- Make decorations: Roll reserved dough into ropes about ½ inch thick. Cut into 4-inch lengths. For each ‘bone,’ roll a rope, pinch ends, and press flat. Cross two pieces on top of loaf to form an X. Roll a small ball and place in the center where bones cross.
- Second rise: Cover shaped loaves loosely with plastic wrap and let rise for 45 minutes to 1 hour until puffy and almost doubled.
- Preheat and bake: Preheat oven to 350°F (175°C). Bake loaves for 20-25 minutes, rotating pan halfway through. Bread should be golden brown and sound hollow when tapped. Internal temperature should reach 190°F.
- Cool completely: Transfer loaves to a cooling rack and let cool for at least 30 minutes before glazing.
- Make glaze: In a small bowl, whisk together powdered sugar, orange blossom water, and milk until smooth. It should be thick but pourable. Add more milk if needed, 1 teaspoon at a time.
- Glaze and garnish: Brush glaze generously over cooled loaves. Sprinkle with orange zest and granulated sugar immediately while glaze is wet. Let set for 15-20 minutes before serving.
Notes
Temperature matters: all ingredients should be at room temperature. Don’t over-flour your work surface; lightly oil hands instead. The bone decorations help support the domed top during baking. Watch bake time closely; tent with foil if browning too fast. Glaze only when bread is completely cool to avoid sogginess. The dough is forgiving—if it tears while shaping, just patch it.
Nutrition
- Serving Size: 1/8 of a loaf
- Calories: 320
- Sugar: 22
- Sodium: 200
- Fat: 8
- Saturated Fat: 4
- Carbohydrates: 55
- Fiber: 2
- Protein: 7
Keywords: pan de muerto, day of the dead bread, orange blossom bread, Mexican sweet bread, holiday bread, fall baking, citrus bread


