Love this? Save it for later!
Share the inspiration with your friends
The Super Bowl party was in four hours and I had nothing to bring. I mean, I’d volunteered to bring an appetizer weeks ago, but between work and life, it completely slipped my mind. Everyone else was showing up with slow-cooker pulled pork, homemade seven-layer dips, and those fancy charcuterie boards that look like they belong in a magazine. I had a block of cream cheese, some shredded cheddar, and a bag of pretzels. Not exactly game-day royalty, you know?
I stood in my kitchen, staring into the fridge like it might magically produce something impressive. That’s when I spotted the bag of pecans in the pantry and the chives I’d bought for a recipe last week. My brain started connecting dots—cheese ball, but smaller. Much smaller. And shaped like footballs because, well, it was game day. I figured I’d give it a shot. Honestly, I was just hoping they wouldn’t be a total disaster.
I mashed the cream cheese and cheddar together, added a little garlic powder and Worcestershire sauce because that felt right, and rolled them into tiny ovals. I pressed pecan pieces into the tops to look like laces. They looked ridiculous, but also kind of adorable? I threw them on a platter, grabbed the pretzels, and rushed out the door.
Here’s the thing—they were the first thing to disappear. People kept walking by, picking one up, and doing that little double-take. “Wait, these are cheese balls shaped like footballs?” someone asked. By halftime, the platter was empty and three people had asked for the recipe. I just stood there, trying to look like I’d planned it all along. Maybe you’ve been there—the accidental hero of the party when you least expect it. That’s why I keep making these little guys. They’re the underdog story that always wins.
Why You’ll Love This Recipe
Let me tell you why these mini football cheese ball bites have become my go-to party trick. I’ve tested this recipe about six times now, tweaking the ratios and trying different coatings, and I can honestly say this version is the one I keep coming back to. It’s not just another cheese ball recipe—it’s the one that actually works every single time.
- Quick & Easy: These come together in under 20 minutes, which is perfect when you realize you forgot about the party until the last minute. No baking, no complicated steps.
- Simple Ingredients: You probably have most of these in your fridge and pantry right now. Cream cheese, cheddar, a few seasonings, and something for the coating. That’s it.
- Perfect for Game Day: They’re literally shaped like footballs. Need I say more? But honestly, they work for any party—birthdays, holidays, or just a Tuesday night snack.
- Crowd-Pleaser: I’ve watched picky eaters, cheese snobs, and kids all go back for seconds. Something about the bite-size format makes people eat more than they expect.
- Unbelievably Delicious: The texture is creamy from the cream cheese, a little sharp from the cheddar, and the pecan coating adds this wonderful crunch. It’s comfort food in two bites.
What makes this recipe different from the rest? It’s the ratio. Most cheese ball recipes have too much cream cheese, making them taste flat. I use a higher proportion of sharp cheddar and a splash of Worcestershire sauce to give it that savory depth. Plus, the mini format means you get more surface area of that crunchy coating. Every bite has that perfect creamy-crunchy contrast.
This recipe isn’t just good—it’s the kind that makes you close your eyes after the first bite. It’s party food reimagined: faster, easier, but with the same satisfying, cheesy goodness you crave. Perfect for impressing guests without any stress, or turning a simple snack into something memorable.
What Ingredients You Will Need
This recipe uses simple, everyday ingredients to create something that tastes way more impressive than it should. Most of these are pantry staples, so you might not even need a grocery run.
For the Cheese Ball Base
- Cream cheese, 8 ounces, softened (I prefer Philadelphia brand for the smoothest texture)
- Sharp cheddar cheese, 1 cup shredded (about 4 ounces—buy a block and shred it yourself for better flavor and texture)
- Garlic powder, ½ teaspoon (adds savory depth without being overpowering)
- Onion powder, ¼ teaspoon (optional, but I love the subtle sweetness it brings)
- Worcestershire sauce, 1 teaspoon (this is the secret ingredient that gives it that “what’s in this?” flavor)
- Salt, ¼ teaspoon (go easy—the cheese and Worcestershire already have salt)
- Black pepper, ⅛ teaspoon, freshly ground
For the Coating & Decoration

- Pecans, ½ cup finely chopped (toast them lightly for extra flavor—I do mine in a dry pan for about 3 minutes)
- Fresh chives, 2 tablespoons finely chopped (for the “laces” on the football—don’t skip these, they make the look work)
For Serving
- Pretzel sticks or crackers for dipping (pretzel sticks look like goal posts, which is a fun touch)
A few notes on ingredient choices. I recommend using full-fat cream cheese here—the low-fat versions have more water and can make the mixture too soft to hold its shape. For the cheddar, sharp or extra-sharp gives you the most flavor. Mild cheddar works in a pinch, but you’ll want to add a pinch more salt to compensate.
If you don’t have pecans, walnuts or even crushed pretzels make excellent substitutes. For a nut-free version, use finely chopped roasted sunflower seeds or crushed pork rinds. The chives can be swapped for finely chopped green onion tops or even dried chives if that’s what you have.
Equipment Needed
You don’t need anything fancy for this recipe, which is part of its charm. Here’s what you’ll need:
- Mixing bowl, medium size (I use a glass bowl because it doesn’t hold onto smells)
- Rubber spatula or wooden spoon for mixing (a spatula makes it easier to scrape the sides)
- Measuring spoons (you’ll need ¼ teaspoon, ½ teaspoon, and 1 teaspoon)
- Cutting board and sharp knife for chopping pecans and chives
- Small skillet if you want to toast the pecans (optional, but recommended)
- Baking sheet or large plate to hold the finished cheese balls while they chill
- Parchment paper or wax paper to line the baking sheet (keeps them from sticking)
- Plastic wrap for covering the bowl while the mixture chills
If you don’t have a baking sheet, any flat dish or platter that fits in your fridge will work. I’ve used a dinner plate in a pinch. For chopping the pecans, you can also use a food processor, but pulse carefully—you want pieces, not powder. I actually prefer chopping by hand because I have more control over the texture.
Preparation Method
Let me walk you through this step by step. I’ve made these enough times to know exactly where things can go wrong, so I’ll point those out as we go.
Step 1: Soften the Cream Cheese
Take your cream cheese out of the fridge about 30 minutes before you start. It needs to be at room temperature to mix smoothly. If you forgot (like I usually do), unwrap it and microwave it on 50% power for 10-second intervals until it’s soft but not warm. Warm cream cheese will make the mixture too loose to shape.
Step 2: Mix the Base
In your medium mixing bowl, combine the softened cream cheese, shredded cheddar, garlic powder, onion powder, Worcestershire sauce, salt, and pepper. Use your rubber spatula to mix everything together until it’s completely uniform. This takes about 2 minutes of solid stirring. You want no streaks of white cream cheese—everything should be an even pale orange color. Taste it. Yes, taste it. This is your chance to adjust the seasoning. I usually add a tiny pinch more Worcestershire at this point.
Step 3: Chill the Mixture
Cover the bowl with plastic wrap and pop it in the fridge for at least 30 minutes. This is crucial. The mixture needs to firm up so you can roll it into balls. I’ve skipped this step before and ended up with sticky, misshapen blobs that looked more like sad potatoes than footballs. Don’t be like me. Give it the full 30 minutes. If you’re in a rush, 20 minutes works, but it’s harder to handle.
Step 4: Prepare the Coatings
While the mixture chills, finely chop your pecans. I like to toast them first in a dry skillet over medium heat for 2-3 minutes, shaking the pan frequently. You’ll know they’re done when they smell nutty and toasty. Let them cool completely before using. Then, finely chop your chives. Mix the pecans and chives together on a plate or in a shallow bowl. Set aside.
Step 5: Shape the Footballs
Line your baking sheet or plate with parchment paper. Take the chilled cheese mixture out of the fridge. Using a small cookie scoop or a teaspoon, scoop out portions of the mixture. Each portion should be about 1 tablespoon. Roll each portion between your palms to form a ball, then gently shape it into an oval, like a mini football. The shaping takes a little practice—you want it slightly elongated with tapered ends. Place each shaped football on the parchment-lined sheet. This step should take about 5-7 minutes for the whole batch.
Step 6: Add the Coating
Roll each football in the pecan-chive mixture, pressing gently so the coating sticks. Make sure the entire surface is covered, but don’t press so hard that you flatten the shape. Place the coated footballs back on the parchment sheet.
Step 7: Create the Laces
Here’s where they really start looking like footballs. Take a few extra chopped chives and press two short lines on the top of each football to mimic the laces. You can also use a toothpick to gently create the seam line down the center before adding the chives. This is optional, but it makes them look so much more intentional.
Step 8: Final Chill
Pop the finished cheese ball bites back in the fridge for at least 15 minutes before serving. This helps them firm up again after being handled. They’ll hold their shape better on the serving platter.
Cooking Tips & Techniques
I’ve made this recipe about a dozen times now, and I’ve learned a few things the hard way. Let me save you some trouble.
Don’t overmix. When you’re combining the cream cheese and cheddar, mix just until everything comes together. Overmixing can make the mixture too soft and almost greasy-feeling. You want it cohesive but not beaten into submission.
The temperature game is real. If your hands are warm, the cheese mixture will start to soften and stick to your palms. I run my hands under cold water before shaping, then dry them thoroughly. It makes a huge difference. If the mixture gets too soft while you’re working, just pop the whole sheet back in the fridge for 10 minutes.
Size matters. I know they’re supposed to be mini, but there’s a sweet spot. Too small and they’re gone in one bite without tasting anything. Too big and they lose the football shape. Aim for about 1 tablespoon each. You should get roughly 16-18 bites from this recipe.
Toast those pecans. I know it’s an extra step, but untoasted pecans are bland and kind of soft. Toasting brings out their natural oils and adds that crucial crunch. Just watch them closely—they go from toasted to burnt in about 30 seconds.
Make ahead tip. You can assemble these completely (except for the coating) up to 24 hours in advance. Keep the uncoated footballs covered in the fridge, then roll them in the pecan-chive mixture right before serving. The coating gets soggy if it sits too long.
My biggest failure: The first time I made these, I didn’t chill the mixture long enough and ended up with cheese all over my hands, the counter, and somehow the ceiling. I’m still not sure about the ceiling. Learn from my mistakes—chill thoroughly.
Variations & Adaptations
One of the best things about this recipe is how easy it is to change up. Here are some variations I’ve tried and loved.
Spicy Football Bites
Add 1 teaspoon of hot sauce (I use Frank’s RedHot) and ¼ teaspoon of cayenne pepper to the cheese mixture. For the coating, swap half the pecans with crushed tortilla chips. The spicy kick pairs great with a cold beer on game day.
Bacon Ranch Version
Add ¼ cup of crumbled cooked bacon and 1 tablespoon of ranch seasoning mix to the base. Replace the pecan coating with crushed bacon bits and chopped fresh parsley. This version disappears even faster than the original, if you can believe it.
Herb & Garlic Variation
Skip the Worcestershire sauce and add 1 minced garlic clove (not garlic powder), 1 tablespoon of fresh chopped parsley, and 1 teaspoon of fresh thyme leaves. Coat in finely chopped walnuts and fresh parsley. This is a more elegant version that works great for holiday parties.
Dairy-Free Adaptation
Use dairy-free cream cheese and a plant-based shredded cheddar. I’ve tried this with Kite Hill brand and it works surprisingly well. The texture is slightly softer, so chill for an extra 10 minutes before shaping. Coat in crushed dairy-free crackers or toasted sunflower seeds.
Smoked Cheddar & Chive
Swap the sharp cheddar for smoked cheddar. The smoky flavor adds a whole new dimension. Double the chives in the coating and add a pinch of smoked paprika to the pecan mixture. This is my personal favorite variation—it tastes like you spent hours smoking cheese when you really didn’t.
Serving & Storage Suggestions
These little footballs are best served cold, straight from the fridge. Arrange them on a platter with pretzel sticks standing upright around them (they look like goal posts—get it?). You can also scatter some extra toasted pecans and fresh chives around the platter for color.
For dipping, I love serving them with a side of honey mustard or a spicy ranch dressing. But honestly, they’re so flavorful on their own that you don’t really need a dip. Crackers, pretzel chips, or celery sticks all work great as vehicles for getting these into your mouth.
Storage: Keep any leftovers (if you have any) in an airtight container in the refrigerator for up to 4 days. Place them in a single layer with parchment paper between layers if you need to stack them. The coating will soften slightly over time, but they’ll still taste great.
Freezing: You can freeze the uncoated cheese balls for up to 1 month. Place them on a parchment-lined baking sheet and freeze until solid, then transfer to a freezer bag. When you’re ready to serve, thaw them in the refrigerator overnight, then roll in the coating. The texture stays surprisingly good this way.
Flavor development: Honestly, these taste even better the next day. The flavors meld together overnight, and the garlic and Worcestershire sauce become more pronounced. So if you can plan ahead, make them a day early (without the coating) and add the coating just before serving.
Nutritional Information & Benefits
Let’s be real—these are a treat, not a health food. But they’re not as bad as you might think for a party appetizer. Here’s the approximate breakdown per cheese ball bite (based on 16 servings):
Calories: 85 | Fat: 7g | Saturated Fat: 3.5g | Cholesterol: 18mg | Sodium: 120mg | Carbohydrates: 2g | Fiber: 0.5g | Sugar: 1g | Protein: 3g
The cream cheese provides a small amount of calcium and vitamin A, while the pecans offer healthy monounsaturated fats and a bit of fiber. The chives add a touch of vitamin K and antioxidants. If you use the bacon variation, you’ll get some extra protein but also more sodium, so keep that in mind.
These are naturally low-carb and keto-friendly, which makes them a hit at parties where people are watching their carbs. They’re also gluten-free as written (just double-check your Worcestershire sauce—some brands contain gluten). For anyone with nut allergies, the sunflower seed or crushed pretzel coating works perfectly.
I personally love that I can serve something indulgent that still fits into a balanced eating plan. One or two of these satisfies that cheese craving without derailing your whole day. And let’s face it, on game day, you deserve a little treat.
Conclusion
These mini football-shaped cheese ball bites are proof that you don’t need hours in the kitchen or a fancy ingredient list to steal the show at a party. They’re quick, they’re fun, and they taste genuinely amazing—not just “good for something you threw together in a panic.”
I love that this recipe lets you be creative. Change up the coating, play with the seasonings, make them spicy or smoky or loaded with bacon. They’re forgiving enough that even if you mess up the shaping, they’ll still taste incredible. And honestly, that’s the kind of recipe I want in my back pocket.
So go ahead—give these a try for your next game day gathering, or honestly, just for a snack on a random Wednesday. Make them your own. And if you come up with a variation I haven’t tried, please come back and tell me about it in the comments. I’m always looking for new ideas, and I’d love to hear what you come up with. Happy snacking!
Frequently Asked Questions
Can I make these cheese ball bites ahead of time?
Absolutely. You can prepare the cheese mixture and shape the footballs up to 24 hours in advance. Just keep them covered in the fridge and add the coating right before serving. The coating gets soft if it sits too long, so wait until the last minute for that step.
How do I keep the cheese balls from sticking to my hands?
Run your hands under cold water and dry them thoroughly before shaping. If the mixture starts getting sticky as you work, just pop the bowl back in the fridge for 10 minutes. Cold hands make all the difference here.
What can I use instead of pecans for the coating?
Walnuts, crushed pretzels, toasted sunflower seeds, or even crushed pork rinds all work great. For a nut-free option, I recommend finely chopped roasted sunflower seeds or crushed cheese crackers like Cheez-Its.
Can I use pre-shredded cheddar cheese?
You can, but I don’t recommend it. Pre-shredded cheese has anti-caking agents that prevent it from melting smoothly. For this recipe, it makes the mixture slightly grainy. Shredding your own cheddar from a block takes two minutes and gives you a much creamier result.
How long do these last in the fridge?
Stored in an airtight container, these will keep for up to 4 days. The coating will soften over time, but they’ll still taste great. If you want to keep them longer, freeze the uncoated cheese balls for up to a month and add the coating after thawing.
Pin This Recipe!
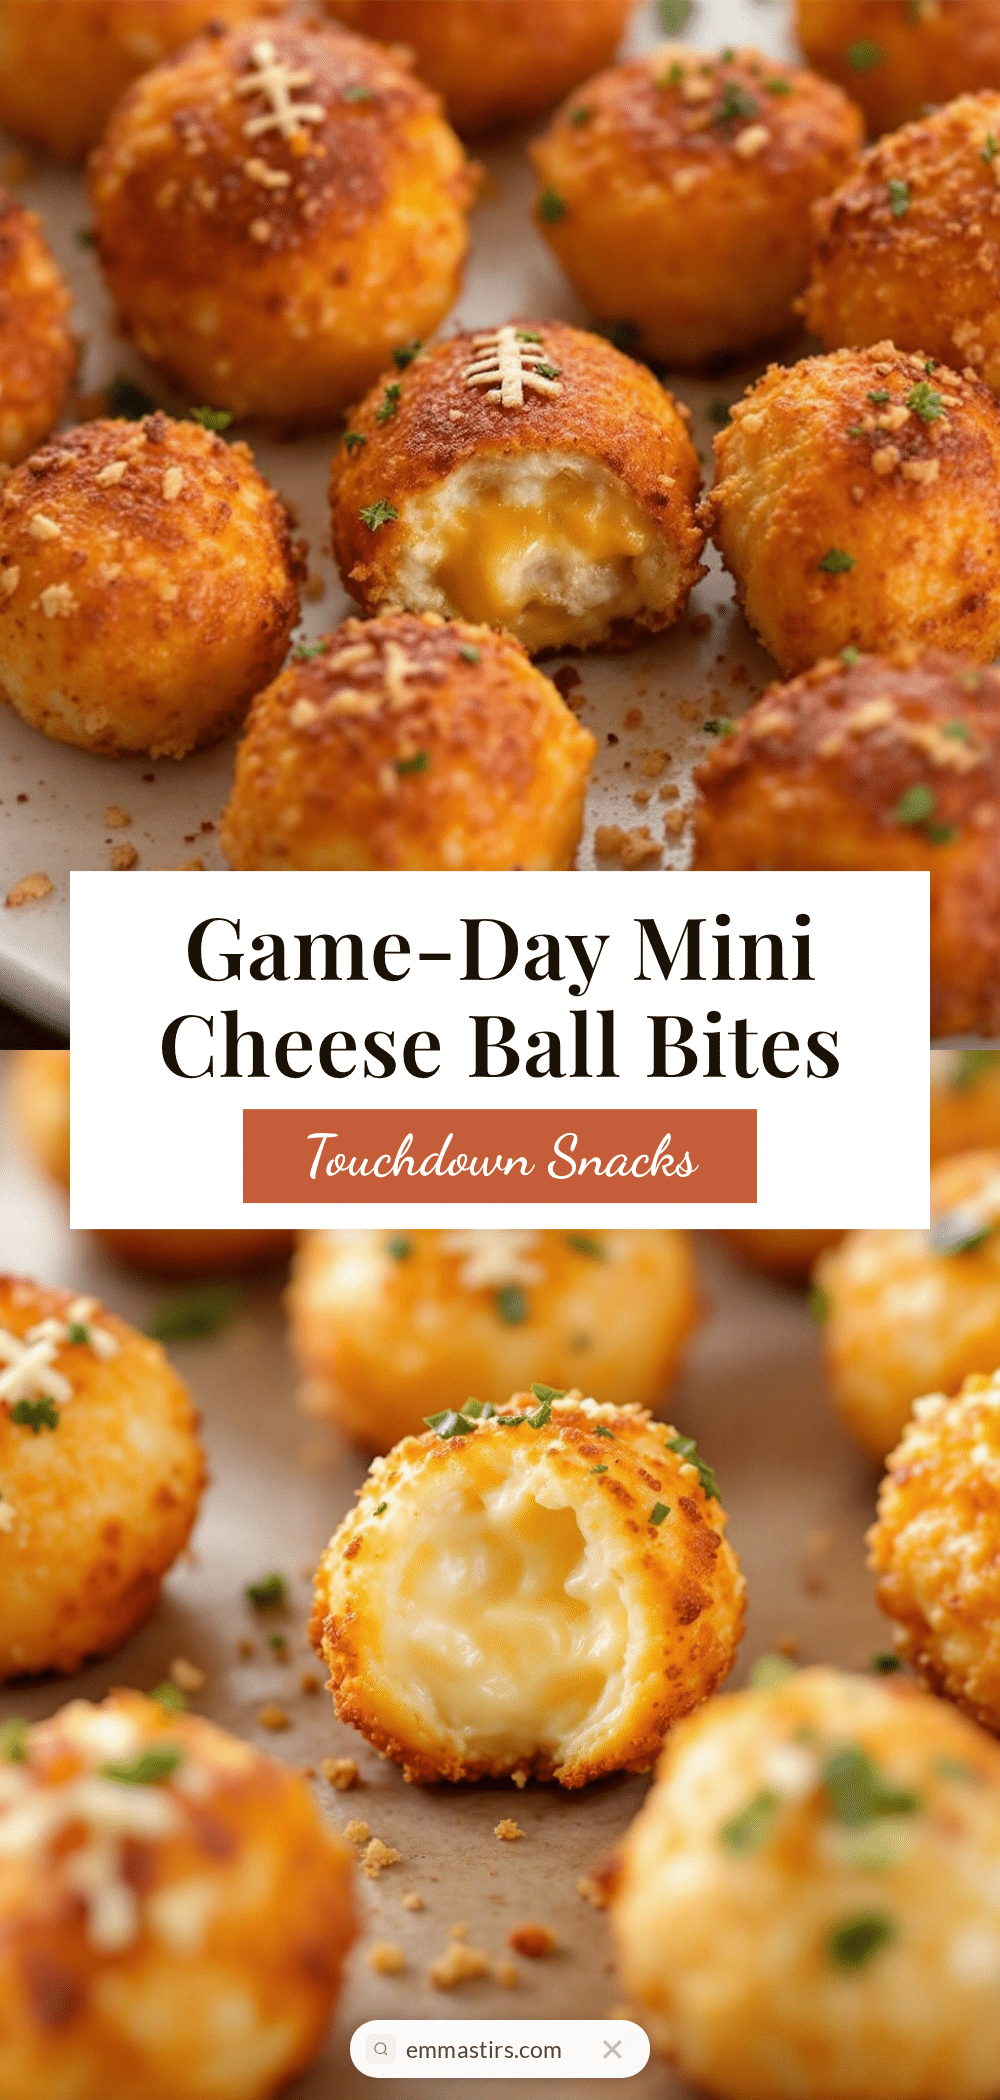
Easy Mini Football Cheese Ball Bites: Best Party Appetizer

These mini football-shaped cheese ball bites are the perfect game day appetizer. Made with cream cheese, sharp cheddar, and a crunchy pecan coating, they come together in under 20 minutes and are always a crowd-pleaser.
- Prep Time: 20 minutes
- Cook Time: 0 minutes
- Total Time: 20 minutes (plus 45 minutes chilling time)
- Yield: 16-18 servings 1x
- Category: Appetizer
- Cuisine: American
Ingredients
- 8 ounces cream cheese, softened
- 1 cup shredded sharp cheddar cheese (about 4 ounces)
- ½ teaspoon garlic powder
- ¼ teaspoon onion powder (optional)
- 1 teaspoon Worcestershire sauce
- ¼ teaspoon salt
- ⅛ teaspoon black pepper, freshly ground
- ½ cup pecans, finely chopped
- 2 tablespoons fresh chives, finely chopped
- Pretzel sticks or crackers for serving
Instructions
- Soften the cream cheese: Take the cream cheese out of the fridge about 30 minutes before starting. If in a rush, microwave on 50% power in 10-second intervals until soft but not warm.
- Mix the base: In a medium mixing bowl, combine softened cream cheese, shredded cheddar, garlic powder, onion powder, Worcestershire sauce, salt, and pepper. Mix with a rubber spatula until completely uniform and no white streaks remain. Taste and adjust seasoning if needed.
- Chill the mixture: Cover the bowl with plastic wrap and refrigerate for at least 30 minutes until firm.
- Prepare the coatings: While the mixture chills, finely chop the pecans. Toast them in a dry skillet over medium heat for 2-3 minutes, shaking frequently, until fragrant. Let cool completely. Finely chop the chives. Mix the pecans and chives together on a plate or shallow bowl.
- Shape the footballs: Line a baking sheet or plate with parchment paper. Using a small cookie scoop or teaspoon, scoop out portions of about 1 tablespoon each. Roll each portion into a ball, then gently shape into an oval (mini football shape) with slightly tapered ends. Place on the parchment-lined sheet.
- Add the coating: Roll each football in the pecan-chive mixture, pressing gently so the coating sticks. Place coated footballs back on the parchment sheet.
- Create the laces: Press two short lines of extra chopped chives on top of each football to mimic laces. Optionally, use a toothpick to create a seam line down the center before adding chives.
- Final chill: Refrigerate the finished cheese ball bites for at least 15 minutes before serving to firm up.
Notes
For best results, use full-fat cream cheese and shred your own cheddar from a block. Chill the mixture thoroughly before shaping. If hands get sticky, run them under cold water and dry before handling. The coating is best added just before serving to maintain crunch. These can be made up to 24 hours ahead without the coating.
Nutrition
- Serving Size: 1 cheese ball bite
- Calories: 85
- Sugar: 1
- Sodium: 120
- Fat: 7
- Saturated Fat: 3.5
- Carbohydrates: 2
- Fiber: 0.5
- Protein: 3
Keywords: mini cheese ball bites, football cheese balls, game day appetizer, easy party appetizer, cream cheese bites, no-bake appetizer


