Love this? Save it for later!
Share the inspiration with your friends
The plate was empty before I even got the ketchup out of the fridge. My niece had grabbed the last one, puff pastry flaking all over her black cat costume, and she didn’t even care. That’s when I knew these easy mummy hot dogs were going to be a Halloween tradition, not just a one-off snack I threw together in a panic.
Honestly, I wasn’t trying to be clever. I had about twenty minutes before the neighborhood kids started showing up for our annual pre-trick-or-treating hangout. The fridge had hot dogs (because, let’s face it, that’s what you buy for a crowd of hungry kids), a tube of crescent rolls I’d grabbed on a whim, and some leftover cream cheese. I figured, worst case scenario, they’d be edible. Best case? They’d look like little mummies. And you know what? They looked ridiculous in the best way possible. Little wrapped bundles with tiny mustard eyes staring up at me from the baking sheet.
I didn’t think much of it until my brother-in-law, a guy who never compliments food unless it involves steak, asked for the recipe mid-bite. That’s when it clicked. This wasn’t just a snack. It was the kind of thing that makes a Halloween party feel special without making you spend all day in the kitchen. It’s spooky, it’s silly, and it’s genuinely good. No weird ingredients, no stress, just a plate of something that makes people smile before they even taste it.
So here’s the thing about these easy mummy hot dogs. They’re not fancy. They’re not complicated. But they are exactly what you need when you want to feed a crowd something fun without losing your mind. And honestly? That’s the best kind of recipe.
Why You’ll Love This Recipe
I’ve tested these easy mummy hot dogs three different ways now, and I keep coming back to this version because it just works. Here’s why you’ll feel the same way:
- Ready in 20 Minutes Flat: From fridge to table in under half an hour. Perfect for those chaotic Halloween evenings when you’re juggling costumes, face paint, and a doorbell that won’t stop ringing.
- Five Ingredients, No Fuss: You probably already have everything in your kitchen. No special trips to the store for obscure spices or hard-to-find pastry sheets.
- Kid-Approved (and Adult-Loved Too): My niece isn’t the only one who goes back for seconds. The grown-ups always hover around the plate pretending they’re just “checking on them.”
- Endlessly Customizable: Swap the hot dogs for turkey dogs, use different mustards for the eyes, or add a little cheese under the wrapping. It’s a recipe that begs to be played with.
- The Visual Payoff Is Huge: These things look genuinely spooky and cute at the same time. They photograph beautifully for Instagram or Pinterest, and they always get a reaction.
What makes these different from other Halloween hot dog recipes I’ve seen? It’s the little details. I brush the pastry with an egg wash to get that deep golden color, and I leave a tiny gap for the eyes so they actually look like mummies instead of sad little bread logs. It’s those small adjustments that turn a good snack into something people remember.
This is the recipe you make when you want to feel like a Halloween hero without actually trying that hard. And honestly, isn’t that the dream?
What Ingredients You Will Need
I love that this recipe relies on simple, everyday ingredients to create something that feels special. No hunting down obscure items at the grocery store. Here’s what you’ll need:
For the Mummy Hot Dogs
- 1 can (8 oz) refrigerated crescent roll dough — I prefer Pillsbury for consistent results, but any brand works. You could also use puff pastry sheets if you want a flakier texture, just roll them out a bit thinner.
- 8 beef hot dogs — Use your favorite brand. I like all-beef hot dogs for better flavor, but turkey or chicken hot dogs work great too. Look for standard-sized hot dogs, not the jumbo ones.
- 1 large egg — For the egg wash. This gives the pastry that gorgeous golden-brown finish. If you’re out of eggs, a splash of milk or cream works in a pinch.
- 1 tablespoon water — To thin out the egg wash so it brushes on evenly.
For the Mummy Eyes (Decorating)
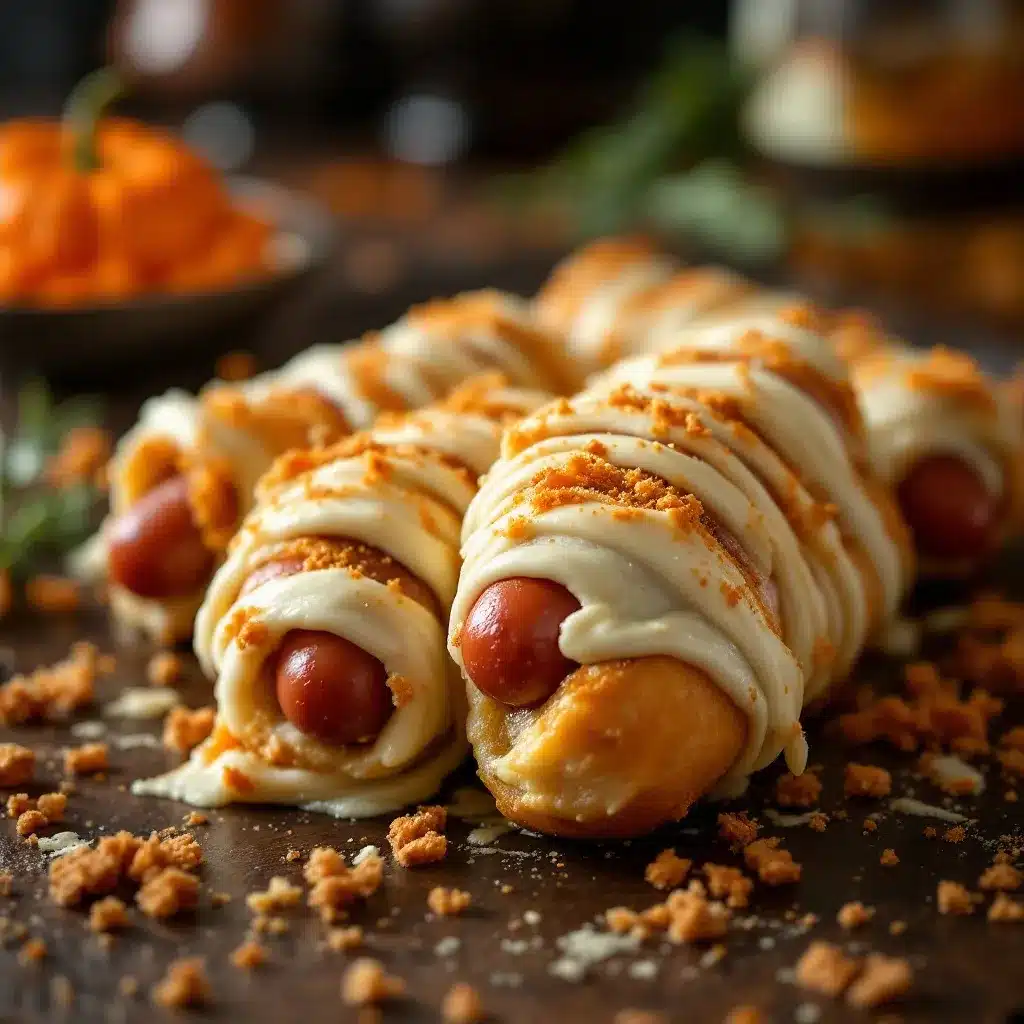
- 2 tablespoons yellow mustard — Classic yellow mustard gives the best “mummy eye” look. You can use Dijon for a more sophisticated flavor or even a little sriracha mayo for a spicy kick. I’ve also used small dots of ketchup for a bloodshot eye effect.
- Optional: 8 small candy eyeballs — If you want to go all out, Wilton makes great candy eyeballs that you can press into the pastry before baking. Just be aware they might melt slightly if they’re made of chocolate.
Ingredient Tips from My Kitchen
I’ve made these easy mummy hot dogs with both crescent rolls and puff pastry, and I honestly prefer the crescent rolls for this recipe. They’re softer, which makes them feel more like a “bandage” texture, and they puff up beautifully. Just make sure your crescent roll dough is cold when you work with it—warm dough gets sticky and hard to wrap neatly.
For the hot dogs, I recommend standard-sized ones rather than jumbo. The wrapping just looks better proportioned. And if you’re feeding vegetarians, veggie hot dogs work perfectly here—just adjust the baking time slightly since they tend to heat through faster.
Equipment Needed
You don’t need a fancy kitchen for these. Here’s what I use every time:
- Baking sheet — A standard half-sheet pan works perfectly. Line it with parchment paper or a silicone baking mat for easy cleanup.
- Sharp knife or pizza cutter — For cutting the crescent roll dough into strips. A pizza cutter makes the job faster and gives cleaner edges.
- Pastry brush — For applying the egg wash. If you don’t have one, a clean silicone spatula or even your fingers work in a pinch (just wash your hands first).
- Small bowl — For whisking the egg wash.
- Toothpicks — Optional, but helpful for securing the ends of the pastry if they start to unroll during baking.
I bought a cheap set of pastry brushes from a kitchen supply store years ago, and they’re still going strong. Just hand-wash them after use and they’ll last forever. If you’re just starting out, don’t feel like you need to invest in expensive equipment. A butter knife and your hands will get the job done.
Preparation Method
Let me walk you through this step by step. I’ve included all the little tricks I’ve learned from making these about a dozen times now.
- Preheat your oven to 375°F (190°C). Line a baking sheet with parchment paper or a silicone mat. Getting the oven hot before you start wrapping is key—you don’t want your mummies sitting around waiting.
- Prepare the egg wash. Crack the egg into a small bowl, add the tablespoon of water, and whisk until smooth and frothy. Set this aside near your work station.
- Open the crescent roll dough. Carefully unroll the dough onto a clean cutting board. Pinch the perforated seams together to create one solid sheet of dough. Don’t worry if it’s not perfect—the mummy look is supposed to be a little uneven.
- Cut the dough into strips. Using a sharp knife or pizza cutter, slice the dough lengthwise into 8 long strips, each about ½ inch wide. If you’re using a pizza cutter, this takes about 30 seconds. You want the strips to be thin enough to look like bandages but thick enough that they won’t tear when you wrap them.
- Wrap the hot dogs. Take one hot dog and start wrapping a strip of dough around it at a slight angle, overlapping slightly as you go. Leave a small gap of about ½ inch at the top for the “face” where the eyes will go. Don’t pull the dough too tight—it needs room to puff up during baking. Tuck the end of the strip underneath the hot dog to secure it.
- Place on the baking sheet. Arrange the wrapped hot dogs on the prepared baking sheet, leaving about 1 inch of space between each one. They won’t spread much, but they need a little breathing room for even browning.
- Brush with egg wash. Using your pastry brush, gently brush each mummy with the egg wash. Be thorough but don’t soak the dough. This step is what gives them that gorgeous golden color.
- Add the eyes (before baking). Using a toothpick or the tip of a knife, dab a small dot of yellow mustard onto the exposed hot dog where the eyes should go. I do two dots per mummy, spaced about ½ inch apart. If you’re using candy eyeballs, press them gently into the dough now.
- Bake for 12-15 minutes. Place the baking sheet on the middle rack of your preheated oven. Bake until the pastry is golden brown and puffed, and the hot dogs are heated through. At 12 minutes, I start checking mine—every oven runs a little differently.
- Let them rest. Remove from the oven and let the mummy hot dogs cool on the baking sheet for 2-3 minutes. This lets the pastry set so it doesn’t fall apart when you pick them up.
- Add final eyes (optional). If you want the mustard eyes to look fresher, you can add another tiny dot of mustard after baking. I sometimes do this for photos because it makes the eyes pop more.
My personal tip: If you’re making a big batch, wrap all the hot dogs first, then brush them all with egg wash at once. It’s way more efficient than doing them one at a time. Also, if the dough starts getting too warm and sticky, pop it in the fridge for 5 minutes to firm up again.
Cooking Tips & Techniques
I’ve made plenty of mistakes with these easy mummy hot dogs so you don’t have to. Here’s what I’ve learned:
The biggest mistake people make is wrapping the dough too tight. I did this my first time, and the pastry ended up tearing during baking, leaving weird gaps that looked more like a horror movie than a cute mummy. Leave a little slack in the dough as you wrap. It needs room to expand.
Don’t skip the egg wash. I know it seems like an extra step, but it’s the difference between pale, sad-looking mummies and golden, photo-worthy ones. If you’re dairy-free, you can use a splash of almond milk instead.
Watch your oven like a hawk after the 10-minute mark. Crescent roll dough goes from pale to burnt really fast. I set a timer for 10 minutes and then start peeking through the oven window every minute after that.
If you’re serving a crowd, keep them warm in a low oven. Set your oven to 200°F (93°C) and place the baked mummies on a wire rack set over a baking sheet. They’ll stay warm for up to 30 minutes without getting soggy.
One thing I learned the hard way: Don’t use fat-free hot dogs. They release too much liquid during baking, which makes the pastry soggy on the bottom. Stick with regular or turkey hot dogs for the best texture.
Variations & Adaptations
This recipe is incredibly flexible. Here are some of my favorite twists:
Spicy Mummy Dogs
Swap the yellow mustard for sriracha or chipotle mayo on the eyes. You can also add a tiny slice of jalapeño under the pastry for a hidden kick. My brother-in-law loves these, and they’re perfect for adults who want a little heat.
Cheesy Mummies
Before wrapping the hot dog, place a thin strip of cheddar or mozzarella cheese along the side. The cheese melts into the pastry as it bakes, creating a gooey surprise inside. Just be careful—the cheese gets hot and can burn your mouth if you bite into it too fast.
Vegetarian Version
Use your favorite plant-based hot dogs. I’ve tried this with both tofu-based and pea protein hot dogs, and they both work well. Just reduce the baking time by 2-3 minutes since veggie dogs heat through faster.
Breakfast Mummies
This is a fun twist I tried for a Halloween morning brunch. Use breakfast sausages instead of hot dogs, and add a tiny dab of maple syrup to the pastry before wrapping. Serve with a side of scrambled eggs. If you’re looking for more breakfast ideas, this healthy egg white breakfast burrito pairs perfectly with a side of these savory mummies.
Gluten-Free Option
Use gluten-free crescent roll dough (I’ve had good luck with the brand from Whole Foods) or swap the dough for gluten-free puff pastry. The texture will be slightly different, but the look is just as cute.
Serving & Storage Suggestions
These are best served warm, right out of the oven. The pastry is at its flakiest, and the hot dog is perfectly heated through. I like to arrange them on a platter with a small bowl of ketchup and mustard for dipping. A little bowl of spicy brown mustard on the side adds a nice adult-friendly option.
For a full Halloween spread, pair them with some cozy campfire banana s’mores boats for dessert and a big bowl of popcorn. The salty-sweet combo is always a hit with kids and adults alike.
Storage: If you have leftovers (which honestly, I rarely do), let them cool completely, then store them in an airtight container in the refrigerator for up to 3 days. The pastry will soften, but they’re still tasty.
Reheating: The best way to reheat these is in the oven or air fryer. Pop them in a 350°F (175°C) oven for 5-7 minutes, or in an air fryer at 350°F for 3-4 minutes. The microwave works in a pinch, but the pastry will be soft instead of crispy.
Freezing: You can freeze these both before and after baking. To freeze before baking, wrap the assembled mummies on a baking sheet and freeze until solid, then transfer to a freezer bag. Bake from frozen, adding 2-3 minutes to the baking time. To freeze after baking, let them cool completely, then freeze in a single layer on a baking sheet before transferring to a freezer bag. Reheat directly from frozen in the oven or air fryer.
Nutritional Information & Benefits
Let’s be real—these are a treat, not a health food. But they’re not as bad as you might think. Here’s the estimated breakdown per mummy (using regular beef hot dogs and crescent roll dough):
- Calories: Approximately 220-250 per mummy
- Protein: 8-10 grams (from the hot dog and egg wash)
- Carbohydrates: 18-22 grams (mostly from the pastry)
- Fat: 14-16 grams
- Sodium: 600-700 mg (hot dogs are naturally high in sodium)
If you’re looking to lighten them up, use turkey hot dogs (saves about 50 calories and 5 grams of fat per serving) and skip the egg wash. The pastry is the main source of carbs, so there’s not much you can do there without changing the recipe entirely.
These are best enjoyed as part of a balanced meal or as a fun party snack. Pair them with a big watermelon cucumber feta salad for a refreshing contrast, or serve them alongside some crispy broccoli bacon cheddar salad for a more filling spread.
Frequently Asked Questions
Can I make these ahead of time?
Absolutely! You can assemble the mummies up to 24 hours in advance and keep them covered in the refrigerator. Just add the mustard eyes right before baking so they don’t bleed into the dough. If you’re planning a party, this is a huge time-saver.
Why did my pastry get soggy?
This usually happens for one of two reasons: either the hot dogs released too much liquid (fat-free hot dogs are notorious for this) or the mummies were left to sit after baking without being cooled on a wire rack. Make sure you let them rest on the baking sheet for just 2-3 minutes, then transfer them to a wire rack if you’re not serving them immediately.
Can I use puff pastry instead of crescent rolls?
Yes, but the texture will be different. Puff pastry is flakier and less soft, so the “bandage” effect looks a bit more structured. If you use puff pastry, roll it out to about ⅛ inch thickness before cutting it into strips, and add 2-3 minutes to the baking time.
How do I get the mustard eyes to look perfect?
Use a toothpick or the tip of a sharp knife to dab the mustard onto the hot dog. Start with a tiny dot and build up if needed—you can always add more, but you can’t take it away. For a more precise look, you can use a piping bag with a tiny round tip, but honestly, the slightly imperfect look is part of the charm.
Can I make these in an air fryer?
Yes! Preheat your air fryer to 350°F (175°C) and cook the mummies in a single layer for 8-10 minutes, flipping halfway through. The air fryer gives them an extra-crispy exterior. Just be careful not to overcrowd the basket—they need space for the air to circulate.
Conclusion
These easy mummy hot dogs have become a non-negotiable part of my Halloween traditions, and I think they deserve a spot in yours too. They’re silly, they’re simple, and they make people genuinely happy. The first time I made them, I was just trying to get dinner on the table before the sugar rush began. Now, I look forward to making them every October.
What I love most about this recipe is how forgiving it is. If your wrapping is uneven, it just looks more like a real mummy. If the mustard eyes are a little crooked, it adds character. There’s no pressure to be perfect, which is exactly the kind of cooking I need during the chaos of Halloween season.
So go ahead and give these a try. Make them your own. Add cheese, swap the mustard for sriracha, or go all out with candy eyeballs. And when you do, I’d love to hear about it. Drop a comment below and tell me how your mummies turned out, or share a photo on social media and tag me. Happy Halloween, and happy cooking!
Pin This Recipe!
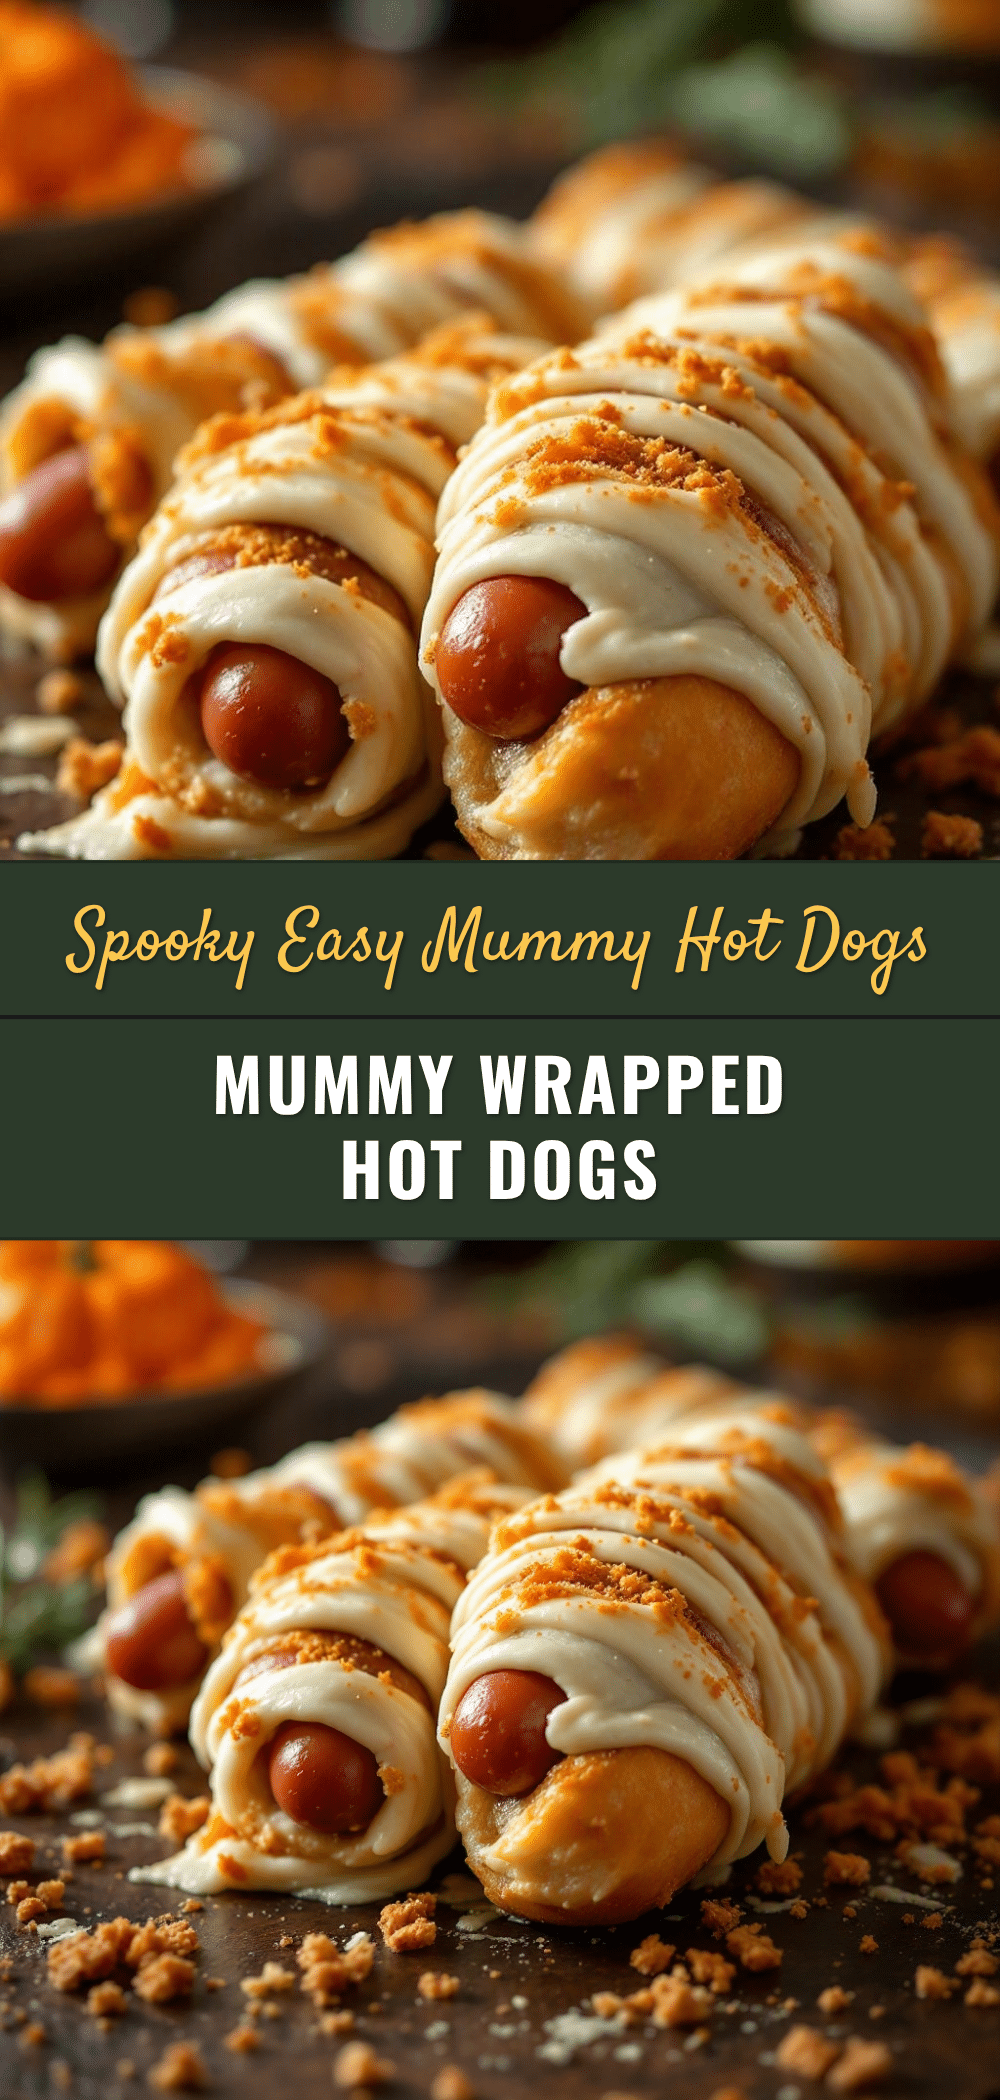
Easy Mummy Hot Dogs: Perfect Halloween Recipe

These easy mummy hot dogs are a fun, spooky, and delicious Halloween snack made with crescent roll dough wrapped around hot dogs to look like little mummies. Ready in 20 minutes, they’re perfect for parties and kid-approved.
- Prep Time: 10 minutes
- Cook Time: 15 minutes
- Total Time: 25 minutes
- Yield: 8 servings 1x
- Category: Appetizer
- Cuisine: American
Ingredients
- 1 can (8 oz) refrigerated crescent roll dough
- 8 beef hot dogs
- 1 large egg
- 1 tablespoon water
- 2 tablespoons yellow mustard
- Optional: 8 small candy eyeballs
Instructions
- Preheat your oven to 375°F (190°C). Line a baking sheet with parchment paper or a silicone mat.
- Prepare the egg wash: Crack the egg into a small bowl, add the tablespoon of water, and whisk until smooth and frothy.
- Open the crescent roll dough and carefully unroll it onto a clean cutting board. Pinch the perforated seams together to create one solid sheet of dough.
- Cut the dough into strips: Using a sharp knife or pizza cutter, slice the dough lengthwise into 8 long strips, each about 1/2 inch wide.
- Wrap the hot dogs: Take one hot dog and start wrapping a strip of dough around it at a slight angle, overlapping slightly as you go. Leave a small gap of about 1/2 inch at the top for the ‘face’ where the eyes will go. Tuck the end of the strip underneath the hot dog to secure it.
- Place on the baking sheet: Arrange the wrapped hot dogs on the prepared baking sheet, leaving about 1 inch of space between each one.
- Brush with egg wash: Using a pastry brush, gently brush each mummy with the egg wash.
- Add the eyes (before baking): Using a toothpick or the tip of a knife, dab a small dot of yellow mustard onto the exposed hot dog where the eyes should go. If using candy eyeballs, press them gently into the dough now.
- Bake for 12-15 minutes: Place the baking sheet on the middle rack of your preheated oven. Bake until the pastry is golden brown and puffed, and the hot dogs are heated through.
- Let them rest: Remove from the oven and let the mummy hot dogs cool on the baking sheet for 2-3 minutes.
- Add final eyes (optional): If you want the mustard eyes to look fresher, add another tiny dot of mustard after baking.
Notes
Don’t wrap the dough too tight or it may tear during baking. For best results, use standard-sized hot dogs (not jumbo). If the dough gets too warm and sticky, pop it in the fridge for 5 minutes to firm up. To keep warm for serving, place in a 200°F oven for up to 30 minutes.
Nutrition
- Serving Size: 1 mummy hot dog
- Calories: 235
- Sugar: 4
- Sodium: 650
- Fat: 15
- Saturated Fat: 5
- Carbohydrates: 20
- Protein: 9
Keywords: mummy hot dogs, Halloween recipe, easy Halloween snack, crescent roll hot dogs, spooky appetizer, kid-friendly Halloween food