Love this? Save it for later!
Share the inspiration with your friends
Third time in as many days I pulled these black velvet Halloween cupcakes out of the oven, and the smoke detector still went off. Not because I burned them—just that first whiff of dark cocoa hitting the hot air sets the thing off every single time. My neighbor probably thinks I’m running some kind of underground bakery operation at midnight. Honestly? Not far off.
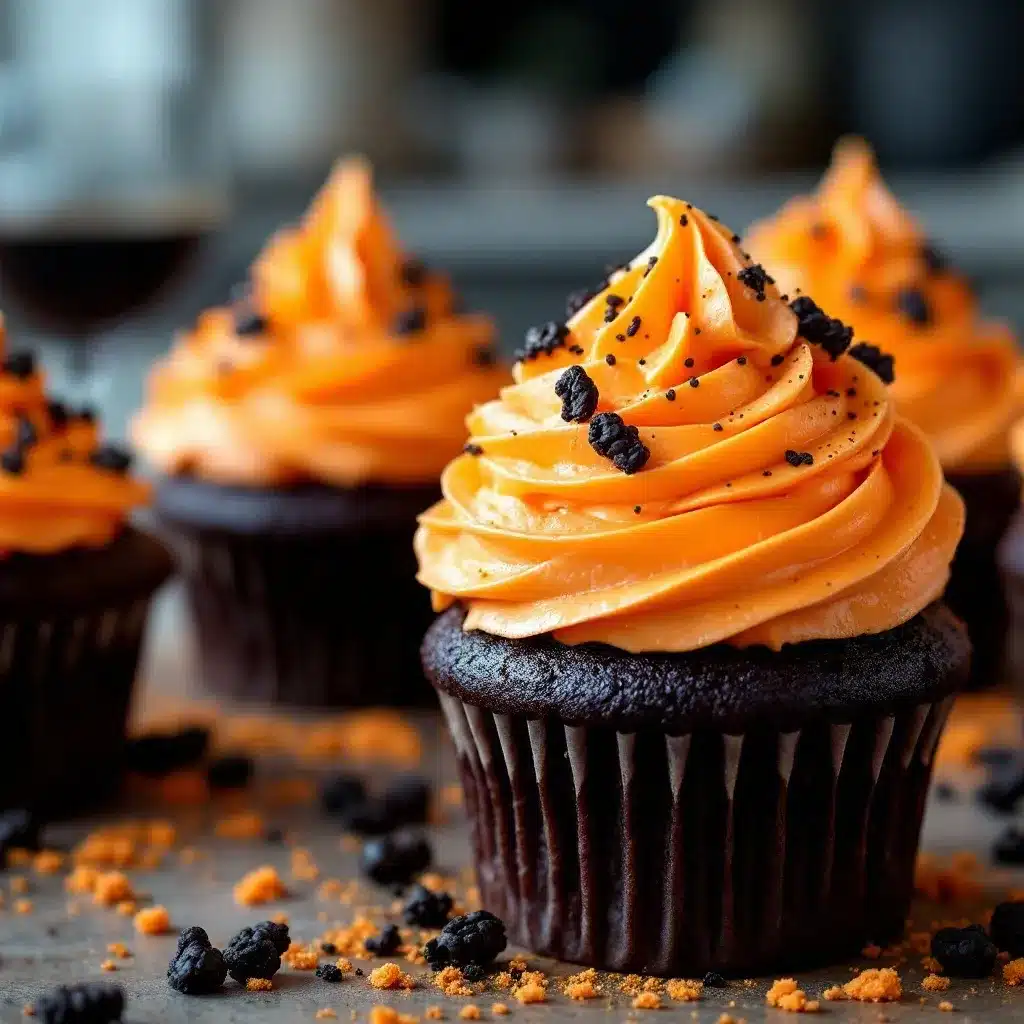
The first batch was a test. The second was for a friend’s Halloween party. The third—that one was just for me, sitting on the kitchen floor at 11 PM, frosting one with orange buttercream while watching a true crime documentary I’d seen twice before. There’s something about the deep, dramatic black crumb against that bright citrusy orange swirl that feels like the visual equivalent of a Halloween night. Spooky but cheerful. Dark but somehow cozy.
I’m not a trained pastry chef or anything close. I’m just someone who got tired of dry, crumbly black velvet recipes that tasted more like food coloring than actual cake. So I kept tweaking. Added a little extra buttermilk. Swapped the standard vinegar reaction for a combo that actually works. And I stopped pretending black cocoa powder was optional—it’s the whole reason these taste like Oreo’s sophisticated older cousin.
These cupcakes don’t need a costume. They already are one.
Why You’ll Love This Recipe
Let’s be real for a second—Halloween desserts often look better than they taste. You know the ones. Frosting that tastes like shortening. Cake that crumbles into dust the second you look at it. These black velvet Halloween cupcakes are not those cupcakes.
- Rich, moist crumb – The buttermilk and oil combo keeps these tender for days, not hours.
- Deep black color without a gallon of dye – Black cocoa powder does most of the heavy lifting. You only need a modest amount of gel coloring.
- Orange buttercream that actually tastes like oranges – Fresh zest and a splash of juice. No artificial flavoring here.
- Perfect for Halloween parties – They look dramatic on a dessert table and hold up well for transport.
- Simple ingredients – Nothing weird. No specialty flours or hard-to-find extracts.
I tested this recipe four times to get the balance right. The first attempt was too dry. The second was too dense. The third had the right texture but the orange buttercream was too sweet. Fourth time? That was the one where I actually closed my eyes after the first bite. It’s that kind of recipe—the kind that makes you stop scrolling and actually bake something.
What Ingredients You Will Need
This recipe uses straightforward ingredients, but a few of them are doing some heavy lifting behind the scenes. Here’s what you need and why each one matters.
For The Black Velvet Cupcakes
- All-purpose flour – 1 ½ cups (180g). Standard stuff. Spoon and level it, don’t scoop straight from the bag.
- Black cocoa powder – ½ cup (45g). This is the secret weapon. It’s darker and less acidic than regular Dutch-process cocoa. I use the one from King Arthur Flour or Rodelle. It tastes like chocolate Oreo crumbs.
- Granulated sugar – 1 cup (200g). Just regular white sugar.
- Baking soda – 1 teaspoon. This reacts with the vinegar and buttermilk for lift.
- Salt – ½ teaspoon. Balances the sweetness and deepens the chocolate flavor.
- Vegetable oil – ½ cup (120ml). Keeps the cupcakes moist. Neutral flavor so it doesn’t compete with the cocoa.
- Buttermilk – 1 cup (240ml), room temperature. The acidity tenderizes the gluten and reacts with the baking soda. No buttermilk? Add 1 tablespoon of lemon juice or vinegar to regular milk and let it sit 5 minutes.
- Large eggs – 2, room temperature.
- Vanilla extract – 2 teaspoons. Pure, not imitation.
- White vinegar – 1 teaspoon. Sounds weird but it boosts the chemical reaction for a lighter crumb.
- Black gel food coloring – About 1 to 2 teaspoons. Start with less, add more if you want it pitch black. I prefer Americolor Super Black.
For The Orange Buttercream
- Unsalted butter – 1 cup (226g), softened to room temperature. Not melted, not cold.
- Powdered sugar – 3 to 4 cups (360g to 480g). Sift it if you’re feeling fancy, but I rarely bother.
- Fresh orange zest – From 1 large orange. This is non-negotiable for real orange flavor.
- Fresh orange juice – 2 to 3 tablespoons. Adds flavor and thins the frosting slightly.
- Vanilla extract – 1 teaspoon.
- Salt – A tiny pinch. Sounds weird in frosting but it balances the sweetness.
- Orange gel food coloring – A few drops if you want that vibrant Halloween orange. Optional but recommended.
Equipment Needed
- Muffin pan – Standard 12-cup. I use a light-colored metal one for even baking.
- Paper cupcake liners – Black or orange ones look great, but plain white works too. Avoid the cheap thin ones—they stick.
- Mixing bowls – At least two medium ones.
- Whisk – For the dry ingredients.
- Electric hand mixer or stand mixer – You can do the buttercream by hand if you have strong arms, but a mixer makes it fluffier.
- Spatula – Rubber or silicone for scraping the bowl.
- Cooling rack – Wire rack so the bottoms don’t get soggy.
- Piping bag and star tip – A Wilton 1M or similar open star tip gives that classic swirl. No piping bag? A zip-top bag with the corner snipped off works in a pinch.
- Microplane or zester – For the orange zest. A box grater works too but the texture is chunkier.
I’ve made these cupcakes with a cheap hand mixer from the grocery store and they turned out fine. You don’t need fancy equipment. Just make sure your butter is actually softened—cold butter in buttercream is a recipe for lumpy frustration.
Preparation Method
Make The Cupcakes
- Preheat your oven to 350°F (175°C). Line your muffin pan with 12 paper liners. Don’t skip this even if the pan is nonstick—the liners help the black color stay dramatic against the orange frosting.
- Whisk the dry ingredients together. In a medium bowl, combine the flour, black cocoa powder, sugar, baking soda, and salt. Whisk until no lumps remain. Black cocoa tends to clump, so be thorough here.
- Mix the wet ingredients in a separate bowl. In a larger bowl, whisk together the vegetable oil, buttermilk, eggs, vanilla extract, and white vinegar. Whisk until smooth and slightly pale.
- Add the black gel food coloring to the wet mixture. Start with 1 teaspoon. Whisk it in. The batter will look dark gray at this point, not black. Don’t panic—the color deepens as the cocoa hydrates and after baking.
- Combine wet and dry. Pour the dry ingredients into the wet mixture. Stir with a spatula or whisk until just combined. Do not overmix. A few small lumps are fine. Overmixing makes the cupcakes tough.
- Check the color. If you want a deeper black, add another ½ to 1 teaspoon of black gel coloring and stir gently. The batter should look like thick black paint.
- Fill the liners. Use a cookie scoop or measuring cup to fill each liner about ⅔ full. Don’t overfill—these rise moderately and you want room for that gorgeous buttercream swirl.
- Bake for 18 to 22 minutes. Rotate the pan halfway through. A toothpick inserted in the center should come out clean or with a few moist crumbs. The tops will look slightly domed and feel springy to the touch.
- Cool completely. Let the cupcakes sit in the pan for 5 minutes, then transfer them to a wire rack. Let them cool completely before frosting. I mean completely—warm cupcakes will turn your buttercream into a puddle.
Make The Orange Buttercream
- Beat the butter. In a large bowl, beat the softened butter with an electric mixer on medium speed for 2 to 3 minutes until pale and fluffy. Scrape the bowl.
- Add the orange zest. Beat it in for about 30 seconds. The kitchen will smell incredible at this point.
- Add the powdered sugar gradually. Start with 3 cups. Add it one cup at a time, beating on low speed to avoid a sugar cloud. After each addition, increase the speed to medium for a few seconds.
- Add the orange juice and vanilla. Pour in 2 tablespoons of orange juice and the vanilla extract. Beat on medium-high for 1 to 2 minutes until light and fluffy. If the frosting is too thick, add the remaining tablespoon of juice. If it’s too thin, add more powdered sugar a tablespoon at a time.
- Add the pinch of salt. Beat it in. Taste the frosting. It should taste bright and citrusy, not just sweet.
- Tint the frosting orange. Add a few drops of orange gel food coloring and beat until uniform. Start with 2 drops and add more if you want it brighter. I usually go for a deep pumpkin orange.
- Pipe the frosting. Transfer the buttercream to a piping bag fitted with a star tip. Starting from the outer edge of each cupcake, pipe a continuous swirl toward the center, then lift straight up. If you don’t have a piping bag, spread the frosting with a knife in a swooping swirl pattern—it still looks great.
Cooking Tips & Techniques
I learned most of these the hard way, so you don’t have to.
Don’t skip the black cocoa. Regular cocoa powder will give you a dark brown cupcake, not black. Black cocoa is what makes these look like they came from a bakery. It’s available at most grocery stores or online. One bag lasts forever.
Gel food coloring works better than liquid. Liquid coloring thins the batter and you need way too much to get a true black. Gel is concentrated. A little goes a long way. And yes, it stains your fingers—wear gloves if you care about that sort of thing.
Room temperature ingredients matter. Cold buttermilk and cold eggs don’t emulsify as well. The batter can look curdled. Let your eggs and buttermilk sit on the counter for 20 minutes before starting. I’ve forgotten this step and the cupcakes still turned out okay, but they were slightly denser.
Don’t overbake. Black cocoa makes it hard to tell when cupcakes are done because the crumb is already dark. Use a toothpick test and trust the timer. Overbaked black velvet cupcakes turn dry and crumbly—same problem I had with my first batch.
Toast the orange zest. This is optional but I tried it once and it adds a deeper, almost candied orange flavor. Spread the zest on a baking sheet and toast at 300°F for 3 to 4 minutes. Let it cool before adding to the buttercream.
Variations & Adaptations
Gluten-Free Version: Substitute the all-purpose flour with a 1:1 gluten-free baking flour blend (like Bob’s Red Mill). Add ¼ teaspoon of xanthan gum if your blend doesn’t already include it. The texture will be slightly more tender but still delicious.
Dairy-Free Version: Use a dairy-free buttermilk substitute—add 1 tablespoon of lemon juice to 1 cup of unsweetened almond or oat milk. For the buttercream, use a high-quality vegan butter stick (not the spreadable kind in a tub). The flavor will be slightly different but still good.
Spiced Variation: Add 1 teaspoon of cinnamon and ½ teaspoon of nutmeg to the dry ingredients. It gives the cupcakes a subtle warmth that pairs beautifully with the orange buttercream. I made this version for a fall dinner party and everyone asked for the recipe.
Chocolate Orange Buttercream: Melt 2 ounces of dark chocolate and let it cool slightly. Beat it into the finished buttercream along with the orange zest. It tastes like a chocolate orange—one of those foil-wrapped ones from Christmas.
Cupcake Flavor Swap: If black velvet isn’t your thing, use this same orange buttercream on top of a classic vanilla cupcake or a chocolate cupcake. It’s versatile enough to work with almost any base.
Serving & Storage Suggestions
These black velvet Halloween cupcakes are best served at room temperature. The buttercream softens slightly and the crumb feels more tender. If you’ve refrigerated them, let them sit on the counter for 20 to 30 minutes before serving.
For a Halloween party: Arrange them on a black or orange cake stand. Sprinkle a few edible glitter stars or candy eyeballs on top for extra drama. I once added a tiny plastic spider to each cupcake and the kids loved it (and a few adults screamed, which was hilarious).
Storage: Store unfrosted cupcakes in an airtight container at room temperature for up to 3 days. Frosted cupcakes should be refrigerated if you’re keeping them longer than 24 hours. Bring them back to room temperature before serving.
Freezing: You can freeze unfrosted cupcakes for up to 3 months. Wrap each one individually in plastic wrap, then place them in a freezer bag. Thaw at room temperature before frosting. The buttercream can also be frozen in an airtight container for up to 2 months—just re-whip it after thawing.
Flavor development: Honestly, these taste even better the day after baking. The black cocoa flavor deepens and the crumb settles into a perfect moist texture. If you can wait, make them a day ahead.
Nutritional Information & Benefits
Let’s be honest—these are cupcakes, not health food. But here’s the estimated breakdown per cupcake (with frosting):
- Calories: Approximately 380 to 420
- Fat: 22g
- Carbohydrates: 48g
- Protein: 4g
- Sugar: 35g
That said, black cocoa powder is rich in antioxidants (more than regular cocoa, actually). Oranges provide vitamin C, and butter has vitamin A. So there’s that.
If you’re looking for a lighter option, you could pair one of these cupcakes with a fresh low-calorie fruit salad with mint for balance. Or save them for a treat and enjoy every single bite without guilt. That’s my approach.
These are not gluten-free or dairy-free by default, but the variations above offer easy swaps. They do contain eggs, dairy, and gluten. If you have allergies, the substitutions I listed work well.
Conclusion
These black velvet Halloween cupcakes with orange buttercream are the kind of recipe that makes people stop and stare before they even take a bite. The deep black crumb against that bright citrus swirl is pure Halloween magic. And the flavor? It actually delivers—moist, rich, and balanced with just enough orange to cut through the chocolate.
I’ve made these for parties, for solo midnight baking sessions, and for neighbors who probably think I’m a little unhinged with the smoke detector situation. Every single time, they disappear. That’s the test that matters.
If you make these, tag me or leave a comment. I love seeing how they turn out—especially if you add your own twist. Maybe extra orange zest. Maybe a sprinkle of flaky salt on top. Maybe you pipe them into little pumpkin shapes instead of swirls. Go for it.
Bake something that feels like Halloween night, even if it’s just a Tuesday in October.
Frequently Asked Questions
Can I make these cupcakes without black cocoa powder?
You can, but they won’t be black. Regular cocoa gives a dark brown color. If you want true black, you need black cocoa. It’s available at most baking supply stores and online. One bag lasts a long time.
How do I get the cupcakes really black without using too much food coloring?
Use black cocoa powder as the base—it’s naturally very dark. Then add just 1 to 2 teaspoons of black gel food coloring. The combination gives you a deep, dramatic black without that artificial aftertaste. Liquid food coloring won’t work as well.
Can I use store-bought frosting instead of making orange buttercream?
You can, but it won’t taste the same. Store-bought frosting is usually too sweet and lacks real orange flavor. If you’re short on time, buy a vanilla buttercream and stir in fresh orange zest and a splash of juice. It’s not perfect but it works in a pinch.
How far in advance can I make these cupcakes?
You can bake the cupcakes up to 3 days ahead and store them unfrosted in an airtight container at room temperature. The buttercream can be made 2 days ahead and refrigerated—just let it come to room temperature and re-whip before piping. Frosted cupcakes are best within 24 hours.
Can I freeze these cupcakes?
Yes. Freeze unfrosted cupcakes individually wrapped in plastic wrap for up to 3 months. Thaw at room temperature before frosting. You can also freeze the buttercream in an airtight container for up to 2 months—re-whip it after thawing for the best texture.
Pin This Recipe!
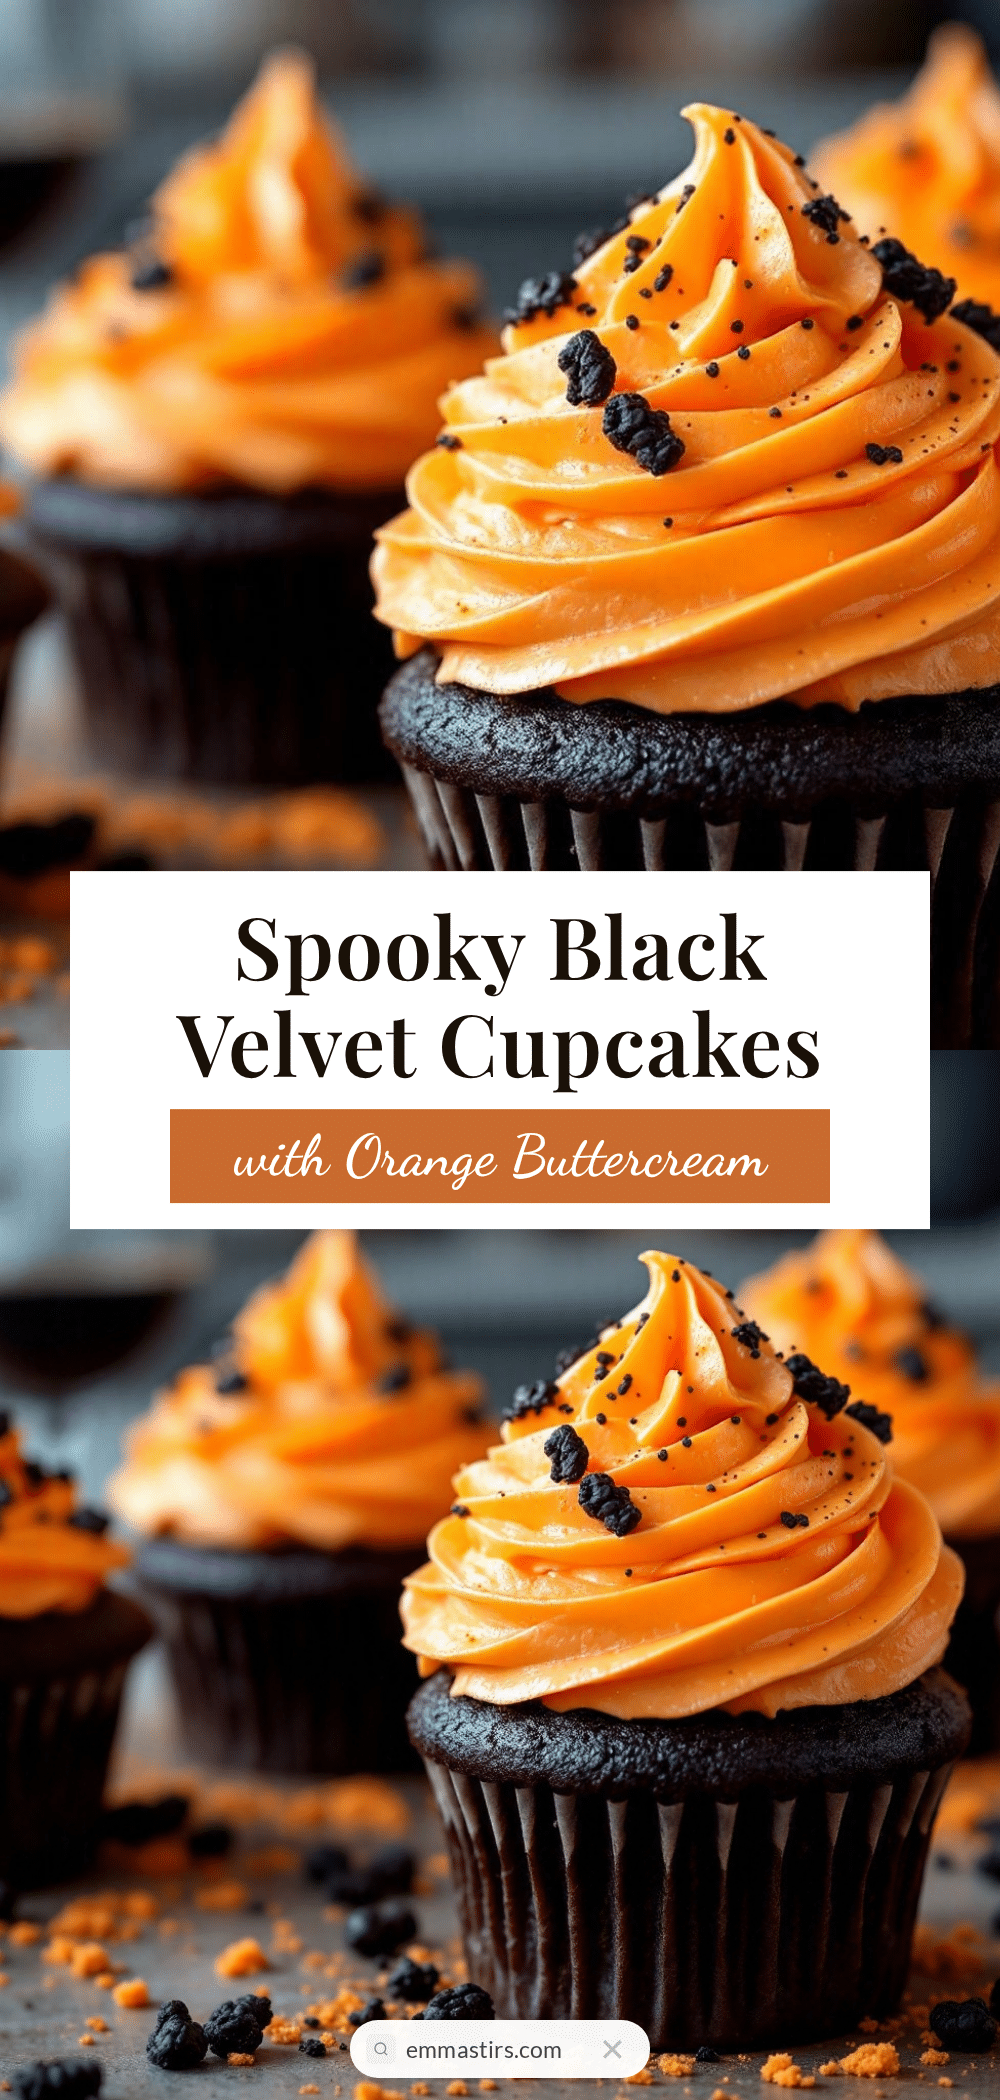
Perfect Black Velvet Halloween Cupcakes Recipe
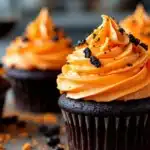
Rich, moist black velvet cupcakes with a deep black crumb and bright orange buttercream. The perfect spooky but cheerful Halloween treat that tastes as good as it looks.
- Prep Time: 20 minutes
- Cook Time: 20 minutes
- Total Time: 40 minutes
- Yield: 12 cupcakes 1x
- Category: Dessert
- Cuisine: American
Ingredients
- 1 ½ cups (180g) all-purpose flour
- ½ cup (45g) black cocoa powder
- 1 cup (200g) granulated sugar
- 1 teaspoon baking soda
- ½ teaspoon salt
- ½ cup (120ml) vegetable oil
- 1 cup (240ml) buttermilk, room temperature
- 2 large eggs, room temperature
- 2 teaspoons vanilla extract
- 1 teaspoon white vinegar
- 1 to 2 teaspoons black gel food coloring
- 1 cup (226g) unsalted butter, softened
- 3 to 4 cups (360g to 480g) powdered sugar
- Zest from 1 large orange
- 2 to 3 tablespoons fresh orange juice
- 1 teaspoon vanilla extract
- Pinch of salt
- A few drops orange gel food coloring (optional)
Instructions
- Preheat oven to 350°F (175°C). Line a 12-cup muffin pan with paper liners.
- In a medium bowl, whisk together flour, black cocoa powder, sugar, baking soda, and salt until no lumps remain.
- In a larger bowl, whisk together vegetable oil, buttermilk, eggs, vanilla extract, and white vinegar until smooth and slightly pale.
- Add 1 teaspoon black gel food coloring to the wet mixture and whisk. The batter will look dark gray.
- Pour dry ingredients into wet mixture and stir until just combined. Do not overmix.
- If desired, add another ½ to 1 teaspoon black gel coloring for deeper color.
- Fill each liner about ⅔ full with batter.
- Bake for 18 to 22 minutes, rotating the pan halfway through. A toothpick inserted in the center should come out clean or with a few moist crumbs.
- Let cupcakes cool in the pan for 5 minutes, then transfer to a wire rack to cool completely.
- For the buttercream: Beat softened butter with an electric mixer on medium speed for 2 to 3 minutes until pale and fluffy.
- Add orange zest and beat for 30 seconds.
- Gradually add 3 cups powdered sugar, one cup at a time, beating on low then medium speed.
- Add 2 tablespoons orange juice and vanilla extract. Beat on medium-high for 1 to 2 minutes until light and fluffy. Adjust consistency with more juice or powdered sugar as needed.
- Add a pinch of salt and beat to combine. Taste and adjust.
- Add a few drops orange gel food coloring if desired and beat until uniform.
- Transfer buttercream to a piping bag fitted with a star tip. Pipe a continuous swirl onto each cooled cupcake, starting from the outer edge and working inward.
Notes
Black cocoa powder is essential for the deep black color—regular cocoa will only yield dark brown. Use gel food coloring, not liquid, for best results. Room temperature ingredients ensure proper emulsification. Cupcakes taste even better the day after baking as the cocoa flavor deepens. For a dairy-free version, use a dairy-free buttermilk substitute and vegan butter. For gluten-free, use a 1:1 gluten-free flour blend with xanthan gum.
Nutrition
- Serving Size: 1 cupcake
- Calories: 400
- Sugar: 35
- Sodium: 220
- Fat: 22
- Saturated Fat: 10
- Carbohydrates: 48
- Fiber: 2
- Protein: 4
Keywords: black velvet cupcakes, Halloween cupcakes, orange buttercream, black cocoa cupcakes, spooky desserts, Halloween baking