Love this? Save it for later!
Share the inspiration with your friends
My niece, Lucy, showed up at my door at 8 PM on a Tuesday, two days before Halloween, holding a bag of candy corn and looking panicked. “I forgot I’m hosting the class party tomorrow,” she said, and the only thing in my pantry was a bag of popcorn kernels and a block of white chocolate I’d stashed for some future baking project I hadn’t gotten around to yet. Honestly, I almost suggested we just order pizza and call it a night. But then I saw the bag of candy eyeballs sitting on my counter from a previous attempt at creepy cupcakes, and something clicked. We needed something spooky, something snackable, and something that looked way more impressive than the fifteen minutes of actual effort we had left in us.
So, we dumped the popcorn into a bowl, melted that sad-looking white chocolate block in the microwave (in thirty-second increments, holding our breath), and started stirring. The first handful looked like a sad, blobby snowman. But then Lucy grabbed a spoon and started shaping the mixture into little clawed hands on a sheet of parchment paper, pressing candy corn into the tips for fingernails. It was ridiculous. It was messy. And honestly? It was the most fun I’d had in the kitchen all month. These Spooky White Chocolate Popcorn Hands aren’t just a treat; they are the kind of accidental, last-minute kitchen magic that makes you remember why you love cooking in the first place. They are weird, wonderful, and perfect for a Halloween party that needs a little personality.
Why You’ll Love This Recipe
This isn’t your average bowl of Halloween candy. These popcorn hands are a total conversation starter, and they come together with almost zero stress. Here is why they will become your new go-to for spooky season:
- Unbelievably Easy: We are talking about a 15-minute total prep time. No baking, no complicated steps, and absolutely no tempering chocolate. Just melt, mix, and shape.
- Minimal Ingredients: You probably already have popcorn and white chocolate in your house. The decorations are totally flexible, so you can use whatever creepy candy you have lying around.
- Perfect for Parties: These are a guaranteed hit at Halloween parties, school events, or even just a fun movie night at home. Kids love making them, and adults love eating them.
- Customizable and Fun: You can make them as cute or as terrifying as you want. Swap the candy corn for slivered almonds for a witchy look, or add a drizzle of dark chocolate for some serious drama.
- Texture Heaven: You get the satisfying crunch of the popcorn, the creamy sweetness of the white chocolate, and the chewy or hard texture of the candy toppings. It’s a party in your mouth, honestly.
What makes this recipe different from a regular popcorn ball is the shape. Instead of a boring sphere, you are creating something that looks like a creepy, disembodied hand reaching out of a snack bowl. It is the kind of playful, slightly spooky treat that makes people stop and smile. Plus, it uses simple ingredients you can find anywhere, so there is no frantic last-minute trip to a specialty store.
This recipe is pure, unadulterated fun. It is the kind of treat that makes you feel like a kid again, covered in melted chocolate and laughing at your own messy creations. It’s comfort food with a spooky twist, and it is guaranteed to bring a little joy (and a little fright) to your Halloween celebration.
What Ingredients You Will Need
This recipe uses simple, everyday ingredients that come together to create something truly special. The key is using good quality white chocolate and fresh popcorn for the best texture and flavor. Here is what you need:
- 8 cups of popped popcorn (plain or lightly salted, no butter) – This is the base of our creepy hands. I prefer using air-popped popcorn for a neutral flavor, but microwave popcorn (just the plain kind) works in a pinch. Fresh popcorn is crucial; stale popcorn will make the hands crumbly.
- 12 ounces of white chocolate melting wafers or white chocolate chips – This is the glue that holds everything together. I recommend Ghirardelli or Guittard melting wafers because they melt smoothly and set up with a nice, hard snap. Standard white chocolate chips can work, but they sometimes have stabilizers that make them seize up. If using chips, add a teaspoon of coconut oil to help them melt smoothly.
- 1 tablespoon of coconut oil or vegetable shortening – This is optional but highly recommended. It helps thin out the white chocolate, making it easier to coat the popcorn evenly and giving the final product a beautiful, shiny finish.
- Candy eyeballs – These are the soul of the hands! You can find them at any grocery store or craft store around Halloween. They add that instant “creepy” factor.
- Candy corn – These become the fingernails. Their triangular shape is perfect for mimicking claws. You can also use orange slices or even slivered almonds for a different look.
- Red licorice strings or red gel icing – For adding bloody veins or creepy details. This is optional but highly recommended for maximum spook factor.
- Optional: Dark chocolate chips (melted) – A drizzle of dark chocolate adds a nice color contrast and a slightly bitter flavor to balance the sweetness.
When selecting your popcorn, make sure it is completely cool and dry. Any moisture will make the white chocolate seize up into a grainy, unusable mess. I learned this the hard way when I tried to use popcorn that was still slightly warm from the air popper. It was a sad, sticky disaster. Trust me, let the popcorn cool completely before you start.
For the candy decorations, feel free to get creative. Pretzel sticks can become broken fingers, and gummy worms can be draped over the hands for an extra creepy touch. The beauty of this recipe is that it is completely adaptable to whatever creepy candy you have in your pantry.
Equipment Needed
You don’t need any fancy kitchen gadgets for this recipe, which is part of its charm. Here is what you will need:
- Large mixing bowl – You need a big bowl to toss the popcorn with the melted white chocolate without making a mess. A metal or glass bowl works best.
- Microwave-safe bowl – For melting the white chocolate. A glass measuring cup is perfect because it has a spout for easy pouring.
- Rubber spatula or wooden spoon – For stirring the popcorn and chocolate together. A silicone spatula is my favorite because it doesn’t scratch the bowl and you can scrape every last bit of chocolate.
- Baking sheet or large platter – Lined with parchment paper or a silicone baking mat. This is where you will shape and set the popcorn hands.
- Parchment paper – Absolutely essential to prevent sticking. Wax paper will work in a pinch, but parchment is more reliable.
- Measuring cups and spoons – For measuring the popcorn and coconut oil.
If you don’t have a microwave, you can melt the white chocolate using a double boiler on the stovetop. Just place a heatproof bowl over a pot of simmering water, making sure the bottom of the bowl doesn’t touch the water. Stir until melted and smooth. It takes a few minutes longer, but it works perfectly. I actually prefer this method sometimes because it gives you more control and reduces the risk of burning the chocolate.
A good tip for cleaning up: soak your bowl and spatula in hot water immediately after you finish shaping the hands. Once that white chocolate dries, it is like cement. A little proactive soaking will save you a lot of scrubbing later.
Preparation Method
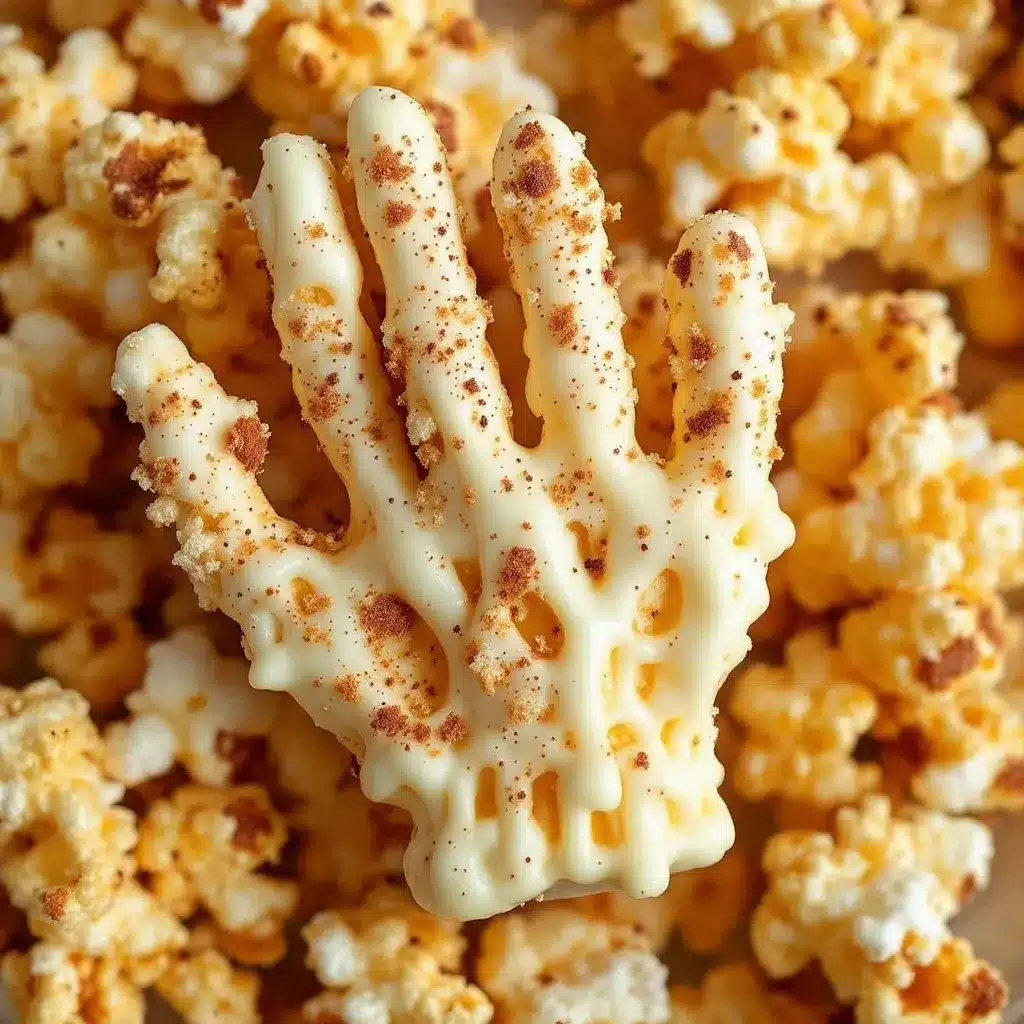
Making these spooky hands is incredibly straightforward, but there are a few little tricks to get them looking just right. Follow these steps, and you will have a batch of creepy, delicious hands in no time.
- Prepare your popcorn: Pop your popcorn according to the package directions. You need about 8 cups of popped popcorn. Spread it out on a baking sheet and pick out any unpopped kernels. Let the popcorn cool completely to room temperature. This is a non-negotiable step. Warm popcorn will melt the white chocolate into a greasy puddle instead of coating it evenly.
- Melt the white chocolate: Place the white chocolate wafers or chips and the coconut oil in a microwave-safe bowl. Microwave in 30-second intervals, stirring well after each interval, until the chocolate is completely smooth and melted. Be careful not to overheat it, or the chocolate will seize up and become grainy. It should be warm to the touch but not hot.
- Combine the popcorn and chocolate: Pour the melted white chocolate over the cooled popcorn in the large mixing bowl. Use your rubber spatula to gently fold the popcorn and chocolate together until every kernel is evenly coated. Work quickly but gently so you don’t crush the popcorn. You want a nice, even coating.
- Shape the hands: This is the fun part. Scoop a generous handful of the coated popcorn onto the prepared parchment-lined baking sheet. Using your hands (lightly greased with a little coconut oil to prevent sticking), shape the popcorn into a hand shape. Start with a rounded base for the palm, then gently press out five fingers. Don’t worry about making them perfect—the more uneven and claw-like, the better. They are supposed to be spooky, not perfect! You should get about 6 to 8 hands, depending on the size.
- Add the decorations: While the white chocolate is still wet and sticky, press the candy eyeballs into the palm area. Place a candy corn at the tip of each finger for a fingernail. If you are using red licorice or gel icing, gently press it into the hands to look like veins. Work quickly because the white chocolate will start to set.
- Set the hands: Place the baking sheet in the refrigerator for about 15 to 20 minutes, or until the white chocolate is completely firm and hard. Do not skip this step. The hands need to be fully set before you try to move them, or they will fall apart.
- Serve and enjoy: Once the hands are firm, carefully peel them off the parchment paper. Arrange them on a platter for a truly spooky presentation. They are best served at room temperature.
One thing I always do is make a few extra “practice” hands with the first handful of popcorn. They never look great, but it helps you get a feel for the texture and how much pressure to use when shaping. Plus, you get to eat the mistakes, which is honestly the best part of cooking.
Cooking Tips & Techniques
I have made these hands more times than I care to admit, and I have learned a few things the hard way. Here are my best tips for getting perfect results every time:
- Work in batches: Don’t try to coat all 8 cups of popcorn at once if your bowl is small. Work in two batches to ensure every kernel gets an even coating of chocolate. It makes the process much less stressful and the results much better.
- Keep your hands greased: The white chocolate mixture is sticky. Lightly coat your hands with a little coconut oil or butter before shaping the hands. It makes a world of difference and prevents the popcorn from sticking to your fingers.
- Don’t overmix: Once you add the white chocolate to the popcorn, fold gently. Overmixing will crush the popcorn and create a dense, crumbly mess instead of a light, crunchy hand. You want the popcorn to stay as intact as possible.
- Use the fridge strategically: If the white chocolate starts to set before you finish shaping all the hands, pop the bowl back in the microwave for 10 seconds to soften it up. But be careful not to melt it completely again. A quick warm-up is all you need.
- Don’t skip the coconut oil: This is my number one tip. Adding a little coconut oil to the white chocolate makes it much more fluid and easier to work with. It also gives the finished hands a beautiful, glossy sheen that looks way more professional.
I once tried to make these without letting the popcorn cool completely first. The white chocolate seized up into a grainy, oily mess, and I had to throw the whole batch away. It was a frustrating lesson, but it taught me the importance of patience. Let that popcorn cool, folks. Your hands (and your taste buds) will thank you.
Variations & Adaptations
This recipe is incredibly versatile, and you can easily adapt it to fit different tastes, dietary needs, or occasions. Here are a few of my favorite variations:
- Dark Chocolate Witch Hands: Swap the white chocolate for dark or semi-sweet chocolate. The bitterness of the dark chocolate pairs beautifully with the salty popcorn and creates a much more sinister-looking hand. Use slivered almonds for the fingernails for a truly witchy vibe.
- Halloween Monster Claws: After shaping the hands, drizzle them with melted dark chocolate and sprinkle with orange and black sprinkles. Use candy corn for the fingernails and add a dollop of red gel icing for a “bloody” effect. These are perfect for a kid’s Halloween party.
- Peanut Butter & Chocolate Hands: Add a tablespoon of creamy peanut butter to the melted white chocolate before mixing in the popcorn. The peanut butter adds a savory, salty element that balances the sweetness and gives the hands an incredible depth of flavor. This is my personal favorite variation.
- Vegan-Friendly Version: Use a high-quality vegan white chocolate (many brands are now available) and coconut oil. Make sure your popcorn is air-popped and free of butter. The rest of the recipe remains exactly the same, and the results are just as delicious.
- Spicy Sweet Hands: For a grown-up twist, add a pinch of cayenne pepper or a dash of chili powder to the melted white chocolate. The heat from the pepper cuts through the sweetness and creates a truly addictive sweet-and-spicy flavor profile. It is unexpected and absolutely wonderful.
If you are looking for a healthier snack option to balance out all this Halloween indulgence, you might want to check out this fresh low-calorie fruit salad with mint. It’s a refreshing palate cleanser after all that sweet, crunchy popcorn!
Serving & Storage Suggestions
These spooky popcorn hands are best served at room temperature, right after they have set in the fridge. The texture is perfectly crunchy, and the white chocolate has a satisfying snap. Arrange them on a large platter with some extra candy corn or gummy worms scattered around for a truly creepy tablescape.
For a Halloween party, I like to serve them with other spooky treats like cozy campfire banana smores boats for a fun, campfire-inspired dessert table. The combination of the crunchy popcorn hands and the gooey, warm smores is a textural dream.
Storage Instructions: Store any leftover popcorn hands in an airtight container at room temperature for up to 3 days. Do not refrigerate them once they have set, as the refrigerator can cause the white chocolate to develop a white, chalky bloom (it is still safe to eat, just less pretty). If you live in a humid climate, the popcorn may lose some of its crunch over time, so it is best to eat them within a day or two.
Freezing Instructions: You can freeze the hands for up to 2 months. Place them in a single layer on a baking sheet and freeze until solid, then transfer them to a freezer-safe bag or container. Thaw them at room temperature for about 15 minutes before serving. The texture will be slightly less crunchy, but they will still be delicious.
I find that the flavors actually meld together a bit overnight, making the second-day hands even more delicious. The white chocolate absorbs a little bit of the popcorn’s saltiness, creating a perfectly balanced sweet-and-salty bite. So don’t be afraid to make them a day ahead!
Nutritional Information & Benefits
Let’s be honest: these are a treat, not a health food. But here is a rough estimate of the nutritional information per hand (assuming you make 8 hands):
- Calories: Approximately 250-300 calories per hand
- Fat: 15-18g
- Carbohydrates: 30-35g
- Sugar: 22-26g
- Protein: 3-4g
The main ingredient, popcorn, is actually a whole grain and a good source of fiber. It is also relatively low in calories compared to other snack foods. The white chocolate, of course, adds the sugar and fat, but it also provides a small amount of calcium. The candy decorations are purely for fun and aesthetic appeal.
For those with dietary restrictions, this recipe can be made gluten-free (just check your popcorn and white chocolate labels) and can easily be adapted to be vegan, as mentioned in the variations section. It is also nut-free if you skip the almond variations and use sunflower seed butter instead of peanut butter.
If you are looking for a more balanced, protein-packed breakfast to fuel your Halloween festivities, you might enjoy this fluffy cottage cheese pancake recipe. It is a great way to start the day before all the candy comes out!
Remember, moderation is key. Enjoy these spooky hands as a fun, occasional treat, and balance them out with plenty of whole foods and vegetables. A little bit of indulgence is good for the soul!
Conclusion
These Spooky White Chocolate Popcorn Hands are more than just a Halloween treat; they are an experience. They are the kind of recipe that brings people together, gets everyone laughing, and creates memories that last long after the last candy corn is eaten. They are easy enough for a last-minute party, impressive enough to steal the show at a potluck, and fun enough to make with kids on a rainy October afternoon.
I love this recipe because it proves that you don’t need fancy ingredients or complicated techniques to make something truly special. Sometimes, the best things come from a moment of panic, a bag of popcorn, and a little bit of creativity. It is a reminder that cooking should be fun, playful, and a little bit messy.
So go ahead, grab a bag of popcorn and some white chocolate, and get your hands dirty. Make them spooky, make them silly, make them your own. I would love to see what you come up with! Leave a comment below and tell me about your Halloween creations, or share a photo of your popcorn hands on social media. Happy Halloween, and happy snacking!
Frequently Asked Questions
Can I use microwave popcorn for this recipe?
Yes, you can! Just make sure you use the plain or lightly salted variety without any butter flavoring. The butter can make the white chocolate greasy and prevent it from adhering properly. Let the popcorn cool completely before using it.
My white chocolate seized up and became grainy. What did I do wrong?
This usually happens when the chocolate gets too hot or comes into contact with moisture. Make sure you melt it slowly in 30-second intervals, and ensure your popcorn is completely cool and dry. Adding a teaspoon of coconut oil can also help prevent seizing.
How far in advance can I make these popcorn hands?
You can make them up to 2 days in advance. Store them in an airtight container at room temperature. If you need to make them further ahead, you can freeze them for up to 2 months, but the texture will be slightly less crunchy after thawing.
Can I use dark chocolate instead of white chocolate?
Absolutely! Dark chocolate works wonderfully and creates a much more sinister-looking hand. Follow the same melting instructions, and consider adding a pinch of sea salt to balance the bitterness. It is a delicious variation.
My popcorn hands are falling apart. How do I fix this?
This usually means there isn’t enough white chocolate to hold the popcorn together. Make sure you are using the full 12 ounces and that every kernel is well-coated. If the mixture is too dry, you can melt a little extra white chocolate and stir it in. Also, make sure the hands are fully set in the fridge before you try to move them.
Pin This Recipe!
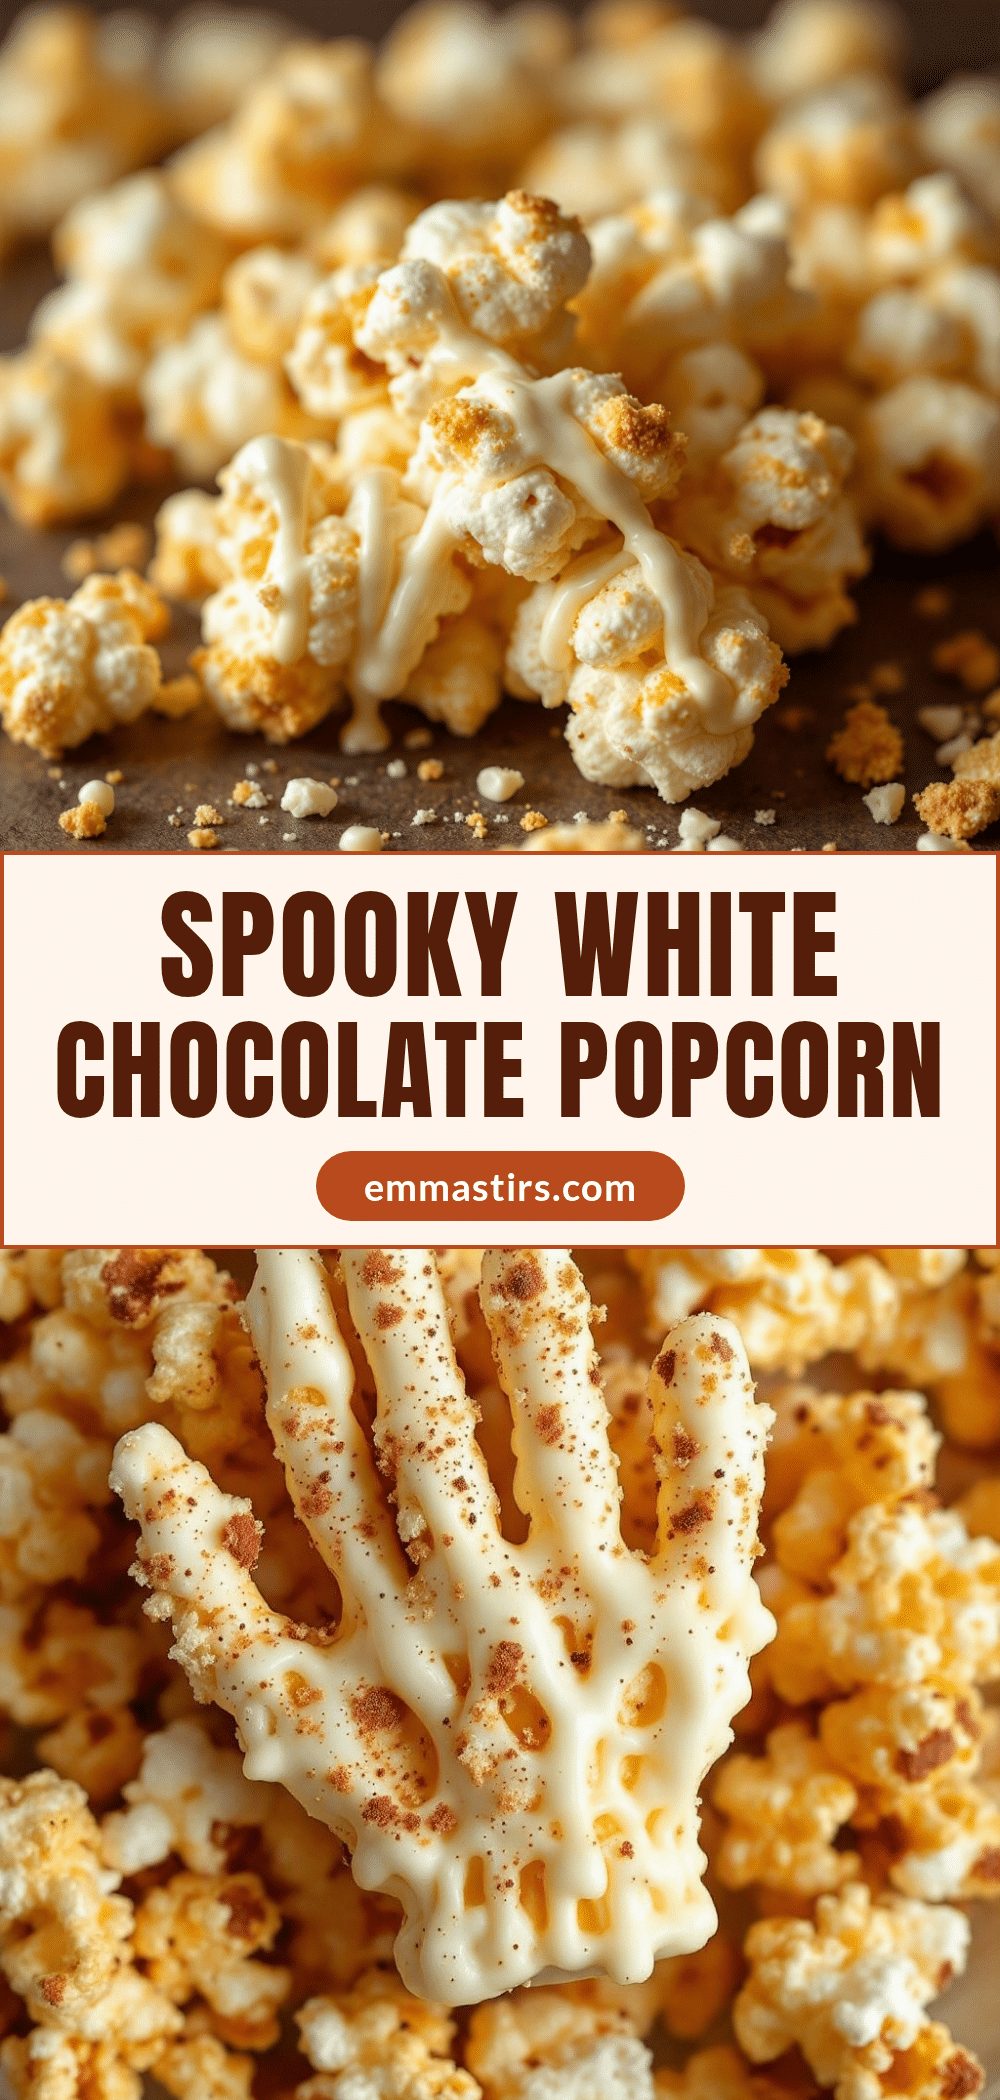
Easy Spooky White Chocolate Popcorn Hands Recipe

These Spooky White Chocolate Popcorn Hands are a fun, last-minute Halloween treat made with popcorn, white chocolate, and candy decorations. They are easy to make, require no baking, and are perfect for parties.
- Prep Time: 15 minutes
- Cook Time: 0 minutes
- Total Time: 35 minutes (including chilling)
- Yield: 6-8 servings 1x
- Category: Dessert
- Cuisine: American
Ingredients
- 8 cups popped popcorn (plain or lightly salted, no butter)
- 12 ounces white chocolate melting wafers or white chocolate chips
- 1 tablespoon coconut oil or vegetable shortening
- Candy eyeballs
- Candy corn
- Red licorice strings or red gel icing (optional)
- Dark chocolate chips, melted (optional)
Instructions
- Pop your popcorn according to package directions to get 8 cups. Spread it out on a baking sheet, pick out any unpopped kernels, and let it cool completely to room temperature.
- Place the white chocolate wafers or chips and coconut oil in a microwave-safe bowl. Microwave in 30-second intervals, stirring well after each, until completely smooth and melted.
- Pour the melted white chocolate over the cooled popcorn in a large mixing bowl. Gently fold with a rubber spatula until every kernel is evenly coated.
- Scoop a generous handful of the coated popcorn onto a parchment-lined baking sheet. Using lightly greased hands, shape the popcorn into a hand shape with a rounded palm and five fingers. Repeat to make 6-8 hands.
- While the white chocolate is still wet, press candy eyeballs into the palm area and a candy corn at the tip of each finger for fingernails. Add red licorice or gel icing for veins if desired.
- Place the baking sheet in the refrigerator for 15-20 minutes, or until the white chocolate is completely firm and hard.
- Carefully peel the hands off the parchment paper and serve at room temperature.
Notes
Let popcorn cool completely before adding chocolate to prevent seizing. Lightly grease hands with coconut oil to prevent sticking. Work quickly when shaping and decorating as the chocolate sets fast. Store in an airtight container at room temperature for up to 3 days.
Nutrition
- Serving Size: 1 hand
- Calories: 275
- Sugar: 24
- Sodium: 85
- Fat: 16
- Saturated Fat: 9
- Carbohydrates: 33
- Fiber: 1
- Protein: 3
Keywords: Halloween, popcorn hands, white chocolate, spooky treats, easy Halloween recipe, no-bake


