Love this? Save it for later!
Share the inspiration with your friends
“You wouldn’t believe how a last-minute craft session turned into my favorite graduation treat,” my friend Jenna told me one sunny Saturday afternoon. She was juggling a pile of supplies and a very demanding toddler, but somehow she managed to pull off these dazzling Perfect Graduation Cap Rice Krispie Treats with Gold Candy Coating that stole the show at her nephew’s party. Honestly, I was skeptical at first—Rice Krispie treats are simple enough, but adding that shiny gold candy coating and turning them into miniature graduation caps? It sounded like a lot of fuss for a kids’ party.
But then she handed me one, still warm, with that crisp yet chewy texture I love, and the subtle shimmer of gold that made it feel downright fancy. The way the candy coating caught the light reminded me of the excitement and pride in the air during graduation season. I mean, maybe you’ve been there, scrambling for a sweet that’s festive but easy enough to make when time’s tight. What really got me was how these treats managed to be both playful and elegant—something that’s not easy to pull off.
Jenna confessed she almost forgot the candy coating step because of her toddler’s interruptions (who can relate?), but it’s exactly that little extra touch that made everyone pause and ask for the recipe. Since then, I keep making them every spring—not just for graduations but whenever I want a fun, golden twist on a classic treat. Let me tell you, once you try these, they stick with you, and honestly, they might just become your go-to for celebrations that call for a bit of sparkle and a whole lot of nostalgia.
Why You’ll Love This Recipe
Having tested this recipe multiple times across different celebrations, I can vouch for how reliably delightful it is. Whether you’re a seasoned baker or a total newbie, these Perfect Graduation Cap Rice Krispie Treats with Gold Candy Coating come together with minimal fuss but maximum impact.
- Quick & Easy: Ready in under 30 minutes, perfect for last-minute party prep or a fun weekend project.
- Simple Ingredients: No need for specialty stores—classic pantry staples plus a bit of candy coating magic.
- Perfect for Graduation Parties: The iconic cap shape and gold shimmer make these treats festive and memorable.
- Crowd-Pleaser: Kids love the chewy texture, adults appreciate the nostalgic charm, and everyone admires the look.
- Unbelievably Delicious: The combination of crispy cereal with that smooth, rich coating is just next-level comfort food.
What sets this recipe apart isn’t just the gold candy coating (though that’s a showstopper). It’s the balanced sweetness and the satisfying texture that stays perfect even after a day or two. I’ve tried other decorated Rice Krispie treats before, but adding that candy coating makes them less sticky and gives them a polished finish that’s both beautiful and fun to eat. Plus, the tutorial I share here breaks down the process into manageable steps so you don’t feel overwhelmed. It’s like turning a childhood classic into a party superstar, and honestly, it’s the kind of recipe that makes you close your eyes and smile after the first bite.
What Ingredients You Will Need
This recipe uses straightforward, wholesome ingredients to deliver a sweet, crunchy treat that’s easy to personalize. You likely have most of these in your pantry already, and the gold candy coating can be found at most craft or baking stores—or ordered online.
- For the Rice Krispie Treat Base:
- 6 cups Rice Krispies cereal (or any crisp rice cereal)
- 4 cups mini marshmallows (I prefer Jet-Puffed for their melt quality)
- 3 tablespoons unsalted butter (room temperature, for smooth melting)
- For the Gold Candy Coating:
- 1 cup white candy melts (I recommend Wilton brand for consistency)
- 1 tablespoon vegetable oil (to thin the candy melts for a smooth finish)
- Edible gold dust or gold luster dust (for that brilliant shine)
- For Decoration and Assembly:
- Black licorice strings or thin black fondant strips (for the tassel)
- Mini pretzel sticks or small square-shaped crackers (optional, for the mortarboard base reinforcement)
- Non-stick cooking spray or parchment paper (to prevent sticking)
Pro tip: If you’re looking for a gluten-free option, double-check that your cereal is certified gluten-free. Also, swapping the candy melts with dairy-free versions works great for those with sensitivities. Seasonal tip: You can use colored candy melts to match school colors instead of gold for different occasions.
Equipment Needed
Making these treats requires just a few basic kitchen tools, many of which you probably already own. Here’s what I used and recommend:
- Large microwave-safe mixing bowl (for melting marshmallows and butter)
- Wooden spoon or heat-resistant spatula (essential for stirring sticky mixtures)
- 9×13-inch baking pan (for shaping the base layer; glass or metal works fine)
- Sharp knife or pizza cutter (to cut the treats into neat squares)
- Small saucepan or microwave-safe bowl (for melting candy melts)
- Baking sheet lined with parchment paper (for coating and cooling the caps)
- Pastry brush (optional, for applying edible gold dust more evenly)
Alternative options: If you don’t have a microwave, you can melt the marshmallows and candy melts on the stovetop using a double boiler method. For cutting, a bench scraper works wonders to get clean edges. Honestly, I’ve made these on a budget with just the basics and they still looked fantastic. Just remember to lightly grease your pan or line it well to avoid sticky messes.
Preparation Method

- Prepare Your Pan: Lightly grease a 9×13-inch baking pan with butter or cooking spray, or line it with parchment paper for easy removal. This takes about 2 minutes.
- Melt Butter and Marshmallows: In a large microwave-safe bowl, combine 3 tablespoons unsalted butter and 4 cups mini marshmallows. Microwave on high for 1 minute, then stir. Continue heating in 15-second intervals, stirring each time, until smooth and fully melted. This should take about 3-4 minutes total. Watch carefully to avoid burning.
- Mix in Rice Krispies: Immediately add 6 cups of Rice Krispies cereal to the melted marshmallow mixture. Stir gently but thoroughly until every bit of cereal is coated. You want a sticky, evenly coated mix. This step is crucial for that perfect chewy texture.
- Press Into Pan: Using a buttered spatula or your hands (lightly greased), press the mixture evenly into your prepared pan. Don’t press too hard—you want them compact but still light and airy. Let cool for 20-30 minutes at room temperature.
- Cut Into Squares: Once firm but not completely cold, use a sharp knife or pizza cutter to cut the treats into uniform squares about 2.5 inches (6 cm) each. This size works well for the graduation cap design.
- Melt Candy Coating: In a microwave-safe bowl, combine 1 cup white candy melts with 1 tablespoon vegetable oil. Microwave in 30-second bursts, stirring between, until smooth and pourable. This should take about 2-3 minutes. The oil helps the coating spread evenly without being too thick.
- Coat the Treats: Dip each Rice Krispie square into the candy coating, using a fork or dipping tool. Place on parchment-lined baking sheet to set. You can also use a spoon to drizzle the coating if you prefer a partial glaze. This step adds the gorgeous gold base.
- Add the Gold Dust: While the candy coating is still tacky, lightly brush edible gold dust over the surface with a dry pastry brush to achieve that shimmering graduation cap look. Let dry completely (about 30 minutes).
- Attach Tassels: Use thin black licorice strings or fondant strips to create tassels on the caps. Secure them with a dab of leftover candy coating as glue. For extra stability, you can insert a mini pretzel stick at one corner as the mortarboard stem.
Note: If the candy coating hardens before you finish dipping, gently reheat it to maintain the perfect consistency. And don’t rush pressing the mixture into the pan — uneven thickness can make cutting tricky.
Cooking Tips & Techniques
Making these treats perfect every time involves a few tricks I’ve picked up along the way. First off, patience is key when melting marshmallows. Microwave in short bursts and stir often to avoid scorching — burnt marshmallows ruin the whole batch!
When mixing in the cereal, fold gently. You want to coat every flake but keep that light texture. Overmixing can make the treats dense and heavy, which is no fun for biting into.
For the candy coating, thinning with a bit of vegetable oil really helps it spread evenly and avoid a clumpy texture. If you’re new to working with candy melts, remember they set fast, so work efficiently but don’t rush to the point of mistakes.
One mistake I made early on was cutting the treats too soon — if they’re too hot, they crumble, and if too cold, they crack. Aim for room temp with a slight firmness. Also, lightly greasing your knife between cuts prevents sticking and keeps edges clean.
Lastly, for the tassel, using licorice strings is a simple hack, but if you want to get fancy, crafting fondant tassels adds a professional touch. Just don’t skip the glue step with candy melts so they stay put through the party chaos.
Variations & Adaptations
Even though this recipe nails the classic graduation vibe, it’s super adaptable for different tastes and occasions.
- Flavor Variations: Add a teaspoon of vanilla or almond extract to the marshmallow melt for a subtle twist. For chocolate lovers, mix mini chocolate chips into the base before pressing into the pan.
- Dietary Adjustments: Use gluten-free crisp rice cereal for those avoiding gluten. Swap regular marshmallows with vegan marshmallows to make these plant-based friendly.
- Colorful Coating: Instead of gold, try school colors using colored candy melts. Blue and silver or red and black can look just as festive and are great for school spirit events.
- Shape Alternatives: If you want a different shape, use cookie cutters to create stars or circles before coating. Just be gentle while dipping to keep the shape intact.
- Personal Experience: One year, I added a sprinkle of edible glitter on top of the gold dust for a little extra sparkle that kids absolutely loved. It made the treats feel like tiny trophies.
Serving & Storage Suggestions
These treats are best served at room temperature so the candy coating stays crisp and the Rice Krispies maintain their perfect chew. Arrange them on a festive platter or use cupcake liners for easy grab-and-go snacking at parties.
They pair wonderfully with a cold glass of milk or even a sparkling lemonade for a fresh contrast. For graduation brunch, they’re a sweet counterpoint to savory dishes like crispy garlic chicken or fresh fruit salads.
To store, keep the treats in an airtight container at room temperature for up to 3 days. Avoid refrigerating as moisture can make them soggy. If you want to make them ahead, you can freeze the uncoated treats for up to a month; just thaw fully before coating.
Reheating isn’t necessary, but if you want a softer bite, a quick 5-second zap in the microwave can do the trick. Over time, the candy coating may dull slightly but the flavor and texture hold up well, making them a great make-ahead option.
Nutritional Information & Benefits
Each Perfect Graduation Cap Rice Krispie Treat (about 2.5-inch square) contains roughly:
| Calories | 120-150 kcal |
|---|---|
| Carbohydrates | 25g |
| Sugars | 15g |
| Fat | 3g |
| Protein | 1g |
While these treats are definitely a sweet indulgence, they’re free from artificial preservatives and made with simple ingredients you can trust. The cereal provides a light crunch and a touch of whole grain if you choose the right brand.
For those mindful of allergens, be aware that marshmallows typically contain gelatin, and candy melts may contain dairy. Gluten-free options are easy to incorporate by selecting certified products. Personally, I appreciate that these treats offer a nostalgic taste without complicated ingredients or additives.
Conclusion
Making the Perfect Graduation Cap Rice Krispie Treats with Gold Candy Coating is like creating a little celebration in your kitchen. They’re charming, tasty, and just the right amount of fancy without being intimidating. Whether it’s your first time or you’re a seasoned treat maker, these are sure to bring smiles and maybe a few “wow” moments.
I love how this recipe lets me bring a bit of sparkle and fun to a milestone event without hours of prep or expensive ingredients. Plus, the personal touch of that shiny gold candy coating always feels like a little victory.
If you give these a try, I’d love to hear how yours turn out or any creative twists you add. Share your stories and photos in the comments below—let’s keep the celebration going!
Remember, every graduation deserves a sweet send-off that’s just as special as the day itself.
FAQs
Can I make these treats ahead of time?
Yes! You can prepare the Rice Krispie base up to 2 days in advance and store it airtight at room temperature. Add the candy coating and decorations on the day of the event for the best look and texture.
What if I don’t have candy melts? Can I use chocolate?
Chocolate can work, but it’s trickier as it melts differently and may not set as smoothly. Candy melts are designed for easy melting and coating. If using chocolate, add a little vegetable oil to thin it and work quickly.
How do I keep the gold candy coating shiny?
Store treats in a cool, dry place away from humidity. Avoid refrigeration, which can cause condensation and dull the shine. Applying edible gold dust while the coating is still tacky helps ensure a lasting glow.
Can I use larger marshmallows if I don’t have minis?
Yes, but chopping larger marshmallows into smaller pieces helps them melt evenly and prevents clumps in the mixture.
Is there a vegan alternative for marshmallows and candy melts?
Absolutely! Look for vegan marshmallows that use plant-based gelatin substitutes, and some brands offer dairy-free candy melts. These swaps work well but may slightly affect texture.
Pin This Recipe!
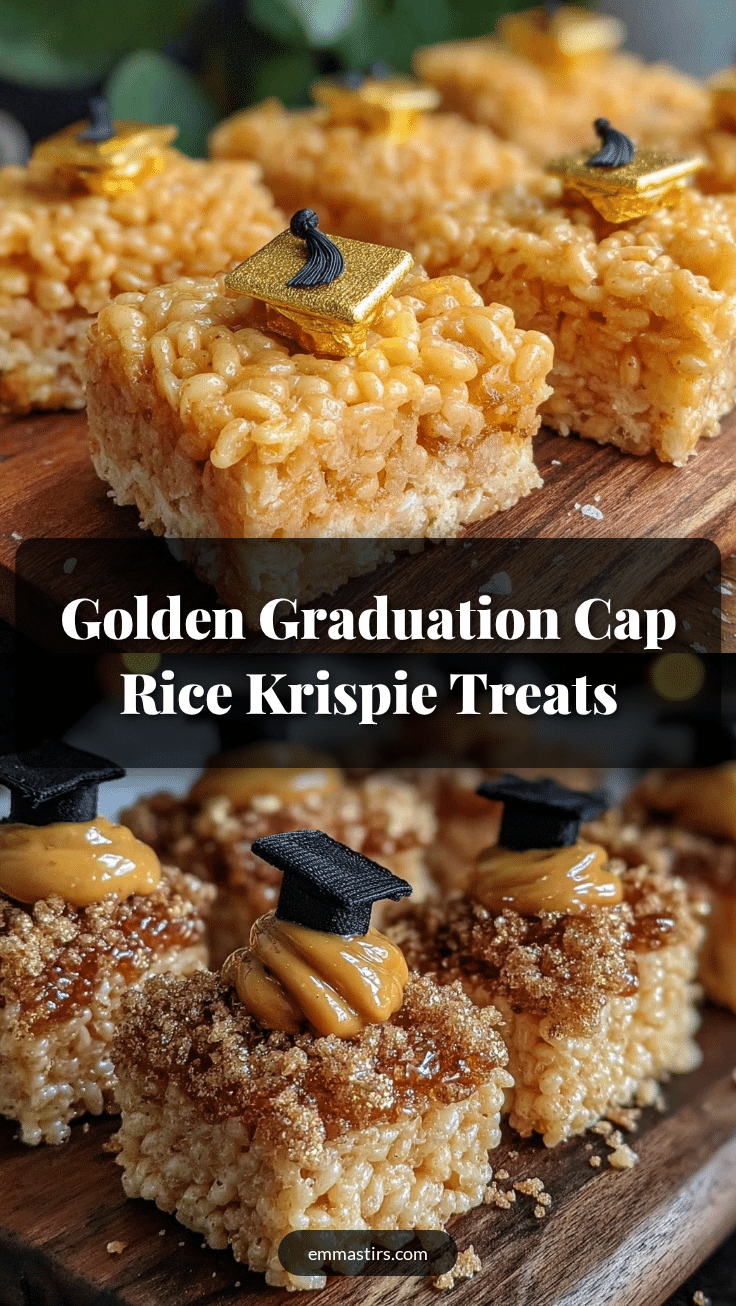
Perfect Graduation Cap Rice Krispie Treats with Easy Gold Candy Coating Tutorial

These festive Rice Krispie treats are transformed into elegant graduation caps with a shiny gold candy coating, perfect for celebrations and easy to make with simple ingredients.
- Prep Time: 10 minutes
- Cook Time: 15 minutes
- Total Time: 25 minutes
- Yield: 24 treats 1x
- Category: Dessert
- Cuisine: American
Ingredients
- 6 cups Rice Krispies cereal (or any crisp rice cereal)
- 4 cups mini marshmallows (Jet-Puffed recommended)
- 3 tablespoons unsalted butter (room temperature)
- 1 cup white candy melts (Wilton brand recommended)
- 1 tablespoon vegetable oil
- Edible gold dust or gold luster dust
- Black licorice strings or thin black fondant strips (for tassel)
- Mini pretzel sticks or small square-shaped crackers (optional, for mortarboard base reinforcement)
- Non-stick cooking spray or parchment paper
Instructions
- Lightly grease a 9×13-inch baking pan with butter or cooking spray, or line it with parchment paper for easy removal.
- In a large microwave-safe bowl, combine 3 tablespoons unsalted butter and 4 cups mini marshmallows. Microwave on high for 1 minute, then stir. Continue heating in 15-second intervals, stirring each time, until smooth and fully melted (about 3-4 minutes total).
- Immediately add 6 cups of Rice Krispies cereal to the melted marshmallow mixture. Stir gently but thoroughly until every bit of cereal is coated.
- Using a buttered spatula or lightly greased hands, press the mixture evenly into the prepared pan. Let cool for 20-30 minutes at room temperature.
- Once firm but not completely cold, cut the treats into uniform squares about 2.5 inches each.
- In a microwave-safe bowl, combine 1 cup white candy melts with 1 tablespoon vegetable oil. Microwave in 30-second bursts, stirring between, until smooth and pourable (about 2-3 minutes).
- Dip each Rice Krispie square into the candy coating using a fork or dipping tool. Place on a parchment-lined baking sheet to set. Alternatively, drizzle the coating partially with a spoon.
- While the candy coating is still tacky, lightly brush edible gold dust over the surface with a dry pastry brush. Let dry completely (about 30 minutes).
- Attach tassels using thin black licorice strings or fondant strips, securing with a dab of leftover candy coating as glue. Optionally, insert a mini pretzel stick at one corner for mortarboard stem.
Notes
If candy coating hardens before finishing, gently reheat to maintain consistency. Press mixture evenly but not too hard to keep treats light and airy. Use gluten-free cereal and vegan marshmallows/candy melts for dietary adaptations. Store treats in airtight container at room temperature for up to 3 days; avoid refrigeration to keep candy coating shiny.
Nutrition
- Serving Size: One 2.5-inch square
- Calories: 135
- Sugar: 15
- Sodium: 90
- Fat: 3
- Saturated Fat: 1.5
- Carbohydrates: 25
- Protein: 1
Keywords: Rice Krispie treats, graduation treats, candy coating, gold candy melts, easy dessert, party treats, kids dessert, festive treats